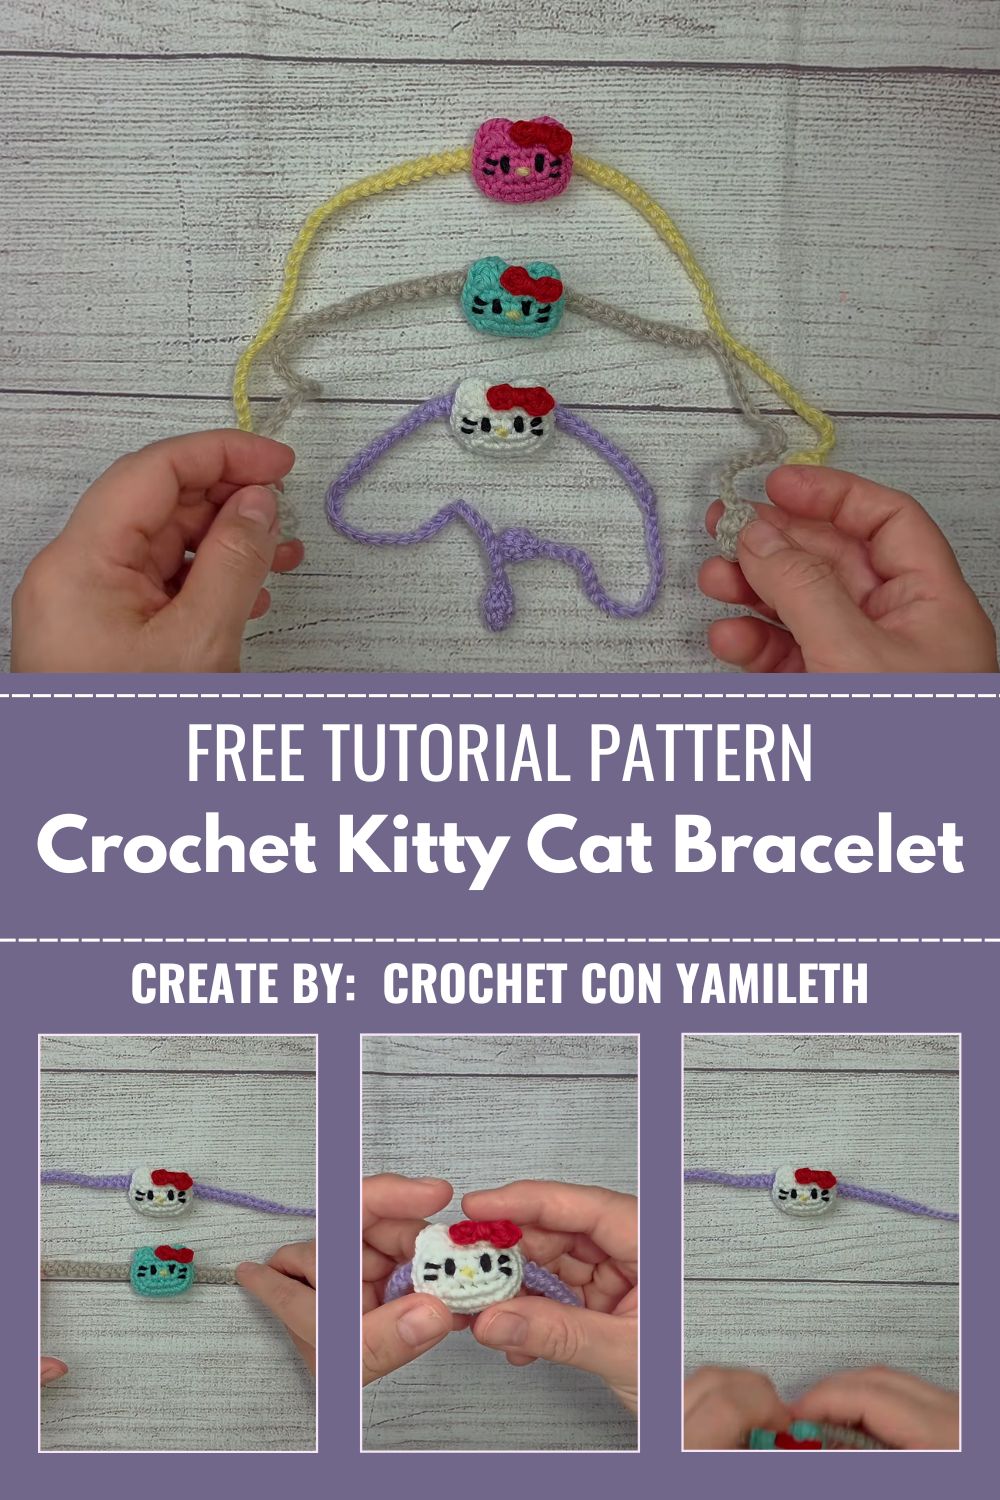
Free Crochet Cat Bracelet Pattern for Wrist Charm
Cats have a way of stealing hearts without even trying, honest. This little Free Crochet Cat Bracelet brings that same playful charm to your wrist. Perfect for cat lovers, gift-giving, or a quick weekend hook-and-yarn project.
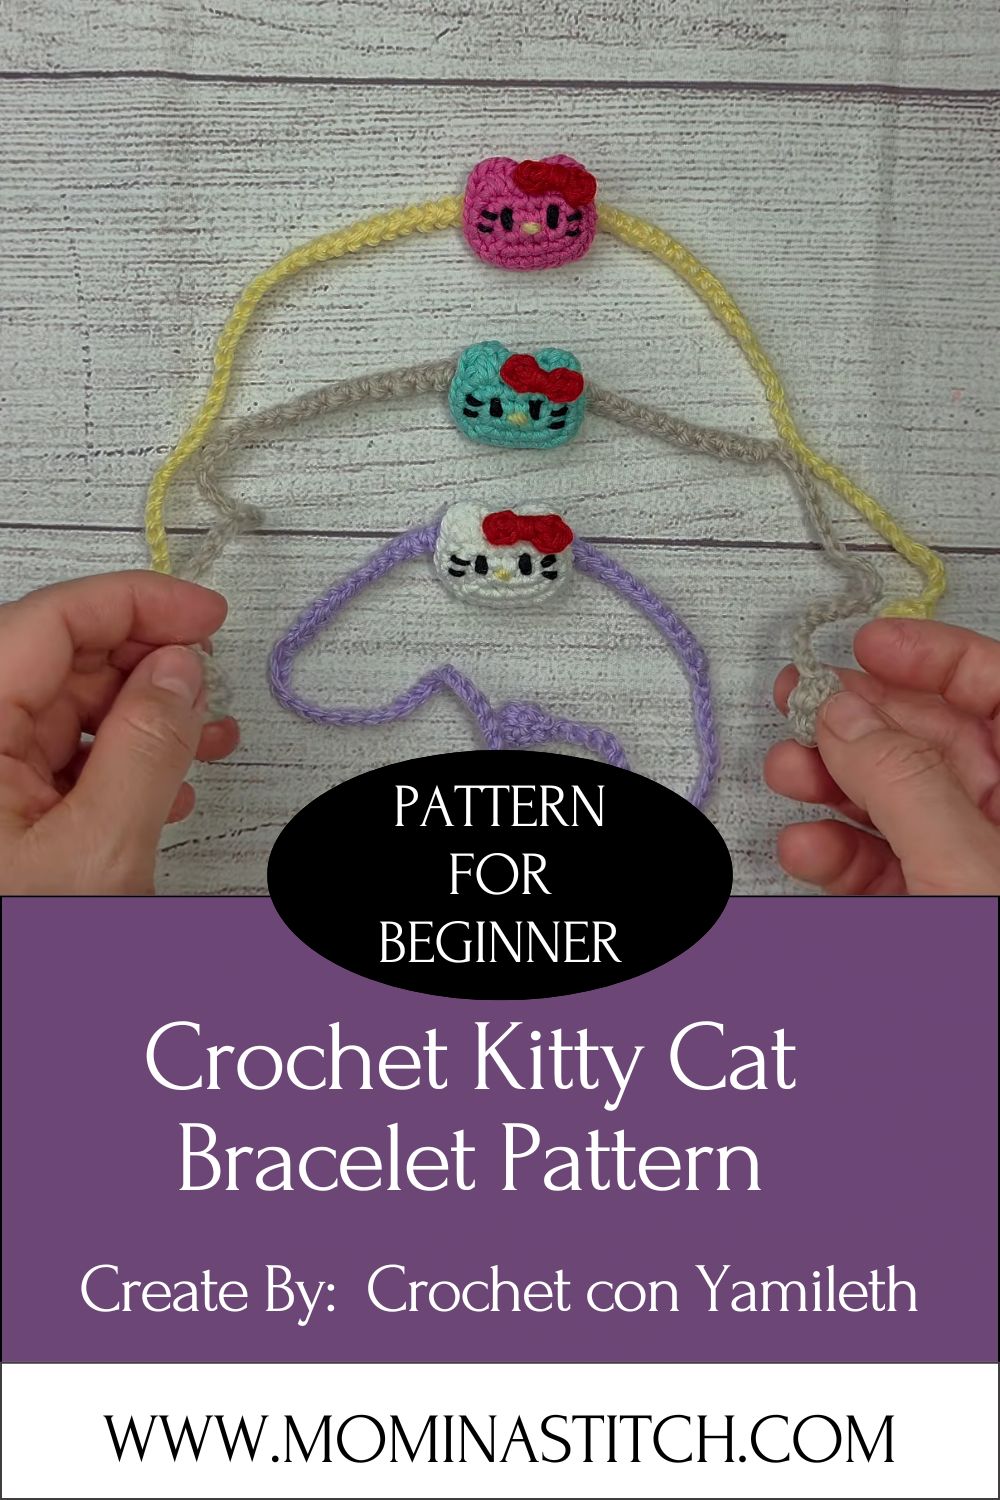
This free crochet kitty cat bracelet pattern turns simple stitches into a wearable amigurumi charm. You’ll build a tiny round head, a soft body, and sweet little ears, then attach it all to a cord or chain bracelet. It works up fast, uses small amounts of yarn, and makes a lovely handmade gift. Beginners and seasoned crocheters alike will enjoy this quick, satisfying make.
Skill Level
Beginner to Beginner-Intermediate. If you already know how to single crochet, increase, and decrease, this project will feel comfortable. New crocheters can follow along too, since the pieces are small and forgiving, and mistakes are easy to fix along the way.
Materials and Supplies
Gather these basics before you start, and you’ll be hooking in no time.
Yarn Colors
- White or cream yarn (main body color)
- Black yarn (for stripes, nose, and outlining, optional)
- Pink yarn (small amount, for cheeks or a bow)
- Any accent color you like for a bow, collar, or heart charm
Tools and Notions
- Crochet hook: 2.5mm or 3mm hook (size depends on your yarn weight; a smaller hook keeps stitches tight)
- Safety eyes: 6mm black safety eyes (or small black beads/embroidery for a child-safe option)
- Stuffing: Polyester fiberfill or yarn scraps
- Needle: Yarn/tapestry needle for sewing pieces together
- Scissors: Sharp small scissors for trimming yarn
- Stitch markers: To track rounds, since amigurumi doesn’t use joined rounds
- Bracelet cord, elastic cord, or chain: To turn your finished kitty into a wearable charm
- Jump ring and clasp (optional): For a more polished bracelet finish
Crochet Techniques Used
Before diving into the pattern, here’s a quick rundown of the stitches and techniques you’ll use throughout.
Magic Ring
This is how most amigurumi pieces begin. A magic ring creates a tight, adjustable loop so there’s no gap at the center of your work.
Single Crochet (sc)
The main stitch used throughout this pattern. It creates a dense, tight fabric that holds stuffing in well, which is exactly what amigurumi needs.
Increase (inc)
Two single crochets worked into the same stitch. This technique shapes the rounded curves of the head and body.
Decrease (dec)
Two stitches worked together as one (invisible decrease works best for amigurumi). This closes up rounds smoothly without leaving holes.
Sewing Parts Together
A tapestry needle and matching yarn are used to stitch ears, tail, and other small pieces onto the main body neatly and securely.
Step-by-Step Crochet Pattern Instructions
Here’s the full breakdown of how this little kitty comes together, piece by piece.
Creating the Head
- Start with a magic ring, work 6 single crochets into it, and pull tight. (6 sts)
- Round 2: Increase in every stitch around. (12 sts)
- Round 3: Single crochet 1, increase repeat around. (18 sts)
- Round 4: Single crochet 2, increase repeat around. (24 sts)
- Rounds 5–7: Single crochet evenly around with no increases, to build the rounded shape. (24 sts)
- Round 8: Single crochet 2, decrease repeat around. (18 sts)
- Insert safety eyes between rounds 5 and 6, spaced evenly apart.
- Round 9: Single crochet 1, decrease repeat around. (12 sts)
- Begin stuffing the head firmly as you close the rounds.
- Round 10: Decrease around until the opening closes. (6 sts)
- Fasten off, leaving a long tail for sewing.
Making the Body
- Since this is a bracelet charm, the body can stay small and simple. Start with a magic ring, work 6 single crochets into it. (6 sts)
- Round 2: Increase in every stitch around. (12 sts)
- Rounds 3–4: Single crochet evenly around. (12 sts)
- Round 5: Single crochet 1, decrease repeat around. (8 sts)
- Stuff lightly, then decrease the remaining stitches closed.
- Fasten off, leaving a tail for sewing the body to the head.
Ears, Tail, and Accessories
Ears (make 2):
- Magic ring, work 4 single crochets into it. (4 sts)
- Round 2: Increase in every stitch around. (8 sts)
- Fasten off, leaving a tail long enough for sewing. Flatten the ear slightly and sew onto the head, angled outward, in a triangle shape.
Tail (optional, for a full-body kitty design):
- Chain 8–10 stitches.
- Single crochet into the second chain from the hook and each chain across.
- Fasten off, leaving tails on both ends. Curl gently and sew onto the back of the body.
Bow or collar accessory (optional):
- Chain 10 stitches in your accent color.
- Fold into a bow shape and pinch the center.
- Wrap a short strand of yarn around the center to secure, then sew or glue beneath the chin.
Facial Details
- Use black yarn or embroidery thread to stitch a small triangle or “Y” shaped nose and mouth below the eyes.
- Add tiny straight stitches for whiskers, three on each side, using white or black thread depending on your yarn color.
- Use pink yarn or felt for small cheek circles, sewn lightly under each eye for extra sweetness.
Assembly Process
- Line up the head and body, checking that the face points forward and the tail (if used) sits at the back.
- Thread your tapestry needle with the tail left after stuffing, and sew the body to the head using a whip stitch, tucking in any stuffing gaps as you go.
- Sew the ears onto the top of the head, angled slightly outward for a natural cat look.
- Attach the tail to the lower back of the body, curling it gently to one side.
- Weave in any remaining yarn tails and trim neatly.
Finishing Touches
- Fluff the stitches gently with your fingers to even out the texture.
- Check that the safety eyes are secure and symmetrical.
- Thread your bracelet cord, elastic, or chain through the back of the kitty’s body, or attach a jump ring to the top for hanging.
- Trim any stray yarn fibers for a clean, polished finish.
Helpful Beginner Tips
A few small habits make a big difference in how your finished kitty turns out.
- Keep stitches tight. Amigurumi needs dense fabric so stuffing doesn’t peek through. Go down a hook size if your stitches look loose.
- Use stitch markers. Amigurumi rounds aren’t joined, so a stitch marker helps you keep track of where each round starts.
- Stuff a little at a time. Add small amounts of stuffing as you go rather than all at once, and push it into corners with a blunt tool for a smooth, firm shape.
- Count your stitches often. It’s easy to lose track during increase and decrease rounds, so pause and count every couple of rounds.
Design Customization Ideas
Once you’ve made one kitty charm, it’s fun to experiment and make it your own.
- Different colors: Try orange and white for a tabby look, gray for a classic kitten, or black for a spooky-cute Halloween charm.
- Cute accessories: Add a tiny crochet bow, a bell, a heart charm, or a mini flower to personalize each bracelet.
- Mini size variations: Use finer yarn and a smaller hook to make a miniature version for earrings, a necklace pendant, or a keychain instead of a bracelet.
Frequently Asked Questions
What is the best yarn for amigurumi?
Cotton yarn or cotton-acrylic blends work best for amigurumi because they hold their shape well and create smooth, even stitches. Worsted weight (medium) yarn is the easiest choice for beginners, though finer yarn gives a more delicate look for tiny projects like this bracelet charm.
How do I make my Free Crochet Cat Bracelet firm?
Firmness comes from tight stitches and generous stuffing. Use a hook one size smaller than usually recommended for your yarn, and stuff in small pinches rather than large clumps, pressing each bit into place before adding more.
How long does this project take?
Since this is a small bracelet charm rather than a full-size amigurumi, most crocheters finish it in about 1 to 2 hours, depending on experience level and how many extra details or accessories are added.
Final Thoughts
This little Free Crochet Cat Bracelet is proof that big charm can come in a small package. It’s quick, beginner-friendly, and endlessly customizable, so don’t be afraid to experiment with colors and accessories once you’ve got the basic shape down. Grab your hook, pick a sweet little yarn color, and give this pattern a try today. Once you finish your first one, you’ll probably want to make a whole set for friends and family.