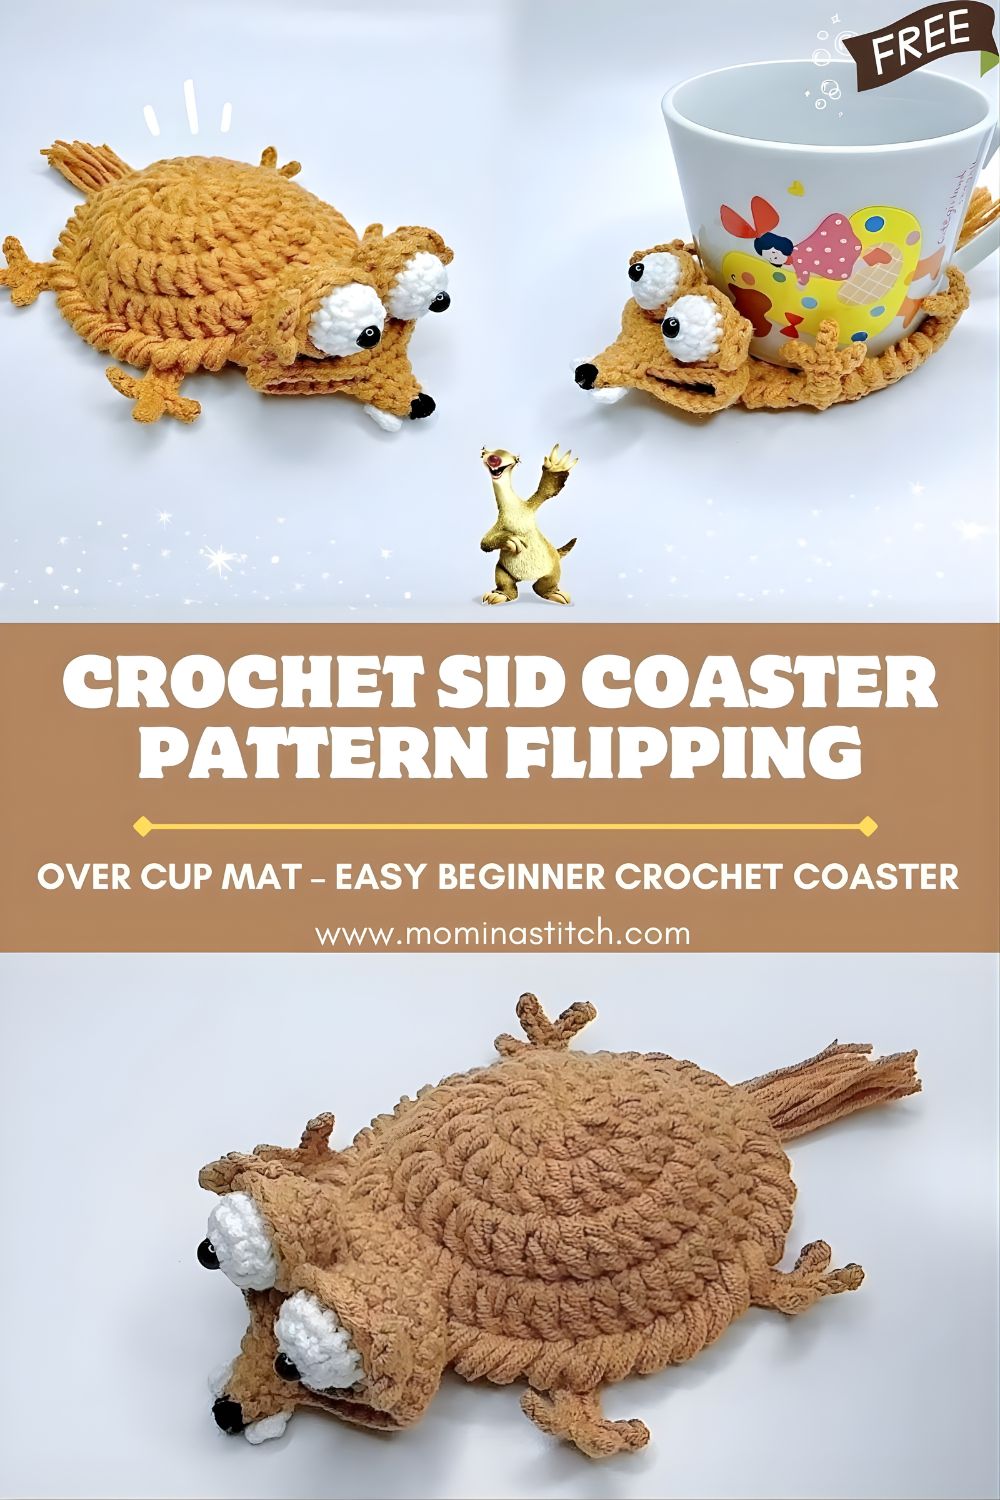
Crochet Sid Coaster Pattern Flipping Over Cup Mat – Easy Beginner Crochet Coaster
This beginner-friendly crochet coaster pattern creates a playful Sid coaster that flips over when you place a cup on top. It’s a fun flipping cup mat idea that’s practical for table protection and extra cute for gifts, desks, and coffee corners.
A flipping coaster (or flipping cup mat) is a two-layer crochet coaster designed so the top section “pops” or flips as a mug presses into the center. The pressure makes the coaster move satisfyingly, part fidget, part function, while still protecting surfaces from heat and condensation. These coasters are popular because they’re quick, beginner-friendly, and easy to personalize with characters like Sid, making them great handmade gifts and craft fair items.
Materials Needed
- Cotton yarn in multiple colors for the Sid character (example: tan/light brown, beige/cream, white, black, and small amounts of accent colors)
- 3.0 mm crochet hook
- Plastic safety eyes (small, e.g., 6–10 mm depending on your scale)
- Yarn needle
- Stitch marker
- Scissors
- Optional fiberfill (tiny amount for shaping raised parts)
Crochet Abbreviations
- ch – chain
- sc – single crochet
- hdc – half double crochet
- dc – double crochet
- sl st – slip stitch
- inc – increase (2 stitches in the same stitch)
- rep – repeat
Skill Level
Beginner-friendly.
You’ll use basic stitches, simple increases, and easy joining. Character pieces are small and beginner-friendly.
Step-by-Step Crochet Pattern
This pattern is written to create a two-layer flipping coaster with a raised “cup seat” in the center. Exact stitch counts can be adjusted to fit your mug size—use the sizing tips below to customize.
Finished Fit (Quick Sizing Tip)
- Your base circle should be slightly wider than your mug bottom (usually 3.5–4.5 in / 9–11.5 cm).
- Cotton yarn + a 3.0 mm hook makes a firm coaster that flips nicely.
Foundation Round
Use your main coaster color (often a neutral/tan that matches the character).
Round 1 – Magic Ring with Stitches
R1: Make a magic ring, ch 1, 6 sc into the ring. Tighten. (6)
Round 2 – Increasing Stitches
R2: inc in each stitch around. (12)
Round 3 – Building the Round Coaster Base
R3: (sc, inc) rep around. (18)
If you want a larger coaster, continue increasing by one more round:
Optional R4 (larger base): (2 sc, inc) rep around. (24)
For the flipping style shown in many “flip coasters,” a medium-small base often flips better than an oversized base.
Round 4 – Creating the Flip Edge
This round creates a hinge-like edge so the coaster can flex.
R4 (flip edge): ch 1, sc in BLO around. (18)
- Work in back loops only to form a crisp ridge.
Round 5 – Building the Second Layer
Now we begin the second layer that will fold/flip.
R5: ch 1, sc in both loops around. (18)
Round 6 – Joining the Layers
To create the “pocket” structure, you’ll join the rim to an earlier round (or to the base edge) so the coaster becomes a double layer.
R6 (join round):
- Fold the piece so the first base layer and the new layer align.
- Working through both thicknesses, sc around to join edges. (18)
Tip: If your edges don’t align perfectly, adjust by skipping 1 stitch on the tighter side or adding 1 extra sc on the looser side—small corrections are normal in flip-style mats.
Round 7 – Creating the Raised Center for the Cup
The raised center helps the mug press down and triggers the “flip.”
Attach yarn at the center of the coaster (you can crochet this as a small circle and sew it on, or crochet directly onto the coaster center if you prefer).
Center bump (make 1):
- MR, ch 1, 6 sc (6)
- Next round: (sc, inc) around (9)
Fasten off, leave a tail.
Sew the bump securely to the coaster center.
Optional: add a tiny pinch of fiberfill under the bump before closing the last stitches for extra “pop.”
Character Details (Sid Design)
The coaster becomes “Sid” with simple, flat appliqué-style pieces. Keep everything lightweight so the coaster still flips.
Head (Appliqué Circle/Oval)
Use a lighter face color (beige/cream).
Headpiece:
- MR, ch 1, 6 sc (6)
- inc around (12)
- (sc, inc) around (18)
Fasten off, leaving a long tail.
Sew the head centered on the coaster surface (the side you want visible when it flips).
Eyes
Option A: Safety eyes (recommended for the look)
- Insert safety eyes through the headpiece before sewing it down (or stitch them after if you prefer).
- Place them wide for a “Sid-style” expression.
Option B: Crochet eyes (kid-friendly/no plastic)
Make two small circles: MR with 6 sc, fasten off, sew on; embroider pupils with black yarn.
Ears (Make 2)
Use head color or a slightly darker shade.
Ear (small oval):
- ch 4, sc in 2nd ch from hook, sc, 3 sc in last ch
- continue on other side of chain: sc, sc
Fasten off, sew to the sides of the head.
Teeth
Use white yarn.
Teeth (simple rectangle):
- ch 4, sc in 2nd ch and across (3 sc)
- ch 1, turn, sc across (3 sc)
Fasten off, sew under the mouth area.
Add a tiny black line (embroidery) to define the mouth if you want.
Tail
Use main body color (tan/brown).
Tail (curved chain tail):
- ch 10–14
- sl st back down the chain to stiffen it slightly
Fasten off, sew to one side of the coaster edge.
Claws (Optional Cute Detail)
Use a contrasting color (orange/cream).
Make 3 small “toe” nubs near the bottom edge of the character:
- Attach yarn, (ch 2, sl st in same st) repeat 2–3 times
Fasten off, weave in.
Assembly Instructions
- Sew the head onto the coaster’s top surface (the face side).
- Attach eyes (safety eyes or crocheted eyes).
- Sew ears to the sides of the head.
- Add teeth below the face; embroider a simple mouth line if desired.
- Attach the tail to the coaster’s outer edge (keep it light so it doesn’t weigh down the flip).
- Add claws (optional).
- Weave in all ends firmly—coasters get handled and washed often.
Tips for Beginners
- Maintaining a round shape: If your coaster starts ruffling, you may have too many increases. If it cups upward, add one more increase round or loosen tension slightly.
- Avoiding curling edges: Cotton + a smaller hook helps. Also, the BLO “flip edge” ridge should be neat—don’t pull those stitches too tight.
- Choosing the right yarn: Cotton yarn is best for coasters because it’s absorbent, durable, and handles heat better than many acrylics. Use smooth cotton for crisp character details.
Uses of Crochet Coasters
- Protecting tables from heat rings, condensation, and spills
- Handmade gifts for coffee/tea lovers, birthdays, teacher gifts, and housewarming sets
- Coffee table decor (make a matching set in a theme)
- Craft fairs (small, affordable, quick-sell items—especially character coasters and flipping styles)
Conclusion
This crochet Sid coaster is a playful twist on the classic coaster: it’s functional, beginner-friendly, and the flipping cup mat effect makes it extra fun to use. Try the pattern, experiment with expressions and colors, and turn it into your own character-inspired, cute crochet coaster set.