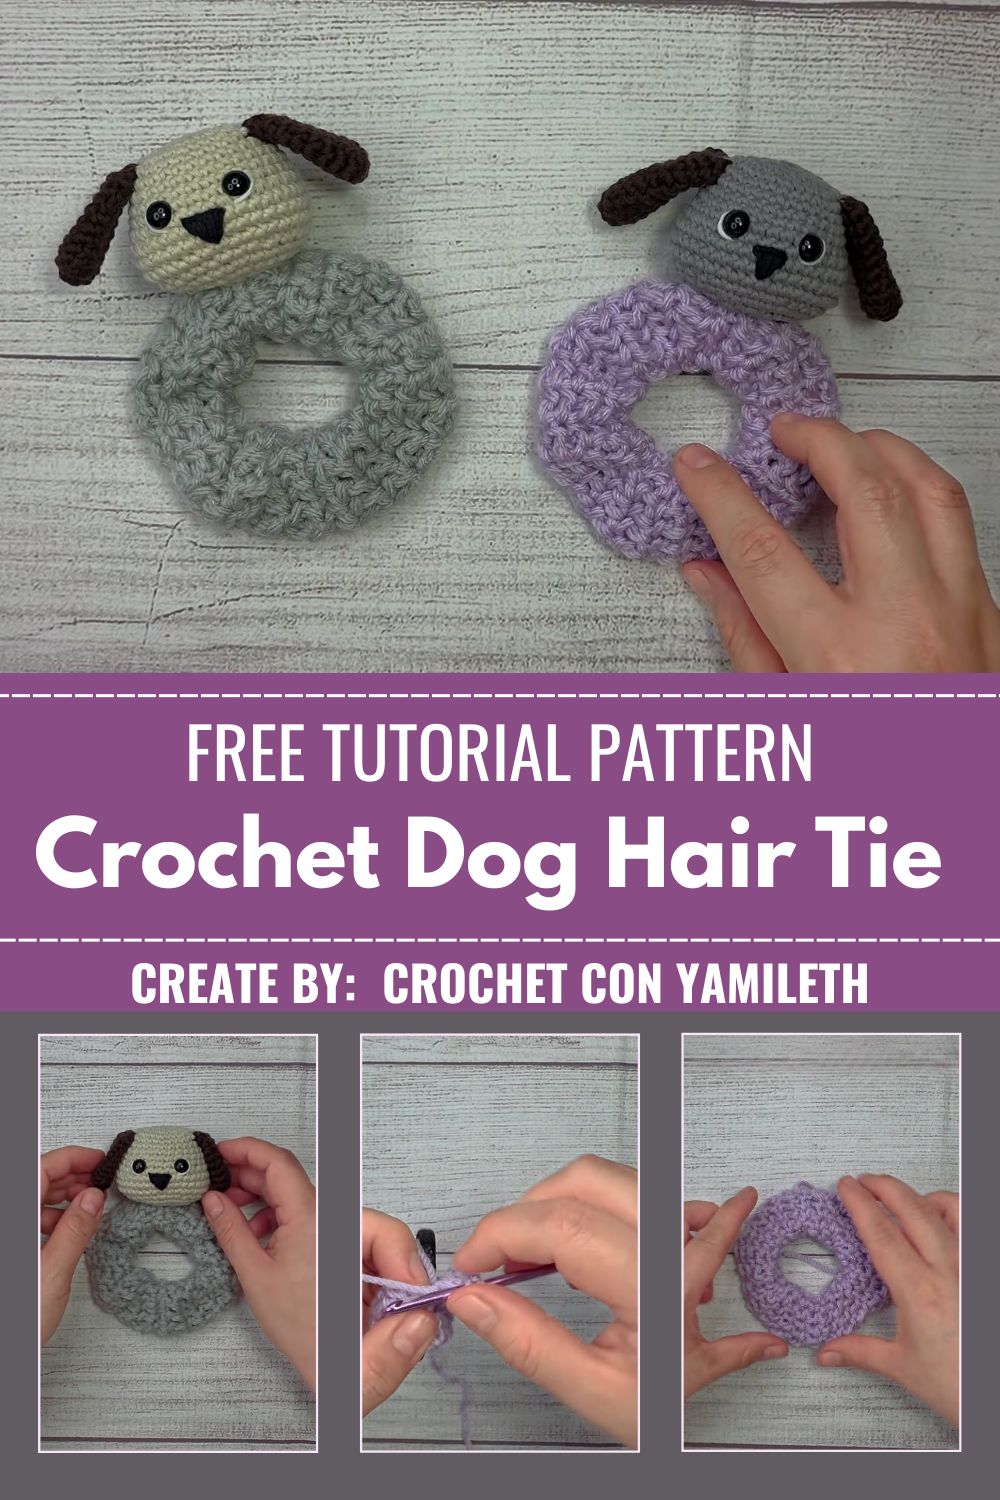
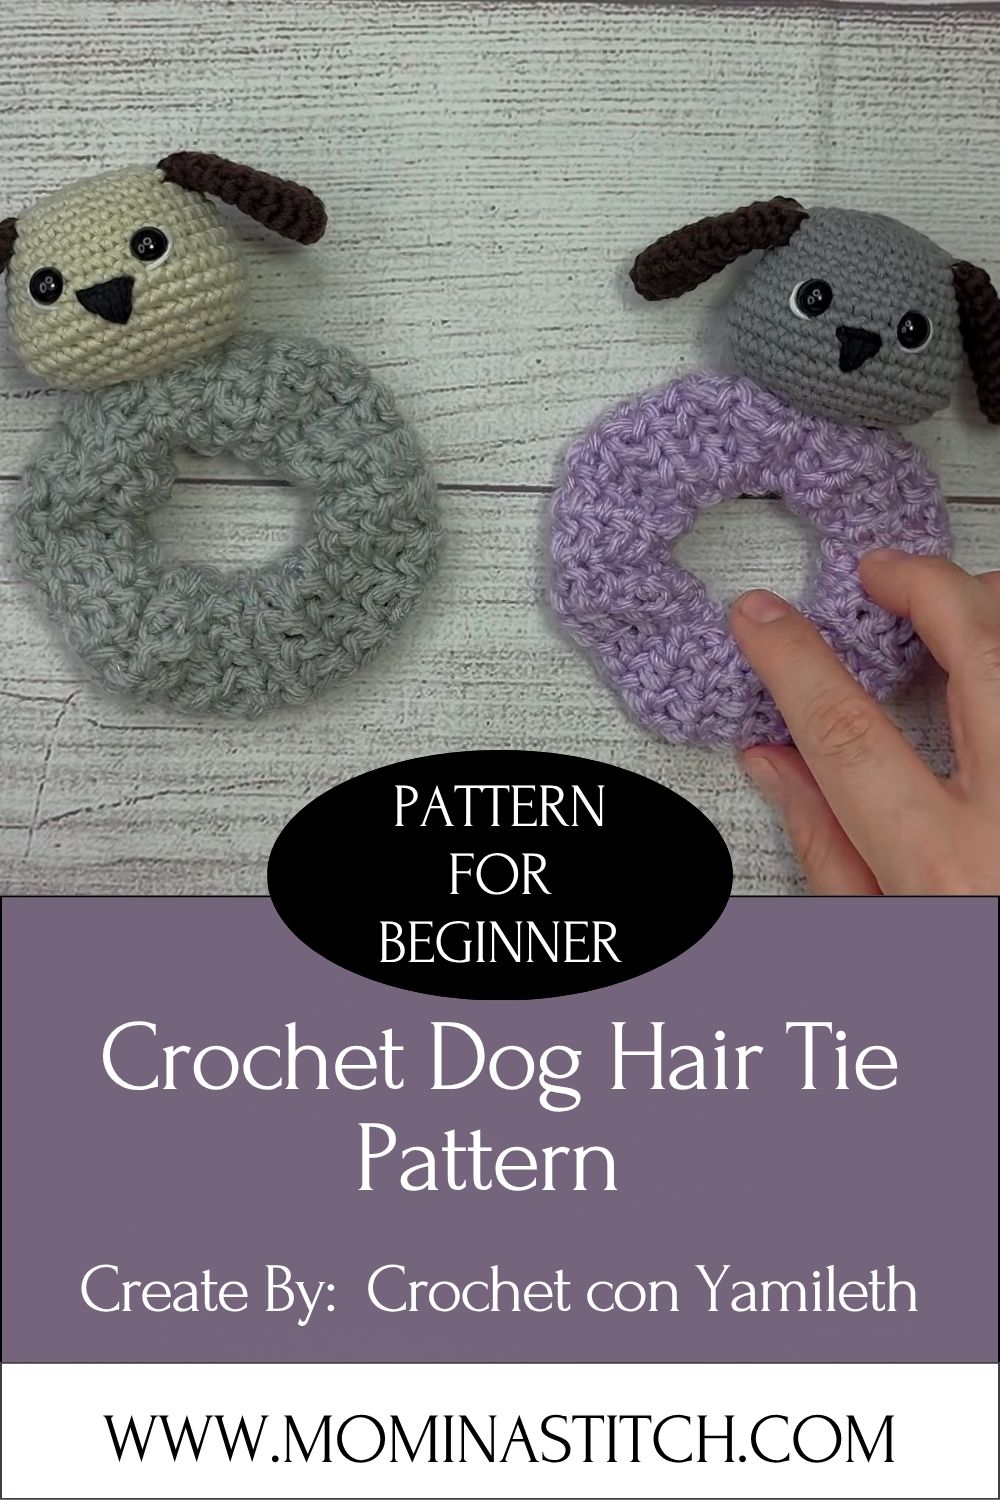
Free Crochet Dog Hair Tie Pattern for a Playful Puppy
The Free Crochet Dog Hair Tie is a cute, charming hair accessory that makes girls’ hairstyles even sweeter. Topped with a tiny crochet dog, this hair tie adds a unique, playful touch to a ponytail, bun, or braid. Inspired by floppy-eared rescue pups, this design is a one-of-a-kind handmade accessory for kids and adults alike, turning everyday hairstyles into something special.
This free crochet dog hair tie pattern shapes a small puppy that sits on a stretchy elastic band. You crochet a round head, a chubby body, two floppy ears, and a wiggly tail. Safety eyes and an embroidered nose finish the face. The whole makes up fast with basic stitches. It’s a quick gift idea and a sweet way to use up leftover yarn scraps from past projects.
Skill Level
Confident beginners can finish this puppy with ease. You only need to know how to work in the round, make increases, and sew small pieces together. Intermediate crocheters will breeze through it in a single sitting.
Materials and Supplies List
Gather your bits before you start so the stitching stays smooth. Here’s everything you’ll need:
- Yarn colors: Worsted weight cotton or acrylic in caramel tan (main body), plus small amounts of cream and dark brown
- Crochet hook size: 3.0 mm or 3.5 mm hook for tight amigurumi stitches
- Safety eyes: Two 6 mm black safety eyes
- Stuffing: Polyester fiberfill, a small handful is plenty
- Needle and scissors: A blunt yarn needle for sewing and sharp scissors for trimming
- Keychain ring or accessories: One elastic hair tie, plus an optional tiny bow or bell
Cotton yarn holds shape nicely and keeps your stitches crisp. Acrylic feels softer and works just as well for a cuddly look.
Crochet Techniques Used
You’ll lean on a handful of friendly basics throughout this pattern. None of them are scary, promise.
- Magic ring (MR): Starts your rounds with no hole in the center
- Single crochet (sc): The main stitch for the whole puppy
- Increase (inc): Two single crochets worked into one stitch
- Decrease (dec): Two stitches joined into one to shape and close
- Sewing parts together: Whip stitch with your yarn needle to attach ears, body, and tail
A quick note on abbreviations: st means stitch, rnd means round, and the number in brackets is your stitch count at the end of that round.
Step-by-Step Crochet Pattern Instructions
Work in continuous spirals unless told otherwise. Drop a stitch marker in the first stitch of each round so you never lose your spot.
Head Creation
Start with your caramel tan yarn.
- Rnd 1: 6 sc in a magic ring (6)
- Rnd 2: inc in each st around (12)
- Rnd 3: (1 sc, inc) repeat 6 times (18)
- Rnd 4: (2 sc, inc) repeat 6 times (24)
- Rnd 5: (3 sc, inc) repeat 6 times (30)
- Rnd 6 to 9: sc in each st around (30)
Place your safety eyes between Rnd 7 and Rnd 8, leaving about six stitches between them. Push the backings on firmly.
- Rnd 10: (3 sc, dec) repeat 6 times (24)
- Rnd 11: (2 sc, dec) repeat 6 times (18)
- Rnd 12: (1 sc, dec) repeat 6 times (12)
Stuff the head firmly now, while you still have room to reach inside.
- Rnd 13: dec around (6)
Cut your yarn, weave the tail through the last loops, and pull tight to close. Set the head aside.
Body Making
Switch to caramel tan again for a matching body.
- Rnd 1: 6 sc in a magic ring (6)
- Rnd 2: inc in each st around (12)
- Rnd 3: (1 sc, inc) repeat 6 times (18)
- Rnd 4 to 7: sc in each st around (18)
- Rnd 8: (1 sc, dec) repeat 6 times (12)
Stuff the body softly so it stays a little squishy. Leave a long tail for sewing, then fasten off.
Ears, Accessories, and Tail
Ears (make 2 in dark brown):
- Rnd 1: 4 sc in a magic ring (4)
- Rnd 2: inc in each st around (8)
- Rnd 3 to 4: sc in each st around (8)
Flatten each ear and leave a tail for sewing. No stuffing needed, you want them floppy.
Snout (make 1 in cream):
- Rnd 1: 6 sc in a magic ring (6)
- Rnd 2: inc in each st around (12)
- Rnd 3: sc in each st around (12)
Flatten slightly and keep a tail for attaching.
Tail (make 1 in caramel tan):
- Rnd 1: 4 sc in a magic ring (4)
- Rnd 2 to 6: sc in each st around (4)
Leave it unstuffed for a soft, wiggly tail. Fasten off with a long tail.
Facial Details
Grab your dark brown yarn and yarn needle for the nose. Embroider a small triangle or oval at the center of the cream snout. Add one short straight stitch underneath for the mouth line. Keep the stitches loose so the face stays soft and friendly.
Real talk, this part is where your puppy gets its personality. Take your time and the expression will look just right.
Assembly Process
Now bring all the pieces together.
- Sew the cream snout to the lower front of the head, just below the eyes.
- Pin the ears to the top sides of the head and whip stitch them in place.
- Attach the head to the top of the body, lining up the face so it points forward.
- Sew the tail to the back of the body at a cheerful upward angle.
Take a step back and check the placement before you knot anything off. Small shifts make a big difference here.
Finishing Touches
Loop your elastic hair tie under the puppy’s body. Stitch the band securely to the underside with a few firm passes of yarn. Test the hold by giving it a gentle tug. Add a tiny bow or bell near one ear if you want extra charm. Weave in all loose ends and trim them close.
Your playful puppy hair tie is ready to bounce on every ponytail.
Helpful Beginner Tips
A few small habits keep your amigurumi looking clean and professional.
- Tight stitches for amigurumi: Use a smaller hook than your yarn label suggests. Tight stitches stop stuffing from peeking through the gaps.
- Using stitch markers: Mark the first stitch of every round. This simple trick saves you from miscounting and ripping back later.
- Proper stuffing techniques: Add stuffing in small amounts and pack it gently. Overstuffing stretches the fabric, while too little leaves the head saggy.
Honestly, the stuffing balance is the one thing most beginners rush. Go slow and your puppy will keep its round, full shape.
Design Customization Ideas
This little dog loves a makeover, so feel free to play around.
- Different colors: Try soft grey for a husky vibe, snowy white for a poodle, or spotted patches for a dalmatian look.
- Cute accessories: Add a mini scarf, a felt collar, or a tiny crochet bone for extra detail.
- Mini size variations: Drop down to a 2.0 mm hook and lace-weight yarn for a teeny version that fits on baby hair clips.
Mix and match these ideas to build a whole pack of puppies. Each one turns out a little different, and that’s the fun part.
Frequently Asked Questions
What is the best yarn for amigurumi?
Cotton and acrylic worsted weight yarns work best for amigurumi. Cotton gives crisp, sturdy stitches that hold their shape. Acrylic feels softer and comes in tons of colors, so pick whichever suits your puppy’s mood.
How do I make a crochet plush firm?
Firmness comes from two things: a small hook and steady stuffing. Tight stitches build a dense fabric, and packing fiberfill in small layers keeps the shape solid without lumps. Squeeze as you go to feel the firmness build.
How long does this project take?
Most crocheters finish this puppy in one to two hours. Beginners might take a little longer while learning the rounds. Either way, it’s a satisfying same-day project that won’t eat your whole weekend.
Conclusion
Little crochet projects like this puppy hair tie prove that small makes carry big charm. You now have a complete free crochet dog hair tie pattern, from the first magic ring to the final bow. The stitches are simple, the yarn cost is tiny, and the smiles it earns are huge.