Creative Crochet knitted Small Souvenir Amigurumi Pattern
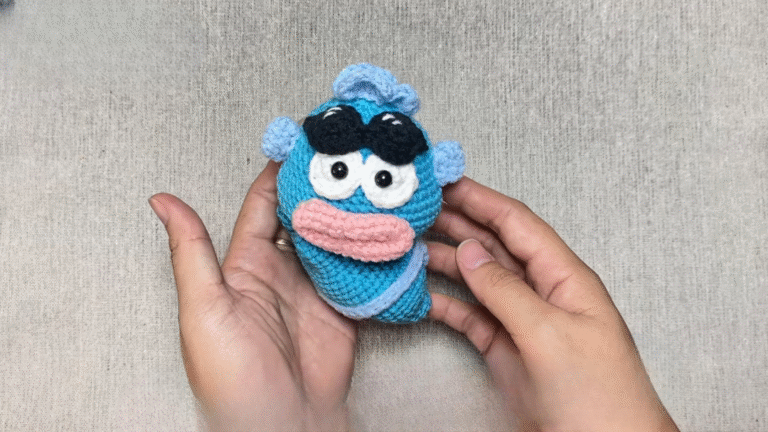
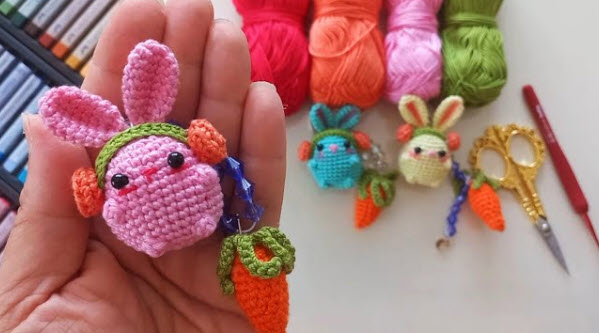
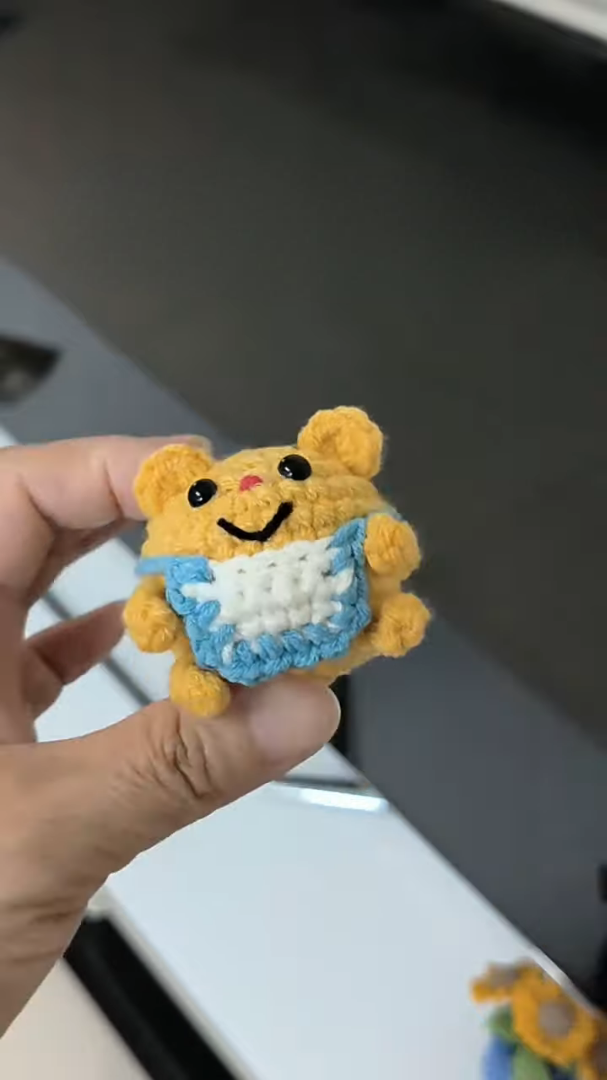
The Creative Crochet Knitted Small Souvenir Amigurumi Pattern is a quick, beginner-friendly make with charming, pocket-size appeal. With clear, step-by-step instructions and minimal yarn, you’ll whip up adorable keepsakes fast. Perfect for gifts, market stalls, and travel crafting, this cute pattern delivers polished results, customizable colors, and instant handmade joy.
charming, and gift-ready, the Creative Crochet knitted Small Souvenir Amigurumi Pattern turns scraps of yarn into adorable keepsakes with a polished, knitted-look finish. This beginner-friendly crochet amigurumi pattern includes clear, step-by-step rounds, minimal sewing, and speedy construction, perfect for last‑minute gifts and market makes.
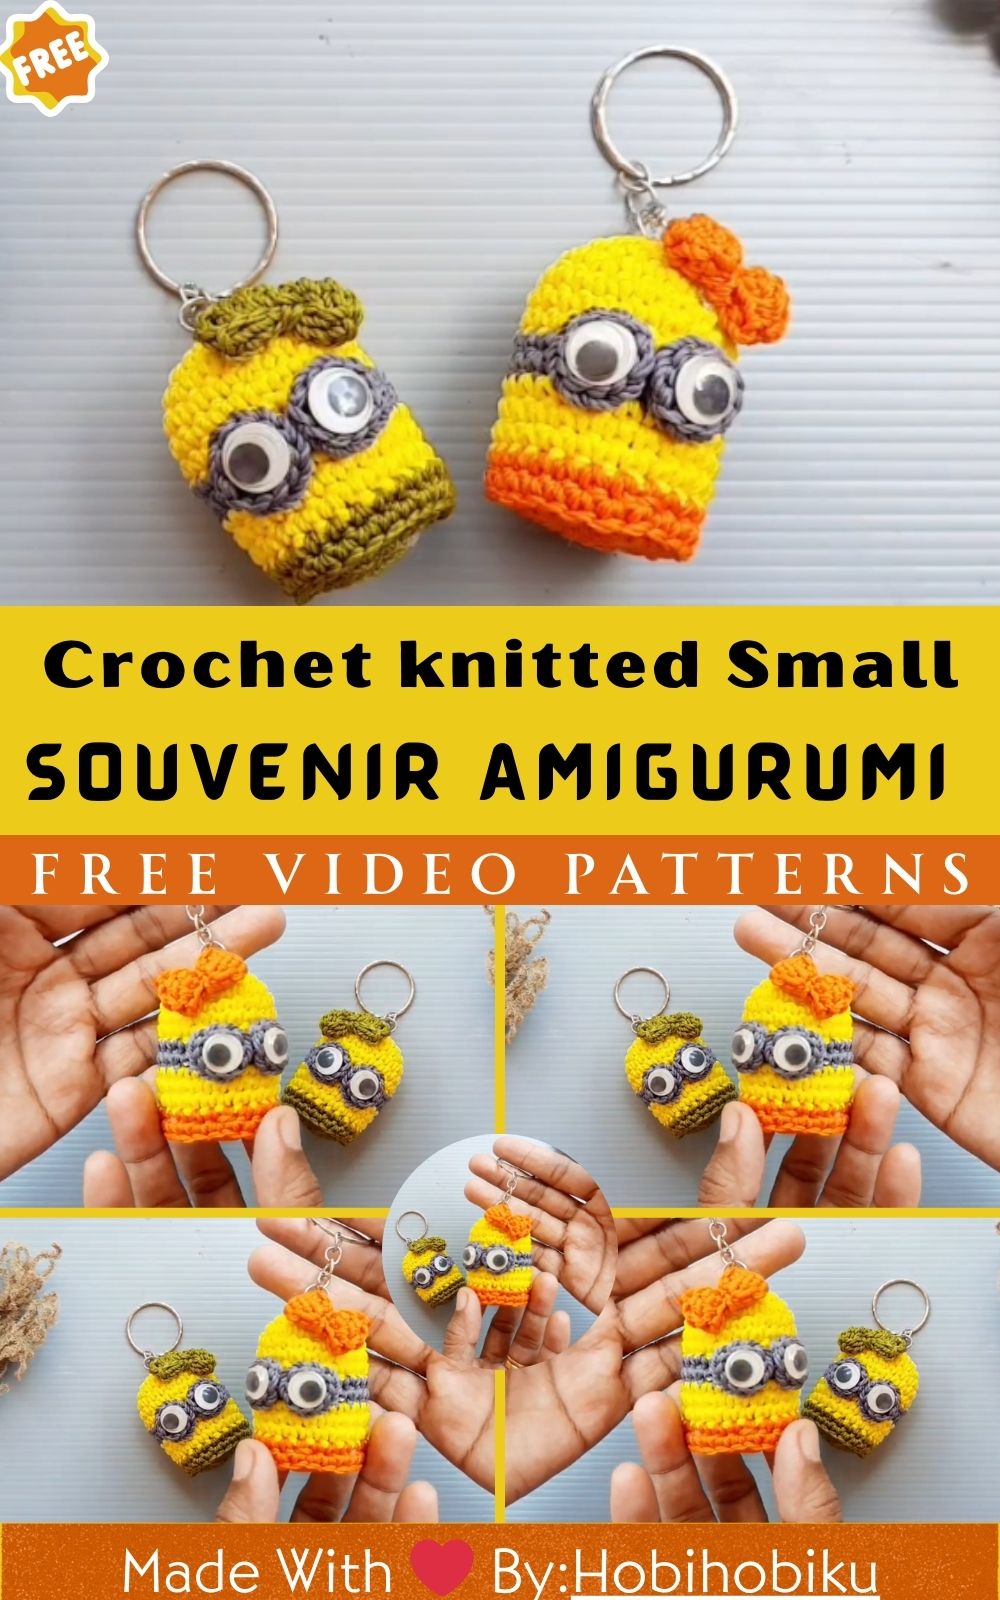
Customize colors, add a loop or safety pin, and create pocket-size souvenirs that travel well and photograph beautifully. A quick, stash‑busting project that still feels premium.
Uses:
- Keychain, bag charm, or backpack buddy
- Travel souvenir or desk companion
- Party favor or market best-seller
Creative Crochet Knitted Small Souvenir Amigurumi Pattern
Firstly, welcome to your new favorite quick make: the Creative Crochet knitted Small Souvenir Amigurumi Pattern, an adorable, pocket-size project with a polished, knit-look finish. Secondly, this beginner-friendly pattern is written in clear steps with exact measurements, realistic time estimates, and easy techniques. Thirdly, you will craft a tiny charm that works as a keychain, bag buddy, desk decor, or market best-seller. Moreover, you can customize colors, add a loop, embroider a city name, or fasten a heart to turn it into a memorable souvenir. Finally, let’s make something cute, useful, and gift-ready without stress and with plenty of fun.
Finished Size, Skill Level, and Time
Firstly, finished size: approximately 6.5–7.5 cm (2.6–3.0 in) tall without loop and approximately 6.5 cm (2.6 in) wide. Secondly, skill level: confident beginner (you only need single crochet in the round, increases, and decreases). Thirdly, total making time: approximately 75–105 minutes, depending on speed and embellishments.
Materials and Exact Measurements
Firstly, yarn:
- DK (Category 3) cotton or cotton-blend yarn, main color (MC): 20 g (approximately 55–60 m / 60–66 yd).
- DK contrast color (CC) for scarf or accent: 5 g (approximately 14–16 m / 15–18 yd).
- DK accent color (AC) for tiny heart or embroidery: 2 g (approximately 5–7 m / 6–8 yd).
Secondly, hook:
- 2.75 mm crochet hook for a dense amigurumi fabric (alternatively, 3.0 mm if you crochet tightly).
Thirdly, safety features:
- 6 mm safety eyes (pair) or embroider eyes with black cotton or embroidery floss.
- Black embroidery floss or 4-ply black cotton for mouth and details: 50 cm (20 in).
Moreover, notions:
- Tapestry/yarn needle with a blunt tip (size 18–20).
- Stitch marker or scrap yarn.
- Sharp scissors.
Additionally, stuffing:
- Polyester fiberfill: 12–15 g (0.4–0.5 oz), packed firmly but evenly.
Furthermore, hardware:
- 20–25 mm split ring keychain plus 4–5 cm (1.6–2.0 in) chain, optional.
- 6–8 mm jump ring, optional.
Finally, extras:
- Blush or fabric-safe pastel for cheeks, optional.
- Small felt piece for applique (1.5–2 cm heart), optional.
- Fabric glue for felt applique, optional.
Gauge and Tension (Amigurumi-Friendly)
Firstly, amigurumi works best with a tight, no-gap fabric. Secondly, aim for approximately 8–9 single crochets per 2.5 cm (1 in) when worked in the round with a 2.75 mm hook and DK yarn. Thirdly, if you see stuffing through your stitches, switch to a smaller hook or tighten your tension. Additionally, consistency matters more than the exact gauge for this small souvenir.
Abbreviations (US Terms)
Firstly, MR = Magic ring. Secondly, ch = chain. Thirdly, sc = single crochet. Moreover, inc = increase (2 sc in the same stitch). Additionally, dec = invisible decrease (sc two stitches together under front loops only). Furthermore, sl st = slip stitch. Likewise, BLO = back loop only. Similarly, FLO = front loop only. Finally, st(s) = stitch(es), rnd(s) = round(s).
Design Overview and Options
Firstly, this pattern makes a tiny, rounded mascot with a clean silhouette that doubles as a keychain. Secondly, you will crochet the body in one piece from the top down for speed and simplicity. Thirdly, you may switch to the waistcoat stitch (center single crochet) on the midsection to mimic a knit-look if you like. Moreover, you can keep the entire body in standard single crochet for a faster finish. Additionally, you can add micro-ears and a ribbed mini scarf for extra charm or skip them for a minimalist souvenir. Finally, you can embroider a tiny city name or initials to turn it into a custom keepsake.
Step-by-Step Instructions (With Realistic Time Estimates)
Step 1: Set Up and Magic Ring (Time: 3–5 minutes)
Firstly, place a stitch marker to track the first stitch of each round. Secondly, create a magic ring and work in a continuous spiral without joining. Thirdly, prepare your stuffing within reach for smooth progress. Moreover, cut a 20 cm tail of contrast yarn if you plan to attach a hanging loop later. Additionally, keep safety eyes and washers close to avoid losing momentum.
- Rnd 1: MR, 6 sc into ring (6).
Step 2: Top Increases for a Smooth Dome (Time: 6–8 minutes)
Firstly, increase gradually to form a neat curve. Secondly, keep stitches even and snug. Thirdly, avoid twisting your round by verifying the marker stays aligned.
- Rnd 2: inc in each st around (12).
- Rnd 3: (sc, inc) x 6 (18).
- Rnd 4: (2 sc, inc) x 6 (24).
Step 3: Reach Full Width for a Plush Sphere (Time: 8–10 minutes)
Firstly, complete the final increase rounds to reach a chubby diameter. Secondly, check your circle for a smooth edge. Thirdly, adjustthe tension if any gaps appear.
- Rnd 5: (3 sc, inc) x 6 (30).
- Rnd 6: (4 sc, inc) x 6 (36).
Optional Knit-Look Midsection (Waistcoat Stitch)
Firstly, you can work Rnds 7–10 in waistcoat stitch (center single crochet) to mimic a knitted “V” texture. Secondly, insert your hook into the “V” of the previous round instead of the normal top loops. Thirdly, keep the tension looser than usual because the waistcoat stitch tightens the fabric. Moreover, if that feels fiddly, simply continue with standard sc for the same stitch counts. Additionally, always maintain 36 stitches per round during this section.
Step 4: Straight Rounds to Build Height (Time: 12–15 minutes)
Firstly, single crochet evenly around to create the body’s height. Secondly, continue to work in a spiral without joining. Thirdly, optionally switch to waistcoat stitch for Rnds 7–10.
- Rnds 7–12: sc around (36) for 6 rounds total.
Additionally, place safety eyes now:
- Firstly, position the eyes between Rnds 9 and 10, approximately 6–7 stitches apart. Secondly, test placement with pins before committing. Thirdly, attach washers securely inside.
Step 5: Begin Decreases and Stuff as You Go (Time: 10–12 minutes)
Firstly, start shaping the lower half with gentle decreases. Secondly, begin adding stuffing after Round 13. Thirdly, distribute stuffing evenly to avoid lumps.
- Rnd 13: (4 sc, dec) x 6 (30).
- Rnd 14: (3 sc, dec) x 6 (24).
Step 6: Finish the Shaping and Close (Time: 12–15 minutes)
Firstly, continue decreasing to form a tidy closure. Secondly, stuff firmly yet evenly—think bouncy, not rock-hard. Thirdly, add a little extra fiberfill just before the final round.
- Rnd 15: (2 sc, dec) x 6 (18).
- Rnd 16: (sc, dec) x 6 (12).
- Rnd 17: dec around (6), then fasten off with a long tail.
Additionally, close the hole:
- Firstly, thread the tail through the front loops of the remaining 6 stitches. Secondly, pull tight to close, and secure with a hidden knot. Thirdly, weave in the end neatly.
Optional Step 7: Tiny Ears for a Mascot Style (Time: 8–10 minutes total)
Firstly, you can leave your souvenir as a simple round charm or add micro-ears for a cute mascot. Secondly, make two ears as follows:
- Ear (make 2)
- Rnd 1: MR, 6 sc (6).
- Rnd 2: (sc, inc) x 3 (9).
- Rnd 3: sc around (9), then fasten off and leave a 15 cm tail.
Thirdly, flatten each ear and stitch to the head approximately 3–4 stitches above the eyes and 5–6 stitches apart. Moreover, secure firmly without puckering the fabric. Additionally, weave in the tails invisibly.
Optional Step 8: Ribbed Mini Scarf for a Cozy Look (Time: 10–12 minutes)
Firstly, cut contrast color yarn (CC) and attach it to your hook with a slipknot. Secondly, create a quick ribbed scarf that mimics a knitted texture. Thirdly, choose one of the two methods below:
- Method A (Slip-Stitch Rib, Super Knit-Look)
- Row 1: ch 46, sl st in the back bump of the 2nd ch from hook and in each ch across (45 sl st).
- Row 2: ch 1, turn, sl st in BLO across (45 sl st).
- Finish: fasten off and weave in ends.
- Method B (HDC Rib, Slightly Faster)
- Row 1: ch 6, hdc in 2nd ch from hook and across (5 hdc).
- Row 2: ch 1, turn, hdc in BLO across (5 hdc).
- Repeat: rows until the strip measures 13–15 cm (5–6 in), then fasten off.
Additionally, tie the scarf around the neck area and secure it with a tiny invisible stitch to prevent sliding. Moreover, avoid compressing the stuffing.
Step 9: Embroider Features and Souvenir Details (Time: 8–10 minutes)
Firstly, thread black floss and embroider a tiny mouth or “smile” centered 1–2 stitches below the eye line. Secondly, optionally add a small “V” nose with a soft pink or brown thread. Thirdly, blush the cheeks lightly using fabric-safe pastel or embroidery circles.
Additionally, add souvenir lettering:
- Firstly, embroider initials or a short city code (for example, “LA” or “NY”) using backstitch or tiny satin stitch. Secondly, keep letters 0.8–1.2 cm tall for readability. Thirdly, secure knots under the scarf for a clean finish.
Optional Step 10: Felt Heart or Mini Applique (Time: 5–7 minutes)
Firstly, cut a 1.5–2 cm heart from felt. Secondly, glue or sew it to the front, slightly off-center, for a charming look. Thirdly, match or contrast the color for maximum pop.
Step 11: Add a Hanging Loop and Hardware (Time: 5–7 minutes)
Firstly, create a crocheted loop:
- Option 1: ch 18 with MC, sl st to the next stitch to form a loop, and fasten off with a 12 cm tail.
- Option 2: attach a folded 6–8 cm length of leather or satin cord and stitch through the top center.
Secondly, attach hardware:
- Firstly, open a 6–8 mm jump ring with pliers. Secondly, slip it through the loop, then add the 20–25 mm split ring keychain. Thirdly, close the jump ring securely to prevent gaps.
Optional Step 12: Tiny Accessory Variations (Time: 5–10 minutes)
Firstly, add a miniature backpack strap using a 6–7 cm chain. Secondly, attach a bell charm near the scarf knot. Thirdly, sew a small button to the scarf for an extra souvenir vibe.
Basic Tips for Success
Firstly, use a smaller hook than the yarn label recommends to eliminate gaps. Secondly, keep your tension firm but comfortable to maintain clean shaping. Thirdly, place your increases and decreases neatly to avoid spiraling distortion. Moreover, always use invisible decreases (front-loop-only dec) for a smooth surface. Additionally, pause to stuff gradually instead of at the end to prevent hard lumps. Furthermore, consider using waistcoat stitch only for the midsection if your hands tire, because it tightens the fabric considerably. Likewise, test eye placement with pins before attaching washers to avoid rework. Finally, weave ends through several stitches and pull slightly to bury knots.
Common Mistakes and How to Avoid Them FOR ( Crochet knitted Souvenir Amigurumi)
Firstly, loose fabric that shows stuffing:
- Solution: choose a 2.75 mm hook, tighten tension, or switch to a slightly heavier DK cotton.
Secondly, uneven sphere or “corners” at increasing points:
- Solution: rotate your increases each round or gently roll the stuffed body between your palms to even it out.
Thirdly, a visible decrease in bumps:
- Solution: Use invisible decreases in the front loops only and keep yarn tension steady.
Moreover, misaligned features:
- Solution: mark the center front with a scrap thread and measure spacing before committing to safety eyes or embroidery.
Additionally, the waistcoat stitch is too tight:
- Solution: size up to a 3.0 mm hook for only the waistcoat rounds, or loosen your grip slightly.
Furthermore, the scarf slipping upward:
- Solution: secure the scarf with 1–2 tiny anchor stitches on the back and side.
Similarly, the keychain loop pulls out:
- Solution: sew the loop through multiple stitches at the crown, and knot them, then bury the tails deeply.
Variations to Personalize Your Souvenir
Firstly, Minimalist Charm:
- Keep the body plain with embroidered eyes and a tiny felt heart, and skip the ears and scarf.
Secondly, Animal Ears Pack:
- Add cat ears (triangles), bear ears (rounds), or bunny ears (long ovals) for instant personality.
Thirdly, City Souvenir Edition:
- Embroider city initials and choose colors matching flags, teams, or landmarks.
Moreover, Seasonal Set:
- Make holiday colorways with red/green scarves, pastel spring shades, or cozy autumn hues.
Additionally, Magnet Version:
- Replace the loop with a 10–12 mm strong craft magnet sewn inside the back, and note safety considerations around electronics.
Furthermore, Knit-Look Body:
- Use waistcoat stitch from Rnds 7–12 for an authentic knit vibe, then return to standard sc for the decreases.
Similarly, Tiny Backpack Buddy:
- Add a short chain and a carabiner clip for travel bags and camera straps.
Safety Notes and Care
Firstly, avoid safety eyes for children under 3; instead, embroider eyes securely. Secondly, hand wash gently with cool water and mild soap, and reshape while damp. Thirdly, air dry completely before use. Moreover, avoid bleach or high heat to protect the fiber and shape. Additionally, check keychain connections periodically to ensure secure attachments.
Troubleshooting Quick Fixes
Firstly, if your sphere looks lopsided, then re-stuff and redistribute fiber with a chopstick. Secondly, if the waistcoat stitch feels tough, then switch back to standard sc and continue. Thirdly, if gaps appear near the closing round, then add one more round of sc before the last decrease to give room for stuffing. Moreover, if your stitch count drifts, then recount at the end of each round and correct with an inc or dec placed at the back. Additionally, if your yarn splits, then slow down slightly and rotate the hook tip to catch all strands. Finally, if your embroidery sinks into stitches, then float the thread lightly across the surface and secure with tiny tacks.
Why This Pattern Works for Beginners FOR ( Crochet knitted Souvenir Amigurumi)
Firstly, the body is crocheted in one piece, so assembly is minimal. Secondly, the stitch vocabulary is intentionally small and approachable. Thirdly, exact measurements and time estimates help you plan and finish without guesswork. Moreover, optional add-ons let you explore creativity without complicating the core pattern. Additionally, the knit-look options offer a sophisticated finish while remaining flexible. Finally, the souvenir theme makes the result personal, giftable, and market-ready.
SEO-Friendly Keywords to Include Naturally
Firstly, Creative Crochet knitted Small Souvenir Amigurumi Pattern. Secondly, beginner-friendly crochet amigurumi. Thirdly, a knit-look crochet keychain. Moreover, a quick crochet gift idea. Additionally, a small amigurumi pattern. Furthermore, a step-by-step crochet tutorial. Similarly, a crochet souvenir charm. Finally, DIY amigurumi keychain.
Quick Reference Pattern (US Terms)
Firstly, Body (one piece):
- R1: MR 6 (6).
- R2: inc x 6 (12).
- R3: (sc, inc) x 6 (18).
- R4: (2 sc, inc) x 6 (24).
- R5: (3 sc, inc) x 6 (30).
- R6: (4 sc, inc) x 6 (36).
- R7–12: sc around (36); optionally use waistcoat stitch for knit-look.
- Place 6 mm eyes between R9–10, 6–7 stitches apart.
- R13: (4 sc, dec) x 6 (30).
- R14: (3 sc, dec) x 6 (24).
- R15: (2 sc, dec) x 6 (18).
- R16: (sc, dec) x 6 (12).
- R17: dec x 6 (6), fasten off, close, weave in.
Secondly, Ears (optional, make 2):
- R1: MR 6 (6).
- R2: (sc, inc) x 3 (9).
- R3: sc around (9), fasten off, leave tails, flatten, sew.
Thirdly, Scarf (choose one):
- Slip-Stitch Rib: ch 46, sl st back bump, then one row sl st BLO; tie and secure.
- HDC Rib: ch 6, 5 hdc, then rows in BLO to 13–15 cm; tie and secure.
Final Thoughts and Friendly Send-Off
Firstly, you now have a complete, polished, and flexible Creative Crochet knitted Small Souvenir Amigurumi Pattern that is quick, cute, and totally customizable. Secondly, you can make it tonight, gift it tomorrow, and sell it this weekend. Thirdly, you can play with colors, textures, and little details to make each one unique. Additionally, you can tag your creations and keep notes on timing so each new version gets even faster. Finally, happy crocheting, and may every tiny souvenir carry a memory, a smile, and a little handmade magic.