Crochet Sleeping Bear Pattern in Plush Yarn
Closed eyes and rosy cheeks give this little bear an irresistible sleepy charm. Worked in plush yarn, this crochet sleeping bear pattern turns a handful of plain shapes into a snuggly toy that seems to be dozing off. Since the velvety yarn makes every stitch look plump and cozy, even basic shaping gives a result worth gifting.
Below, you will find the materials, the stitches, the build order shown in the step photos, and the finishing touches. In addition, there are quick fixes for the problems plush yarn tends to cause.
Crochet Sleeping Bear Pattern Overview
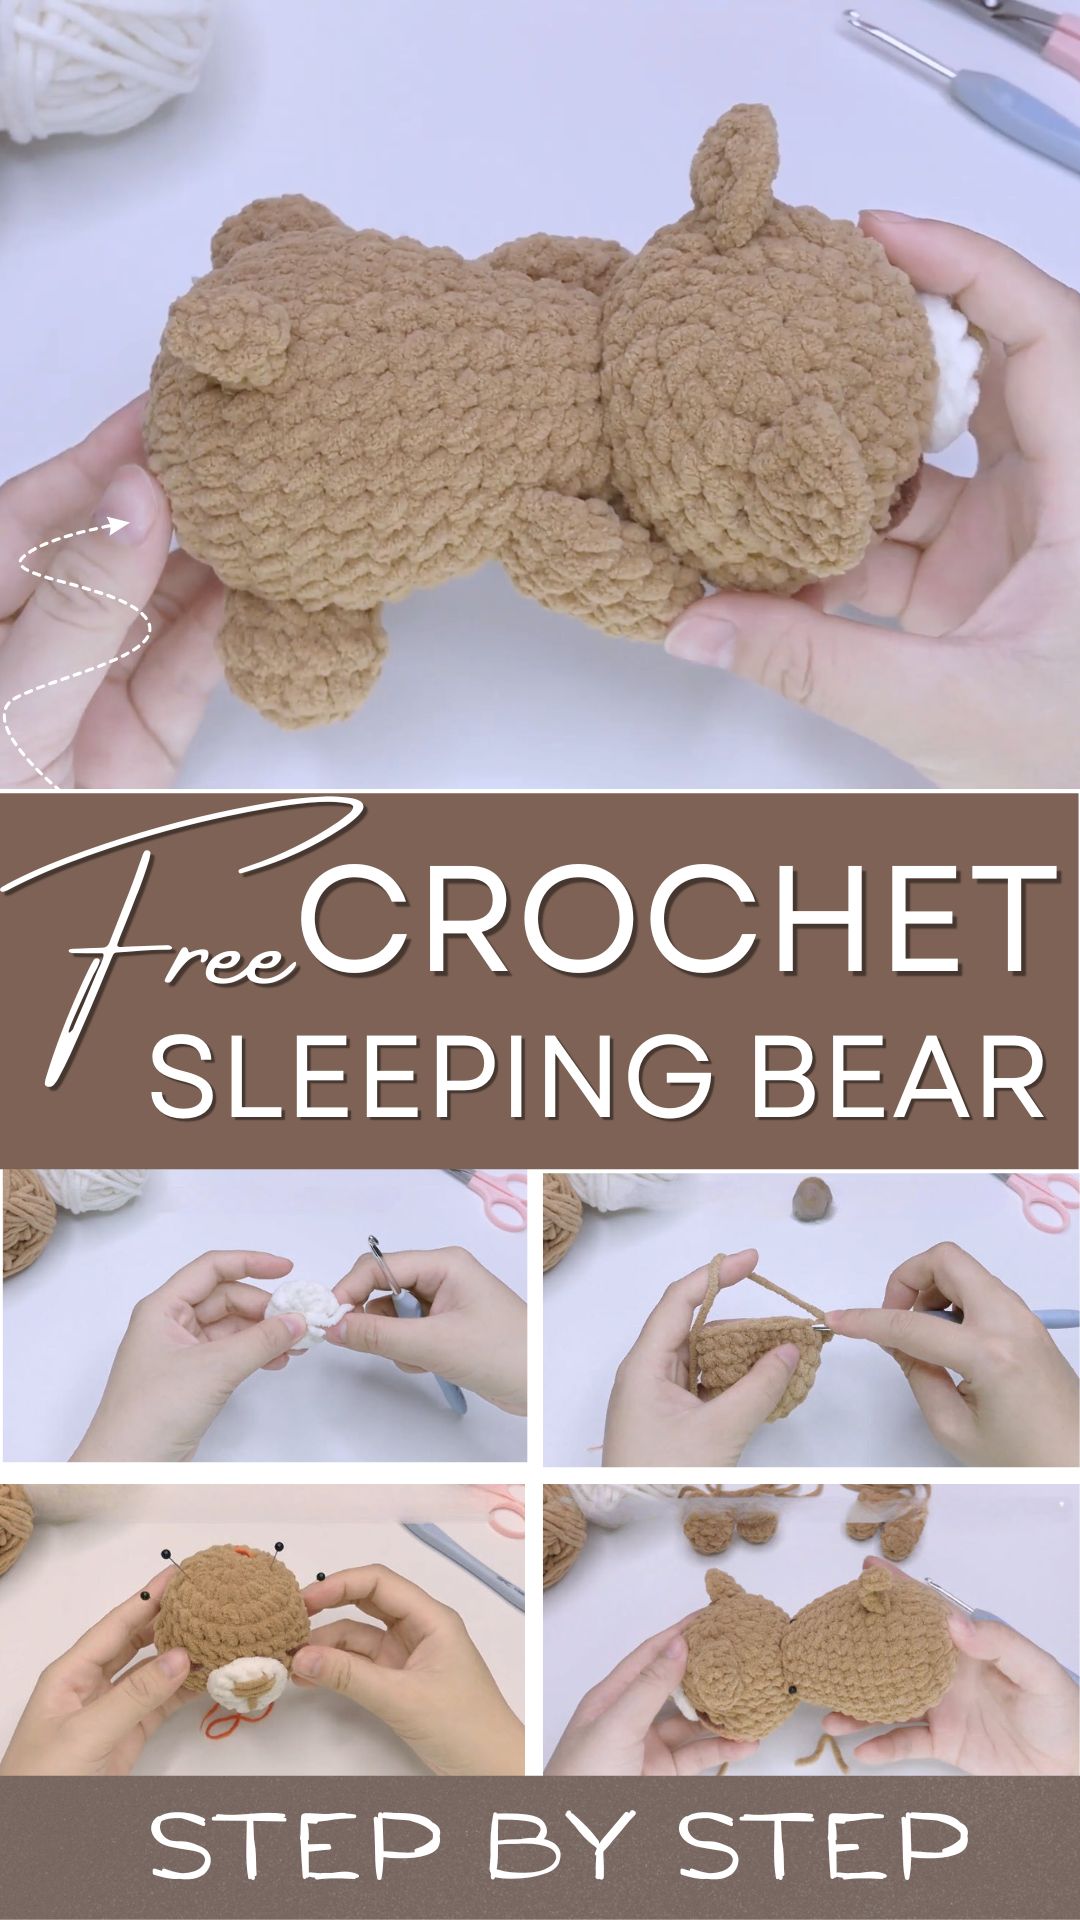
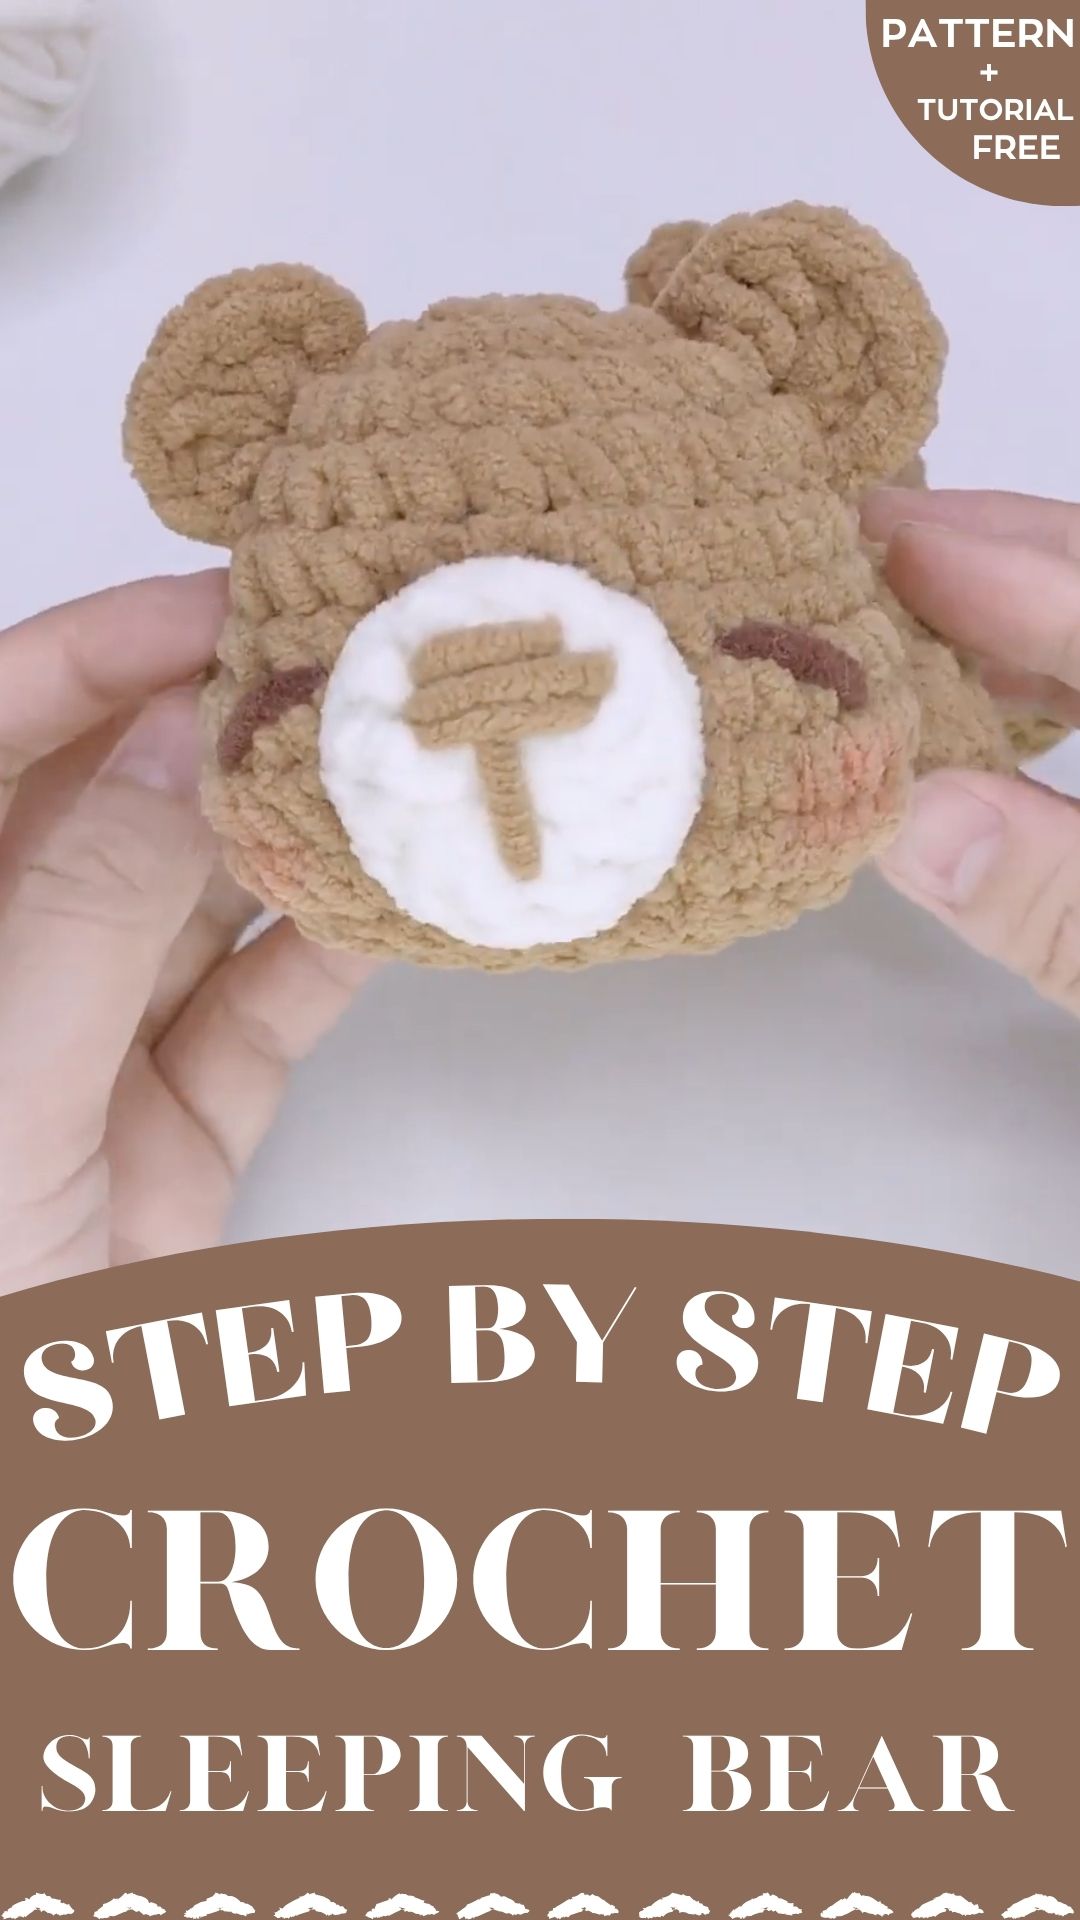
The bear is round and compact, worked in warm light brown with a white muzzle and a small stitched nose. Closed eyes give the face a calm, drowsy look, and soft blush on the cheeks adds sweetness without making the project harder.
Instead of one big piece, the bear is made from a head, a muzzle, ears, a body, and small limbs. First, each piece is crocheted in rounds and stuffed. Then everything is sewn together. Because the limbs sit close to the body in a resting pose, the finished bear looks curled up instead of standing.
This crochet sleeping bear pattern suits a nursery shelf, a bedside table, a keychain-style charm, or a handmade gift for a new baby or anyone who loves bears.
Crochet Sleeping Bear Pattern Features
Here is what makes this design special:
- Soft plush yarn for a squishy, huggable finish
- A white muzzle set against a simple stitched nose
- Closed embroidered eyes for the sleepy expression
- Blush cheeks for a gentle look
- Separate pieces, so shaping and stuffing stay easy to control
- Pins to test placement before any permanent sewing
- A compact body and limbs that create the resting pose
Skill Level for This Crochet Sleeping Bear Pattern
This crochet sleeping bear pattern works best for advanced beginners. The techniques are basic: magic ring, single crochet, increases, decreases, simple embroidery, and sewing pieces together. However, the yarn is where the challenge lies. Plush yarn hides stitches, so careful counting and stitch markers matter more than usual. Even so, anyone who has already made a flat circle or a small ball should manage well.
Materials for the Crochet Sleeping Bear Pattern
Gather these supplies first:
- Yarn: soft plush crochet yarn in light brown for the bear and white for the muzzle, plus scraps of a contrasting color
- Crochet hook: a size matching the yarn label (no hook size is given, so check the label and test a small swatch)
- Fiberfill stuffing
- Stitch markers
- Tapestry needle
- Scissors
- Black embroidery floss: for the eyes and facial details
- Round-head pins: for marking the ears and face
Small scraps of contrasting yarn also work as visible markers on dense plush fabric.
Yarn Information
Plush yarn is thick and soft, with a fuzzy surface that fills the gaps between stitches. As a result, it suits amigurumi well, since stuffing rarely shows through. On the other hand, it makes each stitch harder to read.
Going down one hook size from the label can keep the fabric tight, and dense stitches stop fiberfill from peeking out. If plush yarn is hard to find, soft chunky or bulky acrylic can stand in. However, the bear will look less velvety and may need a slightly different hook. Light brown and white are the main colors, but any two soft shades will work.
Finished Size
No exact measurements are given, so none are promised here. The final height depends on yarn thickness, hook size, and tension. To check the scale early, hold the first head piece against the stuffed shape before continuing, because the other pieces are sized to match it.
Stitches and Abbreviations
- MR: magic ring, the adjustable starting circle
- sc: single crochet
- inc: two single crochets in one stitch
- dec: two stitches worked together
- st: stitch
- sl st: slip stitch, used for finishing off
Everything is worked in continuous rounds, so place a marker on the first stitch of each round to keep your count accurate.
Gauge Information
No gauge is given, and it matters less here than for wearable projects. Density is what counts, since the stitches must be tight enough to hide the stuffing. To test it, make a small circle and stuff it lightly. If fiberfill shows between stitches, go down a hook size.
Tips Before Starting Your Crochet Sleeping Bear Pattern
- First, keep a marker in the last stitch of every round and move it up as the work grows.
- Also, stop often to check your count, since plush yarn hides mistakes.
- Leave long tails on the head, muzzle, ears, and limbs for sewing.
- Next, stuff in small pieces for smooth shaping.
- Finally, use pins to preview every placement before sewing.
Step-by-Step Crochet Sleeping Bear Pattern
The steps below follow the order shown in the step photos. Exact stitch counts are not listed here, so follow the written pattern or the video for those.
Step 1: Make the White Muzzle
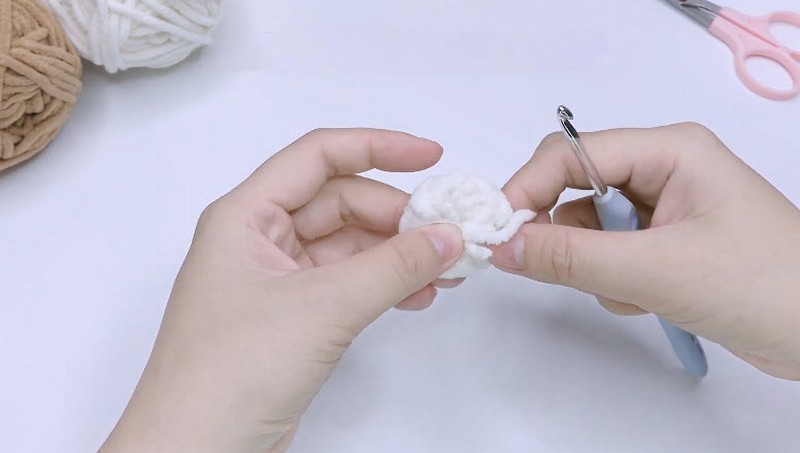
First, start the white muzzle with a magic ring and work increasing single crochet rounds until the small oval is wide enough for the face. Then fasten off and leave a long tail, which you will use later to sew the muzzle to the head. Once the tail is pulled snug, the muzzle should sit slightly rounded with a fluffy surface.
Step 2: Work the Brown Head
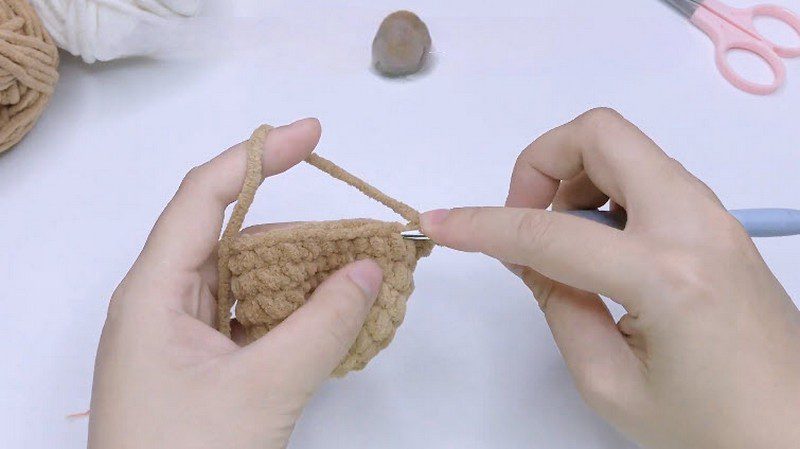
Next, switch to brown yarn and work the head in continuous rounds from a magic ring. Increase in the early rounds to build a wide, round shape, and keep the fabric tight by wrapping the yarn firmly over the hook. In the photo, the work is held between the fingers while the yarn loops over the left hand for tension.
Step 3: Stuff and Close the Head
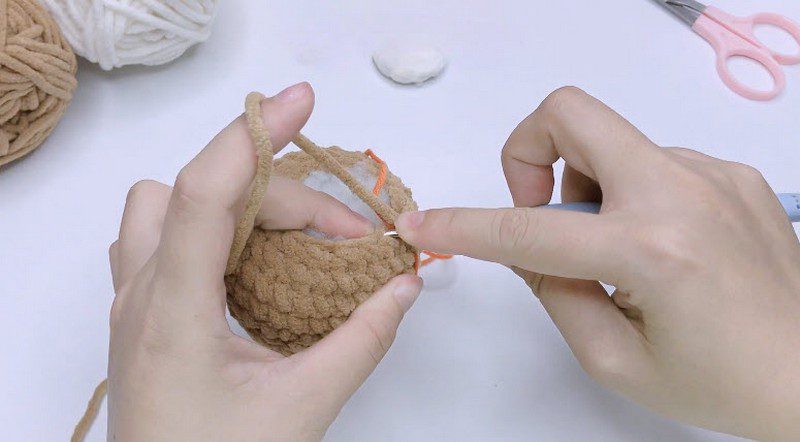
Before the opening gets too small, add stuffing in small pieces and shape it into a round ball. After that, place a few contrasting yarn scraps along the final rounds as markers so the decreases stay even. Work decreases until the opening closes, then pull the tail through the last stitches and tighten.
Step 4: Mark the Face and Ears
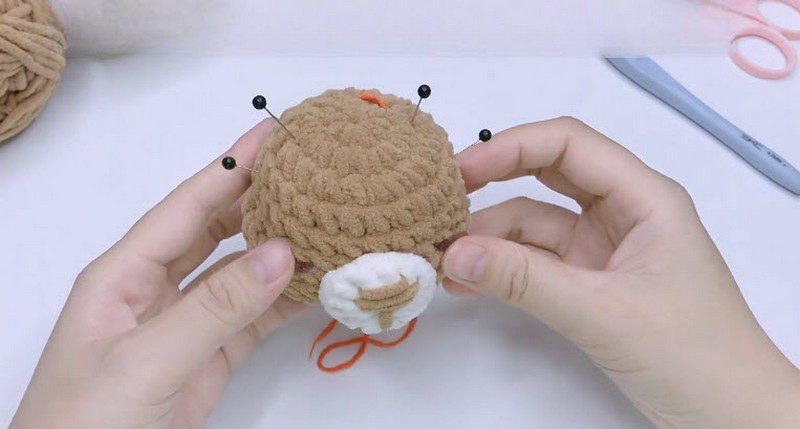
Use round-head pins to test where the ears and eyes will sit. Then place the white muzzle low on the head and stitch the small brown nose over it. Next, embroider closed eyes with black floss, curving them gently downward for the sleepy look, and add blush to each cheek. Finally, check the layout from several angles before sewing anything permanently.
Step 5: Crochet the Body and Limbs
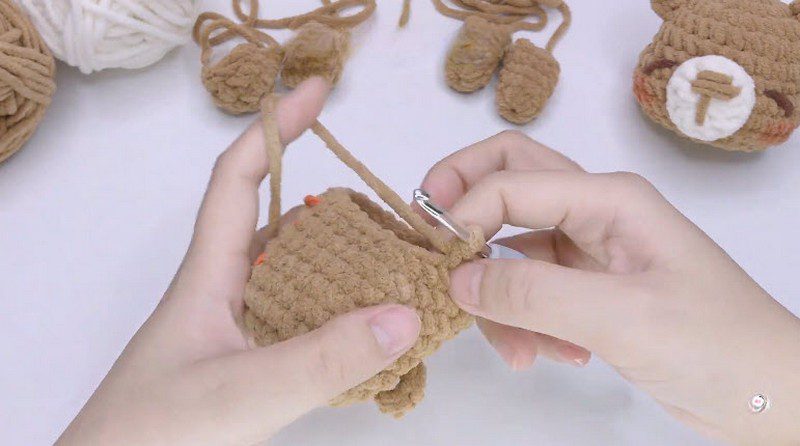
Meanwhile, work the body in rounds from a magic ring, increasing to a rounded base and then working evenly. The photo shows the limbs set aside, with the body in progress and the small limb pieces nearby. Make the limbs as small stuffed pieces, and leave long tails on them.
Step 6: Add the Ears
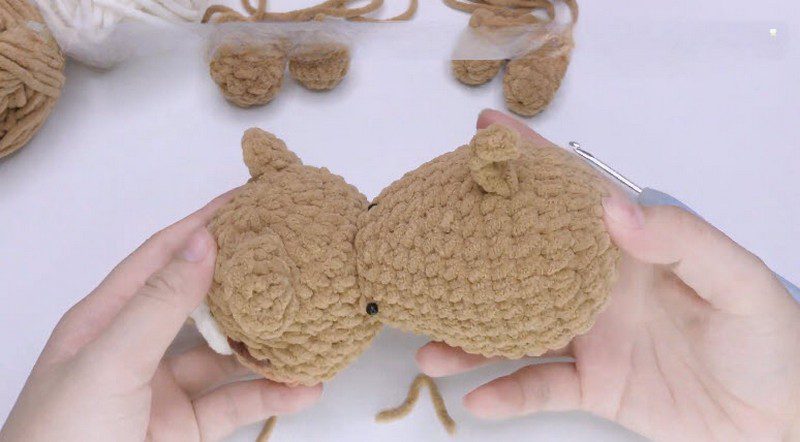
Then crochet two small ears and sew them to the upper sides of the head, using the pin marks as a guide. In the photo, the ear sits slightly forward, which helps the bear look cozy instead of alert.
Step 7: Join the Head and Body
Hold the head against the body to check the pose. The two pieces should lean toward each other as if the bear is resting. After that, pin them in place and sew through both layers with a tapestry needle, working around the neck in small, firm stitches.
Step 8: Attach the Limbs
Finally, sew the limbs to the body one at a time, matching their positions. The paws should tuck in close to suggest a sleeping position. Afterwards, check that the bear can sit or lie down steadily.
Pattern Construction
The bear is built from five parts: head, muzzle, ears, body, and limbs. Each piece is crocheted in rounds, stuffed where needed, and sewn on afterward. Facial details go on before the head joins the body, because a separate head is easier to hold and stitch.
Customization Options for the Crochet Sleeping Bear Pattern
- Colors: swap the light brown for cream, gray, or soft pink.
- Muzzle: use a different contrast shade for a one-of-a-kind look.
- Accessories: add a tiny nightcap, scarf, or small blanket in a second color.
- Size: use thicker yarn and a larger hook for a bigger bear, or thinner yarn for a mini version.
- Face: add tiny eyelashes or stitch a small smile.
Common Mistakes and Troubleshooting
Stuffing shows through the stitches. The fabric is too loose, so switch to a smaller hook and keep your tension firm.
Stitches are impossible to count. Plush yarn hides them. In that case, use a marker every round and count by touch as well as by sight.
The head looks lopsided. Uneven decreases usually cause this, so space them evenly around the round.
Facial features look off-center. Pin first, step back, and compare the face from the front and the side.
Ears sit too high or too wide. Test with pins and shift them until the face looks calm and balanced.
The bear will not stay in its sleeping pose. Adjust where the limbs and head are joined, and add a little more stuffing to the body for support.
Finishing Your Crochet Sleeping Bear Pattern
First, weave in every loose end with the tapestry needle, pulling the tails inside the stuffed pieces so they disappear into the plush fabric. Then trim neatly. Next, fluff the muzzle and head with a gentle brushing motion to lift the fuzzy surface. A stuffed toy does not need blocking, but a quick reshape by hand helps the head look smooth and round.
Care Instructions
Spot clean with a damp cloth and mild soap. Since plush yarn can mat in a washing machine, hand washing is safer for a full bath. Then press the water out gently, reshape the bear, and let it air dry away from direct heat. Store it somewhere dry, ideally out of direct sunlight. If the bear is a gift for a baby, check the yarn label first, and keep the embroidered eyes, which are safer than attached ones.
Bonus: Display and Photo Ideas
A sleeping bear looks lovely on a folded blanket or in a small cloth-lined basket. Natural window light brings out the velvety texture of plush yarn, and a white background makes the light brown stand out. That helps if you are photographing the bear for a shop listing or a blog post.
FAQs About the Crochet Sleeping Bear Pattern
Is this crochet sleeping bear pattern beginner-friendly?
It suits advanced beginners. The stitches are basic, but plush yarn needs careful counting.
Can regular yarn replace plush yarn?
Yes, since a soft chunky or bulky yarn works, although the bear will look less velvety.
What hook size works best?
Start with the size on the yarn label, then test whether going one size smaller keeps the fabric tight.
Do the eyes have to be embroidered?
Embroidered eyes create the closed, sleeping look, and they are safer for small children.
How can I make the bear larger?
Use thicker yarn with a larger hook, and keep the stitch counts from the written pattern.
A Sleepy Bear of Your Own
Soft yarn, simple shapes, and a sweet sleepy face come together in this crochet sleeping bear pattern. Because the step photos cover each stage, from the white muzzle to the final sewn pose, the build is easy to follow. So pick a favorite yarn color, gather your supplies, and start with the head. Once the first bear is napping on your shelf, a whole sleepy family may follow.