Crochet Kuromi Chick Amigurumi – Step-by-Step Cute & Easy Pattern
This Crochet Kuromi Chick Amigurumi is a super cute project inspired by the popular Sanrio character Kuromi with a chick twist. This tiny kawaii crochet toy is perfect as a crochet keychain, a handmade gift, or an adorable desk and shelf decoration.
Crochet Kuromi Chick Amigurumi combines classic amigurumi cuteness with a Kuromi-inspired hood for a playful, unique look. Amigurumi crochet is the art of making small stuffed toys using simple stitches worked in the round, usually starting with a magic ring, then shaping with single crochet, increases, and decreases. Kuromi-inspired crochet toys are popular because they’re instantly recognizable, customizable, and perfect for creating kawaii handmade decor or gifts.
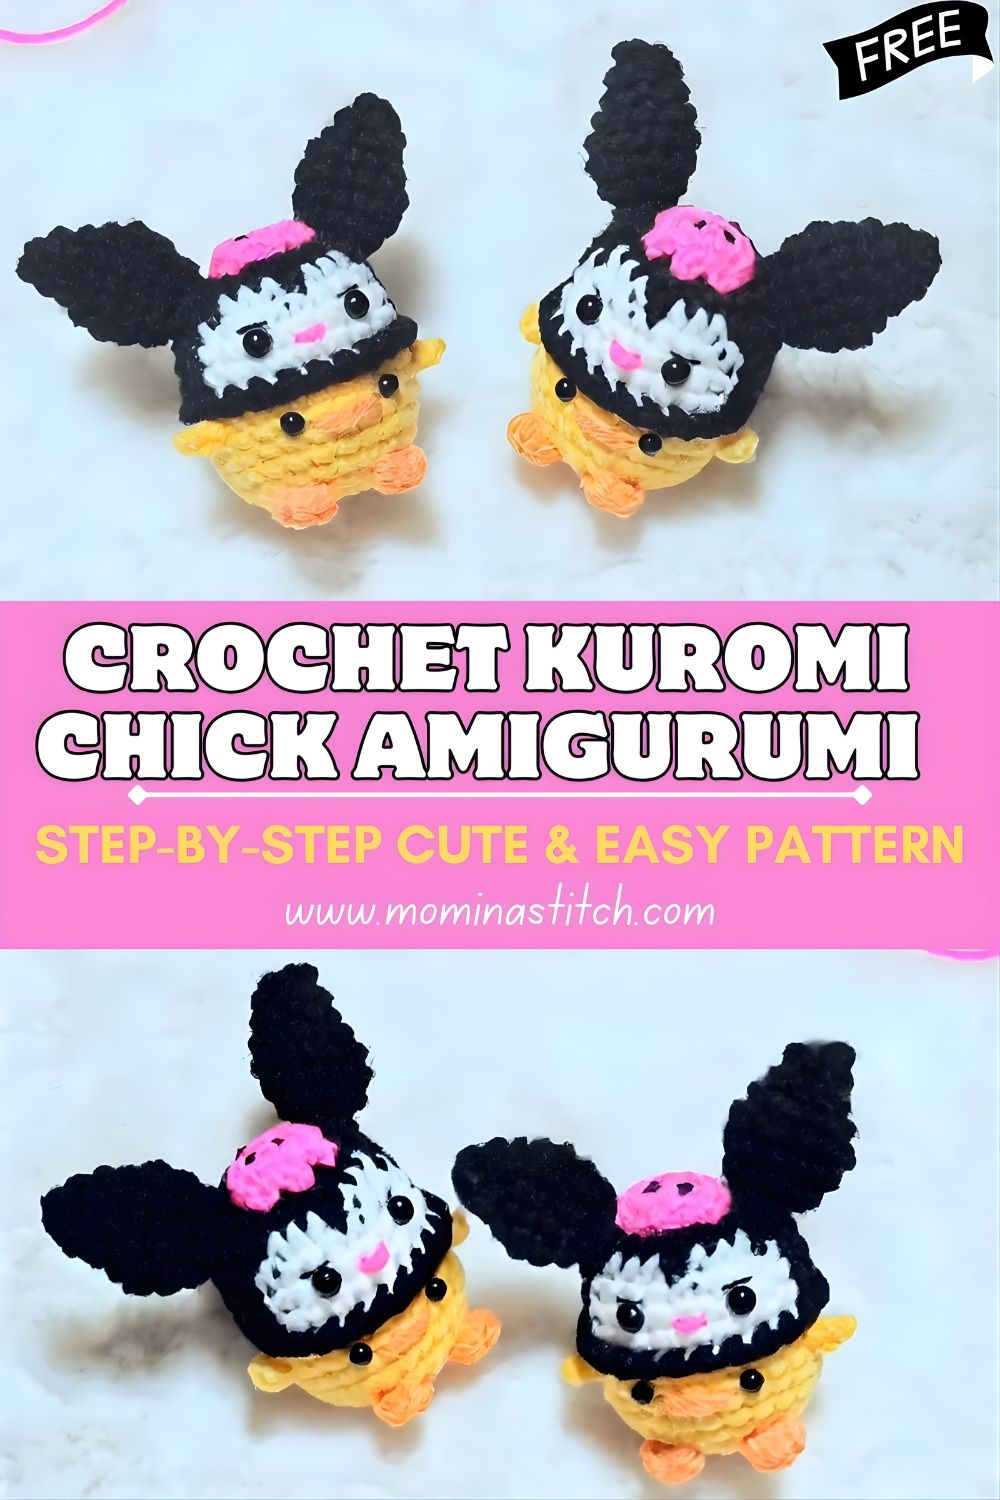
What makes this amigurumi chick extra adorable is the contrast between the bright yellow body and the black Kuromi hood, plus the cute face patch and tiny details. This tutorial is designed for beginners and intermediate crocheters who want a clear, step-by-step pattern. You’ll learn how to crochet the body, wings, feet, beak, hood, ears, and how to assemble everything neatly.
3. Materials Needed
Use these supplies to make your Kuromi chick amigurumi:
- Crochet hook (2.5 mm – 3.5 mm): Smaller hooks create a tighter stitch,s so stuffing won’t show.
- Yellow yarn (chick body): The main body and wings.
- Black yarn (Kuromi hood): Creates the signature Kuromi-inspired hood and ears.
- White yarn (face patch): Makes the cute face area on the hood.
- Pink yarn (nose + skull decoration): Adds Kuromi-style detail accents.
- Orange yarn (feet and beak): For the chick’s beak and feet.
- Safety eyes (8–10 mm): Gives a clean, professional kawaii look (or embroider for baby-safe options).
- Fiberfill stuffing: Shapes the body and makes it plush.
- Yarn needle: For sewing parts together and weaving in ends.
- Stitch marker: Helps track rounds (very useful for beginners).
- Scissors: For trimming yarn ends neatly.
Tip: Cotton or acrylic yarn works great for amigurumi because it holds shape and shows stitches clearly.
4. Crochet Abbreviations
Most amigurumi patterns are worked in continuous rounds using single crochet stitches, with increases and decreases for shaping.
Crochet Abbreviations (No Box)
MR: Magic Ring (adjustable starting loop)
sc: Single Crochet (basic stitch)
inc: Increase (ek stitch mein 2 sc)
dec: Decrease (2 stitches ko 1 banana / sc2tog)
ch: Chain
sl st: Slip Stitch (join/finish ke liye)
st: Stitch
R: Round
Note: Most amigurumi continuous rounds mein sc se banti hai.
5. Crochet Kuromi Chick Pattern (Step-by-Step)
Chick Body (Yellow)
Work in continuous rounds. Use a stitch marker to mark the first stitch of each round.
- R1: 6 sc in magic ring (6)
- R2: inc ×6 (12)
- R3: (1 sc, inc) ×6 (18)
- R4: (2 sc, inc) ×6 (24)
- R5–8: sc around (24)
Start stuffing the body firmly and evenly as you go.
- R9: (2 sc, dec) ×6 (18)
- R10: (1 sc, dec) ×6 (12)
- R11: dec ×6 (6)
Fasten off, close the hole, and weave in ends.
Wings (Make 2, Yellow)
- R1: 6 sc in MR (6)
- R2: (1 sc, inc) ×3 (9)
- R3–4: sc around (9)
Fasten off and leave a sewing tail. Flatten slightly and sew onto the body sides.
Feet (Make 2, Orange)
- R1: 6 sc in MR (6)
- R2: inc ×6 (12)
- R3: sc around (12)
Fasten off and leave a tail. Sew to the bottom of the body (test placement so it sits evenly).
Beak (Orange)
- R1: 4 sc in MR (4)
- R2: (1 sc, inc) ×2 (6)
Fasten off and leave a tail. Sew to the center of the face area.
Kuromi Hood (Black)
- R1: 6 sc in MR (6)
- R2: inc ×6 (12)
- R3: (1 sc, inc) ×6 (18)
- R4: (2 sc, inc) ×6 (24)
- R5–7: sc around (24)
Fasten off,ff leaving a long tail. Place the hood on the chick’s head and sew lightly around the lower edge (just enough to hold shape).
Kuromi Ears (Make 2, Black)
- R1: 5 sc in MR (5)
- R2: (1 sc, inc) repeat around (7–10 depending on tension)
- R3–5: sc around
Fasten off, leave a tail. Flatten slightly and sew to the top of the hood.
Note: Because “repeat” isn’t tied to a fixed stitch count in R2, simply increase evenly around to make a slightly wider ear base. If you want consistent,cy: do (1 sc, inc) ×2, then 1 sc = 7 sts.
Face Patch (White)
- R1: 6 sc in MR (6)
- R2: inc ×6 (12)
- R3: (1 sc, inc) ×6 (18)
Fasten off, leave a tail. Sew onto the front of the hood as the face patch.
6. Assembly Instructions
Follow this order for a neat, balanced look:
- Attach wings to the sides of the chick’s body (slightly below the midpoint looks cute).
- Sew feet to the bottom—place them first with pins or clips so the chick sits evenly.
- Sew the beak to the center of the face area.
- Add safety eyes above the beak (or embroider them with black yarn).
- Place the Kuromi hood over the head and stitch around the lower edge to secure.
- Sew ears onto the hood top.
- Add a small pink decoration on the hood (for the Kuromi-inspired detail).
Proper assembly—especially feet placement and hood alignment—makes your amigurumi look polished and extra cute.
7. Beginner Tips
- Use a stitch marker so you always know where the round begins.
- Stuff gradually to avoid lumps and keep the shape smooth.
- Keep stitches tight (size down your hook if you see holes).
- Count stitches every round—amigurumi shaping depends on accurate stitch counts.
8. Conclusion
This Crochet Kuromi Chick Amigurumi is a charming, collectible project that’s fun to customize—try pastel hoods, add a tiny bow, or make a matching set in different colors. Whether you’re crocheting for yourself or gifting, this little kawaii plush is guaranteed to stand out.