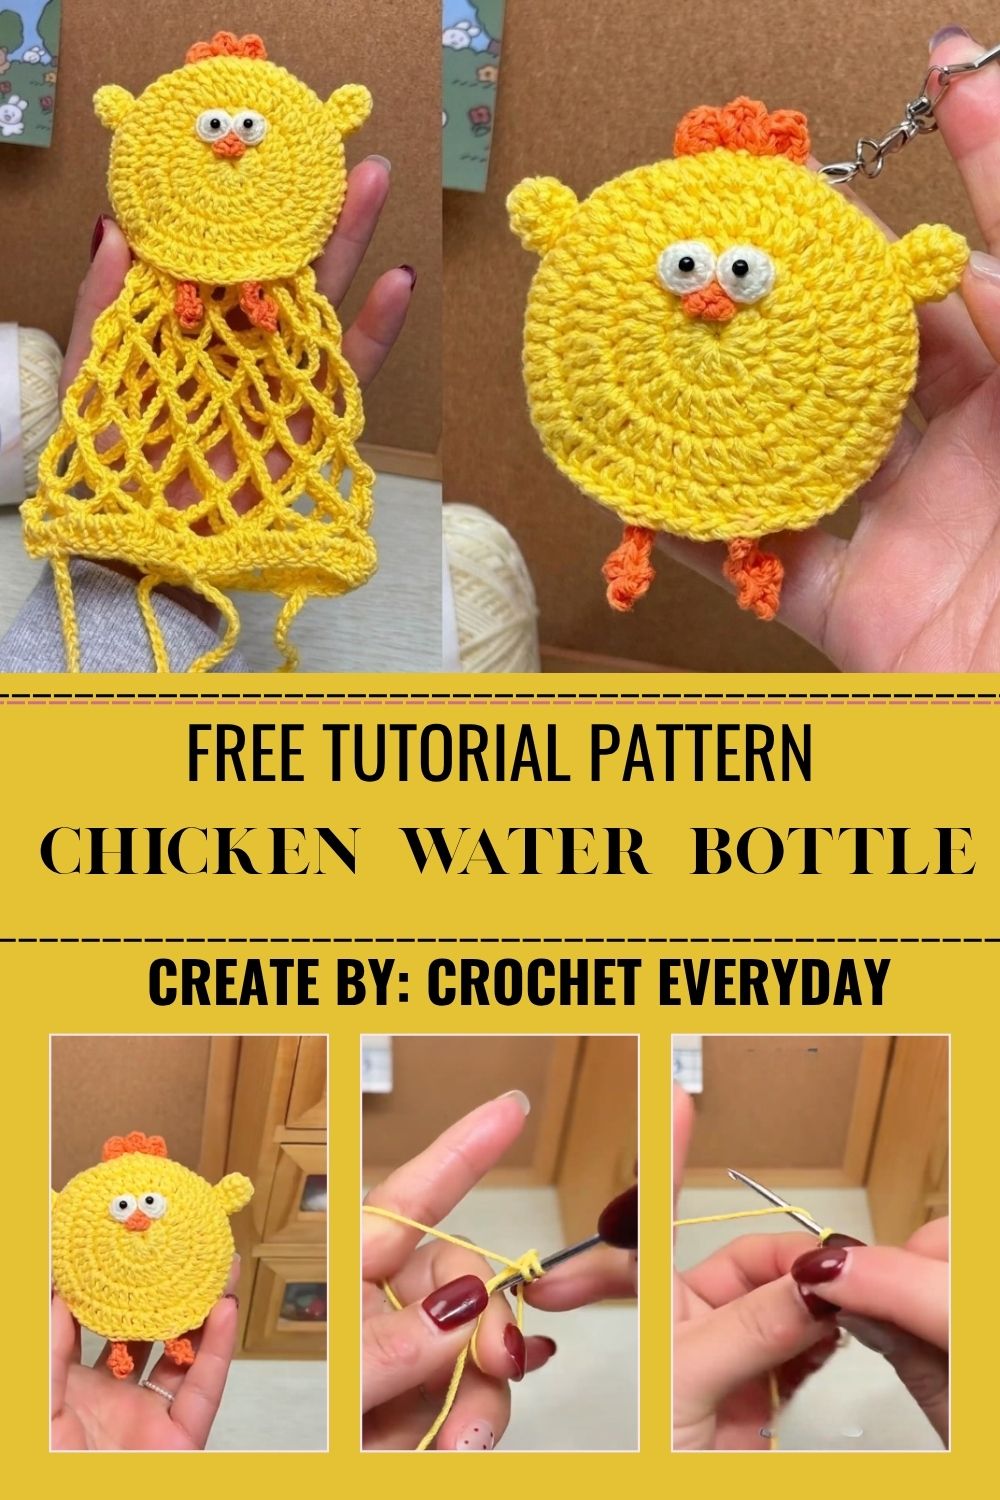
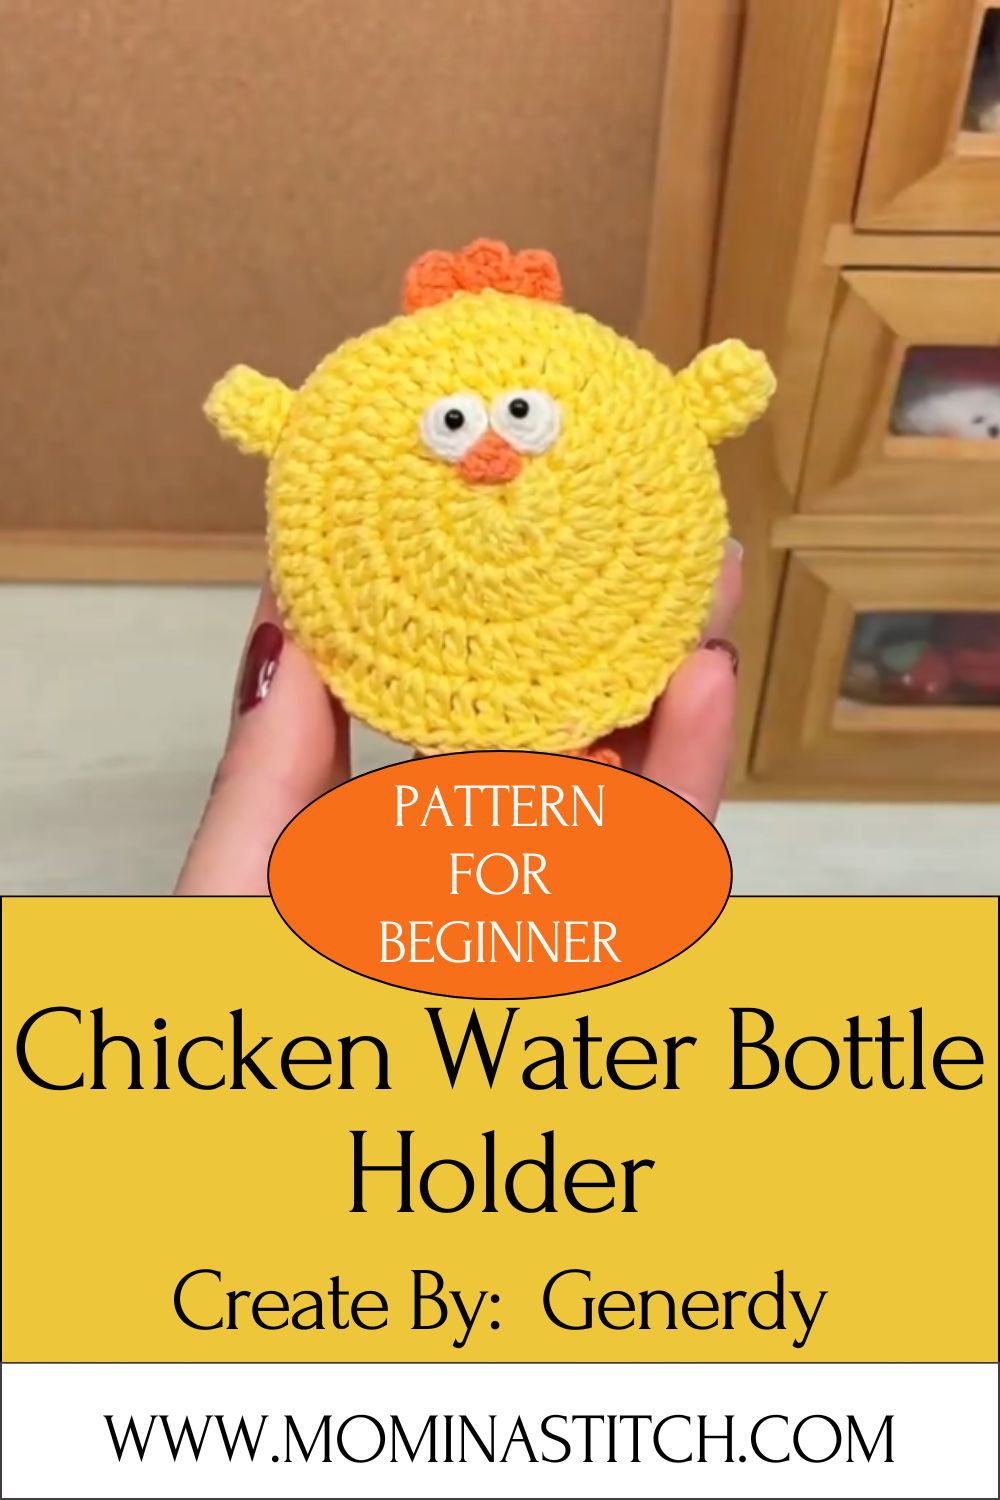
Crochet Chicken Water Bottle Holder Amigurumi Pattern
Plain water bottles can feel a little boring, and you deserve something more special. This Crochet Chicken Water Bottle Holder instantly makes it fun and charming with a floppy red comb and a tiny beak. It’s a quick-to-make, beginner-friendly, and truly fun project to create.
Water bottle holders solve a small but real problem. Bottles slip, sweat, and roll off desks. This little chicken keeps yours upright, easy to carry, and full of personality. Honestly, it looks far harder than it is.
This written pattern is original, beginner-friendly, and great for gifts. For a visual walkthrough of a similar design, you can watch the helpful video tutorial here, and full credit goes to that creator for the inspiration.
What Exactly Are You Making?
You are crocheting a soft sleeve shaped like a cheerful hen. The body is a simple cylinder worked in continuous rounds. No seams, no fuss.
A flat circle forms the base. Single crochet builds the walls. Then you add a beak, comb, wings, and eyes to bring the chicken to life.
A short strap lets you carry it like a tiny bag. You can hang it on a hook, a backpack, or a stroller. Low-key, it is the most fun crochet tutorial you will try this month.
Skill Level: Beginner Friendly
This Crochet Chicken Water Bottle Holder project is rated beginner. If you can make a magic ring and single crochet in a spiral, you are ready. The shaping stays gentle and forgiving.
Confident beginners finish it in two or three hours. New crocheters might take an afternoon, and that is perfectly fine.
Materials and Supplies You Will Need
Gather everything first. It saves time and keeps your flow smooth.
Yarn Type
- Main color (body): Worsted weight (medium, #4) cotton or acrylic in white or cream
- Red: Small amount for the comb and wattle
- Yellow or orange: Tiny amount for the beak
- Cotton holds shape well and resists stretching, so it suits bottle holders nicely
You will not need much yarn. Around 80 to 100 grams of the main color is plenty.
Hook Size
- 3.5 mm or 4.0 mm (G) crochet hook
- A slightly smaller hook than your yarn suggests keeps stitches tight
- Tight stitches stop stuffing and bottles from peeking through
Extra Tools and Supplies
- Two 9 mm safety eyes, or black yarn to embroider eyes
- Tapestry (yarn) needle for sewing parts
- Stitch marker to track the start of each round
- Scissors
- A little fiberfill stuffing for the comb and beak only
That is it. No special gadgets, trust me.
Crochet Stitches and Abbreviations Used
This pattern uses only basic stitches. Here is your quick key.
- MR = magic ring
- ch = chain
- sc = single crochet
- inc = increase (2 sc in one stitch)
- dec = decrease (single crochet two stitches together)
- sl st = slip stitch
- BLO = back loops only
- st / sts = stitch / stitches
- ( ) x6 = repeat the steps in brackets six times
Work in a continuous spiral unless told otherwise. Move your stitch marker up each round.
Step-by-Step Crochet Instructions
Take your time and count as you go. Counting now saves frustration later.
Making the Base
Start with the main body color.
- Round 1: 6 sc in MR (6)
- Round 2: inc in each st (12)
- Round 3: (sc, inc) x6 (18)
- Round 4: (2 sc, inc) x6 (24)
- Round 5: (3 sc, inc) x6 (30)
- Round 6: (4 sc, inc) x6 (36)
- Round 7: (5 sc, inc) x6 (42)
Lay it flat and check the size. It should match the bottom of your bottle. Adjust rounds if your bottle is wider.
Building the Body Walls
Now you stop increasing and go straight up.
- Round 8: sc in BLO around (42)
- Rounds 9 to 26: sc in each st around (42)
The back loops in Round 8 create a clean folded edge. This helps the holder stand tall.
Keep going until the wall reaches just below your bottle cap. Most bottles need around 18 rounds. Add or remove rounds to fit yours.
Finishing the Top Edge
- Round 27: sl st in each st around
- Fasten off and weave in the end
A slip stitch round gives a neat, firm rim. Your cozy now looks polished, ngl.
Crocheting the Comb (Red)
The comb sits on top of the head like a little crown.
- ch 8
- In the 2nd ch from hook: sc, then (sc, ch 2, sl st) in next st
- Repeat small bumps along the chain to form three points
- Fasten off and leave a long tail for sewing
Do not overthink the bumps. Wobbly combs look charming.
Crocheting the Beak (Yellow)
- MR with 4 sc
- Pull tight and fold into a small triangle
- Leave a tail for sewing
Crocheting the Wattle (Red)
- ch 4, sl st in the first ch to form a tiny loop
- Fasten off with a short tail
Making the Wings (Make 2)
- Round 1: 6 sc in MR (6)
- Round 2: (sc, inc) x3 (9)
- Round 3: sc around (9)
- Flatten and fasten off, leaving a tail
Adding the Carry Strap
- ch 40 (or longer for a backpack)
- sc in each ch back down the chain
- Fasten off, leaving tails on both ends
Assembling Your Chicken
This is where the magic happens. Place parts before sewing so you like the look.
- Attach safety eyes near the top, about four stitches apart, before stuffing the head area
- Sew the beak just below and between the eyes
- Stitch the wattle right under the beak
- Sew the comb across the very top edge, pointing up
- Position the wings on each side, slightly toward the front
- Sew the strap ends to opposite sides of the rim
Step back and smile. You just made a chicken hold your water.
Helpful Beginner Tips
A few small habits make a big difference.
- Use a stitch marker. Spirals are easy to lose. A marker keeps your count honest.
- Pull your first stitch of each round snug. This hides the seam line.
- Keep tension even. Loose stitches let the bottle show through.
- Try the bottle often. Slide it in every few rounds to check the fit.
- Weave ends as you go. Future you will be grateful.
Common Mistakes and Easy Solutions
Even simple patterns trip people up. Here are quick fixes.
- Base curls into a cup too soon: You added too few increase stitches. Add one more increase round.
- Base ruffles and waves: You increased too much. Remove an increase round.
- Holder is too loose: Drop down a hook size and try again.
- You lost your round count: Place a marker, then recount the base. Build from there.
- Comb looks flat: Add a tiny bit of stuffing before sewing it down.
Mistakes are part of crochet. Frog it, breathe, and start that section again.
Pattern Customization Ideas
This is your chicken, so make it yours. Here are fun ways to remix it.
- Turn it into a rooster with a taller, bolder comb
- Add a pocket on the front for a phone or keys
- Crochet a drawstring top to keep the bottle secure
- Sew on a heart or flower for a sweet gift version
- Make a family in different sizes for siblings
You can also swap the chicken for other animals. The body stays the same, only the face changes.
Size and Color Suggestions
Sizing is flexible, which makes this pattern so beginner friendly.
- Slim bottles (500 ml): Stop increasing at Round 6 for a snug base
- Standard bottles (750 ml): Follow the pattern as written
- Wide bottles (1 L): Add one or two more increase rounds
For colors, classic white and red read clearly as a chicken. But pastels feel modern and soft. Try mint, peach, or buttery yellow for a fresh handmade crochet look.
Frequently Asked Questions
Is this a good first amigurumi project?
Yes, absolutely. It uses only single crochet and a magic ring. The shaping is gentle, so beginners rarely struggle.
How long does it take to make?
Most crocheters finish in two to three hours. New beginners may take a bit longer, and that is totally normal.
What yarn works best for a water bottle holder?
Cotton is ideal because it holds its shape. Acrylic works too and feels softer, though it stretches a little more.
Can I make it without safety eyes?
Of course. Embroider the eyes with black yarn for a child-safe option. It looks just as cute.
Will it fit any bottle?
It fits most standard bottles. Just measure your base and adjust the number of rounds to match.
Final Thoughts
You now have everything you need to Crochet Chicken Water Bottle Holder from start to finish. Simple stitches, a few colors, and suddenly you hold something charming and handmade. This easy crochet project proves that small makes can bring big joy.
So grab your hook and your favorite yarn. If you try this Crochet Chicken Water Bottle Holder Pattern, share your finished chicken and tag your work. I would love to see your creative twists.