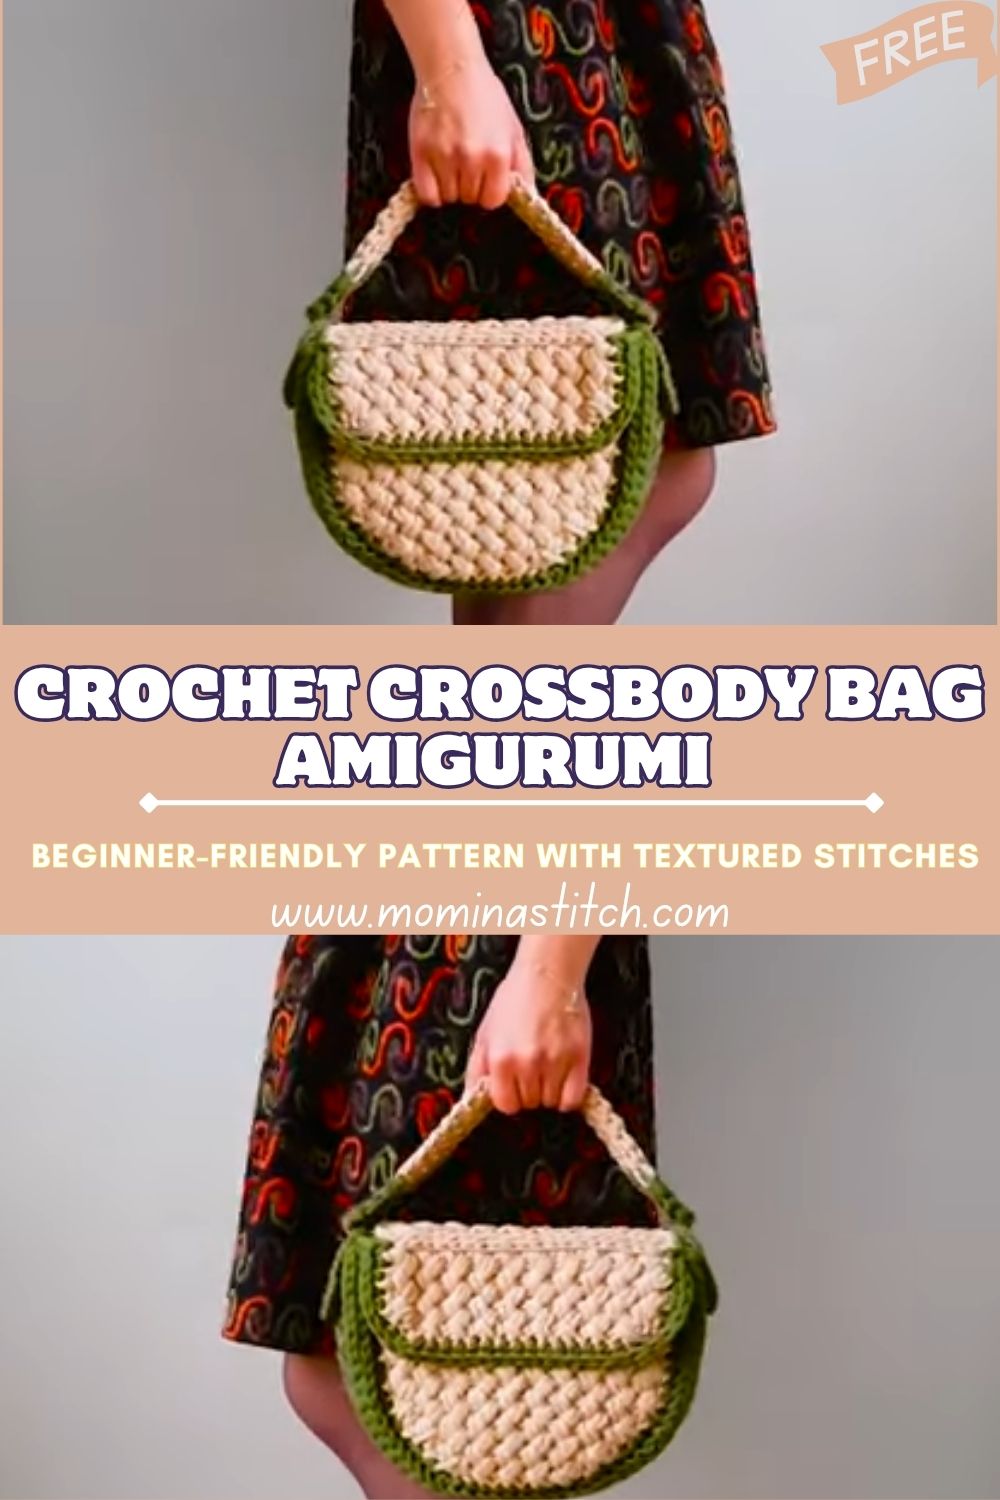
Crochet Crossbody Bag Amigurumi Beginner-friendly Pattern With Textured Stitches, Sturdy Cotton Yarn, Textured Stitches, and Lining Tips.
A sturdy little amigurumi bag can be surprisingly useful, especially when a light, hands-free option is needed for everyday errands. This crochet handbag pattern keeps things simple, so the finished piece looks polished without complicated shaping.
Even better, this crochet crossbody bag pattern is beginner-friendly and quick to customize. First, the base is built; next, the body grows upward; after that, a flap and strap turn it into a practical mini bag with a handmade charm.
Recently, crochet bags and handmade accessories have been trending because they fit real life. First, they are reusable and personal; next, they can be styled with any outfit; meanwhile, they feel extra special because they are handmade. Additionally, mini crossbody bags are especially popular since they hold the basics without weighing anything down.
This crochet handbag is beginner-friendly because it uses a straightforward base, easy rounds, and a simple flap. After that, the finishing steps—edging, strap attachment, and closure pull everything together without tricky construction. The stitches stay beginner-level too: single crochet, slip stitch, chain, and a few increases. As a result, the focus stays on building confidence while creating something functional and stylish.
Important Notes Before Starting
- First, choose sturdy yarn (cotton or t-shirt yarn), because a bag needs structure to hold its shape.
- Next, use a smaller hook if the stitches look loose, since tighter stitches create a firmer fabric.
- Meanwhile, place a stitch marker at the start of each round to keep edges even and prevent drifting.
- After that, check the base size early, since adjusting later is harder once the body grows tall.
- Finally, reinforce the strap attachment with extra stitches, because straps carry weight and get tugged often.
Skill Level
Skill level is beginner/easy. First, the bag is made with basic shapes; next, texture is created with simple repeats. After that, assembly is mostly neat sewing and edging, which is manageable even for first-time bag makers.
Materials Needed
- Yarn (sturdy for structure):
- Option 1 (recommended): Thick cotton yarn, Bulky #5, about 180–220 g (approximately 170–220 m, depending on brand)
- Option 2 (very sturdy): T-shirt yarn, about 250–300 g (yardage varies widely)
- Colors:
- Main neutral color (cream/beige): ~150–180 g
- Border color (green): ~30–40 g
- Crochet hook: 5.0 mm (cotton bulky) or 6.0–7.0 mm (typical for many t-shirt yarns)
- Yarn needle: 1 (blunt tip)
- Stitch marker: 1 locking marker (or scrap yarn)
- Optional lining fabric: 1 piece about 25 cm x 35 cm (10″ x 14″)
- Magnetic button/closure: 14–18 mm magnetic snap (or 1 button, 18–25 mm)
- Strap material:
- Crochet strap using the same yarn (recommended), or
- Cotton webbing strap, 2.5 cm (“”) wide, 90–120 cm (3″”–4″”) long (adjustable if possible)
Abbreviations
- ch = chain
- sc = single crochet
- inc = increase (2 sc in the same stitch)
- dec = decrease (sc2tog or invisible decrease)
- sl st = slip stitch
- st(s) = stitch(es)
- rnd = round
- RS/WS = right side / wrong side
- BLO = back loop only (optional for a ridge)
- FO = fasten off
Making Time (Overview)
Total estimated time: 4–7 hours.
First, the base and body go quickly; next, the flap and strap take a little longer; finally, edging and finishing add the professional touch.
Step-by-Step Instructions
1) Bag Base (Bottom Shape)
Making time: 45–75 minutes
This base is a simple oval, which creates a roomy bottom while keeping the bag compact.
Step 1 – Foundation Chain
- With the neutral yarn, ch 21 (adjust later if a different size is desired).
- Sc in 2nd ch from hook and in each ch across (20 sc).
Step 2 – Turn the Chain into an Oval
- In the last chain, make 3 sc (this rounds the end).
- Now, continue along the underside of the chain: sc in each remaining chain (19 sc).
- In the final chain (the one at the start), make 2 sc (this rounds the second end).
- Do not join; place a marker in the first stitch of the next round.
This first oval round should lie flat. If it curls, then loosen the tension slightly or go up one hook size.
Step 3 – Grow the Oval Evenly
- Rnd 2: sc around, and at each rounded end, increase to keep it flat:
- Work inc in the center stitch of each 3-sc end (and if needed, add one more inc in the stitch beside it).
- Rnd 3: repeat the same idea sc along the sides, and add 2–4 increases total, spaced around the curved ends.
Base check:
First, place a phone, cardholder, or small pouch on the base to test fit. Next, add one more increase round if more space is needed. After that, stop increasing once the oval looks balanced and flat.
2) Bag Body (Build the Height + Add TexTextureaking time: 1.5–2.5 hours
The body can be plain single crochet; however, a simple textured pattern makes it look more” boutique.”
Step 1 – Create a Crisp Corner
- Work 1 round in BLO sc (single crochet in back loops only).
This creates a clean ridge and helps the bag stand upright.
Step 2 – Work Upward
- Continue in normal loops: sc around for 10–14 rounds, depending on preferred height.
Step 3 – Optional Beginner Texture (Easy Repeat)
For a subtle chunky look, alternate rounds:
- Round A: sc around
- Round B: (sl st in next st, sc in next st) repeat around
This gives a gentle texture without complicated counting. Meanwhile, if the sl st round feels tight, then switch to all sc rounds for a smoother finish.
Height tip:
First, stop when the bag reaches about 14–17 cm (5. “”–6.””) tall. Next, fold the top slightly to check proportions. After that, continue only if a deeper bag is desired.
3) Flap Cover (Curved or Straight)
Making time: 40–70 minutes
The flap is worked back and forth in rows from the back top edge.
1 – Mark Flap Width
- Count stitches across the back half of the bag and select a flap width that looks centered.
- As a guideline, the flap can use about 1/2 to 2/3 of the bag’s front width.
2 – Build the Flap in Rows
- Attach the yarn at the back center.
- Row 1: ch 1, sc across the marked stitches, turn.
- Rows 2–8: ch 1, sc across, turn.
3 – Shape the Flap End
For a softly curved flap:
6. Row 9: ch 1, dec, sc across until 2 sts remain, dec, turn.
- Rows 10–12: Repeat the same decrease row until the flap looks gently rounded.
- Final row: sc across to smooth the edge, then FO.
For a straight flap:
- Simply stop after the desired length and keep the last row straight.
4) Handle / Strap (Crossbody or Short Handle)
Making time: 45–90 minutes
A crochet strap can be thick and comfortable, especially with cotton yarn.
Option A – Long Crossbody Strap (Crochet)
- With neutral yarn, ch 151–201 (about 95–125 cm / 3″”–4″”).
- Row 1: sc in 2nd ch from hook, sc across.
- Row 2: ch 1, turn, sc across.
- Repeat 2–4 rows total for a strap width that feels strong.
After that, the FO leaves long tails for sewing.
Option B – Webbing Strap
First, cut to the preferred length. Next, lightly melt the ends (if synthetic) or fold and stitch (if cotton) to prevent fraying. After that, attach with sturdy sewing thread or yarn.
Strap attachment
First, place strap ends at the sides of the bag, slightly below the top edge. Next, sew in multiple passes to form a box shape. Finally, add an”“”” stitch across the box for extra strength.
5) Edging & Borders (Contrast Color Finish)
Making time: 20–35 minutes
A neutral + green border looks fresh and modern while staying classic.
- Join the green yarn at the top edge seam.
- Round 1: ch 1, sc evenly around the top opening.
- Round 2: sl st around for a clean corded look, or sc around for a thicker border.
- For the flap edge, repeat: sc evenly around the flap, and add 2–3 extra sc at corners/curves to prevent puckering.
After that, FO and weave ends neatly inside.
6) Accessories / Details (Closure + Optional Lining)
Making time: 30–75 minutes
Closure (magnetic snap or button)
- Magnetic snap (recommended):
First, mark the center of the flap tip and the matching point on the bag front. Next, install the snap through small reinforced fabric or crochet layers. Finally, double-check alignment before fully securing. - Button option:
First, sew the button to the bag front. Next, create a small chain loop on the underside of the flap. After that, test the stretch so it closes comfortably.
Optional lining (clean interior)
- Cut fabric to match bag width and height, leaving 1 cm (3/”) seam allowance.
- Sew side seams to form a pouch.
- Fold the top edge under, then press.
- Slip lining inside the bag and stitch it to the top edge by hand with small whip stitches.
Meanwhile, lining helps prevent stretching and keeps small items from poking through stitches.
7) Face & Assembly (Bag Construction)
Making time: 25–45 minutes
To keep everything neat and beginner-friendly, assemble in a clear order:
- First, check the bag body for even rounds and straighten the seam line if it drifts.
- Next, attach the flap to the top back edge if it was made separately (if it was worked from the bag, skip this step).
- Meanwhile, attach the closure pieces, since placement is easier before the strap is in the way.
- After that, attach the strap securely with reinforced stitches and multiple passes.
- Finally, weave in all ends, steam lightly (if yarn allows), and shape the bag by hand.
Beginner-friendly tips:
- First, use stitch markers to hold the strap ends while sewing, as this prevents twisting.
- Next, tug gently after sewing to test strength.
- After that, add extra stitches if any area looks like it might loosen.
Special Features
- Chunky textured stitches that feel sturdy and look high-end
- Stylish color contrast (neutral + green border) for a clean, modern finish
- Compact yet functional size for phone, keys, cards, lip balm, and earbuds
- Handmade aesthetic appeal that makes everyday outfits feel more personal
Sizing Tips
Yarn thickness and hook size change the final bag size and stiffness.
- Thicker yarn + larger hook: a bigger bag; however, it may feel softer unless stitches stay tight.
- Thick yarn + smaller hook: firmer structure, sharper shape, and less stretching over time.
- T-shirt yarn: naturally stiff, therefore it creates a more structured mini handbag even with a larger hook.
To resize:
- First, change the base chain length for the width.
- Next, add or remove rounds to adjust base depth.
- Finally, add more body rounds for height.
Finishing Tips
- First, keep edges clean by placing a stitch marker in the first stitch of each round.
- Next, count stitches every few rounds, since it prevents slow leaning”in the bag walls.
- Meanwhile, the weave ends in three directions because the bag fabric gets pulled during use.
- After that, shape the bag while lightly steaming (only if the yarn label allows).
- Finally, the secure strap features extra-reinforcement stitching for long-term durability.
Common Mistakes to Avoid
- Loose stitches: cause stretching and gaps; therefore, use a smaller hook and snug tension.
- Uneven edges happen when the round starts to drift; consequently, use stitch markers and count rounds.
- Weak strap attachment: leads to tearing; for that reason, sew in a box-and-X reinforcement.
- Incorrect sizing: results from skipping early base checks; instead, test items on the base first.
- Skipping stitch markers: makes it easy to lose the round start; ultimately, this affects symmetry.
Variations & Customization Ideas
- Different color combinations: black + cream, denim blue + white, blush + tan, or sage + ivory
- Add stripes or patterns: simple stripe bands, color blocks, or a two-tone flap
- Adjust size:
- Mini coin-pouch style (shorter base chain, fewer body rounds)
- Larger everyday bag (longer chain, more base increase rounds, deeper body)
- Extra features: inner pocket, outer slip pocket, zipper top, or tassel charm
Tutor Suggestions (Confidence-Boosting Guidance)
- First, practice tight single crochet on a small swatch, because stiffness matters more in bags than in scarves.
- Next, choose cotton yarn for the first attempt, since it holds shape and shows stitches clearly.
- Meanwhile, measure strap length by testing across the body, because comfort is more important than guessing.
- After that, reinforce the closure area with an extra crochet patch or a small piece of fabric.
- Finally, celebrate the first finished bag, even if the edges are not perfect, because the next version will always look even better.
Conclusion
A mini amigurumi bag combines the fun of shaping with the practicality of a real accessory. First, the sturdy base provides the foundation; next, the textured body builds quickly; finally, the flap and strap turn it into a stylish crochet handbag ready for everyday use. Finally, changing colors, adding stripes, or resizing the shape makes each crochet crossbody bag pattern feel completely personal so experimenting becomes part of the joy.