Beautiful Crochet Phone Bag Sling Perfect Pattern for Small Daily Use
This crochet phone bag sling is a neat, practical project for everyday carry. You will follow a simple crochet sling bag pattern using basic stitches, so it suits a beginner crochet bag journey too. Make it a DIY crochet phone bag.
Designed as a secure crochet phone pouch, this small accessory keeps your hands free while looking stylish. Using cotton yarn helps your handmade crochet bag stay firm and wearable. The structured shape makes it an easy crochet sling bag for quick practice and gifting. Wear it as a crochet crossbody phone bag on errands or travel. This crochet phone bag sling also adapts easily to different phone sizes and strap lengths.
What is this Crochet Phone Bag
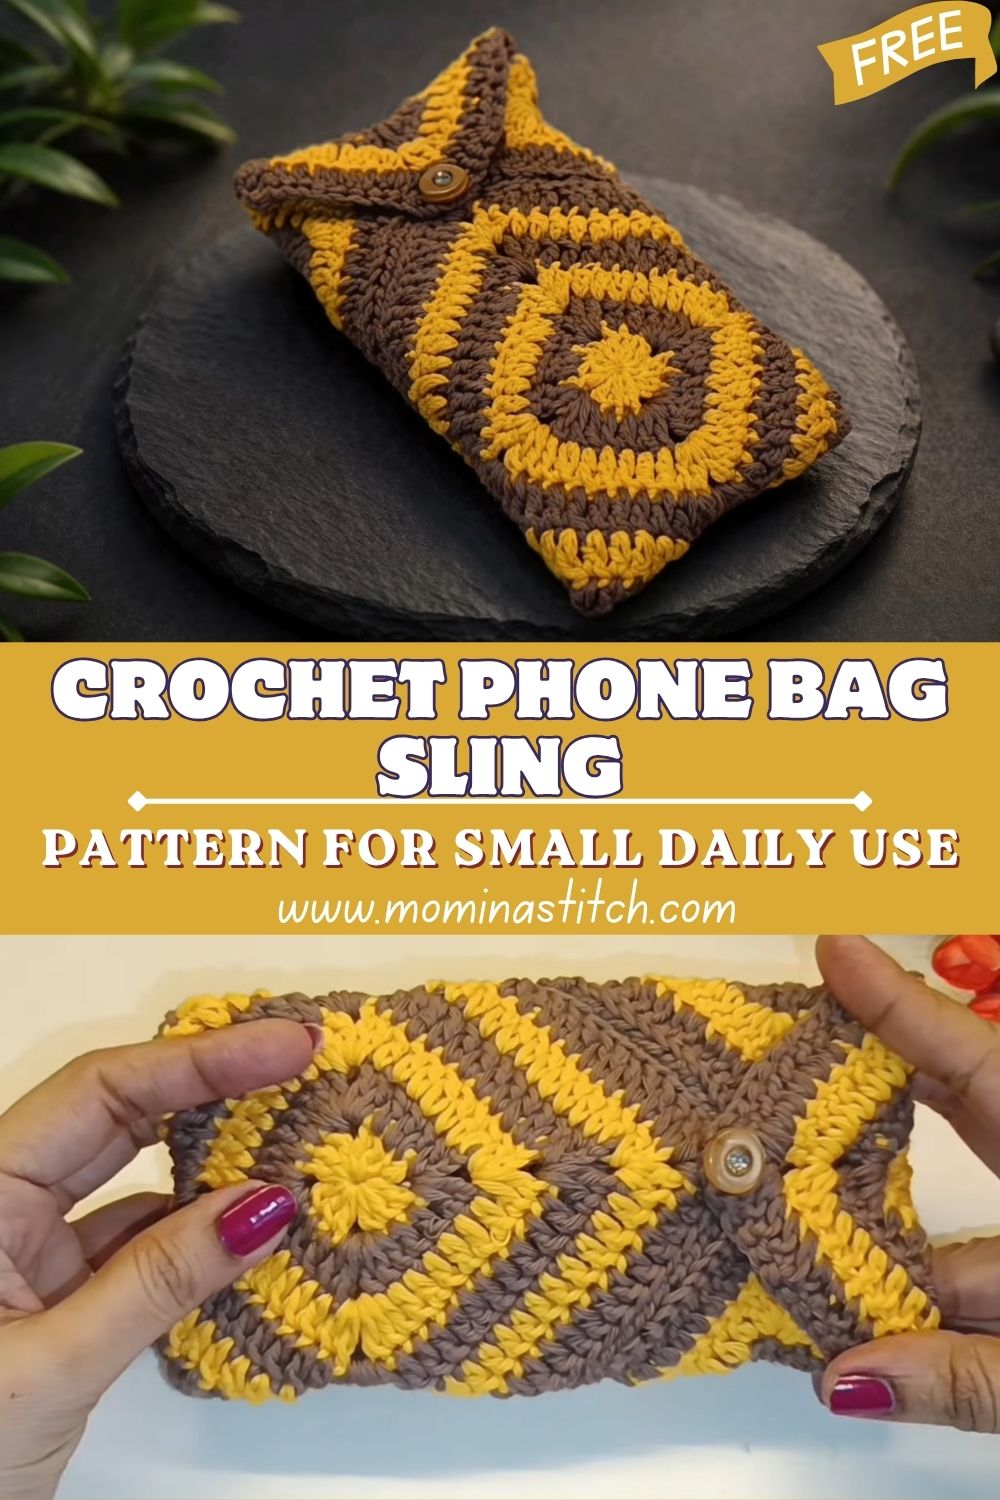
A crochet phone bag sling is a small crossbody pouch designed to hold a phone and a few essentials, such as cards or keys. This version has a clean oval base, a tall single-crochet body for structure, a triangle-style flap, and a simple button closure. The long strap makes it comfortable for daily use, especially when you do not want to carry a full handbag.
Why this Project is Useful for Daily Use
A phone sling is one of those items you reach for again and again because it solves real problems:
- Keeps your phone secure and covered with a flap
- Hands-free for shopping, walks, commuting, and events
- Lightweight, so your shoulder does not feel heavy
- Easy to tuck in a card, cash, or earphones
- Quick to make, so it is great for gifts and small product listings
Who Can Make It
This is a friendly project for:
- Beginners who know chain and single crochet
- Anyone practicing neat tension and counting rounds
- Makers who want a fast, functional crochet accessory
- Sellers who want a customizable size and color option
Finished Size Estimate
With DK or worsted cotton and a 3.5 to 4.0 mm hook, your bag will be around:
- Width: 10 to 11 cm
- Body height (without flap): 16 to 18 cm
- Flap length: 6 to 8 cm
Fit always depends on your phone. If your phone is wider or thicker, you will adjust the starting chain length and/or add an extra base-increase round.
Skill Level
Beginner-friendly Skills used:
- Working around a foundation chain (oval base)
- Single crochet in rounds
- Simple decreases for a triangular flap
- Basic sewing for buttons aand straps
Materials Section
Yarn Types and Colors
- Best choice: cotton yarn (DK or worsted weight)
Cotton is best for durability, and tight stitches help keep the bag strong and structured. - Optional: cotton blend for a softer feel
- Colors: 1 main color for the bag body, optional contrast for edging or flap border
Hook Size
- 3.5 mm to 4.5 mm, depending on yarn
Tip: choose the smaller end of the range for tighter stitches and fewer gaps.
Closure
- 1 button (18 to 25 mm works well)
or - 1 magnetic snap for a cleaner finish (optional)
Tools and Accessories
- Tapestry needle for sewing and weaving ends
- Scissors
- Stitch marker (highly recommended)
- Optional lining fabric + sewing needle and thread
Abbreviations
- ch = chain
- sc = single crochet
- dc = double crochet
- sl st = slip stitch
- inc = increase (2 stitches in the same stitch)
- dec = decrease (2 stitches crocheted together)
Notes Before Starting
- Measure your phone first: width, height, and thickness. Your starting chain controls how wide the pouch will be.
- Keep stitches tight for structure. If you see holes, go down a hook size.
- Add the flap and strap at the end so you can adjust fit and placement neatly.
- Phone bags are simple beginner projects because they use basic stitches and repeatable rounds.
The pattern is worked in continuous rounds unless otherwise stated. Use a stitch marker to mark the first stitch of each round.
The sample size below fits many modern smartphones. For a larger phone, start with ch 15 instead of ch 13.
1) Base: Oval Base (worked around a chain)
Ch 13.
Round 1:
Sc in 2nd ch from hook, sc in next 10 ch, 3 sc in last ch.
Rotate and work into the other side of the chain: sc in next 10 ch, 2 sc in last ch.
Stitch count: 26
Round 2:
Inc in first st, sc in next 10, inc in next 3 sts (the curved end), sc in next 10, inc in last 2 sts (the other curve).
Stitch count: 34
Round 3:
Sc 1, inc, sc in next 10, (sc 1, inc) x3, sc in next 10, (sc 1, inc) x2.
Stitch count: 42
Round 4:
Sc around.
Stitch count: 42
Optional test: place your phone on the base. The base should be slightly wider than the phone so the sides can come up without pulling.
2) Body: Work Up the Sides
Round 5:
Back-loop-only sc around (this creates a crisp fold edge).
Stitch count: 42
Rounds 6 to 22:
Sc around.
Stitch count each round: 42
Adjust the height if needed: add or remove a few rounds so the phone sits fully inside, leaving about 2 to 3 cm of space for the flap to close.
Finish Round 22 with sl st. Do not fasten off if you want to start the flap immediately.
3) Flap: Triangular Flap (rows)
You will crochet the p fabric back and forth across the back of the bag opening. Choose a centered section of 14 stitches on the back.
Row 1:
Sc 14, ch 1, turn.
Stitch count: 14
Row 2:
Dec, sc 10, dec, ch 1, turn.
Stitch count: 12
Row 3:
Dec, sc 8, dec, ch 1, turn.
Stitch count: 10
Row 4:
Dec, sc 6, dec, ch 1, turn.
Stitch count: 8
Row 5:
Dec, sc 4, dec, ch 1, turn.
Stitch count: 6
Row 6:
Dec, sc 2, dec, ch 1, turn.
Stitch count: 4
Row 7:
Dec x2, ch 1, turn.
Stitch count: 2
Row 8:
Dec.
Stitch count: 1
Flap edging (optional, for a neat finish):
Ch 1, sc evenly around the flap edges (place 1 sc per row edge, and 2 sc at the tip if you want a sharper point). Sl st to finish.
Fasten off, weave in ends.
4) Button Loop
Join yarn at the flap tip.
Ch 10, then sl st back into the same point to form a loop.
If your button is thick, chain 12 instead.
Fasten off and weave in.
5) Button Placement
Close the flap and see where the loop lands on the front of the bag. Sew the button there using strong thread or yarn. Make multiple passes so it holds up to daily use.
6) Strap
Option A (simple and sturdy): chain + sc strap
Ch 170 to 200 (choose based on your height and preferred crossbody length).
Row 1:
Sc in 2nd ch from hook, sc across.
Stitch count: 169 to 199 (depends on your starting chain)
Fasten off, leaving long tails for sewing.
Option B (extra strong): make a second sc row back across the strap. This gives a thicker strap and reduces stretch.
7) Attach Strap to Bag
Sew the strap ends to the top edges of the bag opening, one on each side seam. Stitch firmly with repeated passes. Weave in tails inside the bag.
8) Optional Lining (Quick Method)
Cut fabric slightly smaller than the bag shape, sew side seams, then hand-stitch it inside. Keep stitches small and tidy, especially near the top edge and button area.
Step-by-Step Making Guide
Step 1: Gather materials
Pick cotton yarn, a matching hook, a button or magnetic snap, scissors, a stitch marker, and a tapestry needle. If you want lining, choose thin cotton fabric.
Step 2: Crochet base
Start with a chain and crochet around it to form an oval. This is the part that decides the width, so test it with your phone early.
Step 3: Build body
Work single crochet rounds straight up. Keep your tension tight so the bag stands up and does not sag.
Step 4: Make a flap
Crochet the flap in rows on the back side. Use decreases at both ends to form a clean triangle shape.
Step 5: Add a button
Make a chain loop at the flap tip, then sew the button onto the front where the loop reaches naturally.
Step 6: Create a strap
Crochet a long strap and reinforce it with a row of single crochet so it stretches less during wear.
Step 7: Assemble
Sew the strap ends securely to the bag sides. Double-check that the flap closes smoothly over the opening.
Step 8: Finishing
Weave in every end neatly, shape the bag with your hands, and do a final fit check with your phone and essentials.
Common Mistakes
- Using too large a hook, which creates holes and weakens the fabric
- Skipping the back loop only round, so the base edge looks messy
- Not testing the size with your phone until the end
- Sewing the strap with too few stitches (it can rip over time)
- Placing the button too high or too low, making the flap pull
Customization Ideas
- Add a contrast border around the flap edge
- Make a textured front panel with DC or a simple stitch pattern
- Add a small inner pocket (especially if you add lining)
- Use two colors: solid body, contrast flap and strap
- Add a tassel or charm to the flap tip for a cute finish
Conclusion
This crochet phone bag sling is one of those satisfying projects you can finish, use immediately, and remake in different colors. Try it in sturdy cotton, keep your stitches tight, and adjust the size to your phone for the best fit. If you make one, save your notes so the next one turns out even cleaner.