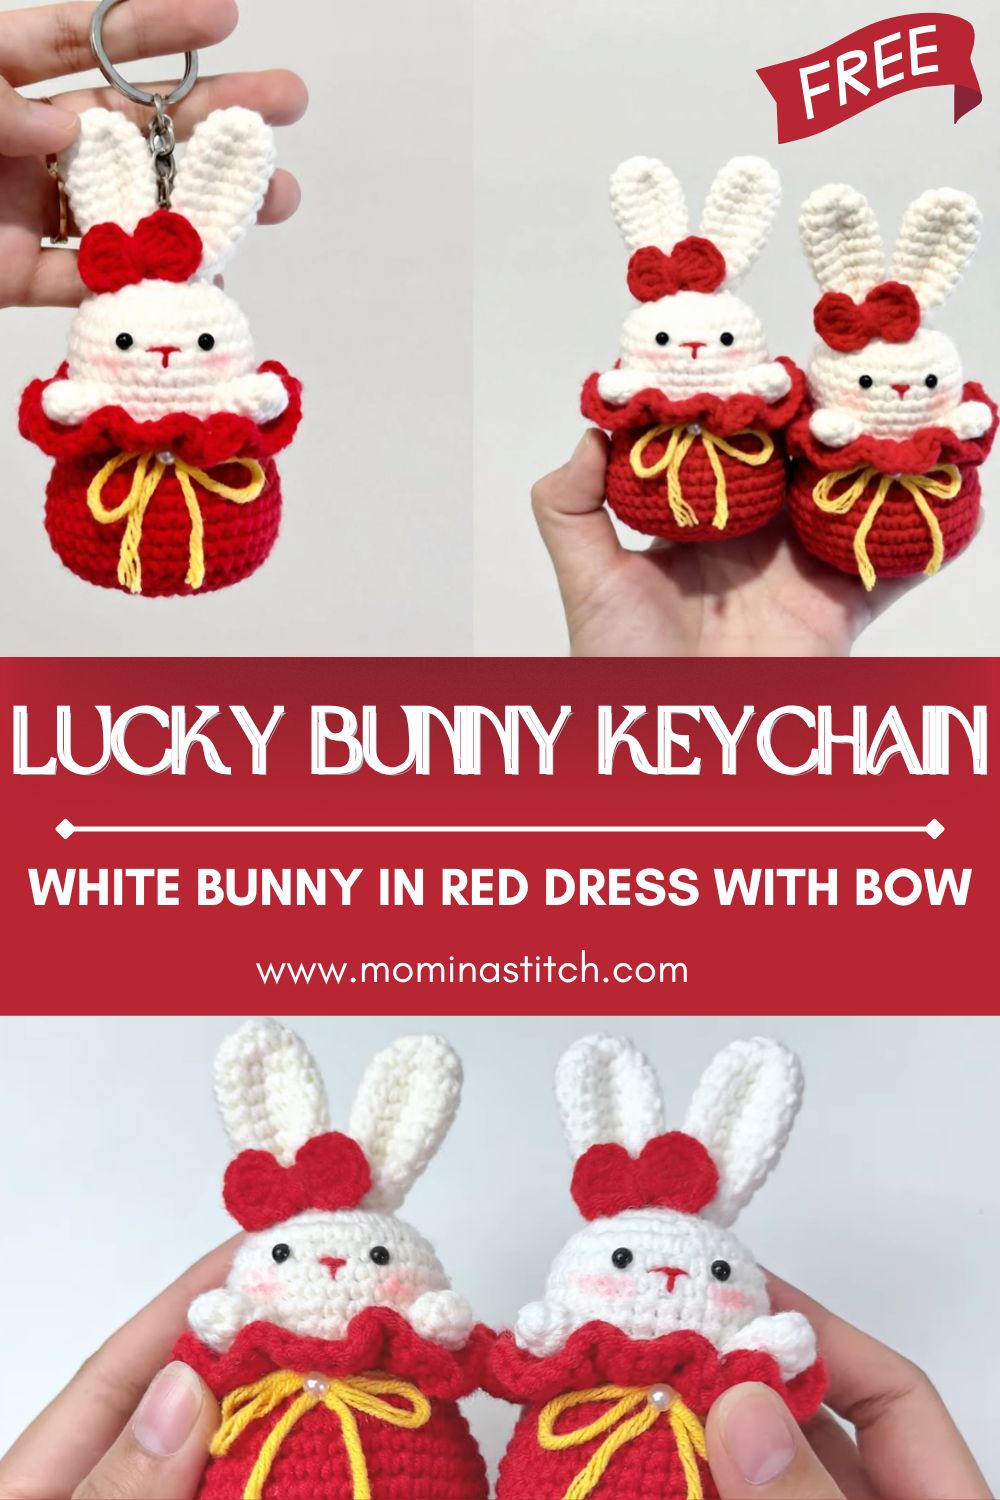
Crochet Lucky Bunny Keychain Pattern White Bunny in Red Dress with Bow
Create a crochet lucky bunny keychain using this easy amigurumi pattern, featuring a white bunny, a red dress, a red bow, and a yellow ribbon, perfect for gifts.
If you enjoy small crochet projects that are quick, adorable, and useful, this lucky bunny keychain is going to be one of your favorites. Based on the bunny in your image, we’ll make a tiny white bunny with upright ears, a bright red dress, a matching red bow, and a cute yellow ribbon detail. Finally, we’ll add a secure keychain loop so it can hang from keys, bags, or backpacks.
This pattern is written in a clear, human way with round-by-round instructions and stitch counts—so even if you’re new to amigurumi, you can follow along confidently.
Skill Level
Beginner / Easy Intermediate (simple stitches, small parts, and sewing)
Estimated Time Required
2–4 hours
Materials Needed
Yarn (recommended for the neatest look)
- Category 2 (Sport/Fingering) cotton yarn
- White (bunny)
- Red (dress + bow)
- Yellow (ribbon detail)
Hook
- 2.25 mm crochet hook (2.0–2.5 mm also works depending on tension)
Tools
- Stitch marker
- Tapestry needle (for sewing)
- Scissors
- Fiberfill stuffing
- 6 mm safety eyes (or black thread to embroider)
- Black embroidery thread (nose/mouth)
- Keychain hardware: split ring + short chain (or lobster clasp)
Abbreviations (US Terms)
- MR = magic ring
- ch = chain
- sc = single crochet
- inc = increase (2 sc in same st)
- dec = decrease (sc2tog / invisible dec)
- sl st = slip stitch
- st(s) = stitch(es)
- rnd = round
- BLO = back loop only
- FLO = front loop only
Complete Crochet Pattern (Round-by-Round)
Head (White)
Rnd 1: 6 sc in MR (6)
Rnd 2: inc around (12)
Rnd 3: (sc, inc) x6 (18)
Rnd 4: (2 sc, inc) x6 (24)
Rnd 5: (3 sc, inc) x6 (30)
Rnd 6: (4 sc, inc) x6 (36)
Rnd 7–10: sc around (36)
Eyes: Place 6 mm safety eyes between Rnd 8–9, about 6–7 sts apart.
Rnd 11: (4 sc, dec) x6 (30)
Rnd 12: (3 sc, dec) x6 (24)
Rnd 13: (2 sc, dec) x6 (18)
Rnd 14: (sc, dec) x6 (12)
Stuff firmly.
Rnd 15: dec around (6)
Fasten off and close (6)
Nose/Mouth: Embroider a tiny “Y” or small triangle nose centered under the eyes.
Ears (Make 2, White)
Rnd 1: 6 sc in MR (6)
Rnd 2: (sc, inc) x3 (9)
Rnd 3: sc around (9)
Rnd 4: (2 sc, inc) x3 (12)
Rnd 5–9: sc around (12)
Rnd 10: (2 sc, dec) x3 (9)
Rnd 11–12: sc around (9)
Flatten and close top with 4 sc through both layers.
Fasten off, leave a long tail for sewing.
Body (White)
Rnd 1: 6 sc in MR (6)
Rnd 2: inc around (12)
Rnd 3: (sc, inc) x6 (18)
Rnd 4: (2 sc, inc) x6 (24)
Rnd 5–6: sc around (24)
Rnd 7: (2 sc, dec) x6 (18)
Stuff firmly.
Rnd 8: (sc, dec) x6 (12)
Rnd 9: dec around (6)
Fasten off and close (6)
Arms (Make 2, White)
Rnd 1: 6 sc in MR (6)
Rnd 2: (sc, inc) x3 (9)
Rnd 3–5: sc around (9)
Lightly stuff the hand.
Rnd 6: (sc, dec) x3 (6)
Rnd 7–9: sc around (6)
Flatten and close with 3 sc through both layers.
Fasten off, leave a tail for sewing.
Dress (Red)
Rnd 1: 18 sc in MR (18)
Rnd 2: sc around (18)
Rnd 3: (2 sc, inc) x6 (24)
Rnd 4: sc around (24)
Rnd 5: (3 sc, inc) x6 (30)
Rnd 6: sc around (30)
Rnd 7: (4 sc, inc) x6 (36)
Rnd 8: sc around (36)
Fasten off, weave in ends.
(If your dress feels too tight/loose, you can start Rnd 1 with 16 or 20 stitches.)
Yellow Ribbon Detail (Yellow)
Ch 26 (adjust to fit around waist)
Sl st back in 2nd ch from hook and across (25 sl sts)
Fasten off. Wrap around the waist and stitch or tie in place.
Bow (Red)
Ch 18
Row 1: sc in 2nd ch from hook and across (17)
Row 2: ch 1, turn, sc across (17)
Row 3: ch 1, turn, sc across (17)
Fasten off, leaving a long tail.
Pinch the center and wrap the yarn tail around the middle 6–8 times. Secure and leavea tail for sewing.
Assembly Instructions
- Sew ears to the top of the head, slightly angled outward.
- Sew head to body, centered and firmly attached.
- Slide the dress on and stitch it to the body at a few points so it doesn’t twist.
- Attach arms to each side, slightly forward.
- Add the yellow ribbon around the waist and secure with a few stitches.
- Sew the red bow near one ear (or centered between the ears).
Keychain Attachment Instructions
Option: Crochet loop (simple and strong)
- Insert the hook at the top of the head between the ears.
- Pull up a loop of white yarn and ch 12–15.
- Sl st back into the same point to form a loop.
- For extra strength, work sl sts around the loop once more.
- Add your split ring through the loop.
Finishing Tips
- Use invisible decreases for a smoother look.
- Don’t overstuff—overstuffing can stretch stitches and create gaps.
- Before sewing, pin pieces in place to check symmetry.
- Weave in ends deep inside the body/head so nothing pops out with use.
Pro Tips for a Perfect Shape
- Keep stitches tight and even (amigurumi looks best with dense fabric).
- Shape the head with your fingers as you stuff.
- Reinforce the keychain loop area with extra stitches sto ensureit can withstand pulling.
- If the bunny leans, add a little extra stuffing to the lower body.
Care Instructions
- Spot clean gently using mild soap and cool water.
- Air dry completely before using again.
- Avoid machine washing (small parts + keychain hardware).
- For small children, use embroidered eyes instead of safety eyes.
Conclusion
This lucky bunny keychain is a small project, but it makes a big impression. The white bunny body keeps it classic and clean, while the red dress, bow, and yellow ribbon add a bright, cheerful look that stands out on any bag or keyring. Whether you make one for yourself, as a “good luck” charm for a friend, or as a cute item to sell, this pattern is a fun and satisfying crochet make.
If you’d like, tell me what yarn brand and hook size you’re using, and I can help you adjust the stitch counts to match the exact size you want.