Awesome Crochet Baby Chicken Amigurumi Pattern Toy
An awesome crochet baby chicken amigurumi pattern toy, beginner-friendly, quick, and photo-ready, perfect for nursery decor, Easter baskets, and heartfelt handmade gifts, with clear steps and smart tips.
Meet the Awesome Crochet Baby Chicken Amigurumi Pattern Toy, an irresistibly cute, beginner-friendly project that stitches up fast and shines in any nursery. With clear, step-by-step instructions and simple stitches, this quick crochet pattern uses worsted-weight yarn to create a soft, huggable chick perfect for spring and year-round smiles. Customize colors, choose safety eyes or embroidery, and finish in an afternoon.
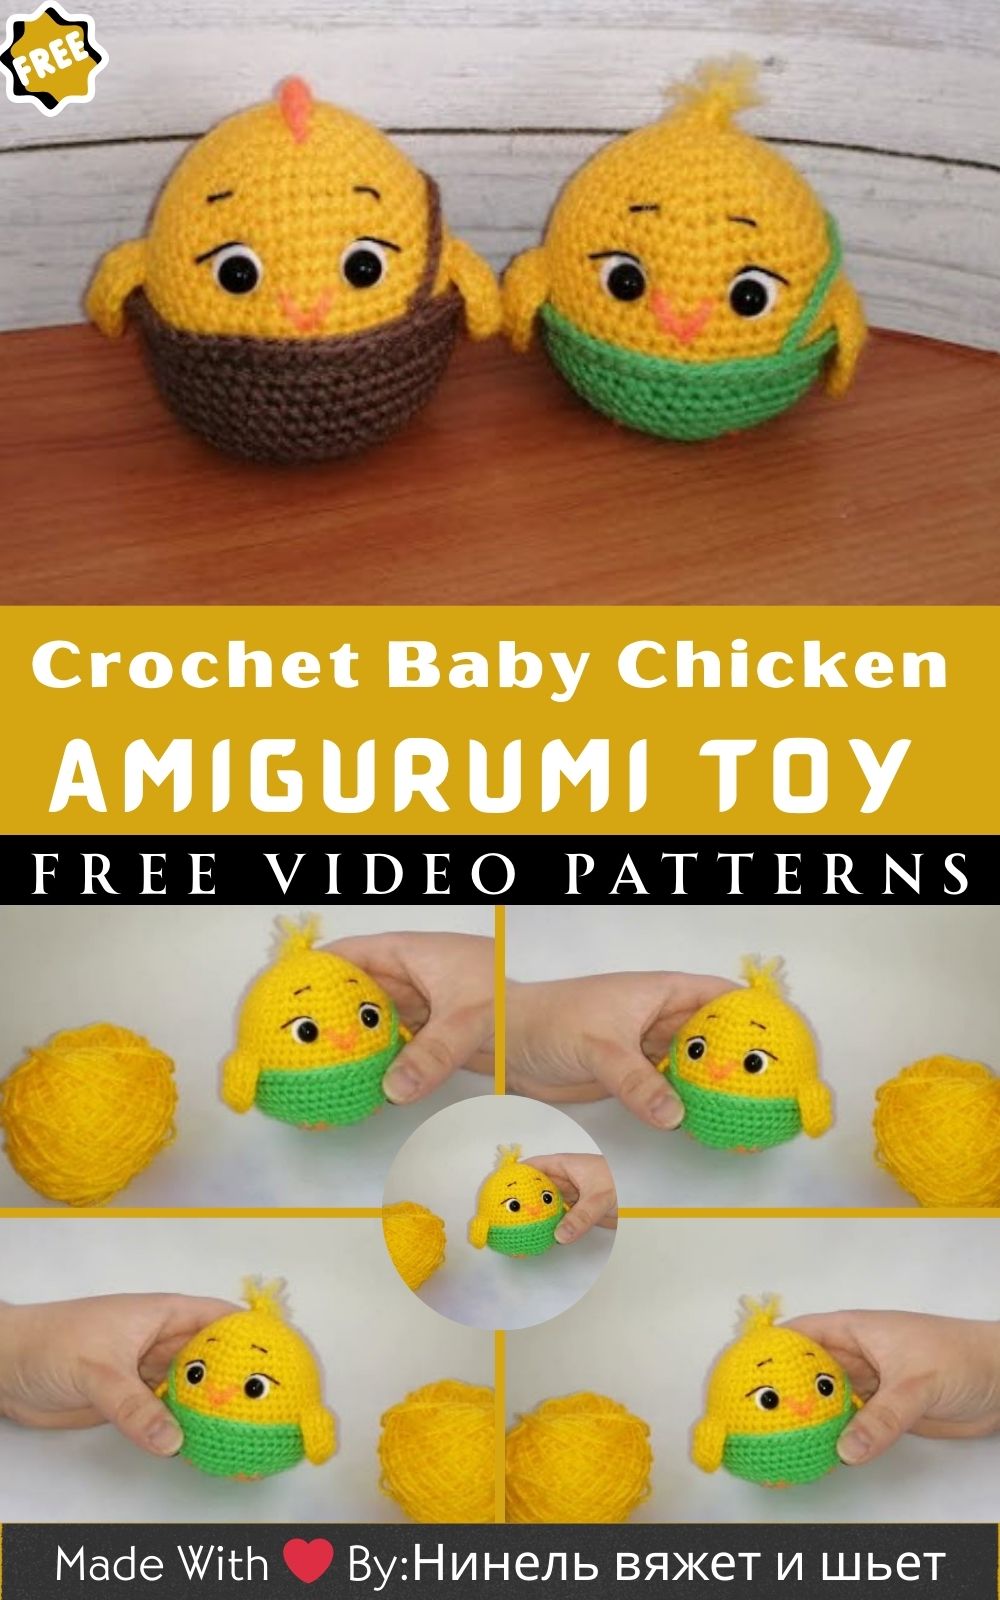
Whether it’s your first amigurumi or a craft-fair favorite, this cheerful baby chicken delivers charming, photo-ready results every time.
uses:
- Nursery decor or shelf display
- Adorable baby shower or Easter gift
- Cute desk buddy or stress-relief plush
Awesome Crochet Baby Chicken Amigurumi Pattern Toy
Ready to stitch a tiny bundle of sunshine? With this Awesome Crochet Baby Chicken Amigurumi Pattern Toy, you’ll create a super-cute, palm-sized chick that is quick to make, delightfully soft, and perfect for gifting. Moreover, this beginner-friendly guide walks you through every step with clear counts, smart tips, and easy techniques. Additionally, you’ll find exact measurements, time estimates per step, and gentle coaching to help you finish with confidence. Furthermore, you can personalize colors, choose baby-safe eyes, and add small accessories for extra charm. As a result, your handmade chick will be photo-ready, cuddly, and proudly yours.
For visual learners who like a companion video, you may also watch: https://youtu.be/AoUJA_xj4Io.
Quick Overview
- Skill level: Beginner (easy amigurumi)
- Finished size: Approximately 9–10 cm (3.5–4 in) tall when made with worsted-weight yarn and a 3.5 mm hook
- Total making time: About 3–4 hours for most beginners; about 2–3 hours for experienced crocheters
- Construction: Worked in continuous rounds; body and head are one piece; separate wings, beak, comb, and feet are sewn on
- Safety note: For babies and toddlers, always embroider eyes instead of using safety eyes, and secure all parts firmly
Materials and Exact Measurements
- Yarn (Worsted/Category 4):
- Yellow (body and wings): 25 g (approximately 55–60 m)
- Orange (beak and feet): 5 g (approximately 10–12 m)
- Red (comb, optional): 3 g (approximately 6–7 m)
- Pink (cheeks, optional embroidery): small scrap
- Black (eyes/smile, if embroidering): small scrap of embroidery floss or yarn
- Hook: 3.5 mm (US E/4) for dense, gap-free stitches
- Eyes:
- 6 mm safety eyes (pair) or black embroidery floss for baby-safe eyes
- Stuffing:
- Fiberfill: 15–20 g for the body and a small pinch for the comb if desired
- Notions and tools:
- Blunt tapestry needle (size 16–18)
- Locking stitch marker
- Sharp scissors
- Pins or clips for positioning parts
- Optional: 18–22 mm rattle insert or small squeaker, keychain hardware, small bow or ribbon
- Gauge (amigurumi-style, tight):
- Approximately 16–18 single crochet (sc) stitches x 18–20 rows = 10 cm x 10 cm (4 in x 4 in) in continuous rounds
- Note: Because amigurumi is stuffed, tension matters more than exact gauge
Abbreviations and Notes for (Crochet Baby Chicken Amigurumi)
- MR: magic ring (adjustable ring)
- ch: chain
- sc: single crochet
- inc: increase (2 sc in the same stitch)
- dec: invisible decrease (insert hook into front loops of next 2 stitches, yarn over, pull through 2 loops, yarn over, pull through both loops)
- sl st: slip stitch
- st(s): stitch(es)
- BLO/FLO: back loop only/front loop only (used if noted)
- FO: fasten off
- Work in a spiral (continuous rounds) unless otherwise stated. Therefore, use a stitch marker at the first stitch of each round. Consequently, you will prevent losing your place. Additionally, keep your tension firm so the stuffing will not show.
Finished Size and Fit
- Body/head circumference at widest point: About 24–26 cm (9.5–10.25 in)
- Height (without comb): About 9–10 cm (3.5–4 in)
- Width (wingtip to wingtip): About 8–9 cm (3–3.5 in)
- Weight: Approximately 35–45 g when fully assembled and stuffed
Step-by-Step Instructions (With Time Estimates)
Because every maker crochets at a different pace, the times below include a realistic range. Therefore, you can plan your session without stress. Additionally, consider pausing after each section to check shape and placement.
- Body and Head as One Piece (Yellow)
Estimated time: 60–80 minutes total
- Rnd 1: MR, 6 sc into ring (6)
- Tip: Consequently, tightening the ring firmly prevents a hole at the base.
- Rnd 2: inc around (12)
- Rnd 3: (sc, inc) x 6 (18)
- Rnd 4: (2 sc, inc) x 6 (24)
- Rnd 5: (3 sc, inc) x 6 (30)
- Rnd 6: (4 sc, inc) x 6 (36)
- Rnd 7: (5 sc, inc) x 6 (42)
- Rnd 8: (6 sc, inc) x 6 (48)
Time for Rnds 1–8: 20–25 minutes
- Rnd 9–14: sc around (48) for 6 rounds (maintain count)
- Tip: Additionally, rotate your work occasionally to keep tension even. Furthermore, check for an even, round shape.
Time for Rnds 9–14: 20–25 minutes
Before decreasing, install safety eyes or mark eye positions:
- Eye placement:
- With 6 mm safety eyes, place between Rnds 12 and 13, approximately 7 stitches apart (about 12–14 mm apart center-to-center).
- For embroidered eyes, mark the same spots with pins and stitch later.
- Nose/beak position:
- Center the beak between the eyes, slightly lower than the midpoint between Rnds 12 and 13.
- Rnd 15: (6 sc, dec) x 6 (42)
- Rnd 16: (5 sc, dec) x 6 (36)
- Rnd 17: (4 sc, dec) x 6 (30)
Pause to stuff:
- Stuffing checkpoint:
- Add small tufts of fiberfill, pressing gently to fill the lower half. Moreover, avoid hard lumps so the chick stays squishy and cute.
Time for Rnds 15–17 plus stuffing: 10–15 minutes
- Rnd 18: (3 sc, dec) x 6 (24)
- Rnd 19: (2 sc, dec) x 6 (18)
- Rnd 20: (sc, dec) x 6 (12)
- Rnd 21: dec around (6)
- FO, leaving a long tail for closing if needed. Then, use a tapestry needle to weave throughthe front loops of the last 6 sts and cinch closed. Additionally, secure with a knot hidden inside and weave in the tail.
Time for Rnds 18–21 and closing: 10–15 minutes
- Tiny Beak (Orange)
Estimated time: 8–10 minutes
Option A: Flat triangle (easiest)
- Ch 5.
- Row 1: sc in 2nd ch from hook and across (4), ch 1, turn.
- Row 2: sc2tog, sc2tog (2), ch 1, turn.
- Row 3: sc2tog (1).
- FO, leaving a 20–25 cm tail for sewing.
- Fold slightly and curve as desired when attaching.
Option B: Little 3D nugget (slightly firmer)
- Rnd 1: MR, 4 sc into ring (4).
- Rnd 2: (sc, inc) x 2 (6).
- Rnd 3: sc around (6).
- Rnd 4: sc around (6).
- FO, leaving a tail for sewing.
Because both options work, choose the look you love. Additionally, pin and preview placement before sewing.
- Wings (Make 2 in Yellow)
Estimated time: 20–25 minutes for the pair
- Rnd 1: MR, 6 sc (6)
- Rnd 2: inc around (12)
- Rnd 3: (sc, inc) x 6 (18)
- Rnd 4: sc around (18)
- Rnd 5: (sc, dec) x 6 (12)
- FO, leaving a 25–30 cm tail for sewing.
Assembly note:
- Flatten each wing slightly. Consequently, you will get a neat teardrop shape when stitched on. Additionally, pinch one edge as you sew to create a cute curve.
- Comb (Red, Optional)
Estimated time: 10–12 minutes
Option A: Picot comb (flat)
- Ch 7.
- Row 1: sc in 2nd ch from hook and across (6).
- Row 2: ch 1, turn; (sc, picot) three times, sc across remaining stitches; FO with long tail.
- Picot: ch 3, sl st into first ch to form a small bump.
- Sew along the top center of the head.
Option B: Tiny bobble comb (3 small bumps)
- Rnd 1: MR, 4 sc (4).
- Rnd 2: inc around (8).
- Rnd 3: (bobble, sc) repeat around to make 3 bumps, with sc between; FO.
- Sew to the top center, slightly toward the back.
Because safety matters, avoid hard embellishments when making for babies. Additionally, always secure stitches firmly.
- Feet (Make 2 in Orange)
Estimated time: 15–20 minutes for the pair
Option A: Simple ovals (beginner-friendly)
- Ch 4.
- Round 1 (worked around the chain): sc in 2nd ch from hook, hdc in next ch, 4 sc in last ch; rotate and work on the opposite side of the chain; hdc in next ch, sc in last ch (8–10 sts total depending on your increase placement).
- FO, leaving a long tail for sewing.
Option B: Tiny nub feet (super quick)
- Rnd 1: MR, 6 sc.
- Rnd 2: sc around (6).
- FO, leaving a long tail.
- Stitch flat to the body’s base, as little toes.
Because everyone loves options, pick the style that matches your aesthetic. Additionally, keep both feet symmetrical for balance.
- Face Details (Black and Pink)
Estimated time: 8–12 minutes
- Eyes:
- If using safety eyes, insert backs now if you paused earlier.
- If embroidering, satin-stitch small ovals or create sleepy eyes with short arches.
- Cheeks:
- With pink yarn or blush, add soft circles slightly below and outside each eye.
- Smile:
- With black floss, stitch a tiny curve centered under the beak.
Because small details add personality, test placements with pins before committing. Additionally, keep floats on the inside short to avoid snagging.
- Assembly and Final Shaping
Estimated time: 20–30 minutes
- Beak:
- Position between the eyes, centered, with the top aligned roughly at the space between Rnds 12 and 13. Then sew with small, even stitches. Additionally, secure the tail inside.
- Wings:
- Place each wing at the side around Rnds 10–13. Consequently, you’ll achieve a balanced, cuddly silhouette. Moreover, the angle is slightly downward for a friendly pose.
- Feet:
- Attach to the lower front so the chick “perches” upright. Additionally, ensure both sit evenly so the toy stands or leans cutely without tipping.
- Comb:
- Stitch to the head’s crown, slightly offset toward the back so it is visible from the front.
After attaching, gently roll the toy between your hands to even out the stuffing. Furthermore, steam lightly from a distance if needed to relax any squashed stitches. Finally, weave in all ends securely.
Estimated Total Time Summary
- Body and head: 60–80 minutes
- Beak: 8–10 minutes
- Wings (pair): 20–25 minutes
- Comb: 10–12 minutes
- Feet (pair): 15–20 minutes
- Face details and assembly: 28–42 minutes
- Total: Approximately 3–4 hours
Basic Tips for Beginners
- Keep tension firm:
- Because tight stitches prevent stuffing from peeking through, aim for a consistent, snug feel. Additionally, if your hands tire, take short breaks and stretch.
- Use a stitch marker:
- Because amigurumi is worked in continuous rounds, mark the first stitch of every round. Additionally, move the marker up as you go to avoid miscounts.
- Count as you crochet:
- Since mistakes multiply later, check each round’s stitch count immediately. Additionally, recount after increases and decreases to confirm accuracy.
- Stuff gradually:
- Because clumps look lumpy, add fiberfill in small tufts and shape as you go. Additionally, support the form with your non-dominant hand while stuffing.
- Choose baby-safe finishes:
- For infants and toddlers, embroider eyes instead of using safety eyes. Additionally, keep accessories minimal, soft, and firmly sewn.
- Practice invisible decreases:
- Since invisible decreases minimize gaps, use front-loop-only decreases on the outside of your toy. Additionally, pinch the fabric slightly to guide your hook.
Common Mistakes and How to Fix Them for (Crochet Baby Chicken Amigurumi)
- Gaps between stitches:
- Problem: Loose tension or using too large a hook.
- Fix: Switch to a 3.25–3.5 mm hook and tighten your yarn feed slightly. Additionally, use invisible decreases rather than standard decreases.
- Lumpy shape:
- Problem: Overstuffing or uneven stuffing.
- Fix: Remove some fiberfill and redistribute in small tufts. Moreover, massage the fabric to smooth bumps, and add just a pinch more in soft spots.
- Crooked stitch line:
- Problem: Spiral seam drift or missed stitches at the round start.
- Fix: Keep your marker accurate, count every round, and occasionally rotate your work. Additionally, block gently with steam to relax the fabric.
- Misplaced eyes:
- Problem: Eyes too high, too low, or too far apart.
- Fix: Pin and preview before attaching. Additionally, keep eyes between Rnds 12–13 and about 7 stitches apart, then adjust slightly for personality.
- Visible closing hole:
- Problem: Loose finishing on the last round.
- Fix: Weave through the front loops of the last 6 stitches and cinch firmly. Additionally, secure with a hidden knot and weave in the tail.
Variations to Personalize Your Chick
- Size changes:
- Because yarn weight affects size, switch to DK or sport yarn with a 3.0 mm hook for a tiny keychain chick. Alternatively, choose chunky yarn and a 5.0 mm hook for a huggable plush.
- Color swaps:
- For a pastel spring set, try mint, peach, or lilac bodies. Additionally, create a classic white chick with a soft yellow beak for a farmhouse vibe.
- Eggshell hat:
- For a playful look, crochet a cracked eggshell cap in white: work a small half-sphere and add zigzag FLO picots along the edge. Then perch it at a jaunty angle.
- Bow or scarf:
- For charm, tie a satin ribbon or crochet a tiny bow. Additionally, ensure any accessory is firmly knotted, a nd ends are secured.
- Embroidered expressions:
- For personality, embroider sleepy eyes, winks, or sparkling highlights. Moreover, add tiny freckles or a single stitch “tongue” for extra whimsy.
- Rattle or squeaker:
- For baby gifts, insert a rattle bead or squeaker inside the stuffing, centered in the torso. Additionally, wrap it in a small layer of fiberfill to keep it cushioned.
- Flat-bottom mod:
- For display stability, work one round in BLO near the base and add a thin felt circle inside before stuffing. Consequently, your chick will sit more securely.
Care and Safety
- Washing:
- Because gentle care preserves stitches, hand-wash in cool water with mild soap and blot with a towel. Additionally, reshape while damp and air-dry.
- Safety:
- For children under three, avoid safety eyes and small, removable parts. Additionally, check seams periodically to ensure everything stays secure.
Troubleshooting and FAQ
- My magic ring loosens:
- Because slippery yarns can slide, wrap the tail twice before tightening,g or use the ch 2 start with 6 sc in the second chain as an alternative. Additionally, secure the tail with a small knot hidden inside.
- My wings look uneven:
- Because hand tension varies, block them lightly before attaching. Additionally, pin both in place andmeasure thee distance from the center seam before sewing.
- The chick won’t stand:
- Because stuffing and foot placement matter, shift a bit of fiberfill toward the bottom front. Additionally, sew the feet slightly forward and flatten the base with your palm.
Optional Embellishments (Quick Add-Ons)
- Tiny flower crown:
- Because seasonal flair is adorable, crochet three mini flowers (MR, 5 sc, sl st to join) in pastel scraps and stitch across the forehead.
- Heart pocket:
- For gifting, crochet a 2-row heart and attach it to the belly. Additionally, tuck in a small note or wish.
- Keychain conversion:
- For portability, insert a screw eye pin at the top center with a drop of fabric glue, then add a keyring. Additionally, keep stitches extra tight for durability.
SEO-Friendly Highlights (At a Glance)
- Easy crochet baby chicken amigurumi pattern
- Beginner-friendly, fast, and adorable
- Step-by-step instructions with exact counts
- Safety-eye and baby-safe embroidery options
- Customizable wings, beak, feet, and comb
- Ideal handmade gift for baby showers and Easter
How to Read the Pattern Quickly
- Firstly, skim the round counts and place a stitch marker at the start. Secondly, confirm you have the materials ready and pre-cut tails for sewing. Thirdly, set out pins and your tapestry needle so you can assemble efficiently. Finally, keep water nearby and take stretch breaks to keep your hands happy.
Recap and Next Steps for (Crochet Baby Chicken Amigurumi)
With a handful of worsted-weight yarn, a 3.5 mm hook, and this clear pattern, you can create an irresistibly cute crochet baby chicken in an afternoon. Furthermore, the exact measurements, time estimates, and beginner-focused tips will guide you from magic ring to final smile. Additionally, the variations let you personalize for holidays, nurseries, or desk decor. Consequently, your finished chick will be cheerful, cuddly, and uniquely yours. Finally, when you are ready for more, make a tiny flock in rainbow colors, add eggshell hats, and gift them as heartfelt, handmade keepsakes.
Happy stitching and enjoy every adorable stitch