
Free Crochet Floral Bag Pattern for Cute Children’s
Soft yarn flowers turn an ordinary pouch into a treasure your child carries everywhere. This Crochet Floral Bag Pattern holds crayons, snacks, and tiny finds with ease. You can make one in a single weekend, and this free guide covers every step. So grab your hook and start stitching today.
Children love things that feel theirs, and a handmade Crochet Floral Bag Pattern fits perfectly. The bright flowers grab their attention right away. Because the yarn feels soft, little hands enjoy holding it. The size also stays small and is easy to carry across the shoulder.
Parents love these bags for different reasons. They hold up well, they wash easily, and they cost very little to make. Plus, you control every color, so the bag matches your child’s favorite shade. Honestly, that personal touch is hard to beat with store-bought options.
Project Overview
This project creates a small round bag with a flat base and sturdy sides. You crochet the body in continuous rounds for a smooth, seamless look. After that, you make a long strap and stitch it firmly in place.
Next comes the fun part. You crochet a few floral appliqués with green leaves, then attach them across the front. Finally, you add a simple closure so nothing slips out. The finished bag stays lightweight yet strong enough for daily play. Best of all, these crochet patterns stay flexible, so you can resize the bag for a mini pouch or a roomy tote.
Skill Level
This pattern suits confident beginners and easy intermediate makers. You only need to know single crochet, increases, and basic sewing. Because the stitches repeat often, you build a steady rhythm fast. So even if you are new, you can finish this with patience and a little practice.
Materials and Supplies
Gather everything before you start, since it keeps your flow smooth. Here is your full crochet bag supply list:
- Main bag yarn: worsted-weight cotton in one solid color, around 100–150 grams
- Flower yarn: small amounts in two or three bright shades, such as pink, yellow, and lavender
- Leaf yarn: a small ball of leaf-green cotton
- Crochet hook: size 4.0 mm to 4.5 mm (H/8) for firm, even stitches
- Stuffing: a tiny pinch of fiberfill, only if you want raised, puffy flowers
- Yarn needle: a blunt tapestry needle for sewing parts together
- Scissors: a sharp pair for clean cuts
- Closure: one button, a snap, or a short drawstring with a cord
- Optional lining: a small piece of cotton fabric to reinforce the inside
Cotton yarn works best here because it holds shape and stays sturdy. Avoid very soft acrylic for the body, since it can sag under weight.
Crochet Techniques You Will Use
You only need a handful of skills for this bag. Review them quickly so each step feels familiar.
Magic Ring
The magic ring starts your base with a tight, hole-free center. You wrap the yarn, work your first round into the loop, then pull it closed. As a result, your bag’s bottom stays neat and gap-free.
Single Crochet
Single crochet builds the entire bag body. This short, dense stitch creates firm fabric that holds its form. Because the stitches sit close together, small items never slip through.
Increase and Decrease
Increases add stitches to widen your base. Decreases pull stitches together to shape the top or curve a flower. Together, they control the bag’s size and form.
Rounds Versus Rows
You work the bag body in continuous rounds for a smooth, seamless shape. However, you can work flat in rows if you prefer a square tote. Flowers usually start in rounds, while leaves often work in short rows.
Sewing Parts Together
Once your pieces are ready, you join them with a yarn needle. Whip stitch or mattress stitch both work well. Strong, even sewing keeps your handles and flowers secure for years.
Step-by-Step Crochet Pattern Instructions
Follow each stage in order, and use a stitch marker to track your rounds. Keep your tension steady throughout for the best result.
Step 1: Make the Bag Base
Start with a magic ring, then build a flat circle.
1: 6 sc into the magic ring (6)
Round 2: 2 sc in each stitch around (12)
3: 1 sc, 2 sc in next st repeat around (18)
4: 2 sc, 2 sc in next st repeat around (24)
5: 3 sc, 2 sc in next st repeat around (30)
Keep adding one stitch between increases each round. Stop once your base reaches the width you want. For a small bag, 36 to 42 stitches usually work well.
Step 2: Build the Bag Body
Now stop increasing, since the sides must rise straight up.
Work 1 sc in each stitch around, with no increases. Repeat this round again and again until the body reaches your chosen height. Around 15 to 20 rounds gives a nice, useful depth. Because you skip increases, the fabric curves upward into walls.
After you reach the top, work one more plain round. Then fasten off if you want an open bag. Otherwise, keep going to add a closure flap later.
Step 3: Make the Handles or Strap
You can crochet a flat strap or a simple chain handle.
For a flat strap, chain 60 to 80 stitches for shoulder length. Then work 3 to 4 rows of single crochet along the chain. This creates a wide, comfy band that spreads weight evenly.
For a shorter top handle, chain about 25 stitches and work two rows. Make two of these for a double-handle look.
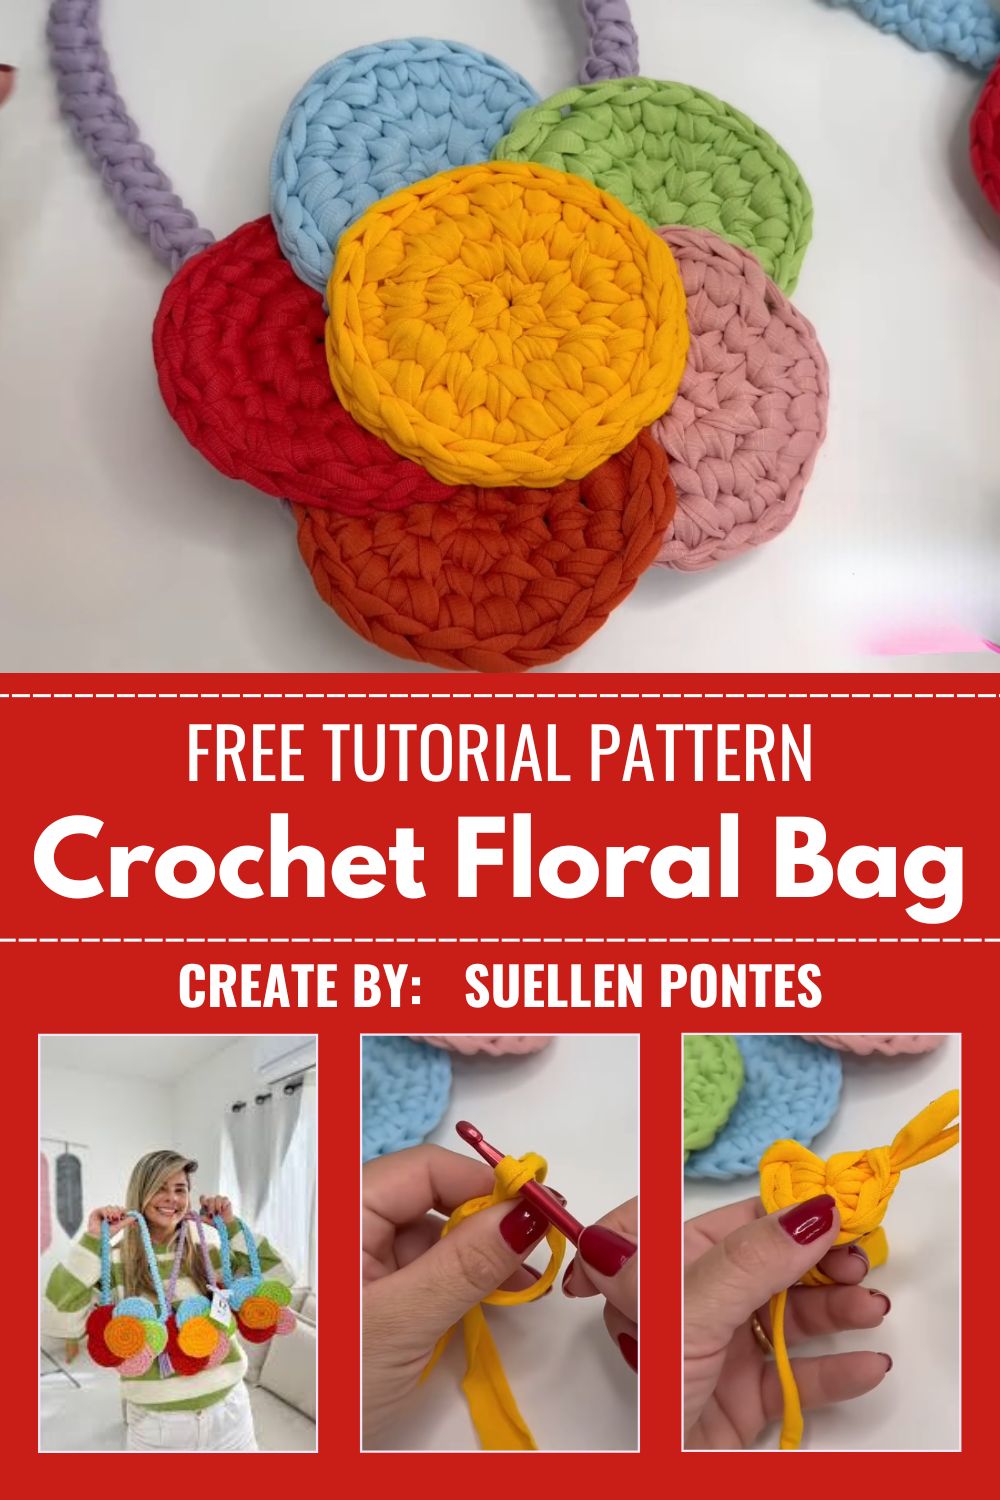
Step 4: Crochet the Floral Appliqués
Small flowers add the charm, and they stitch up fast.
For one simple flower, start with a magic ring.
Round 1: 5 sc into the ring (5)
Round 2: ch 3, 1 sc in next st, repeat around to form 5 petals
Pull the ring tight and fasten off. Make five or six flowers in mixed colors. For a puffy look, tuck a tiny pinch of stuffing behind each one.
Step 5: Crochet the Leaves
Leaves frame your flowers beautifully.
Chain 7 with green yarn. Then sc along the chain, add a few half-double crochet in the middle, and sc back. This gives a soft leaf shape with a pointed tip. Make four to six leaves for a full look.
Step 6: Attach Flowers and Leaves
Lay your flowers and leaves across the bag front first. Move them around until the design feels balanced. Once you like the layout, pin or hold each piece in place. Then sew them down firmly with matching yarn. Stitch through the back petals so the front stays smooth.
Step 7: Add the Closure and Finishing Touches
Sew your strap ends to the inside top of the bag. Anchor each end with several strong stitches.
Next, add your closure. A button needs a small loop on the opposite side. A snap sews directly onto both inner edges. A drawstring weaves through the top round of stitches. Finally, weave in all loose ends and trim them close.
Helpful Beginner Tips
A few small habits make a big difference in your finished bag.
- Keep even tension. Pull each stitch with the same gentle pressure. Loose stitches create gaps, while tight ones strain your hands. Steady tension gives a sturdy, even bag.
- Use stitch markers. Place a marker in the first stitch of each round. Move it up as you go. Because rounds blend together, this trick stops miscounts.
- Secure your handles well. Bags carry weight, so weak handles tear off. Stitch each handle end many times, and knot your yarn tightly. For extra strength, reinforce with a second pass of yarn.
- Block your flowers. Lightly spray and flatten each appliqué before sewing. Flat petals lie neatly and look more polished.
Trust me, these little steps save you from frustrating fixes later.
Design Customization Ideas
Your bag does not need to match anyone else’s. Make it truly your child’s own.
- Switch up the colors. Try a soft pastel body with bold flowers, or reverse it for drama. Rainbow flowers also delight younger kids.
- Change the flower style. Swap simple five-petal blooms for layered roses or tiny daisies. Mix sizes for a garden feel.
- Add a name tag or charm. Crochet a small tag with their initial, then stitch it on. A little pom-pom or bell adds extra fun.
- Resize the bag. Start with fewer stitches for a mini coin pouch. Add more rounds for a roomy tote that carries books.
- Line the inside. Add cotton fabric for a smooth, sturdy interior that holds shape.
Because the base pattern stays the same, you can remix it endlessly.
Frequently Asked Questions
What is the best yarn for a kids’ Crochet Floral Bag Pattern?
Cotton yarn wins for kids’ bags, hands down. It stays firm, washes easily, and resists stretching. A cotton-blend works too if you want a softer texture. However, avoid loose, fuzzy yarn, since it weakens the bag’s shape.
How do I make a Crochet Floral Bag Pattern hold its shape?
Tight, single crochet stitches form the foundation of a sturdy bag. Cotton yarn adds natural structure as well. For extra firmness, sew in a fabric lining or a thin plastic base. Also, blocking the finished bag helps the walls stand tall.
How long does this project take?
Most makers finish this bag in one weekend. The body takes a few focused hours. Flowers and leaves stitch up quickly during a movie night. Beginners may need a little longer, and that is perfectly fine.

Final Thoughts
You now have everything you need to crochet a sweet Crochet Floral Bag Pattern that your child will treasure. From the magic ring base to the last petal, each step builds real skill. So pick your favorite colors, settle in, and enjoy the process.
Ready to start? Grab your hook today and crochet a floral bag that brings a little garden everywhere your kid goes. Once you finish, share your creation and inspire another maker to try these crochet patterns too.


