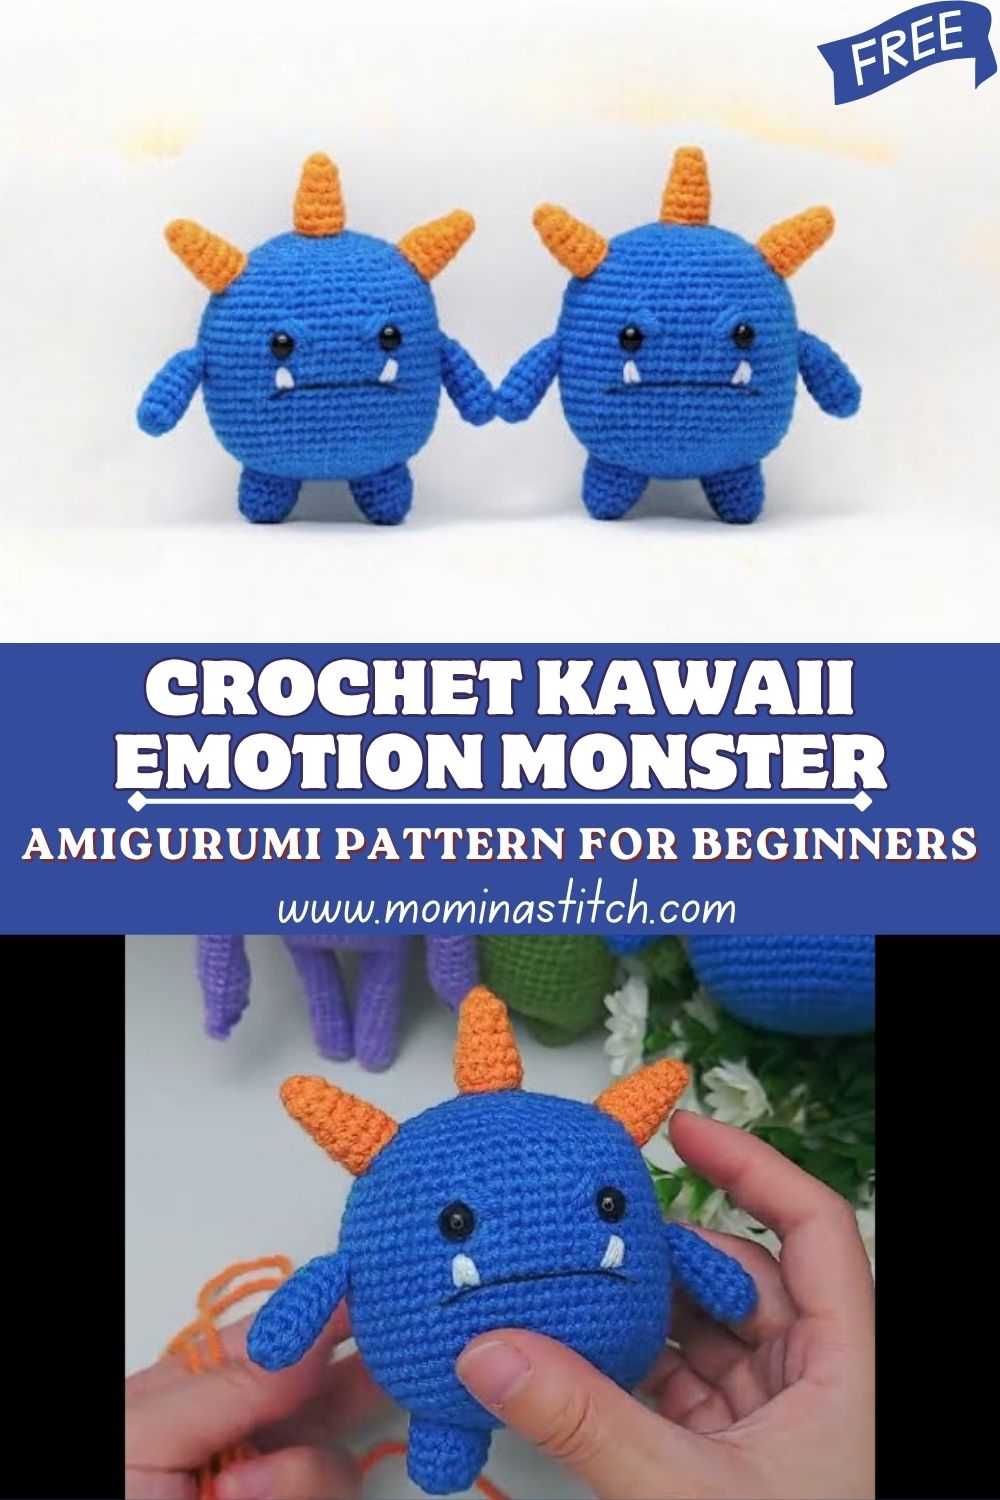
Inspiring Crochet Kawaii Monster Amigurumi Pattern for Beginners
If you’ve ever scrolled through a crochet community and spotted those chubby little Crochet Kawaii Monster Amigurumi with the biggest, most expressive eyes you already know the magic of kawaii amigurumi. These tiny, adorable creatures have a way of making everyone smile, and the best part? You don’t need to be an expert crocheter to make one.
This beginner-friendly pattern is inspired by the Kawaii Emotion Monster tutorial on YouTube. It’s one of those projects that looks impressive but is actually very approachable once you know the basic steps. Whether you’re crocheting your very first amigurumi or looking for a cute quick project to add to your collection, this little monster is calling your name.Let’s dive in!
What Is Kawaii Amigurumi — And Why Everyone Is Obsessed
The word amigurumi comes from Japanese “ami” means knitted or crocheted, and “nuigurumi” means stuffed doll. It’s the art of making small, stuffed yarn creatures, and it has taken the crafting world by storm.
Kawaii is the Japanese word for “cute,” and when you combine it with amigurumi, you get the most irresistibly adorable little plushies imaginable. The kawaii emotion monster in this pattern has a round, squishy body, tiny stubby limbs, and an expressive face that gives it loads of personality. Think big round safety eyes, a tiny embroidered mouth, and little horns or ears on top — it’s basically the cutest thing you’ll ever make with yarn.
People love kawaii crochet monsters because they’re fun to customize. You can make a happy one, a grumpy one, a sleepy one — the emotions are endless, and each monster becomes its own character.
Project Overview
Project: Kawaii Emotion Monster Amigurumi Skill Level: Beginner to Easy Intermediate Finished Size: Approximately 4–5 inches tall (depending on yarn weight and tension) Time to Complete: 3 to 6 hours (perfect for a weekend project!) Best For: Gifts, keychains, plush toys, decoration, or just because
This is the kind of project you’ll want to make over and over again once you’ve made one emotion, you’ll want to make the whole set.
Materials and Supplies You’ll Need
Before you sit down with your hook and yarn, gather everything so you’re ready to go. Here’s a complete list of what you need to crochet your kawaii monster:
Yarn Colors
- Main body color — pick your monster’s base color (classic choices: lavender, mint green, dusty pink, sky blue, or creamy white)
- Accent color — for horns,` ears, or small details
- Black or dark gray — for embroidering the mouth or other facial features
- Small amounts of white yarn or felt for eye highlights (optional but cute!)
Any worsted weight yarn (size 4) works great for this project. Cotton yarn gives a firmer texture, while acrylic yarn is soft and beginner-friendly. Either works beautifully.
Tools and Accessories
- Crochet hook: 3.5mm or 4mm (match to your yarn’s label recommendation)
- Safety eyes: 12mm or 15mm black safety eyes (2 pieces per monster)
- Polyester fiberfill stuffing — enough to fill the head and body firmly
- Yarn needle — for sewing parts together and weaving in ends
- Sharp scissors
- Stitch markers — at least 2 to track your rounds
- Optional: Keychain ring or lobster clasp if you want to turn your monster into a bag charm
Crochet Techniques Used in This Pattern
Don’t let the word “techniques” scare you. This project sticks to the basics, which is exactly why it’s so great for beginners. Here’s a quick rundown of everything you’ll be doing:
- Magic ring (adjustable ring) — used to start rounds without a hole in the center
- Single crochet (sc) — the main stitch used throughout the entire pattern
- Increase (inc) — crocheting 2 single crochets into the same stitch to make the piece wider
- Decrease (dec) / invisible decrease — joining 2 stitches into 1 to shape the piece
- Slip stitch (sl st) — used to join rounds or finish off
- Sewing and assembly — joining the head, body, and small parts with your yarn needle
That’s it! If you can single crochet, you can make this monster.
Step-by-Step Crochet Pattern Instructions
Part 1: The Head
The head is the star of the show, so we’ll make it first.
Round 1: Start with a magic ring. SC 6 into the ring. Pull tight. (6 sts)
Round 2: Inc in each stitch around. (12 sts)
Round 3: SC 1, inc — repeat around. (18 sts)
Round 4: SC 2, inc — repeat around. (24 sts)
Round 5: SC 3, inc — repeat around. (30 sts)
Round 6: SC 4, inc — repeat around. (36 sts)
Rounds 7–12: SC in each stitch around for 6 rounds. (36 sts)
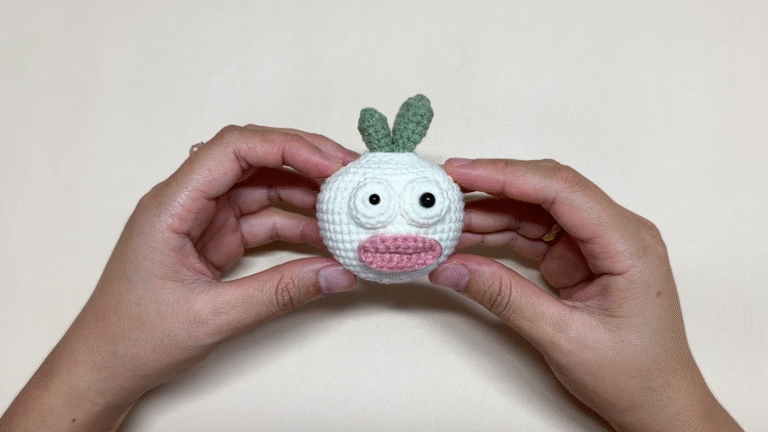
At this point, attach your safety eyes between rounds 8 and 9, leaving about 6–8 stitches between them. The placement makes a big difference in how expressive your monster looks, so take your time here.
Round 13: SC 4, dec — repeat around. (30 sts)
Round 14: SC 3, dec — repeat around. (24 sts)
Now stuff the head firmly with fiberfill. Don’t be shy — a well-stuffed head keeps its round, squishy shape.
Round 15: SC 2, dec — repeat around. (18 sts)
Round 16: SC 1, dec — repeat around. (12 sts)
Round 17: Dec around. (6 sts)
Fasten off, leaving a long tail for sewing. Close the hole with your yarn needle.
Part 2: The Body
The body is slightly smaller and connects to the head below.
Round 1: Magic ring, SC 6. (6 sts)
Round 2: Inc in each stitch. (12 sts)
Round 3: SC 1, inc — repeat around. (18 sts)
Round 4: SC 2, inc — repeat around. (24 sts)
Round 5: SC 3, inc — repeat around. (30 sts)
Rounds 6–10: SC in each stitch around for 5 rounds. (30 sts)
Round 11: SC 3, dec — repeat around. (24 sts)
Round 12: SC 2, dec — repeat around. (18 sts)
Stuff firmly before closing.
Round 13: SC 1, dec — repeat around. (12 sts)
Round 14: Dec around. (6 sts)
Fasten off with a long tail for sewing to the head.
Part 3: Arms (Make 2)
Round 1: Magic ring, SC 6. (6 sts)
Round 2: Inc in each stitch. (12 sts)
Rounds 3–6: SC around. (12 sts)
Stuff lightly, fasten off with a long tail. Set aside.
Part 4: Legs (Make 2)
Round 1: Magic ring, SC 6. (6 sts)
Round 2: Inc in each stitch. (12 sts)
Rounds 3–7: SC around. (12 sts)
Stuff lightly, fasten off with a long tail. Set aside.
Part 5: Horns or Ears (Make 2)
For pointy horns:
Round 1: Magic ring, SC 4. (4 sts)
Round 2: SC 1, inc — repeat twice. (6 sts)
Rounds 3–4: SC around. (6 sts)
Do not stuff. Fasten off with a long tail for sewing.
For rounded ears, follow the same steps but flatten and pinch slightly before sewing on.
Part 6: Facial Details
Once your safety eyes are secured, it’s time to give your monster its emotion!
Using black yarn or embroidery floss and your yarn needle, stitch the mouth. Here are a few ideas:
- Happy monster: A wide U-shaped smile stitched below the eyes
- Grumpy monster: A small straight line or downward curve
- Surprised monster: A small oval mouth stitched in a circle
- Sleepy monster: Closed eyes embroidered in a soft arc shape
You can also add little blush marks using pink yarn or a pink fabric marker for an extra kawaii touch.
Part 7: Assembly
Now comes the really fun part — putting your monster together!
- Position the head on top of the body and pin them together before sewing. Make sure they’re centered.
- Use your yarn needle and the long tail from the body to stitch all the way around, joining the two pieces securely.
- Attach the arms on either side of the body, at about round 6 or 7.
- Attach the legs at the bottom of the body, side by side.
- Sew the horns or ears to the top of the head, spacing them evenly.
- Weave in all loose ends carefully and trim.
Step back and admire your adorable little kawaii emotion monster!
Beginner Tips for the Best Results
Making amigurumi is a little different from regular crochet. Here are some tips that will make your experience much smoother:
Keep your stitches tight. Loose stitches leave gaps, and stuffing can peek through. Use a hook that’s slightly smaller than your yarn label recommends — this is totally normal for amigurumi.
Use stitch markers. Since amigurumi is worked in continuous rounds (not joined), it’s easy to lose track of where a round begins and ends. Pop a stitch marker in the first stitch of each new round and move it up as you go.
Stuff as you go. Don’t wait until the very end to add stuffing. Add fiberfill as you decrease so you can pack it in evenly without fighting the closing stitches.
Don’t skip the magic ring. It gives you a tight, seamless start. If you’re new to it, there are great short tutorials on YouTube — it only takes a minute to learn.
Leave long tails when fastening off. You’ll need them for sewing pieces together. A tail of at least 12 inches gives you plenty to work with.
Design Customization Ideas
Once you’ve made your first emotion monster, the creative possibilities are wide open. Here are some fun ways to make it your own:
Color variations:
- Pastel rainbow set — make 7 monsters in rainbow colors
- Galaxy vibes — use ombre or variegated yarn in purple and blue
- Classic Halloween — black and orange with little fangs
Cute accessories:
- Stitch a tiny bow on top of the head
- Add a little scarf using a thin strip of crochet
- Give your monster a tiny crocheted heart to hold
- Sew on a button nose instead of embroidering one
Size variations:
- Use fingering weight yarn and a 2mm hook for a tiny keychain version
- Use bulky yarn and a 6mm hook for an oversized pillow monster
- Make a whole family in graduating sizes
FAQ — Your Crochet Kawaii Monster Questions Answered
What is the best yarn for Crochet Kawaii Monster Amigurumi?
For beginners, a smooth worsted weight acrylic yarn like Lion Brand Pound of Love or Red Heart Super Saver is ideal. It’s affordable, widely available, and easy to work with. If you prefer a more natural feel, cotton yarn like Paintbox Simply DK or Drops Safran gives a firmer, cleaner finish.
How do I make my crochet plush firm and not floppy?
Two things matter most: tight stitches and generous stuffing. Use a smaller hook than recommended on your yarn label to close up gaps, and stuff your pieces really firmly more than you think you need. Fiberfill compresses over time, so pack it in well.
How long does this project take to finish?
Most beginners finish this monster in about 4 to 6 hours spread over a weekend. If you’re already comfortable with single crochet and increases, you might breeze through it in 3 hours or less. It’s a great Netflix-friendly project.
Do I need to know how to read a Crochet Kawaii Monster Amigurumi pattern?
This pattern is written in a simple, row-by-row format that’s easy to follow even if you’re new to reading patterns. If you ever get confused, referring to the original YouTube video alongside this written guide will help enormously.
Can I sell amigurumi I make from this Crochet Kawaii Monster Amigurumi pattern?
Many pattern creators allow selling of finished items made from their tutorials with credit given. Always check the original creator’s guidelines to be sure.
Final Thoughts for Crochet Kawaii Monster Amigurumi
There’s something really special about finishing your first amigurumi. That moment when you attach the last piece and your little monster stares back at you with those big round eyes it’s genuinely one of the most satisfying feelings in crafting.
The kawaii emotion monster is the perfect project to build your confidence with amigurumi. It’s simple enough that you won’t get overwhelmed, but detailed enough that the finished piece feels really impressive. Whether you’re making it as a gift, a bag charm, or just for yourself — it’s going to be wonderful.