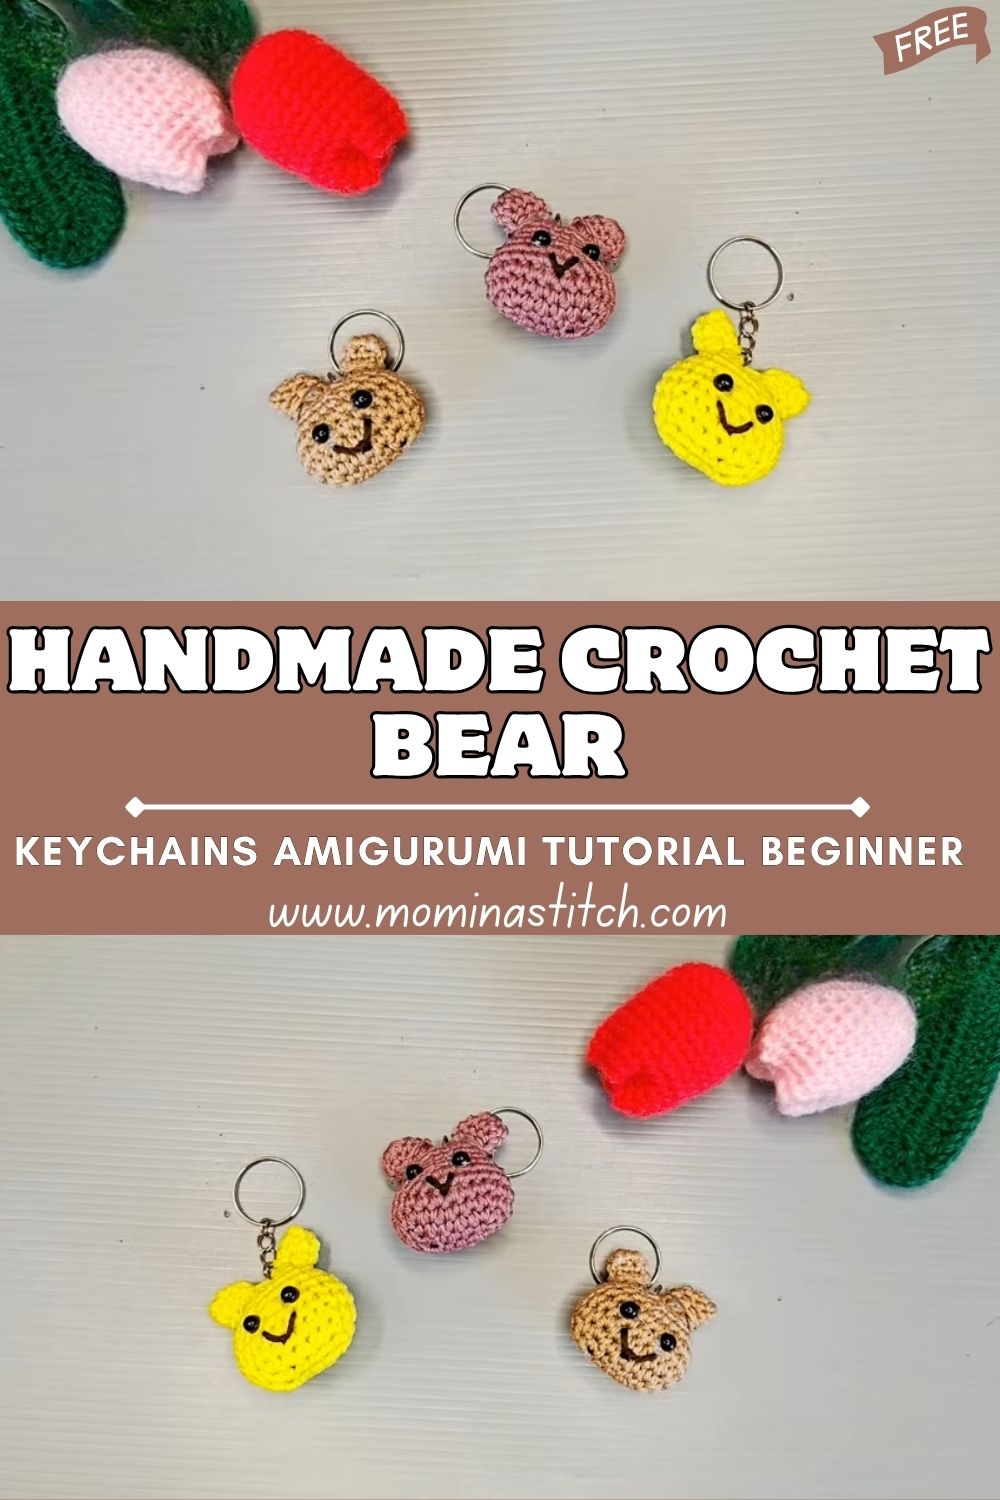
Handmade Crochet Bear Keychains Amigurumi Tutorial for Beginner
These adorable crochet bear keychain faces are a perfect mini project, soft, lightweight, and ideal for decorating keys, backpacks, and handbags. This crochet animal keychain style also makes a thoughtful, handmade gift.
Make a full set using an easy crochet keychain pattern by switching yarn colours, tweaking the amigurumi bear face details, and adding different expressions. These handmade crochet keychains are beginner-friendly, quick to finish, and great for custom orders or small-business listings.
Handmade crafts are also booming because people want items that feel personal and meaningful. A crochet keychain is not just an accessory; it’s a tiny, handmade piece of art. It’s lightweight, budget-friendly to produce, quick to make compared with large plushies, and easy to customise for customers (with different colours, expressions, initials, bows, or themes). For creators and small businesses, bear-face keychains are a smart product: they are cute, highly giftable, and ideal for repeat orders in sets.
Step-by-Step Visual Breakdown
1) Colours Used
From the image, the keychains feature bear faces in soft, trendy tones. You can see multiple shades, such as:
- Warm brown tan (classic bear look)
- Cream or beige (light, minimal style)
- Black or dark charcoal (bold contrast)
- Soft pastel variations (for a modern “cute” aesthetic)
These colours work well because they match everyday bags and are popular in handmade marketplaces.
2) Shapes and Patterns
Each keychain appears to be based on a rounded bear face shape:
- A circular or slightly oval base (the head)
- Two small, rounded ears are placed symmetrically on top
- A small snout/muzzle patch (often a lighter colour)
The stitches look tight and uniform, suggesting amigurumi-style single crochet in continuous rounds for a smooth finish.
3)Materials You’ll Likely Need
To create keychains like these, you typically use:
- Yarn: cotton or cotton-blend yarn (best for crisp stitch definition)
- Hook: usually 2.5mm–4.0m,m depending on yarn thickness
- Stuffing: a small amount of fiberfill to give a puffed look
- Safety eyes or embroidery thread: for facial features
- Keychain hardware: jump rings + lobster clasp or keyring
- Tapestry needle + scissors + stitch marker
4) Design Details (Eyes, Stitching, Expressions)
These bear faces look expressive despite being minimal. That’s the magic of small details:
- Eyes: either small safety eyes or embroidered French knots/black thread stitches
- Nose/mouth: a tiny triangle/oval nose with a short stitched mouth line
- Stitch consistency: even tension and clean shaping make each face look “professional”
- Ear placement: evenly spaced ears create a balanced, cute silhouette
Skill Level
Skill Level: Beginner to Intermediate.
You should know how to crochet in the round, make single crochet stitches, and do basic increases/decreases. If you can count stitches confidently, you can make these.
Important Notes Before Starting
- Use tight tension: Keychains get handled a lot, so tight stitches prevent gaps and keep stuffing hidden.
- Choose durable yarn: Cotton yarn holds shape better than fuzzy yarn and resists pilling over time.
- Size matters: Use a smaller hook than usual for a firm, neat fabric ideal for a crochet bear keychain.
- Secure attachments: Keychain rings must be strongly stitched or reinforced so they don’t tear out.
- Test facial placement: Pin eyes and snout before sewing. Tiny shifts in placement can completely change the expression.
Step-by-Step Pattern Process
Step 1: Crochet the Bear Face Base (Round Head)
- Start with a magic ring.
- Work single crochet stitches into the ring to form the first circle.
- Increase evenly across rounds until you reach the desired head width (small keychains often reach 24–36 stitches around).
- Crochet a few rounds without increasing for a smooth, round edge.
- Lightly stuff the head to keep it puffy but not stretched.
- Decrease evenly to close, then fasten off and weave in the tail.
Tip: A flatter face (less stuffing) looks like a badge; a puffier face looks more “plush.”
Step 2: Crochet the Ears (Make 2)
- Create a small magic ring.
- Crochet a tiny circle with one or two rounds of increases.
- Flatten the ear slightly and stitch it to the top-left and top-right of the head.
Placement tip: Ears look cutest when they sit slightly outward, not too close together.
Step 3: Crochet or Sew the Snout/Muzzle Patch
- Make a small oval or circle in a lighter shade of yarn (cream/beige).
- Position it slightly below the centre of the face.
- Sew it down neatly using a whip stitch around the edge.
Step 4: Add Eyes and Nose (Expression Building)
You have two clean options:
Option A: Safety eyes (fast + professional look)
- Insert eyes before fully closing the head (if the back is closed later), or attach with a strong backing through the fabric.
Option B: Embroidered face (best for kid-safe items)
- Use black embroidery thread or thin yarn.
- Stitch small eyes, then a tiny nose and a short mouth line.
Expression tip: Eyes placed closer together look “baby cute.” Wider spacing looks calmer/more neutral.
Step 5: Attach Keychain Hardware
- Add a small yarn loop at the top centre (between the ears works well), or stitch a small strap.
- Thread a jump ring through the loop and attach the clasp/keyring.
- Reinforce the loop with extra stitches to handle daily pulling.
Beginner-Friendly Tips to Get a Neat, Cute Result
- Use a stitch marker to track rounds—tiny projects are easy to miscount.
- Count every round, so the circle stays even and doesn’t turn into a hexagon.
- Keep facial parts symmetrical: pin ears and eyes before sewing.
- Weave the ends deep into the work so nothing pops out with key friction.
- Make a “sample bear” first to finalise your size, hook, and eye placement.
Finishing Touches
- Block lightly (optional): If edges curl, gently shape with fingers and light steam at a safe distance.
- Add blush detail: A tiny pink thread stitch or fabric blush gives a sweet “kawaii” look.
- Reinforce the top loop by adding extra stitches or a second yarn layer for long-term durability.
- Uniform set-making: If making multiples, measure ear spacing and eye position for consistent results.
Common Mistakes to Avoid
- Loose stitches: This causes stuffing to show and makes the face look messy. Use a smaller hook.
- Wrong eye placement: Even 1–2 stitches off can change the whole expression. Pin first.
- Weak keychain attachment: If the loop isn’t reinforced, it may snap with daily use.
- Overstuffing: Too much stuffing stretches stitches and warps the circle shape.
Care Instructions
- Spot clean first: Use mild soap and a damp cloth for small stains.
- Hand washing gently: Cool water, minimal scrubbing; avoid twisting the keychain.
- Air dry completely: Lay flat and reshape ears/face while drying.
- Hardware care: Keep metal parts dry to prevent rust or discolouration.
Conclusion for ( Crochet Bear Keychains Amigurumi )
These bear-face crochet keychains show how a simple shape, one round head, two tiny ears, and minimalist facial stitching can become a high-cuteness handmade accessory. With the right yarn, tight stitches, and careful facial placement, you can recreate this crochet bear keychain style for gifts, personal use, or even a small handmade business. Make one, then experiment with colours and expressions to build a full collection.
If you want, share your target size (in cm/inches) and yarn type, and I’ll convert this into a precise stitch-by-stitch pattern with exact round counts.