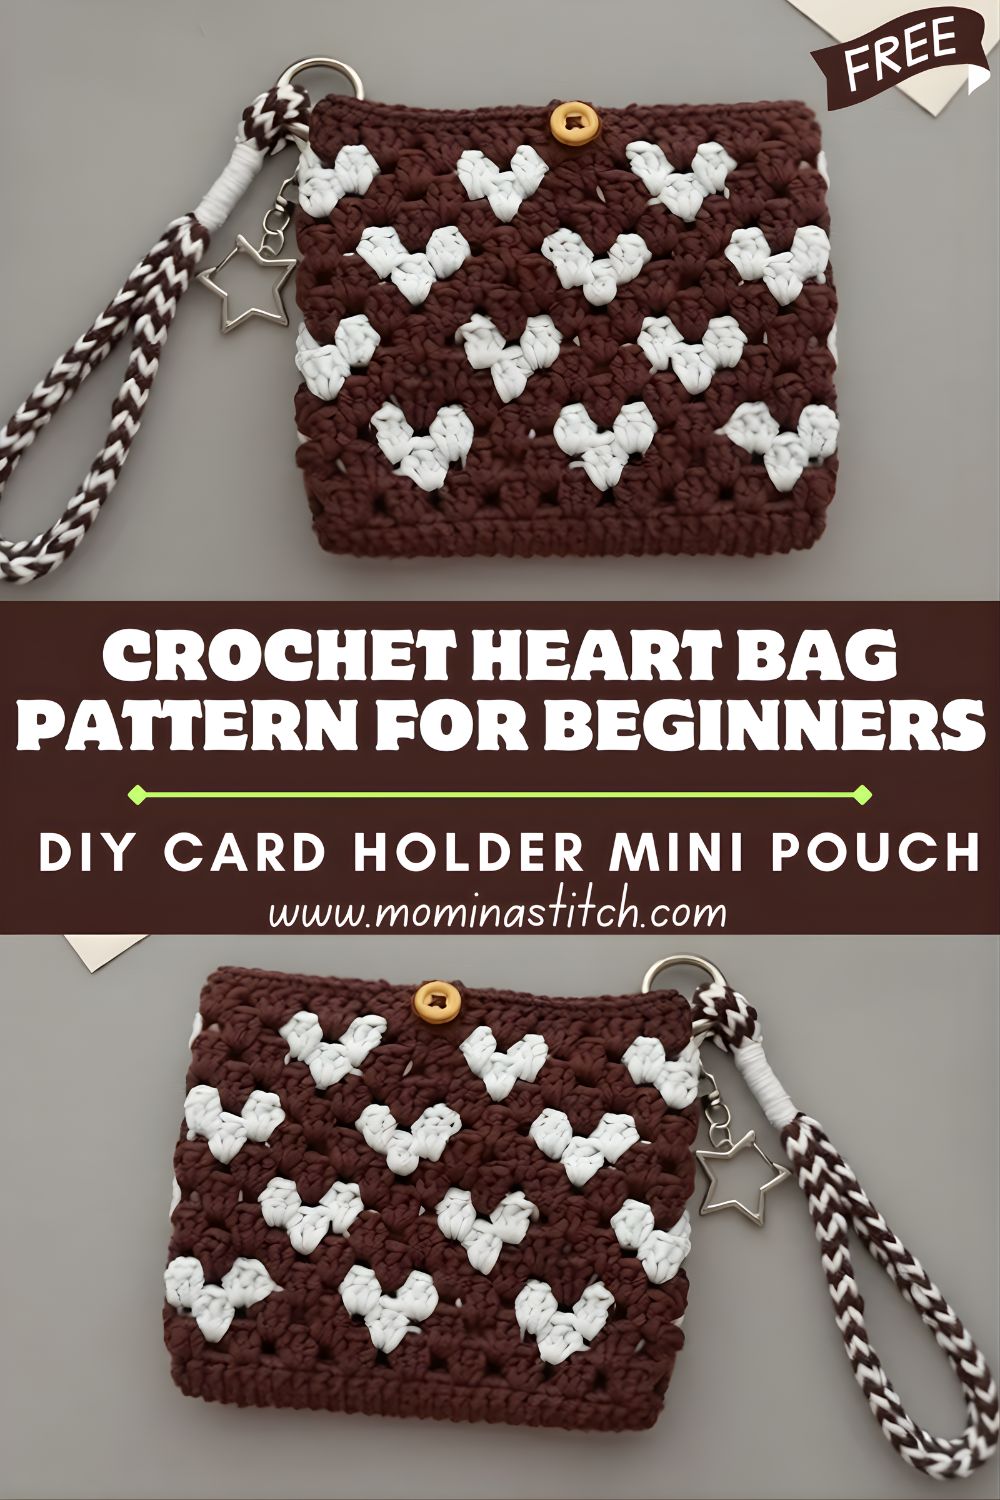
Crochet Heart Bag Pattern for Beginners DIY Card Holder Mini Pouch
Looking for a sweet, practical project? This Crochet Heart Bag Pattern for Beginners makes an adorable DIY Card Holder you can finish in one sitting. It’s simple, cute, and perfect for everyday use or gifting.
A Crochet Heart Bag is a small crocheted pouch shaped like a heart, usually just big enough to hold cards, cash, lip balm, or little essentials. If you’ve been searching for a Beginner Crochet Pattern that feels fun (not intimidating), this is a great place to start.
Why it’s beginner-friendly:
- It uses basic stitches (chains and simple crochet stitches).
- The shaping is straightforward and forgiving.
- It’s small, so you’ll see progress fast.
Common ways to use it:
- DIY Card Holder for bank cards, ID, or travel cards
- Mini pouch for coins, earbuds, or chapstick
- A thoughtful handmade gift (add a note and you’re done!)
Materials Needed
Here’s what you’ll need to crochet your heart bag:
- Yarn: Worsted (medium #4) cotton or acrylic (cotton gives a sturdy pouch)
- Crochet hook: 4.0 mm–5.0 mm (choose based on your yarn label)
- Scissors
- Yarn needle (for sewing and weaving ends)
- Stitch marker (optional, but helpful)
- Button, snap, or small magnetic clasp (optional closure)
- Keyring or lobster clasp (optional, if you want it as a keychain pouch)
Abbreviations & Basic Stitches
These are the common crochet terms used in this beginner crochet pattern:
- ch (chain): Makes the starting chain and spaces
- sc (single crochet): A short, tight stitch—great for sturdy pouches
- dc (double crochet): Taller stitch that builds height quickly
- sl st (slip stitch): Joins rounds neatly and moves yarn without adding height
If you’re brand new: keep your tension relaxed and consistent. Tight stitches can make the bag stiff and hard to work with.
Step-by-Step Crochet Heart Bag Pattern (Beginner-Friendly)
This Crochet Heart Bag is made from two heart panels. You’ll crochet them, then join them to form a pouch.
Step 1: Start with the Base (Magic Ring Heart Centre)
You’ll begin at the centre of the heart.
- Make a magic ring (or ch 4 and join with sl st to form a ring).
- Ch 2 (counts as your first dc).
- Work 11 dc into the ring (so you have 12 dc total, including the starting ch-22).
- Pull the ring tight.
- Join with sl st to the top of the starting ch.
Tip: If the “magic ring” feels tricky, the ch-4 ring option works perfectly for beginners.
Step 2: Form the Heart Shape (Top Curves Point)
Now you’ll shape the heart using a mix of dc and sc.
- Ch 1.
- In the first stitch, work 2 dc (this starts the first curve).
- In the next stitch, work 2 dc again.
- In the next 2 stitches, work 1 dc in each.
- In the next stitch, work 1 sc.
- In the next stitch, work 1 sc again (this begins heading toward the point).
- In the next stitch, work 1 dc.
- In the next stitch, work 2 dc (building toward the second curve).
- In the next stitch, work 2 dc.
- In the last stitch, work 1 dc.
- Join with sl st.
You should see a soft heart shape forming, with two rounded bumps at the top and a gentle point at the bottom.
Make 2 hearts total (front and back panel).
Step 3: Join Both Sides (Turn Hearts into a Pouch)
This is where it becomes a DIY Card Holder.
- Place the two hearts wrong sides together (so the nicer sides face outward).
- Attach the yarn to the top-right side of the heart with a sl st.
- Work the seam evenly around the sides and bottom to join both panels.
- Leave the top open (don’t stitch across the top curves)—this is your pouch opening.
- Sl st to finish and fasten off.
Beginner note: If you’re unsure where to place stitches along curved edges, just aim for “even spacing.” The heart shape hides tiny imperfections beautifully.
Step 4: Add Edging (Clean, Cute Finish)
Edging makes your crochet look polished.
Option A (simple):
- Join yarn at the opening edge and work 1 round of sc around the opening only.
- Sl st to join and fasten off.
Option B (slightly decorative):
- Work sc, ch 1, skip 1 around the top edge for a tiny eyelet look.
Step 5: Create a Strap or Closure
Choose what suits your style—this pattern is flexible.
Option 1: Easy Chain Strap (Crossbody or Wrist Strap)
- Attach yarn to one top side.
- Ch 40–80 (short for wrist, longer for crossbody).
- Attach the chain to the other side with a sl st.
- For extra strength, sc back along the chain (optional).
Option 2: Button Loop Closure (Great for a Card Holder)
- Sew a button onto the front panel near the top centre.
- On the back panel, attach yarn and ch 10–14 to create a loop.
- Sl st the loop back into the same spot and fasten off.
- Test the loop around the button and adjust if needed.
- Crochet a long chain, weave it through the gaps at the top edge (if you used eyelets), then tie.
Tips for Beginners
A few friendly tips to keep your project smooth and stress-free:
- Use cotton yarn if you want the pouch to hold its shape (great for a DIY card holder).
- Count stitches on the first heart, then match the second heart so they join neatly.
- If the heart looks uneven, block it lightly (pin it into shape and lightly steam or mist).
- Don’t over-tighten your joining sc—tight joins can make the edges ripple.
- Weave in ends securely, especially if you’ll use it daily.
Customisation Ideas
Make your Crochet Heart Bag feel yours totally:
- Colour combos: two-tone hearts, stripes, or ombré yarn
- Add decorations: tiny bow, crochet flower, or a small charm
- Change the size: use thicker yarn for a bigger pouch, thinner yarn for a smaller card holder
- Texture upgrade: try puff stitches on the heart panels (once you’re confident)
- Lining: add a simple fabric lining for extra durability and a “store-bought” finish
- Turn it into a gift: slip in a gift card or a sweet note inside
Conclusion
This Crochet Heart Bag Pattern for Beginners is one of those projects that feels cute, useful, and achievable all at once. Whether you use it as a DIY Card Holder, a mini pouch, or a handmade gift, it’s a great way to practice shaping while still keeping the stitches simple. Grab your yarn, take it step by step, and enjoy watching that heart come to life in your hands.