
Crochet Halloween Zombie Rose Floral Amigurumi for Spooky Season
There’s something truly magical about the simple act of turning a ball of yarn into a work of art. Whether it’s a tiny toy, a cozy scarf, or a whimsical decorative piece, crochet allows us to bring imagination to life one stitch at a time. The soothing motion of hooking loops together is more than just crafting it’s therapy, creativity, and joy bundled into a single string.
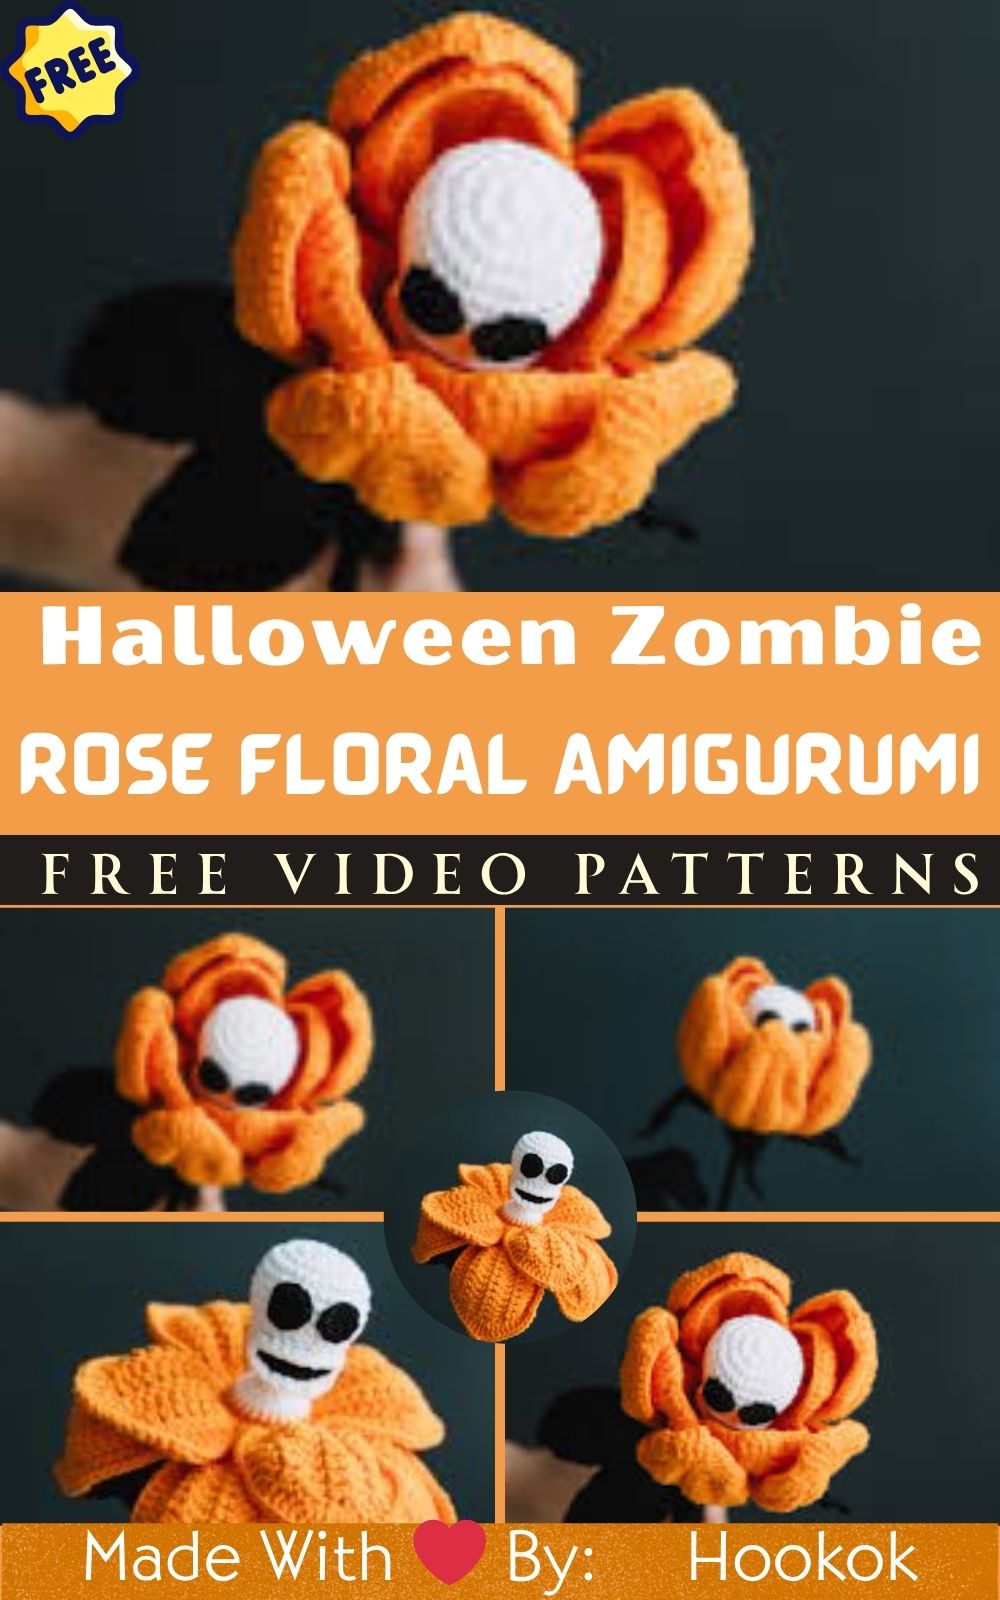
In this tutorial, we’re diving into one of the most eye-catching projects for the Halloween season: the Crochet Halloween Zombie Rose Floral Amigurumi. This isn’t your average flower plush. It’s a playful fusion of spooky charm and soft floral beauty perfect for those who love cute yet creepy décor. With a broken petal effect, stitched eyebrows, and eerie zombie facial expressions, this rose doll is packed with personality and Fall-season appeal.
What makes this crochet project even more exciting is how beginner-friendly it is. While advanced crocheters will appreciate the character-building details and shaping techniques, beginners can also enjoy experimenting with fun stitches and basic amigurumi structure. Whether you’re creating a full zombie bouquet or a single undead rose plush, this is a piece that’s bound to spark conversation.
And let’s not forget the calming joy of crochet the quiet satisfaction of seeing a handmade toy come to life. With its balance of creepy and cute, the Crochet Halloween Zombie Rose is not only ideal for Halloween lovers, but also for year-round gifting, display, or decorating your craft space with soft undead charm.
Materials & Tools You’ll Need
Before starting this spooky crochet adventure, make sure you’ve gathered the following supplies:
Yarn:
Weight: Worsted weight (Size 4)
Type: 100% acrylic or cotton-blend yarn
Colors Needed:
Deep red or burgundy (rose petals)
Green (stem and leaves)
Beige, grey, or pale green (zombie face)
Black (mouth/eyebrow embroidery)
Hook:
Size 2.5mm or 3.0mm crochet hook (smaller hook for tighter stitches)
Additional Supplies:
Polyester fiberfill stuffing
6mm–8mm safety eyes (or embroidered eyes)
Yarn needle for sewing and weaving ends
Scissors
Stitch markers
Optional: Red fabric paint or embroidery thread for “blood” drip effect
Yarn Tips:
Choose soft acrylic to keep the plush squishy.
Muted, eerie tones enhance the Halloween feel.
For a more realistic zombie tone, try marled yarn or mix greys and beiges.
Step-by-Step Crochet Instructions
Below is a general guide using typical amigurumi construction techniques. Follow along for a complete step-by-step approach to making your own Crochet Halloween Zombie Rose Floral Amigurumi.
1. Crocheting the Head (Zombie Face)
Begin with a magic ring, work single crochets in the round.
Increase each round until you reach the desired head width.
Insert safety eyes or leave space to embroider eyes later.
Add stuffing as you go but leave room for facial shaping later.
Expert Tip: Push the stuffing outward with the back of your hook for a smooth shape.
2. Creating the Neck and Upper Stem
Continue crocheting in green yarn from the base of the head.
Work a few rounds without increases to create the neck/stem.
Stuff lightly if needed for stability.
Optional: Add bendable wire inside the stem for poseable bending.
3. Building the Main Rose Base
After the stem, start crocheting wider rounds to form the bottom of the rosebud.
Work several rounds of red or burgundy to build the bulb shape.
Pinch and fold the edges slightly for a wilted, zombie-like petal effect.
Keep stuffing minimal to maintain the shape without bulging.
4. Shaping the Petals
Petals are made individually by crocheting flat or semi-circle pieces and attaching to the bud.
Make a mix of intact and jagged petals for an “undead” look.
Sew them around the base in layers.
Pro Tip: Use slip stitches for cleaner joins as you go.
5. Arms or Limbs (Optional)
For extra zombie character, crochet mini arms with hands shaped like vines or thorny tendrils.
Attach to the stem right below the head.
Embroider small scratches or stitches across the face and limbs.
6. Assembly
Make sure the head is securely attached to the stem before adding final touches.
Sew petals evenly around the rose base for a full look.
If creating a bouquet, repeat the pattern in different colors and attach stems.
7. Final Details
Embroider a crooked mouth, stitched X’s, or frown for a zombie expression.
Use red thread or fabric paint to simulate blood drips.
Add leaf accents along the stem or around the head.
Customization Ideas
Want to give your zombie rose even more personality? Here are some creative variants:
Black Petals + Neon Slime: Swap red for black petals and add bright green embroidery for a radioactive effect.
Multicolor Rainbow Zombie Rose: Each petal a different faded color—perfect for a pride-themed Halloween bouquet.
Pumpkin Rose: Use orange for petals and add a Jack O’Lantern face—a cute October mashup!
Add Props: Give your zombie rose a bow tie, a mini cape, a witch hat, or a gravestone base.
Advanced Tips & Troubleshooting
Here are some professional pointers to help you avoid common amigurumi challenges:
Invisible Decrease: Use front-loop-only decreases to avoid holes and keep the plush smooth.
Even Tension: Hold the yarn gently and check your work every few rounds.
Prevent Petal Twisting: Block gently with pins and a steam iron to keep shapes flat.
Fixing Gaps: If stuffing peeks through, work tighter stitches or switch to a smaller hook.
Joining Seams: Use the mattress stitch for clean and invisible part joining.
Safety Eye Positioning: Pin eyes in place, step back to view symmetry before securing.
Avoid Overstuffing: Too much stuffing creates bumps—add gradually and shape with fingers.
Reinforce Stems: If your rose leans over, add floral wire or pipe cleaners for support.
Care Instructions
Your Crochet Halloween Zombie Rose Floral Amigurumi is a handmade treasure—treat it with care!
Gently hand wash in cold water using mild soap.
Avoid harsh scrubbing—soaking works better.
Press water out (don’t twist), reshape and lay flat to dry.
Keep out of direct sunlight to prevent fading.
For display storage, keep in a clean, dry spot or within a dust cover.
Display & Gift Ideas
Here are some fun ways to showcase or gift your zombie rose creation!
Use as centerpiece Halloween décor in a jar labeled “Undead Florals.”
Display several in a spooky bouquet wrapped in black mesh.
Add a name tag and gift as a gothic Valentine or birthday present.
Use it as a desk plant alternative—no watering required.
Turn it into a spooky floral accessory by attaching a pin back.
Healing Through Handmade Art
Creating a Crochet Halloween Zombie Rose Floral Amigurumi isn’t just about making a seasonal craft—it’s an enriching experience that:
Encourages mindfulness and calm focus as you stitch.
Offers a release from stress, one rhythmic loop at a time.
Gives a sense of accomplishment and empowerment when finished.
Promotes eco-friendly, sustainable gifting through handmade art.
Connects you emotionally to your creation—and to whoever receives it.
Photography & Social Media Tips
Want your amigurumi zombie rose to shine online? Here’s how to capture it:
Shoot with soft, natural morning or afternoon light.
Use a vintage or woodland-themed background for eerie vibes.
Include fall props: pumpkins, bones, moss, or Halloween confetti.
Try top-down shots with the petals spread out.
Don’t forget hashtag fun: #HalloweenCrochet #AmigurumiGraveyard #CrochetRose
Conclusion
There’s an extra layer of delight in crafting something a little spooky, a little whimsical, and 100% handmade. The Crochet Halloween Zombie Rose Floral Amigurumi is a quirky, fun, and beginner-friendly project that brings out the magic of creativity—and makes a statement wherever it’s displayed. Grab your hook, turn up a spooky playlist, and let your imagination bloom into a stunning undead rose that’s guaranteed to bring smiles, spooks, and satisfying creative joy.


