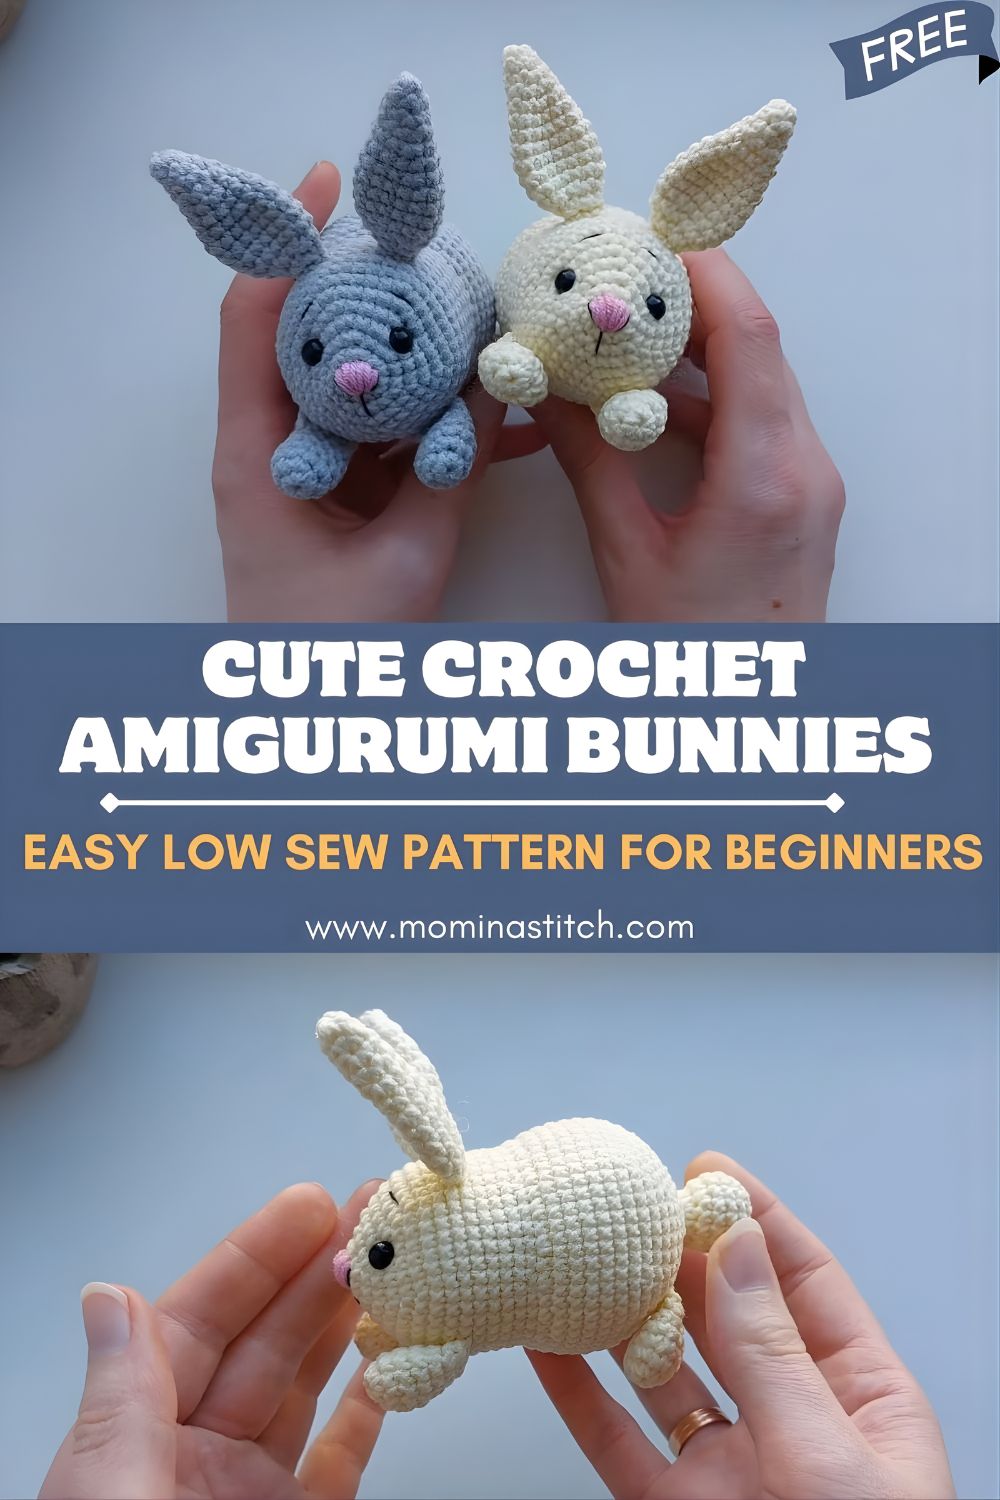
Cute Crochet Amigurumi Bunnies – Easy Low Sew Pattern for Beginners
This crochet amigurumi bunny project is the kind of quick, squishy make you’ll want to repeat in every color, grey, cream, and beyond. If you’re looking for an easy crochet animal that’s giftable and adorable, this low-sew crochet pattern is ideal for beginners and perfect for last-minute handmade presents.
Amigurumi crochet is the art of creating small stuffed toys using tight single crochet stitches worked in the round. A classic crochet bunny is one of the most popular amigurumi gifts because it’s cute year-round, easy to personalize, and instantly recognizable with simple features like long ears, tiny paws, and a sweet nose. One of the best parts about this amigurumi bunny pattern is its low-sew construction: instead of lots of separate pieces, the body is made as one simple shape,e and the details are minimal, making it faster to finish and easier for new crocheters.
This tutorial-style pattern is great for beginners who know basic stitches (sc, inc, dec) and also for intermediate crocheters who want a relaxing, speedy project. You’ll learn how to shape a round bunny body, place safety eyes, crochet upright ears, make tiny paws, and embroider a neat face.
Finished Size
With DK or light worsted yarn and a 2.5–3.5 mm hook, the finished bunny is approximately 4–5.5 in (10–14 cm) tall (including ears).
Yarn size changes everything:
- Sport/DK yarn + 2.5–3.0 mm hook: smaller, more “mini” bunny.
- Worsted yarn + 3.0–3.5 mm hook: medium bun,ny like the image.
- Plush/chenille yarn + larger hook: bigger, very soft bunny (features may need adjusting).
Materials Needed
- Yarn colors: grey, cream, or any preferred bunny color (plus pink for nose embroidery)
- Crochet hook: 2.5–3.5 mm
- Safety eyes: 8–10 mm black
- Fiberfill stuffing
- Yarn needle
- Stitch marker
- Scissors
Optional but helpful: embroidery floss for face, pins for positioning, blush/chalk for cheeks.
Crochet Abbreviations
- MR – Magic Ring
- sc – Single Crochet
- inc – Increase (2 sc in the same st)
- dec – Decrease (sc2tog; invisible decrease recommended)
- ch – Chain
- sl st – Slip Stitch
- st – Stitch
Notes
- Work in continuous rounds unless stated.
- Use a stitch marker in the first stitch of each round.
- Stitch count is in ( ) at the end of each round.
Crochet Bunny Body Pattern (Step-by-Step)
Body (One Piece)
This creates a round, palm-sized body like the bunnies shown (soft sphere/oval with a cute face).
Round 1: 6 sc in MR (6)
Round 2: inc in each st (12)
Round 3: (1 sc, inc) repeat around (18)
Round 4: (2 sc, inc) repeat around (24)
Round 5: (3 sc, inc) repeat around (30)
Round 6: (4 sc, inc) repeat around (36)
Rounds 7–10: sc around (36)
Where to insert safety eyes
Place safety eyes between Rounds 8 and 9, about 7–9 stitches apart, centered on the front of the body.
- Closer together = cuter “baby” look
- Wider apart = more realistic plush look
Add the washers securely.
Round 11: (4 sc, dec) repeat around (30)
Round 12: (3 sc, dec) repeat around (24)
Round 13: (2 sc, dec) repeat around (18)
When to start stuffing
Start stuffing firmly around Round 12 and continue as you go.
- Keep the front (face area) smooth.
- Fill evenly so the bunny doesn’t get lumpy.
Round 14: (1 sc, dec) repeat around (12)
Add a final bit of stuffing—firm but not stretched.
Round 15: dec repeat around (6)
How to close the body
Fasten off, leaving a long tail. Thread the tail through the front loops of the last 6 stitches, pull tight to close, and weave in.
Bunny Ears Pattern (Long Upright Ears) — Make 2
These ears are designed to be tall and simple, with minimal shaping, ing so they stand nicely once sewn.
Round 1: 6 sc in MR (6)
Round 2: (1 sc, inc) repeat around (9)
Rounds 3–8: sc around (9)
Round 9: (2 sc, inc) repeat around (12)
Rounds 10–14: sc around (12)
Sl st to finish. Fasten, leaving a long sewing tail.
Ear shaping tip: Lightly stuff only the bottom 1/3 of the ear (optional) or leave unstuffed and flatten slightly when sewing for a neat upright look.
Bunny Legs / Paws Pattern (Small + Low-Sew Look)
Option A: Tiny Paws (Make 2, minimal sewing)
These are small “nubs” that give the bunny a cute sitting, look like the image.
Round 1: 6 sc in MR (6)
Round 2: sc around (6)
Sl st to finish. Fast, and off, leaving a long tail.
Attach: Sew each paw to the lower front of the body, around Rounds 12–14, about 3–5 stitches apart.
Option B: No-Sew Paw Bumps (ultra low-sew)
If you want even less sewing, you can create paw bumps directly onto the body:
- Choose two spots on the lower front.
- Join yarn and work (sl st, ch 1, 2–3 sc in the same stitch, ch 1, sl st).
- Fasten off and weave in.
This creates tiny raised paws without making separate pieces.
Nose and Face Details
The bunnies in the image have a sweet pink nose and a simple mouth.
Embroidered pink nose
- Thread pink yarn or embroidery floss on a needle.
- Make a small horizontal stitch (about 2–3 stitches wide) between/under the eyes.
- Stitch over it 2–3 times to thicken it into a little oval/triangle nose.
Mouth
- From the center underside of the nose, stitch a short vertical line down 1–2 rounds.
- Then make a tiny “Y” or two small angled stitches to form a simple smile.
Optional: Add light blush on cheeks (cosmetic blush or pastel chalk).
Assembly Instructions
Attach ears
- Position ears on top of the head/body area, roughly centered and spaced evenly.
- Place them so they stand upright (slightly angled outward looks cute).
- Sew each ear securely along the base.
Attach paws
- Sew the two small paws to the lower front (or use the no-sew bumps method above).
- After attachment, pinch the body slightly to check symmetry.
Shape the bunny
- Add or redistribute stuffing by pressing gently with fingers.
- Roll the bunny between your palms to smooth out lumps.
- If the ears flop, sew a few extra anchoring stitches at the back of each ear base.
Beginner Crochet Tips
- Use stitch markers: Continuous rounds are easy to lose—mark the first stitch of every round.
- Keep stitches tight: Use a slightly smaller hook so stuffing doesn’t show through.
- Invisible decreases help: sc2tog using front loops only gives a cleaner finish.
- Stuff evenly: Add small pieces of fiberfill and push into curves; avoid one big clump.
- Check face placement early: Insert eyes before closing t,o o much so you can adjust.
Customization Ideas
- Color options: Make classic bunnies (white/cream/grey), pastel Easter sets, or bold rainbow “storybook” bunnies.
- Extra embroidery: Add eyebrows, eyelids, freckles, or whisker dots for personality.
- Keychain bunny: Add a small loop of yarn between the ears and attach a keyring (embroider eyes instead of safety eyes for child-safe makes).
- Baby toy version: Use cotton yarn, embroider features, and keep hardware off.
- Make it bigger: Use plush/chenille yarn and a larger hook; place bigger eyes or embroider sleepy eyes for a cozy look.
Conclusion
These cute crochet amigurumi bunnies are perfect when you want a fast, beginner-friendly project with a polished result—and the low-sew crochet pattern style means you’ll spend more time crocheting and less time assembling. Try making a matching grey and cream pair like the image, then experiment with colors and facial expressions. If you make one, share your bunny photos and notes—your edits and color choices help inspire other crocheters, too!