Crochet Worry Monster Plush Toy Perfect for Kids & Anxiety Relief
There’s a special kind of magic in holding a ball of yarn and transforming it into something tangible, heartwarming, and full of personality. Crocheting allows us to bring our imagination to life stitch by stitch, turning simple threads into adorable creations that can be displayed, gifted, or loved by children. The satisfaction of completing a handmade piece is unmatched it’s a blend of creativity, patience, and the joy of seeing an idea become reality.
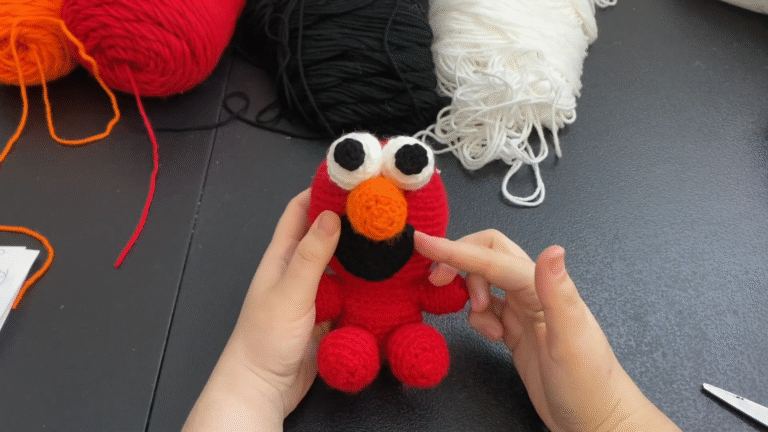
The Crochet Worry Monster Plush Toy is a perfect example of this magic. Unlike typical stuffed toys, this whimsical monster is designed to be both adorable and functional, offering comfort for kids while also serving as a cute decorative item. Its bright colors, playful features, and soft texture make it an instant eye-catcher, capable of lifting moods and spreading smiles.
This project is wonderfully versatile, suitable for beginners and seasoned crocheters alike. Beginners will enjoy learning new stitches, constructing shapes, and creating a soft, huggable toy. Advanced crocheters can experiment with textures, color combinations, and personalization techniques, adding their own creative flair. The pattern strikes a perfect balance between fun and challenge, making it engaging for all skill levels.
Crocheting a Worry Monster also offers a calming rhythm that promotes mindfulness. Each stitch becomes a soothing, meditative motion, while the final result delivers a deep sense of accomplishment. Whether you’re crafting for yourself, as a gift, or for your child’s comfort, this project is ideal for slow, intentional, and meaningful crafting.

3. Materials & Tools
To create your Crochet Worry Monster Plush Toy, you will need the following materials:
Yarn: Soft, medium-weight (worsted) acrylic or cotton yarn; consider bright or pastel colors depending on desired look.
Crochet hook: Recommended size 3.5–4 mm for best stitch definition.
Stuffing: Polyester fiberfill for a soft, cuddly feel.
Safety eyes: 8–12 mm (optional depending on whether you want embroidered or plastic eyes).
Scissors for cutting yarn neatly.
Tapestry needle for sewing pieces together.
Stitch markers to mark rounds and keep track of increases/decreases.
Tips for choosing yarn:
Opt for soft, smooth yarns for easy stitching and kid-safe plush toys.
Pair complementary colors for a cheerful, inviting design.
Avoid highly fuzzy or novelty yarns that may obscure stitch definition.
4. Step-by-Step Crochet Instructions
1. Making the Head
Begin with a magic ring and work 6 single crochets (sc) into it.
Round 2: Increase in each stitch (12 sc).
Round 3: 1 sc, increase around (18 sc).
Continue increasing evenly until the head reaches the desired width.
Insert safety eyes or embroider eyes before fully stuffing.
Gradually stuff the head to maintain a natural, round shape.
Pro tip: Light stuffing prevents the head from looking overstuffed and keeps stitches neat.
2. Forming the Neck and Upper Body
Crochet 2–4 rounds without increases to form the neck.
Keep stitches even to create a smooth transition between head and body.
Stuff lightly to avoid distorting the neck’s shape.
3. Building the Main Body
Continue with rounds, increasing evenly to shape a plump, oval body.
Ensure stuffing is balanced for a soft, huggable toy.
Add clover dubbing or textured yarn loops to create a playful, tactile effect.
4. Shaping or Attaching the Base
Crochet a small, flat base or stabilizing coil depending on your design.
Sew it securely to the body for proper balance and stability.
5. Creating Limbs or Tail
Crochet arms, legs, or tail pieces separately.
Use invisible decreases for tapered, natural-looking limbs.
Stuff lightly and position carefully for symmetry.
6. Assembly and Positioning
Attach limbs, tail, and any other appendages using a tapestry needle.
Ensure all pieces are securely fastened to prevent shifting or gaps.
Adjust placement to achieve a balanced and visually appealing look.
7. Adding Final Touches and Accessories
Add whimsical touches like embroidered smiles, small bows, scarves, or tiny props.
Extra texture using clover dubbing or loop stitches adds charm.
Make sure all embellishments are securely sewn for child-safe handling.
5. Customization Ideas
Alternative color schemes: Rainbow, pastel, or bold primary colors.
Different yarn types: Mix cotton, acrylic, or novelty yarns for visual interest.
Themed versions: Holiday monsters, fantasy-inspired colors, or glow-in-the-dark yarn.
Add-ons: Tiny hats, scarves, bows, or embroidered motifs to personalize your toy.
6. Advanced Tips & Troubleshooting
Use invisible decreases to maintain smooth shaping.
Maintain even tension to prevent uneven or lumpy stitches.
Check for twists in rounds frequently.
Adjust stuffing to fix uneven shapes or floppy areas.
Ensure a balanced amount of stuffing in each section.
Join parts seamlessly to avoid visible seams.
Read pattern abbreviations carefully to prevent mistakes.
Use stitch markers to track rounds and increases/decreases.
Experiment with textures and yarn types for added charm.
Take breaks to maintain a consistent crochet rhythm and prevent hand fatigue.
7. Care Instructions
Hand wash gently using mild detergent.
Rinse thoroughly and air dry flat to maintain shape.
Avoid direct sunlight to prevent fading.
Store safely when not in use, especially if gifting or displaying.
8. Display & Gift Ideas
Display as a home décor item on shelves or nursery tables.
Use as a kid’s room companion or bedtime comfort toy.
Perfect as a desk buddy to reduce stress and brighten your workspace.
Customize as a holiday ornament or seasonal gift.
Offer as a personalized handmade gift for birthdays, baby showers, or special occasions.
9. Benefits of Creating a Crochet Worry Monster Plush Toy
Relaxation and mindfulness: Focused crafting promotes mental calm.
Stress relief: Repetitive stitches act as therapeutic motion.
Sense of accomplishment: Completing a handmade toy is rewarding.
Eco-friendly gifting: Handmade items reduce reliance on mass-produced toys.
Emotional connection: Personalized creations foster meaningful bonds with recipients.
10. Photography & Social Media Tips
Capture your toy using natural daylight for vibrant color display.
Use props such as yarn, baskets, or flowers to enhance visual appeal.
Soft, neutral backgrounds allow textures to stand out.
Include close-ups to highlight stitch detail and tactile features.
12. Conclusion
Crocheting the Worry Monster Plush Toy is more than a craft — it’s a heartfelt experience that combines creativity, mindfulness, and the joy of handmade art. Each stitch contributes to a soft, whimsical toy that can bring comfort to children, serve as a cheerful home décor item, or become a thoughtful, personalized gift. Transforming yarn into this playful, anxiety-relieving companion is immensely satisfying, leaving both maker and recipient with a tangible reminder of love, care, and the magic of handmade creations. So gather your yarn, hooks, and imagination, and bring your very own Crochet Worry Monster Plush Toy to life today.