DIY Crochet Bunny Plushie Amigurumi Patttern Toy
There’s something timeless about crocheted bunnies they’re soft, adorable, and bring instant comfort the moment you see them. This Crochet Bunny Plushie Amigurumi Pattern captures all of that charm in a single project. The finished bunny is round, fluffy, and full of personality, with floppy ears, a cute little face, and a huggable body that makes it hard to resist.
The overall look is cozy and minimalist. Whether you use pastel tones for a dreamy baby gift or bold colors for a modern twist, this bunny will always look sweet. The plush texture makes it perfect for snuggling, while its compact shape means it sits beautifully on a shelf, bed, or desk. It’s soft enough for kids but stylish enough to be used as a piece of home decor.
This project is great for both beginners and experienced crocheters alike. It’s simple enough to follow but still satisfying to complete. You’ll enjoy watching the bunny come together piece by piece and once you make one, it’s hard to stop. Many crocheters end up creating a whole “family” of bunnies in different colors! Whether it’s for Easter, birthdays, or just because, this bunny plushie makes the perfect handmade gift or keepsake.

Materials Needed
Before you start, gather the essentials below so your project goes smoothly:
Yarn: Chenille, velvet, or plush yarn (super bulky weight works best for a soft, fluffy look). Approx. 100–150g total.
Crochet Hook: 4.0 mm or 5.0 mm, depending on your yarn thickness.
Stuffing: Polyester fiberfill or similar stuffing for plushies.
Safety Eyes: 8 mm–12 mm, depending on the size of your bunny. You can also embroider eyes for a baby-safe version.
Tapestry Needle: For sewing pieces together.
Scissors: For trimming yarn.
Stitch Markers: Optional, but useful when working in continuous rounds.
Optional Add-ons: Ribbon, small bow, felt blush, or pom-pom tail.
Choosing the Right Yarn and Colors
For the softest and most cuddly results, chenille or velvet yarn is ideal. It gives your bunny that luxurious, squishy texture we all love in plush toys. If you prefer a lighter, neater look, cotton yarn also works it’ll produce a firmer, more defined bunny.
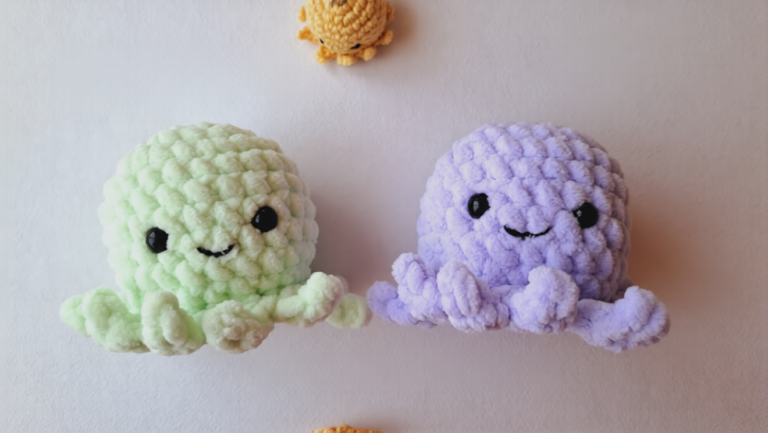
When it comes to colors, neutrals like beige, cream, or gray give a modern minimalist look. Pastel pink, mint, or lavender are perfect for baby gifts, while bright shades like mustard or teal make fun statement pieces. Don’t forget small details like the ear lining or ribbon color can completely change the bunny’s vibe.
Level of Difficulty
This pattern is beginner-friendly and perfect for anyone looking to make their first plush amigurumi. The stitches are simple mostly single crochet (sc), increases (inc), and decreases (dec) all worked in the round.
Even if you’re new to working with plush yarn, don’t worry. It’s slightly thicker, but very forgiving any small mistakes blend right in with the fluff. The construction is straightforward, and most pieces are crocheted separately and then sewn together. With a little patience and attention to detail, you’ll have a beautiful handmade bunny that looks like it hopped right out of a toy shop.
Step-by-Step Overview
1. Starting the Body
Begin with a magic ring and work in continuous rounds to form the body’s base. The shape gradually expands into a rounded oval, then tapers slightly toward the top. Keep your tension even but not too tight — plush yarn works best when stitches are soft and flexible.
As you go, stuff the body lightly but evenly. It helps to pause occasionally and shape the plush with your hands to make sure it stays symmetrical. The body should feel firm enough to hold shape, but still squeezable and soft.
2. Shaping the Head
The head is worked separately, usually starting with the top of the head and increasing to a wide round form. You’ll then decrease toward the neck area to complete the sphere. Before closing the final rounds, insert safety eyes and lightly stuff the head.
If you’re gifting this to a baby or prefer a fully soft version, skip the plastic eyes and instead embroider sleepy eyes with black yarn. This gives your bunny a gentle, handcrafted look.
Once stuffed, sew the head securely to the top of the body. At this stage, it helps to check proportions if your bunny looks slightly uneven, you can adjust the positioning by adding a few extra stitches on one side.
3. Making the Ears
The bunny’s signature feature! Each ear is crocheted separately in an elongated oval shape, tapering slightly at one end. You can make them floppy or slightly upright, depending on how you want your bunny to look.
Once both ears are finished, fold them lightly at the base and sew them onto the top sides of the head. Try pinning them first to see how they sit slightly angled ears give a playful look, while straight ones look more classic.
4. Creating the Arms and Legs
The limbs are small, rounded tubes that you’ll crochet separately. The arms are usually shorter, while the legs are a bit thicker to help the bunny sit upright.
Stuff each limb lightly before sewing too much stuffing can make them stiff. Attach the arms slightly below the head and the legs toward the lower body. If your bunny tends to tip forward, shift the legs slightly back to help balance it.
5. Adding the Tail and Details
No bunny is complete without a fluffy tail! You can crochet a small sphere for the tail or simply use a pom-pom made from matching yarn. Sew it securely to the back of the body.
For finishing touches, embroider a small nose and mouth, add tiny blush spots on the cheeks with pink yarn or felt, and tie a ribbon around the neck. These simple details bring the plushie to life and give it personality.
Special Features of This Pattern
This Crochet Bunny Plushie Amigurumi Pattern stands out for its simplicity and adorable results. Even if you’ve made other plush toys before, this one has a special charm thanks to its squishy texture and timeless design.
Beginner-friendly structure: Simple shapes that are easy to assemble.
Quick to complete: Great weekend project or last-minute gift.
Soft plush texture: Ideal for cuddling or displaying.
Minimal sewing: Most parts are small and attach easily.
Customizable size: Works well with any yarn thickness.
Cute personality: Every bunny looks slightly different that’s the beauty of handmade.
This pattern’s gentle, rounded proportions and soft fabric make it especially lovable. It’s equally beautiful as a child’s toy or an aesthetic decor piece for your craft corner or nursery shelf.
Tips for Best Results
A few thoughtful habits can take your bunny from good to great:
Keep your tension loose when using plush yarn it’s easier to see stitches and shape the plush.
Use stitch markers to track the start of each round.
Stuff gradually to avoid lumps, shaping the bunny as you go.
Insert safety eyes before stuffing to ensure proper placement.
Sew parts slowly and check symmetry before tightening.
Brush the yarn lightly with a soft brush to fluff it up.
Hide yarn tails inside the plush for a neat, professional finish.
Experiment with expressions a small change in the eyes or smile changes the whole mood.
Use a strong joining yarn (like embroidery thread) for attaching limbs.
Enjoy the process it’s meant to be relaxing and creative, not rushed.
How to Use or Gift Your Crochet Bunny Plushie Amigurumi Pattern
Once your bunny is complete, the possibilities are endless!
Cuddly Toy: Perfect for babies, kids, or anyone who loves handmade plushies.
Home Decor: Display it on a nursery shelf, bedroom corner, or craft studio.
Seasonal Gift: Great for Easter baskets or springtime decor.
Personalized Gift: Make one for birthdays, baby showers, or Valentine’s Day.
Craft Fair Favorite: These plushies sell beautifully at handmade markets and fairs.
If you’re gifting it, consider wrapping your bunny in tissue paper and placing it inside a kraft box or cotton drawstring bag. Add a handwritten tag that says something like Made with love and yarn. Small, personal touches like this make your handmade creation feel extra special.
Customization Ideas
One of the best things about this pattern is how easily it can be customized to match your personality or the recipient’s style.
Color Choices:
Classic: White, cream, or gray for a timeless look.
Playful: Pink, mint, lavender, or sky blue for a cute pop.
Modern: Dusty tones like taupe, sage, or peach.
Yarn Types:
Velvet or chenille for a plush, luxurious bunny.
Cotton for a neat, structured look.
Acrylic for a light, durable option.
Size Variations:
Use bulky yarn and a larger hook for a giant cuddly bunny.
Try fine yarn for a smaller, decorative version.
Add-Ons:
Add bows, scarves, or flower crowns.
Create themed versions a Christmas bunny with a red scarf or a pastel bunny with a floral accessory for spring.
You can even embroider initials or small hearts on the body to make it more personal.
Each bunny you make will have its own personality, and that’s part of the joy every stitch tells a story.
Conclusion
The Crochet Bunny Plushie Amigurumi Pattern is one of those projects that perfectly combines relaxation and creativity. It’s soft, cozy, and full of handmade charm. Whether you’re crocheting for yourself or someone you love, each bunny becomes a little symbol of comfort and care.
So grab your favorite yarn, settle in with a cup of tea, and enjoy bringing this cuddly bunny to life. Once you finish your own Crochet Bunny Plushie Amigurumi Pattern, you’ll see how much warmth and personality a few simple stitches can create.