Crochet Clown Fish Loopy Amigurumi Pattern
Soft yarn, tiny limbs, and a costume that makes you laugh and melt at the same time. This Crochet Clown Fish Loopy Amigurumi is a small, palm-sized plush doll dressed up in the sweetest little fish hoodie.
If you love crochet clownfish amigurumi, this is such a fun twist because it feels like a cute fish-doll crochet project and a cuddly character plush all in one. It is also a cozy beginner plush crochet toy you can work on in small, happy steps.
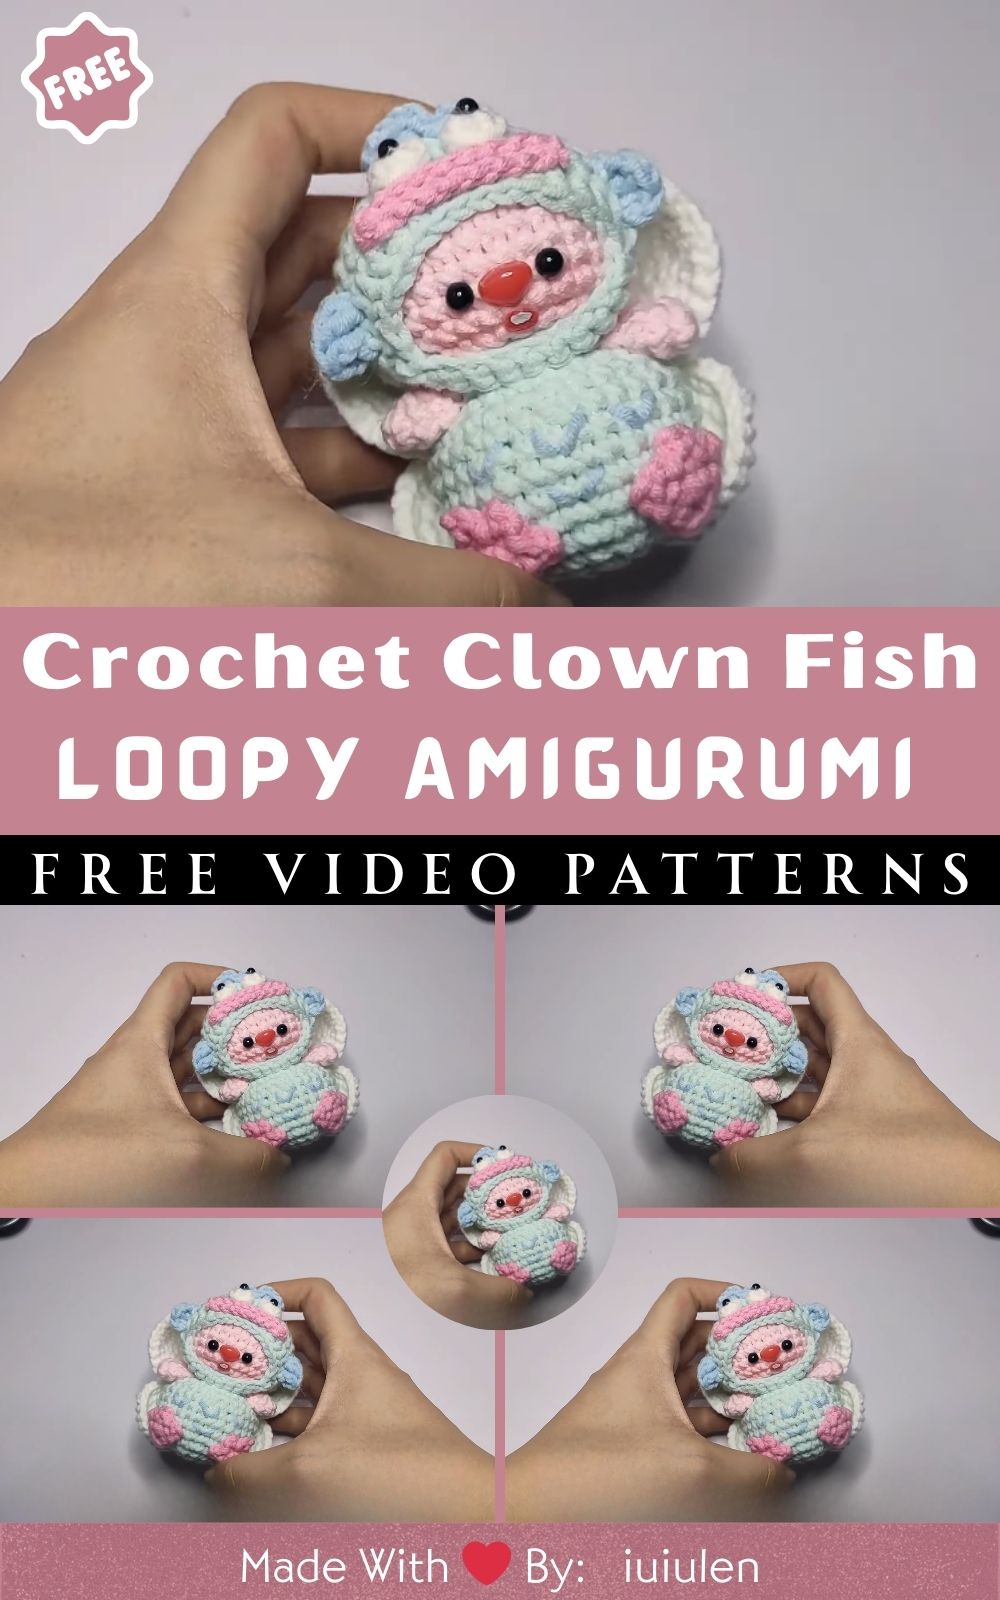
There is something extra adorable about baby-style amigurumi. The chubby body, big eyes, and tiny arms make it look like it is ready for a nap in your hand. Then you add the clownfish costume, and it becomes a whole little story, like a cuddly ocean outfit for a tiny doll. That is exactly why this Crochet Clown Fish Loopy Amigurumi is so unique and giftable.
What I also love is how beginner-friendly it can be when you break it into parts. First, you crochet the head and body with simple rounds; next, you make small limbs; then you create the fish hoodie layer with fins and a cute top detail. After that, you add a simple face. The texture stays soft, the shaping is gentle, and the finished plush makes a lovely nursery buddy, a handmade collection piece, or a comforting little toy.
Materials Needed
- Soft yarn (DK or light worsted is easiest):
- Light blue: 30 g (about 70 m)
- White: 20 g (about 45 m)
- Pink: 15 g (about 35 m)
- Black yarn (for face embroidery): 1 to 2 m
- Crochet hook: 2.5 mm to 4.0 mm
- Use 3.0 mm for tighter stitches with DK yarn
- Use 3.5 to 4.0 mm for a softer, slightly bigger plush
- Safety eyes: 8 mm (or 6 mm for a smaller face)
- Stuffing (polyfill): 25 to 40 g
- Stitch marker: 1
- Tapestry needle: 1
- Scissors: 1 pair
Optional: a tiny bit of pink embroidery floss for blush cheeks.
Abbreviations (US Terms)
- MR = magic ring
- sc = single crochet
- inc = increase (2 sc in one stitch)
- dec = decrease (sc2tog)
- sl st = slip stitch
- ch = chain
- rep = repeat
- FO = fasten off
Skill Level
Beginner to Easy Intermediate. The doll uses basic amigurumi skills like single crochet, increases, and decreases, plus simple sewing to assemble the parts. The costume layer adds a little extra shaping, but it is still very approachable if you go slowly.
Finished Size
This is meant to be a small, palm-sized plush, about 11 to 14 cm (4.3 to 5.5 in) tall, depending on the yarn and hook. Tighter stitches and a smaller hook make a firmer, smaller doll. Softer tension makes a slightly bigger, squishier plush.
Time Planning at a Glance
Total time estimate: 3 to 5 hours
- Body: 45 to 70 min
- Head: 45 to 70 min
- Costume (fish hoodie): 45 to 75 min
- Fins and details: 30 to 50 min
- Assembly: 20 to 40 min
Important Notes Before Starting (5 Tips)
- Count stitches every round. A chubby doll looks best when the shaping stays even.
- Use tight tension so stuffing does not show through.
- Stuff slowly and evenly. Add small amounts, shape with your fingers, then add more.
- Keep pieces symmetrical. Make both arms and both legs with the same stitch counts and row numbers.
- Pin before sewing. It saves so much time and helps the face and limbs look centered.
Step-by-Step Crochet Pattern
This pattern is written in a simple, beginner-friendly style and creates a small doll plus a removable or stitched-on fish hoodie. Work in continuous rounds unless stated otherwise. Use a stitch marker to track the first stitch of each round.
A. Head
Goal: A round baby-like head with big eyes.
1) Start and build the circle
- Round 1: MR, 6 sc into the ring. (6)
- Round 2: inc in each stitch around. (12)
- Round 3: (sc, inc) rep around. (18)
- Round 4: (2 sc, inc) rep around. (24)
- Round 5: (3 sc, inc) rep around. (30)
2) Shape the round head
- Rounds 6-9: sc in each stitch around. (30)
3) Add safety eyes
- Place safety eyes between rounds 7 and 8, about 6-7 stitches apart.
- If you prefer embroidered eyes, wait until the end.
4) Start decreasing
- Round 10: (3 sc, dec) rep around. (24)
- Round 11: (2 sc, dec) rep around. (18)
Start stuffing the head firmly, shaping it into a smooth ball.
- Round 12: (sc, dec) rep around. (12)
- Round 13: Dec around. (6)
- FO, close the opening, weave in the end.
B. Body
You can crochet the body separately and sew it to the head. That is often easier for beginners.
1) Base of the body
- Round 1: MR, 6 sc. (6)
- Round 2: inc around. (12)
- Round 3: (sc, inc) rep around. (18)
- Round 4: (2 sc, inc) rep around. (24)
2) Chubby tummy
- Round 5: (3 sc, inc) rep around. (30)
- Rounds 6-9: sc around. (30)
3) Taper slightly
- Round 10: (3 sc, dec) rep around. (24)
- Round 11: sc around. (24)
- Round 12: (2 sc, dec) rep around. (18)
Stuff the body, keeping it rounded and soft. Aim for a squishy but supported shape.
- Round 13: (sc, dec) rep around. (12)
- Round 14: dec around. (6)
- FO, close, leave a tail for sewing the head to the body.
C. Arms and Legs
Make two of each in your chosen body color, or use white/pastel for a baby look.
Arms (Make 2)
- Round 1: MR, 6 sc. (6)
- Round 2: sc around. (6)
- Round 3: (sc, inc) rep 3 times. (9)
- Rounds 4-6: sc around. (9)
- Lightly stuff just the rounded end if desired.
- Flatten the opening and sc through both layers to close. FO leaving a tail.
Legs (Make 2)
- Round 1: MR, 6 sc. (6)
- Round 2: inc around. (12)
- Round 3: sc around. (12)
- Round 4: (2 sc, dec) rep around. (9)
- Rounds 5-7: sc around. (9)
- Stuff lightly, flatten opening, close with sc through both layers. FO leaving a tail.
D. Clown Fish Costume (Hoodie)
This is the “outfit” layer that gives the doll its clown fish look, but in soft pastel tones. You can make it as a hood with a little cape-like body cover, or as a full hoodie. Keep it simple and flexible.
1) Hood opening (face ring)
Use white for a clean face frame.
- Round 1: MR, 6 sc. (6)
- Round 2: inc around. (12)
- Round 3: (sc, inc) rep around. (18)
- Round 4: (2 sc, inc) rep around. (24)
Now we create an opening that fits around the doll’s face. Test it against the head. It should sit around the face without covering the eyes.
2) Build the hood depth
Switch the fish hood color to light blue or pink.
- Rounds 5-7: sc around. (24)
3) Create the hood shape
- Round 8: (2 sc, dec) rep around. (18)
- Round 9: sc around. (18)
- Round 10: (sc, dec) rep around. (12)
- FO leaving a tail for sewing to the body or for attaching details.
4) Side fins (Make 2)
Use light blue or pink.
- Ch 6.
- sc in 2nd ch from hook and across. (5)
- Ch 1, turn, dec, sc 1, dec. (3)
- Ch 1, turn, sc 3.
- FO, leave tail.
5) Top detail fin
This can be a tiny nub fin on top of the hood.
- MR, 4 sc. (4)
- Round 2: inc around. (8)
- Round 3: sc around. (8)
- FO, lightly stuff if you want it puffy, then sew to the hood top.
6) Costume body wrap (simple option)
If you want the fish costume to cover the body like a little wrap:
- Ch enough stitches to wrap around the body’s widest point, usually 26 to 32 chains, depending on your tension.
- Sl st to form a ring, being careful not to twist.
- Work 3 to 5 rounds of sc to create a short tube.
- FO and test on the doll.
You can stitch the hood to this wrap, or keep them separate for a removable outfit.
E. Face Details
Keep the face baby-sweet and minimal.
- With black yarn, embroider a tiny mouth (a short curve or a small line) under the nose.
- With pink yarn, embroider a tiny nose dot or small triangle.
- Optional: add two small blush stitches on the cheeks.
Less is more here. A simple face looks extra cuddly.
Assembly Instructions
- Sew the head to the body using the long tail. Match center points, then stitch around securely.
- Attach legs low on the body front, spaced evenly so the doll can sit.
- Attach arms on the sides slightly below the head line.
- Fit the fish hoodie over the head and position it so the face opening frames the eyes nicely.
- Sew the hood in place with a few stitches at the back if you want it permanent, or leave it removable.
- Attach side fins to the hood sides.
- Sew the top fin detail to the hood top.
- Final check: sit the doll up, look from the front, and adjust anything that feels uneven.
Finishing Touches
- Add a little more stuffing if the head or body feels underfilled.
- Smooth the shape using your hands, especially around decreases.
- Make sure the hoodie sits evenly, and the fins match.
- Weave in all ends securely, especially on parts that may be tugged.
Beginner Tips (5 Helpful Crochet Tips)
- If your stitches look loose, go down one hook size for a cleaner amigurumi fabric.
- Stuff in small amounts and often in shapes. Overstuffing can stretch stitches.
- Use pins or stitch markers to map where limbs go before sewing.
- When making the second arm or leg, count rounds carefully so they match.
- For neat color changes, complete the last stitch of the old color with the new color pulled through.
Common Mistakes to Avoid
- Loose stitches: stuffing peeks through, and the plush looks messy
- Uneven stuffing: lumpy head or body, especially near the neck
- Misaligned eyes: changes the expression a lot, so measure the spacing
- Incorrect shaping: missing an increase or decrease can make the head or body look tilted
- Rushed sewing: causes limbs to sit at different heights
Variations to Personalize Classic clownfish
- h colors: swap pastels for orange, white, and black stripes for a more traditional look.
- Keychain version: make the same pattern with thinner yarn and a smaller hook, then add a keyring loop on top.
- Accessories: add a tiny bow, a mini hat, or a little starfish applique.
- Mini or larger size: use plush chenille yarn for a bigger cuddle toy, or use sport weight for a tiny collectible.
- More costume details: add embroidered stripes or small stitched “gill” lines on the hoodie.
Conclusion
This little fish-costume doll has the kind of charm that makes you want to crochet “just one more” for a gift shelf. The Crochet Clown Fish Loopy Amigurumi is soft, sweet, and full of personality, and it is the perfect mix of simple shapes and playful costume details. Take it slowly, enjoy each step, and when you finally pull the hoodie over that chubby little head, you will feel the magic of a handmade toy coming to life.