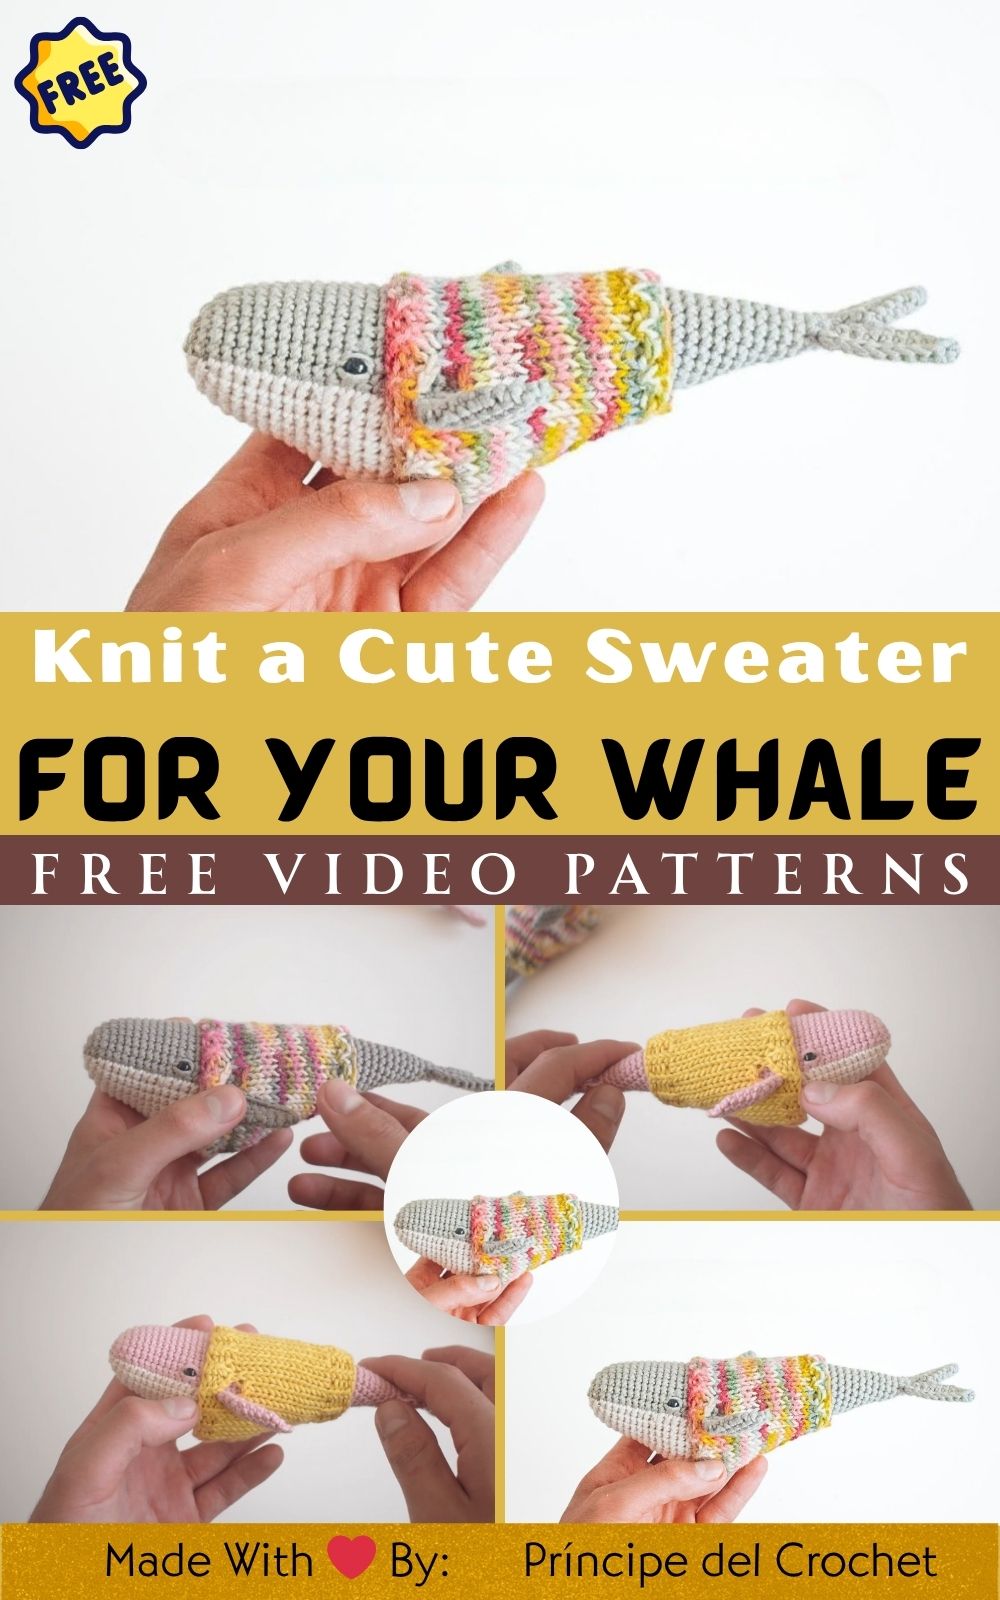
How to Crochet & Knit a Cute Sweater for Your Whale Pattern
There’s something truly enchanting about taking a simple strand of yarn and turning it into something alive with personality. Each loop and stitch carries warmth, patience, and the quiet joy of creation. The rhythm of the hook, the softness of the fiber, and the unfolding of form it all feels like magic in motion. Whether you’re crocheting under the glow of a cozy lamp or alongside your favorite mug of tea, crafting connects heart and hand in a beautifully soothing way.
Why This Whale Sweater Project Stands Out
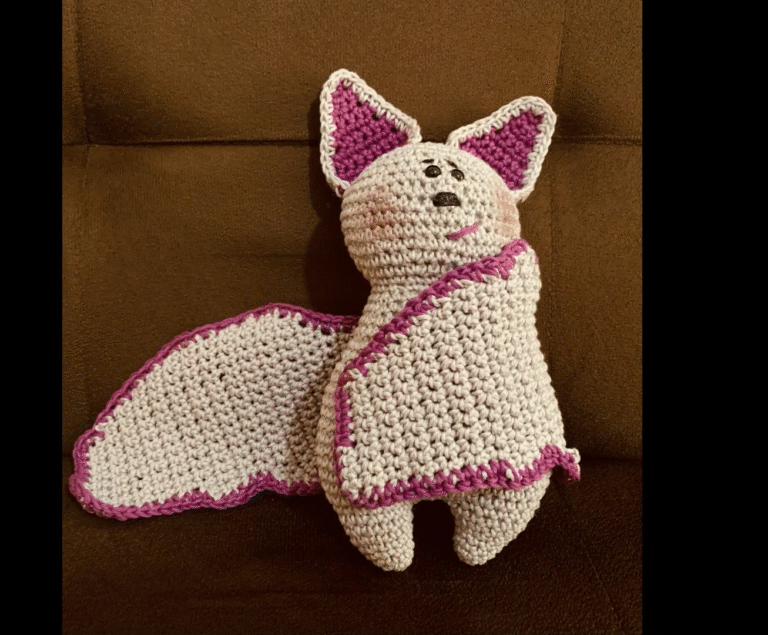
Today’s project, Crochet & Knit a Cute Sweater for Your Whale Pattern, combines playful design with creative craftsmanship. This charming mini whale in its tiny, snug sweater has stolen the hearts of crafters everywhere. Its rounded body, expressive fins, and cozy outfit make it irresistible — the kind of project that melts stress away as you work. The finished whale is perfect as a plush toy, décor piece, or thoughtful handmade gift.
Suitable for All Skill Levels
The best part? This project welcomes everyone from absolute beginners to seasoned crocheters. With simple stitches, minimal shaping, and lots of room for customization, it’s an ideal way to learn, practice, or just relax. Advanced makers will enjoy the detailing opportunities, while beginners will appreciate how forgiving and fun the process is.
The Calm and Joy of Slow Crafting
Crocheting this whale sweater isn’t just about the finished result; it’s about the soothing rhythm that calms your mind. Watching the sweater take shape stitch by stitch brings a sense of accomplishment that can’t be replicated by anything store-bought. It’s a perfect reminder that handmade art isn’t rushed — it’s experienced, cherished, and shared.
Materials & Tools You’ll Need
Before diving in, let’s gather everything needed to bring your little whale to life:
Yarn
Main Body: Worsted or DK weight cotton yarn in oceanic blue, teal, or gray.
Sweater: Contrasting yarn in pastel, striped, or seasonal hues (e.g., coral, mustard, or cream).
Accent Yarn: A few yards of white or darker yarn for detailing.
Hook & Knitting Needles
Crochet hook: 3.5 mm (E/4) or 4 mm (G/6) for standard DK yarn.
Optional knitting needles: 3 mm for the sweater portion if you prefer a knit texture.
Stuffing & Accessories
Polyfill or eco-friendly fiber stuffing
Safety eyes (6–8 mm)
Tapestry needle for sewing parts
Scissors
Stitch markers to keep track of rounds
Yarn Choice Tips
When choosing yarn, pick soft, durable fibers with minimal fuzz. Cotton blends hold shape beautifully, while acrylic yarn adds squishiness for plushies. If you’re going for a realistic whale, choose muted blues or grays. For a fun, fantasy whale, go wild with ombré, rainbow, or sparkle yarns. The sweater works best with slightly textured yarn — it gives that “hand-knit sweater” charm even in crochet.
Step-by-Step Crochet Instructions
Let’s bring your cozy whale to life, step by step!
Making the Head
Start with a magic ring and work 6 single crochets (sc) into it.
Increase evenly every round until you have a smooth dome — typically 36 stitches around.
Work even rounds (no increases) to give depth to the head.
Insert safety eyes between rows 6–8, spaced evenly.
Lightly stuff the head as you go to maintain shape.
Tip: Keep your tension even — tight stitches create a firm surface for stuffing, avoiding bulges.
Forming the Neck and Upper Body
Continue crocheting downward, reducing slightly to taper the neck area.
Alternate rows of single crochet and half-double crochet (hdc) for a soft texture transition.
Begin increasing again for the main body curve.
Expert Note: Don’t overstuff yet — the neck should stay flexible for sweater fitting later.
Building the Main Body
Work continuous rounds until the whale reaches your desired body length.
Shape the belly by alternating tighter and looser tension stitches.
Insert stuffing gradually as you progress.
Finish by slip-stitching closed when you’re satisfied with the fullness.
Pro Tip: Add a few grains of dried rice inside a small muslin pouch if you want a weightier, beanbag-like whale.
Shaping or Attaching the Base
For a flat base, decrease evenly until you have about 6 stitches left, then fasten off.
For a curved finish, crochet two small ovals and sew them at the bottom as fins.
Use your tapestry needle to weave in all loose ends securely.
Tip: Use invisible seams for a cleaner look — thread from the inside out through stitch loops only.
Creating the Tail and Fins
Chain 6, turn, and work sc down the chain, increasing in the last stitch.
Work symmetrical fins by mirroring the pattern.
Attach to the body’s back end with a few tight whip stitches.
Shape by pinching the tips slightly to give a gentle curve.
Tip: If you want a realistic tail flare, lightly steam-block the fins before sewing them on.
Making the Sweater
Now for the fun part — the tiny sweater!
Chain enough to wrap around the whale’s widest body section.
Work back and forth in rows of half-double crochets or knit stockinette if using needles.
Add ribbing by alternating front post and back post stitches (or knit 1, purl 1).
Join ends with a slip stitch to form a tube.
Slide the sweater over the whale gently.
Optional: Add tiny sleeves by attaching short chains on each side and working circular rounds for 3–4 rows.
Styling Tip: Use seasonal colors — red and white for holidays, sky blue for spring, or mustard for fall.
Final Assembly and Touches
Sew the fins, tail, and body securely.
Adjust stuffing if necessary for balance.
Embroider a small smile or blush cheeks with pink thread.
Add details like buttons, bows, or a mini tag saying “handmade with love.”
Finishing Tip: A touch of blush using pastel powder gives your whale’s cheeks a soft, lifelike warmth!
Customization Ideas
Make your whale unique with these creative twists:
Color Variations: Try gradient blues, mint greens, or lavender for dreamy sea tones.
Themed Whales:
Christmas Whale – red sweater with snowflake embroidery.
Rainbow Whale – colorful stripes and sparkly fins.
Pastel Whale – baby pink and cream hues, perfect for nursery décor.
Texture Experiments: Use velvet yarn for luxury softness or cotton-linen blends for a rustic look.
Accessories: Add a mini scarf, hat, or even tiny sunglasses for fun photo props.
Embroidery: Stitch initials or tiny hearts onto the sweater for personalized gifting.
Each variation gives your whale personality from classy minimalist to quirky cartoonish!
Advanced Tips & Troubleshooting
Even simple projects have challenges. Here’s how to overcome them like a pro:
Invisible Decreases: Insert hook into front loops of the next two stitches, yarn over, pull through both, yarn over again, pull through two — seamless!
Even Stitch Tension: Keep your yarn hand steady and use the same hook angle to avoid uneven rounds.
Avoid Twisted Rounds: Always check your foundation chain lies flat before joining.
Fixing Uneven Shapes: Add or remove small amounts of stuffing; shape gently with your fingers.
Proper Stuffing Balance: Distribute stuffing evenly — too much makes the whale stiff, too little makes it sag.
Seamless Joins: Use the mattress stitch method to connect pieces invisibly.
Reading Patterns: Understand abbreviations like “sc inc” (single crochet increase) and “dec” (decrease).
Yarn Splitting Prevention: Use a smooth-tipped hook and avoid pulling too sharply.
Color Change Cleanliness: For sweater stripes, switch yarns before completing the final pull-through of the stitch.
Blocking for Perfection: Steam-block parts before assembly for professional symmetry.
Care Instructions
Handmade crochet plushies deserve love and care:
Hand Wash Gently: Use lukewarm water with mild detergent.
Rinse Thoroughly: Never twist or wring the toy.
Air Dry Flat: On a towel under shade, never under direct sunlight.
Avoid Harsh Heat: Don’t use dryers or irons directly.
Storage: Keep in a dry place, away from pets and dust.
Display Protection: For open shelves, place inside glass domes or clear boxes to preserve shape.
Bonus Tip: For gifting, include a small care card explaining how to wash and store the handmade whale — it adds a professional, heartfelt touch!
Display & Gift Ideas
Here’s how you can showcase or gift your whale sweater masterpiece:
Home Décor: Place it on bookshelves, window sills, or side tables for a cozy handmade vibe.
Kid’s Room Buddy: Soft and safe, this plush is perfect as a child’s bedtime companion.
Desk Friend: Cheer up your work desk with this adorable whale — instant mood booster!
Holiday Ornament: Hang miniature versions on your Christmas tree or gift them as stocking stuffers.
Personalized Gift: Attach a tiny note, ribbon, or charm for birthdays, baby showers, or Valentine’s Day.
Photo Idea: Set your whale beside seashells or yarn skeins for a nautical-themed display shot!
Benefits of Crocheting a Whale Sweater
Crafting isn’t just about making — it’s about feeling. Here’s what this project brings to your life:
Relaxation & Mindfulness: Repetitive stitches calm the nervous system and focus the mind.
Stress Relief: The tactile nature of yarn soothes anxiety — every stitch melts tension.
Sense of Accomplishment: Finishing a handmade piece builds confidence and pride.
Sustainable Gifting: Handmade over mass-produced means eco-friendly and filled with intention.
Emotional Connection: Every handmade whale carries the crafter’s heart — a unique connection money can’t buy.
Skill Growth: You’ll refine shaping, tension control, and design intuition.
Creativity Boost: The freedom to change colors, patterns, or textures unlocks endless inspiration.
Photography & Social Media Tips
Ready to show off your whale? Here’s how to make it shine online:
Use Natural Daylight: Soft morning or late-afternoon light brings out yarn texture.
Choose Soft Backgrounds: Neutral tones like white, beige, or driftwood enhance your whale’s colors.
Add Props: Baskets, hooks, or spools of yarn make your setup cozy.
Try Close-Ups: Focus on the sweater stitches or tail detailing for professional results.
Use Hashtags:
#CrochetWhale
#AmigurumiLove
#HandmadeWithYarn
#CrochetSweaterWhale
#CraftyOceanFriends
Edit Lightly: Adjust brightness and contrast — avoid heavy filters that distort color.
Share the Process: People love seeing behind-the-scenes shots of your workspace or yarn choices.
Pro Tip: Create short crochet reels showing your whale “getting dressed” in its sweater — perfect for Instagram or TikTok!
Conclusion
Crocheting and knitting your whale sweater pattern is more than just a creative pastime — it’s a celebration of imagination, patience, and joy. From the first loop to the final stitch, each step carries a spark of love and intention. When you hold your finished whale in your hands — soft, colorful, and uniquely yours you’re not just seeing yarn; you’re seeing your creativity come to life.
So grab your favorite yarn, find a comfy corner, and let your hands tell a story through thread and texture. Whether it’s for yourself or someone special, your handmade whale sweater will always carry a little piece of your heart and that’s the true magic of crochet.