DIY Crochet Full Guy Amigurumi Easy Pattern for Beginners
Creating a polished Crochet Full Guy Amigurumi involves several advanced techniques and avoiding common mistakes that beginners might make. One of the key advanced tips is perfecting the tension in your stitches. Keeping the tension consistent ensures that the Amigurumi’s shape remains uniform and prevents any gaps where the stuffing might show through. Additionally, use a smaller hook size to achieve tight, neat stitches, which lends a more defined look to the final product.
When assembling the different parts of the Amigurumi, having a clear, well-organized workspace helps maintain efficiency and accuracy. Carefully pinning limbs and other components before sewing them onto the body can ensure proper alignment and symmetry, which is crucial for a professional finish. To add personality and polish, consider using embroidery techniques to define facial features, thus enhancing the character’s overall expression.
Beginners often encounter difficulties such as uneven stitching, incorrect stuffing amounts, and poor attachment of parts. To address these issues, if the stitches are too loose, consider switching to a smaller hook and paying close attention to maintaining even tension. For stuffing, using smaller pieces and distributing them evenly throughout prevents the Amigurumi from becoming lumpy or distorted. Under-stuffing can result in a saggy look, so add stuffing gradually while shaping the Amigurumi.
When attaching parts like arms or legs, double-check positioning before sewing to ensure balance and symmetry. If the sewing appears messy, take the time to redo it for a cleaner finish. Following these tips and learning from common mistakes, even beginners can create a Fall Guy Amigurumi that is both polished and charming. Consistent practice and attention to detail are key to mastering this intricate yet rewarding hobby.

How to Crochet Full Guy Amigurumi
To Crochet Full Guy Amigurumi, begin with the head by creating a magic ring and crocheting six single crochets. Follow an increase pattern to expand to 36 stitches, then maintain the circumference for several rows. Transition to the body by crocheting rounds of 36 stitches, decreasing towards the end to align with the head. For the arms and legs, form small cylinders using a magic ring with four single crochets, increasing slightly for arms and feet shape.
To assemble, position the arms midway down the body’s sides, and align the legs symmetrically at the base. Secure them with a yarn needle. Lastly, add facial details using embroidery thread for the eyes and mouth. Attach safety eyes, ensuring they’re secured from the back. Carefully stuff the head and body before final closure, paying close attention to symmetry and stuffing evenly for a balanced appearance.

Step by step to Make a Crochet Fall Guys Amigurumi
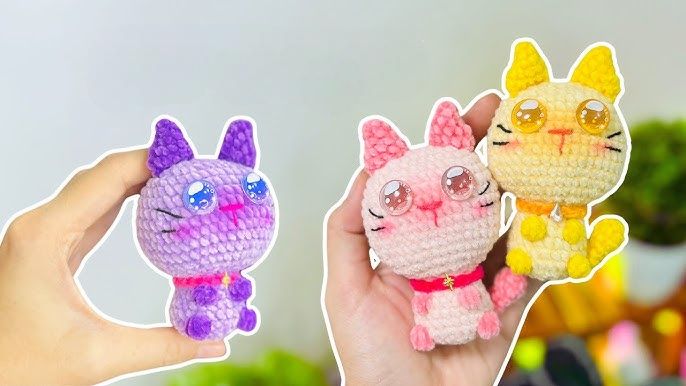
Crochet Full Guy Amigurumi gather the following materials for a seamless creation process. Start with medium weight yarn in vibrant colors, like pastel pink or blue, to bring the character to life. Select a suitable crochet hook, typically a 3.5mm or 4mm, to match the yarn thickness for tight stitches. Use 10mm safety eyes to give the doll its distinct, playful expression. For a plush, huggable texture, polyester fiberfill stuffing is ideal to fill the head, body, and appendages. Don’t forget a yarn needle for sewing parts together with precision. Small embroidery thread can be used for additional facial features or stripes, adding detail to the amigurumi. Stitch markers and scissors are essential for track keeping and cutting yarn cleanly. A row counter is a handy addition, ensuring accurate patterns as you progress through rounds. With these tools, creating a Fall Guys Amigurumi becomes an enjoyable and rewarding experience.

Crochet Fall Guys Pattern for Beginners
Fall Guys, the popular and whimsical online multiplayer game, has captivated audiences with its colorful characters and playful design. For those looking to bring a bit of this charm into their home, crocheting a Fall Guys character offers an enjoyable and accessible project. This beginner-friendly pattern will guide through each step, ensuring even those new to crocheting can create their own adorable Fall Guy. The process involves selecting the right yarn and hook size, mastering basic stitches, and assembling the various parts. By following the detailed instructions, anyone can produce a delightful crochet version of these beloved characters. This project is perfect for honing crochet skills while creating a fun, tangible link to the delightful world of Fall Guys.

Fall Guys Step-by-step Amigurumi
While beginning amigurumi projects can be rewarding, several practical tips can enhance the experience. It’s crucial to maintain consistent tension throughout the project to ensure uniformity and prevent mismatched pieces. Beginners often make the mistake of not counting stitches, leading to uneven shapes, so regularly counting to align with the pattern is advised. Using stitch markers can help keep track of rounds in complex designs. Choosing the right type of yarn and hook size can significantly affect the outcome, so opting for recommended materials in the pattern can aid in achieving the desired finish. For smooth assembly, pinning pieces in place before sewing can guarantee proper alignment. Once completed, displaying amigurumi on a dedicated shelf or in a creative setting can highlight the handiwork. Sharing the finished project on social media platforms can connect with fellow enthusiasts and might even inspire others to start their own amigurumi journey.

Fall Guys Amigurumi Crochet Step by Step
The wildly popular game, Fall Guys, has captured the hearts of gamers everywhere with its adorable and clumsy characters. Creating amigurumi versions of these whimsical figures offers a delightful way to bring the colorful chaos of the game into the real world. This article provides a meticulous, step-by-step guide to crocheting your own Fall Guys amigurumi. To start, the face is crocheted with white yarn, making slip knots and single crochet stitches to form the base structure. Once the face is complete, proceed to the body, chaining two and using single crochet stitches to build the desired shape. Each piece, including the iconic jellybean-shaped body, arms with four fingers, and feet, is carefully detailed. The guide ensures that even beginners can follow along, creating charming little figures that echo the playful spirit of Fall Guys.

Crown Crochet Fall Guys Amigurumi
For creating a Fall Guys amigurumi, start by crocheting the face with white yarn, making slip knots and single crochet stitches to form a rounded base. Proceed to the body, chaining two and using single crochet stitches to develop the jellybean shape. The arms and feet are next, created with consistent single crochet stitches, ensuring symmetry. Assembly begins with attaching the arms and feet to the body using a yarn needle. Secure the face in place on the body, aligning it centrally.
For the crown, begin by making a slip knot using gold yarn and chaining 22 stitches. In the first row, perform single crochet stitches across to achieve 21 stitches. The second row follows the same pattern. In the third row, chain three, slip stitch back, single crochet in the next stitch, then slip stitch in the following three stitches. Repeat this until seven points form. Bring the ends together to form a crown, securing them with a yarn needle. The crown is then ready to be attached to the Fall Guy’s head.

Amigurumi Fall Guy Season Crochet Pattern
To bring the seasonal theme to the Fall Guy amigurumi, various accessories can be created for each season. For winter, crochet a small hat using single crochet stitches, and add a tiny pompom on top. A matching scarf can be made by chaining the desired length and working single crochet rows to provide warmth.
In spring, create delicate crochet flowers by making small slip stitch rounds with bright and pastel-colored yarns, attaching them to the hands or head. For fall, crochet small leaves in orange, red, and brown tones, using basic leaf patterns, and attach them around the character’s body or head. These seasonal accessories not only enhance the charm of the Fall Guy amigurumi but also infuse it with a lively and festive feel, perfectly reflecting the changing seasons.