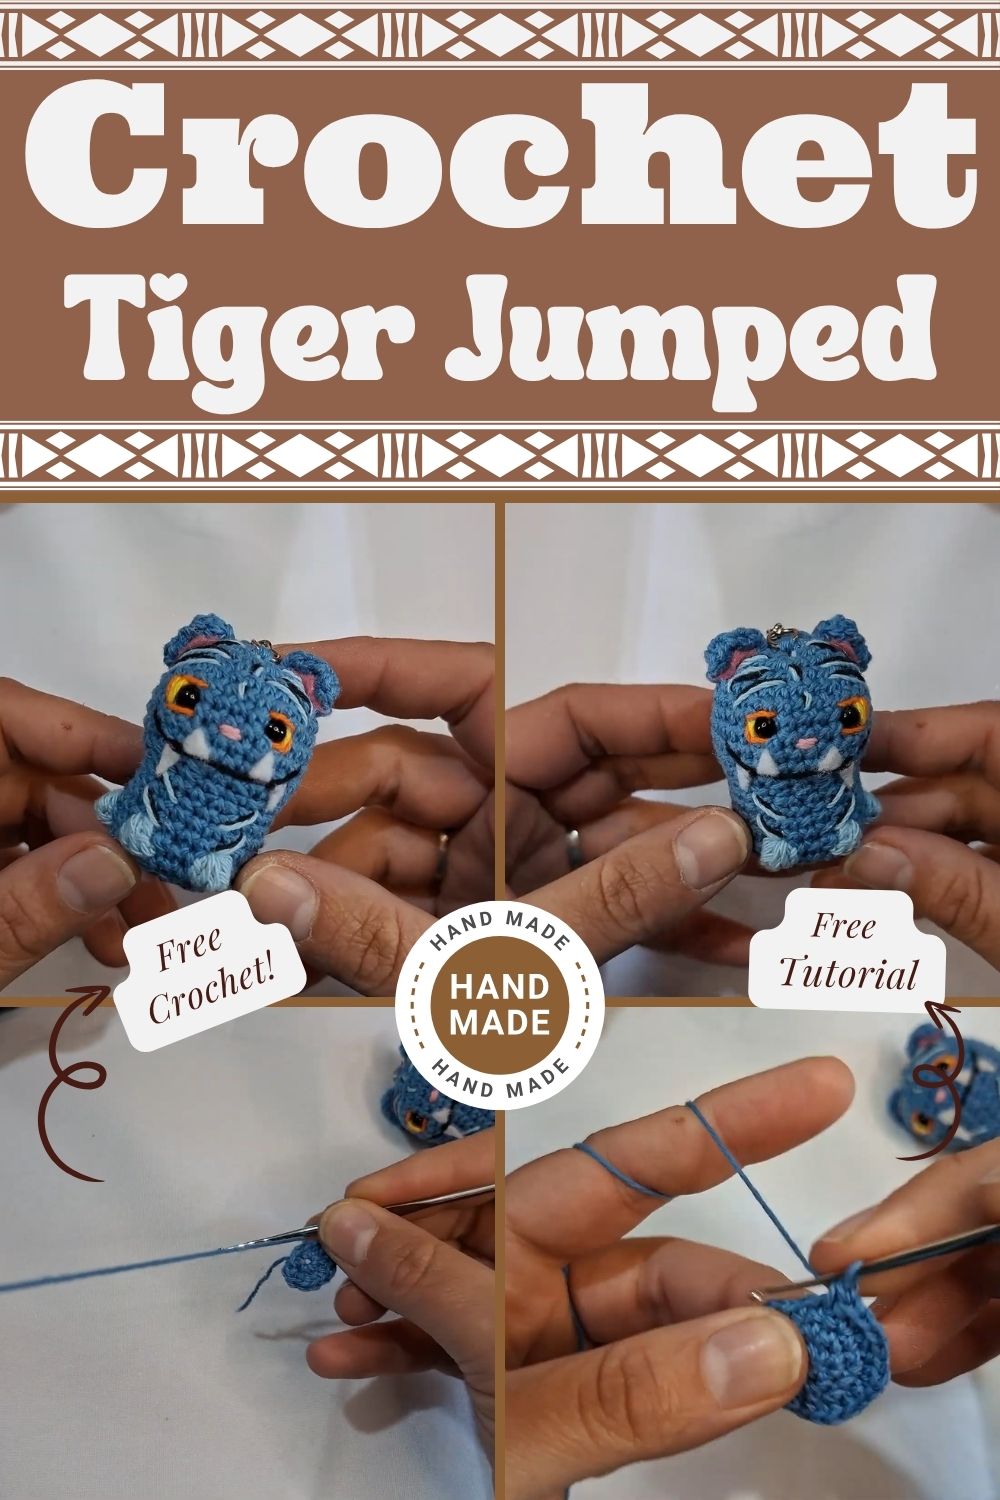
Gentle Blue Crochet Derpy Tiger Jumped Straight from Demon Amigurumi Pattern
Hey friends! I’m still smiling every time I look at my keys because this little blue Crochet Derpy Tiger is now officially my favourite bag charm. He’s bright, chubby, slightly goofy, and absolutely full of personality with those big sparkling eyes, tiny fangs, pink inner ears, and the softest white muzzle. I made him over one lazy weekend and honestly, he turned out even cuter than I imagined.
When I first clicked on the tutorial, I thought, “This looks fun but I wonder if I can pull off the tiger stripes and that derpy expression.” Turns out, yes and it was way easier than I expected! The moment I attached the safety eyes and embroidered those little fangs, he came to life and I actually giggled out loud. If you’ve been craving a quick, happy project that gives you that “I made this!” boost, you’ll fall in love with this Gentle Crochet Derpy Tiger. He jumped straight from the viral Demon Amigurumi vibes into my hands and now he’s ready to jump into yours too. Whether you’re a busy crocheter needing a fast win or a beginner looking for something adorable, this one delivers pure joy.
Why You’ll Love This Pattern
- Super quick and satisfying — finished in just a few cozy hours
- True no-sew magic (arms and legs attach as you go!)
- Perfect for using up leftover yarn scraps
- Beginner-friendly with room to grow your skills
- Makes the cutest keychain, bag charm, or mini plush
- Thoughtful handmade gift for kids, friends, teachers, or K-pop fans
- Relaxing weekend project that feels like self-care
- Looks amazing in every color — classic tiger or wild pastels
- Budget-friendly and endlessly customizable
- Brings instant smiles everywhere he goes!
Materials & Tools
I kept it simple with things I already had in my stash:
- Yarn: Medium weight acrylic or cotton in bright blue (main), white (muzzle), black (stripes), and pink (inner ears). I love cotton because it doesn’t fuzz and photographs beautifully.
- Hook: 4.25 mm (or 4 mm if you prefer tighter stitches)
- Safety eyes: 12–14 mm — those orange-rimmed ones in the photos make him look extra expressive!
- Stuffing: Polyester fiberfill (or clean yarn scraps in a pinch)
- Extras: Tapestry needle, stitch markers, scissors, and a sturdy keyring with a chain
Pro tip: Choose colors that spark joy — bold blue like mine for fun energy, or soft neutrals for a calm nursery vibe.
Instruction Step by Step
I followed the wonderful YouTube tutorial (linked at the bottom) and worked in continuous rounds. Here’s how it felt in real life:
Start with the arms and legs — tiny tubes that are quick and forgiving. Stuff them lightly as you go. Then begin the body and attach those limbs right on the hook. That no-sew moment? Pure satisfaction!
For the head, I used a magic ring and built up the rounds. Placing the safety eyes was the wow step — suddenly, he had soul! The white muzzle is a small oval that you sew on gently. Embroider the nose, mouth, and those tiny fangs with black yarn — I actually had to redo the fangs once because the first ones were too big, but the second try was perfect.
Ears come next: outer blue pieces with pink insides. They stitch on so easily and give him that alert, perky look. The tail is a simple striped tube — I curved it a bit while stuffing for extra character. Finally, add the black tiger stripes with surface crochet or embroidery. Don’t stress if they’re not perfectly even — it adds to his derpy charm!
Pro Tip: If your tension feels off in the first few rounds, don’t panic. Stuffing evens everything out beautifully. I had one frogging session and still finished with a huge grin.
Crochet Pattern Details
This free pattern from MerakiGurumi is a true 3-in-1 gem — you can make a cat, kitten, or full tiger. The tiger version has those signature stripes and fangs that make it stand out. The construction is seamless and clever: limbs are crocheted first, then joined while building the body and head. It uses basic stitches (single crochet, increase, invisible decrease, color changes) but feels advanced because of the polished result.
The video is clear, well-paced, and shows close-ups of tricky parts like the muzzle and eye placement. My finished tiger is about 6–7 inches tall — ideal keychain size but also cute as a standalone plush. The pattern is very forgiving with yarn weight, so you can scale it up or down. I spent roughly 4–5 relaxing hours total, including breaks for tea and scrolling crochet inspiration. It’s one of those projects where every step feels like progress. You’ll love watching this little guy take shape!
Customization Ideas
This pattern is a blank canvas for creativity! Make a classic orange tiger with black stripes, or go wild with mint green, lavender, or even rainbow stripes. Add a tiny bow, bell, or heart on the chest for extra sweetness. Turn him into a car mirror charm, backpack buddy, or nursery mobile. Mix cotton and velvet yarn for a super soft texture. Wouldn’t he look adorable peeking out of a gift bag or sitting on a desk as a stress-reliever? The possibilities are endless — I already have plans for a whole colorful tiger family.
Finishing & Assembly
Stuff evenly, especially the head and cheeks, for that signature chubby look. Close the final rounds with neat decreases and weave in ends securely. Attach ears and tail firmly so they stay put even after adventures. For the keyring, I added a chain loop at the top of the head — super simple. If making for little ones, embroider eyes instead of using safety ones. Give him a gentle squeeze and admire your work — he’s ready to roam!
Gift Tip: Wrap him in colorful tissue paper inside a small box — instant handmade happiness.
Bonus: Care & Maintenance
Hand wash gently in cool water with mild soap and air dry flat. The colors stay bright and the shape holds up beautifully. I keep mine on my keys, but he also looks charming on a yarn shelf or windowsill. A quick brush with a soft toothbrush brings back the fluff if he gets squished in a bag.
Final Thoughts
Every time I see this little derpy tiger dangling from my keys, I smile. He reminds me why I fell in love with crochet in the first place — the colors, the calm rhythm of the hook, and the joy of creating something that spreads happiness. This project was exactly what my soul needed: fun, fast, and full of personality.
If you make one, please tag me or drop a photo in the comments — I’d genuinely love to see your version! Whether you go blue like mine or totally different, your tiger will be perfect.
Grab the free tutorial here: https://www.youtube.com/watch?v=WZPrGi3Rb0c&t=2s
Happy hooking, friends!
FAQ
Q: What yarn works best? A: Cotton or acrylic #4 weight — both work great. Cotton gives crisp details.
Q: How long does it take? A: 3–5 hours once you get into the flow. Perfect evening project!
Q: Is it beginner-friendly? A: Yes! Clear video + simple techniques = success even for first-time amigurumi makers.
Q: How do I turn it into a keychain? A: Add a metal ring and chain at the top — done in seconds!