Crochet Children’s Toy Amigurumi Squeaker Fun Crochet Pattern for Amateur
A soft, squishy crochet children’s toy that chirps with a gentle squeak can turn a simple handmade project into something unforgettable. Better still, an amigurumi squeaker is small, quick, and wonderfully portable, so it fits perfectly into a beginner-friendly routine.
As a result, this crochet squeaker tutorial focuses on simple stitches, gentle shaping, and easy assembly. Plus, the finished bunny-style toy feels like a heartfelt gift for babies, toddlers, or any child who loves tiny cuddly companions.
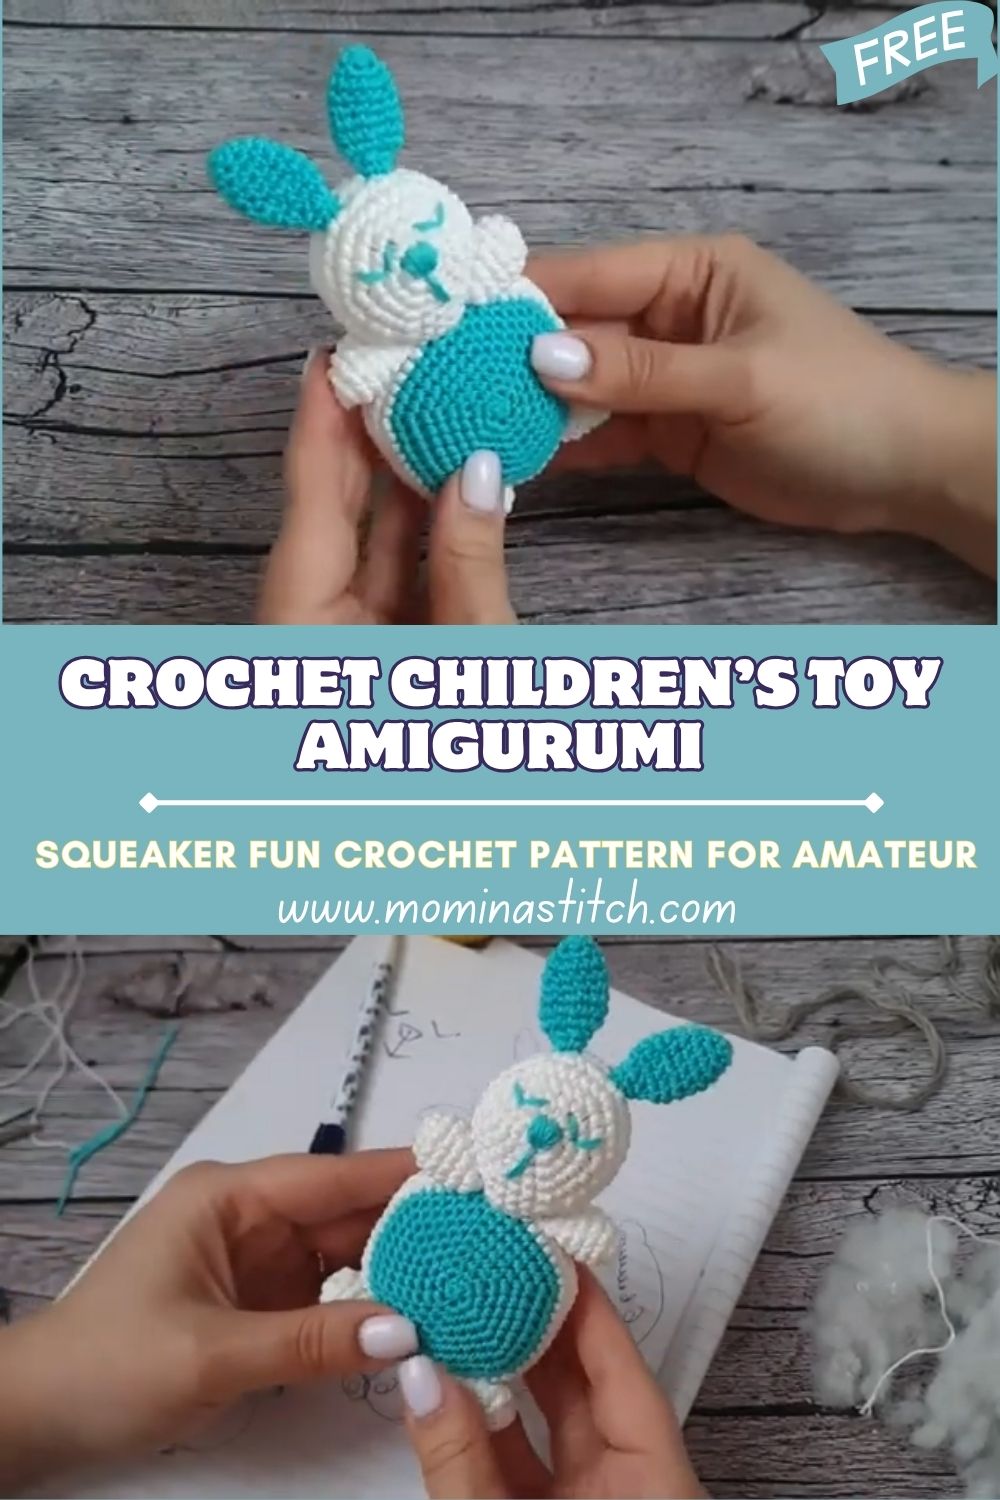
This tutorial creates a small amigurumi animal (bunny-like) with a soft body and an insertable squeaker. First, the head and body are crocheted as a single smooth shape; next, the limbs and ears are made separately; finally, everything is sewn together tightly. Finally, a simple embroidered face brings the toy to life.
A squeaker adds gentle interaction, so the toy becomes more than a decoration. For example, a quick squeeze can reward curiosity with a fun sound. Meanwhile, the crocheted fabric stays soft and warm compared with many store-bought plastic toys. Additionally, the small size makes it easy for little hands to grip. However, safety should always come first, so tight stitches and secure assembly matter at every step.
Materials Needed
- Yarn: DK (Category 3) or Worsted (Category 4) cotton or cotton-blend
- Main color: 25–35 g (about 55–80 m / 60–90 yd)
- Accent color: 5–10 g (about 10–20 m / 11–22 yd)
- Crochet hook: 2.75 mm–3.5 mm (choose smaller for tighter fabric)
- Safety eyes: 8 mm (small) or 10 mm (slightly bigger)
- Stuffing: Polyfill, about 10–15 g
- Stitch marker: 1 removable marker (or scrap yarn)
- Needle for assembly: 1 tapestry needle
- Squeaker: 1 insertable squeaker, 35–45 mm (1.4–1.8 in)
- Optional: Keychain ring 25–30 mm, ribbon bow, mini scarf strip
Skill Level
Beginner
Making Time (Overview)
Total estimated time: 1.5 to 2.5 hours.
If sewing is new to you, add another 15–20 minutes because careful assembly is worth it.
Step-by-Step Instructions
Stitches used: magic ring (MR), single crochet (sc), increase (inc), decrease (dec), slip stitch (sl st)
Important: Work in continuous rounds unless stated otherwise, and move the stitch marker each round.
Body (Main Shape)
Part A: Crochet the Head (Rounds 1–12)
- Start the round shape
- Round 1: MR, 6 sc (6)
- Round 2: inc around (12)
- Round 3: (sc, inc) around (18)
- Round 4: (2 sc, inc) around (24)
- Round 5: (3 sc, inc) around (30)
- Round 6: (4 sc, inc) around (36)
- Build head height
- Rounds 7–10: sc around (36)
- Place eyes early (recommended)
- Next, place eyes between Rounds 8 and 9, about 6–7 stitches apart.
- Then, add a small puff of stuffing to support the face.
- Shape into the neck
- Round 11: (4 sc, dec) around (30)
- Round 12: (3 sc, dec) around (24)
Making time: 20–30 minutes
Part B: Crochet the Body (Rounds 13–26)
- Increase to a cute belly
- Round 13: (3 sc, inc) around (30)
- Round 14: (4 sc, inc) around (36)
- Round 15: (5 sc, inc) around (42)
- Add body height
- Rounds 16–20: sc around (42)
- Insert the squeaker securely
- First, stuff the body about halfway.
- Next, wrap the squeaker in a thin layer of polyfill, so the edges feel softer.
- Then, place it into the center of the belly area, slightly toward the front.
- After that, stuff it around firmly so it cannot slide.
- Close the base
- (5 sc, dec) around (36)
- (4 sc, dec) around (30)
- (3 sc, dec) around (24)
- (2 sc, dec) around (18)
- (sc, dec) around (12)
- dec around (6)
Finally, fasten off and close the hole neatly with a needle.
Making time: 35–55 minutes
Limbs
Arms (Make 2)
- Round 1: MR, 6 sc (6)
- Round 2: (sc, inc) around (9)
- Rounds 3–6: sc around (9)
- Next, flatten the opening and 4 sc across to close.
Then, fasten off and leave a long tail.
Time: 8–12 minutes
Legs (Make 2)
- Round 1: MR, 6 sc (6)
- Round 2: inc around (12)
- Round 3: sc around (12)
- Round 4: (2 sc, dec) around (9)
- Rounds 5–7: sc around (9)
- Next, flatten and 4 sc across to close.
Finally, fasten off and leave a long tail.
Time: 12–18 minutes
Additional Parts
Ears (Make 2)
- Round 1: MR, 6 sc (6)
- Round 2: (sc, inc) around (9)
- Round 3: sc around (9)
- Round 4: (2 sc, inc) around (12)
- Rounds 5–12: sc around (12)
- Round 13: (2 sc, dec) around (9)
- Rounds 14–16: sc around (9)
Then, lightly stuff only the bottom third (optional), so the ears stay floppy. Finally, flatten the opening, fasten off, and leave a long tail.
Time: 15–20 minutes
Optional Details (Nose, Mouth, Cheeks)
- Nose: pink yarn, tiny triangle or 2–3 satin stitches
- Mouth: then add a simple “Y” or two short lines
- Cheeks: meanwhile, add a few small blush stitches
Time: 5–10 minutes
Face & Assembly
Face First: Simple Placement That Looks Centered
- First, locate the center between the eyes by counting stitches.
- Next, embroider the nose, because it anchors the mouth.
- Then, stitch the mouth with small, even passes.
- Finally, weave the ends inside the head and trim.
Assembly Order (Easiest and Cleanest)
- Attach ears
- First, pin each ear on top of the head, slightly to the sides.
- Next, sew along the base using tight, close stitches.
- Afterward, tug gently to confirm the seam feels strong.
- Attach arms
- Then, sew arms near the neck transition so they sit naturally.
- Attach legs
- Finally, sew the legs slightly forward on the body so the toy can sit.
- If it tips backward, shift legs forward a stitch or two.
No-gap tips for beginners
- First, use a smaller hook for amigurumi fabric, because tight stitches reduce holes.
- Next, avoid overstuffing near seams, since stuffing can push stitches apart.
- Also, sew through multiple rounds, not just one, so parts feel anchored.
Assembly time: 25–40 minutes
Special Features
- Texture: Soft, squishy body that feels cozy to squeeze
- Expression: Minimal embroidery creates a sweet, playful face
- Size: Small enough for a keychain (optional) or a tiny nursery basket toy
Sizing Tips
- If DK yarn and a 2.75–3.0 mm hook are used, the toy becomes smaller and tighter.
- If worsted yarn and a 3.25–3.5 mm hook are used, the toy becomes slightly bigger.
- However, if the hook is increased too much, gaps may appear; therefore, prioritize tight stitches over speed.
Finishing Tips
- First, use invisible decreases for a smoother look.
- Next, weave tails through several stitches inside the body.
- Then, knot discreetly and hide the knot by pulling it into the stuffing.
- Finally, shape the toy by gently rolling it in the hands.
Common Mistakes to Avoid
- Loose stitches: Gaps can show stuffing; therefore, size down the hook.
- Unsecured squeaker: If it slides, the belly shape can warp; instead, cushion it with stuffing.
- Weak sewing: If parts wobble, add more stitches and sew through multiple rounds.
Variations & Customization Ideas
- First, switch the colors to a spotted bunny or a pastel palette.
- Next, swap ears to create a bear (small, round ears) or a cat (pointy ears).
- Add accessories like a tiny scarf, a bow, or a stitched-on heart.
- Finally, resize by increasing both the arm weight and the Quaker size to achieve a balanced look.
Tutor Suggestions
- First, count stitches every round because missed counts can quickly change the shaping.
- Next, pause every few rounds to check tension and correct early.
- Meanwhile, pin pieces before sewing, so placement stays symmetrical.
- Finally, enjoy experimenting slowly, adding one customization at a time.
Conclusion for ( Crochet Children’s Toy Amigurumi )
A handmade amigurumi squeaker is small, sweet, and surprisingly fun to crochet from start to finish. Because the shaping is simple and the steps are repeatable, this crochet squeaker tutorial is a cozy beginner project that still looks polished when finished. Next, try different animal ears, playful colors, or tiny accessories, and then build a whole set of squeaky crochet friends as charming gifts for children.