Fantastic Crochet Hippopotamus Amigurumi Easy Hippo Pattern for Rookies
A soft crochet hippopotamus amigurumi is one of those projects that instantly makes a crochet basket feel happier. Because the shape is round and forgiving, this little plush comes together smoothly, even for first-time amigurumi makers.
Most importantly, this amigurumi hippo pattern keeps everything simple: basic rounds, easy increases, and small parts that attach without stress. As a result, the finished crochet hippo plush looks sweet, chubby, and gift-ready.
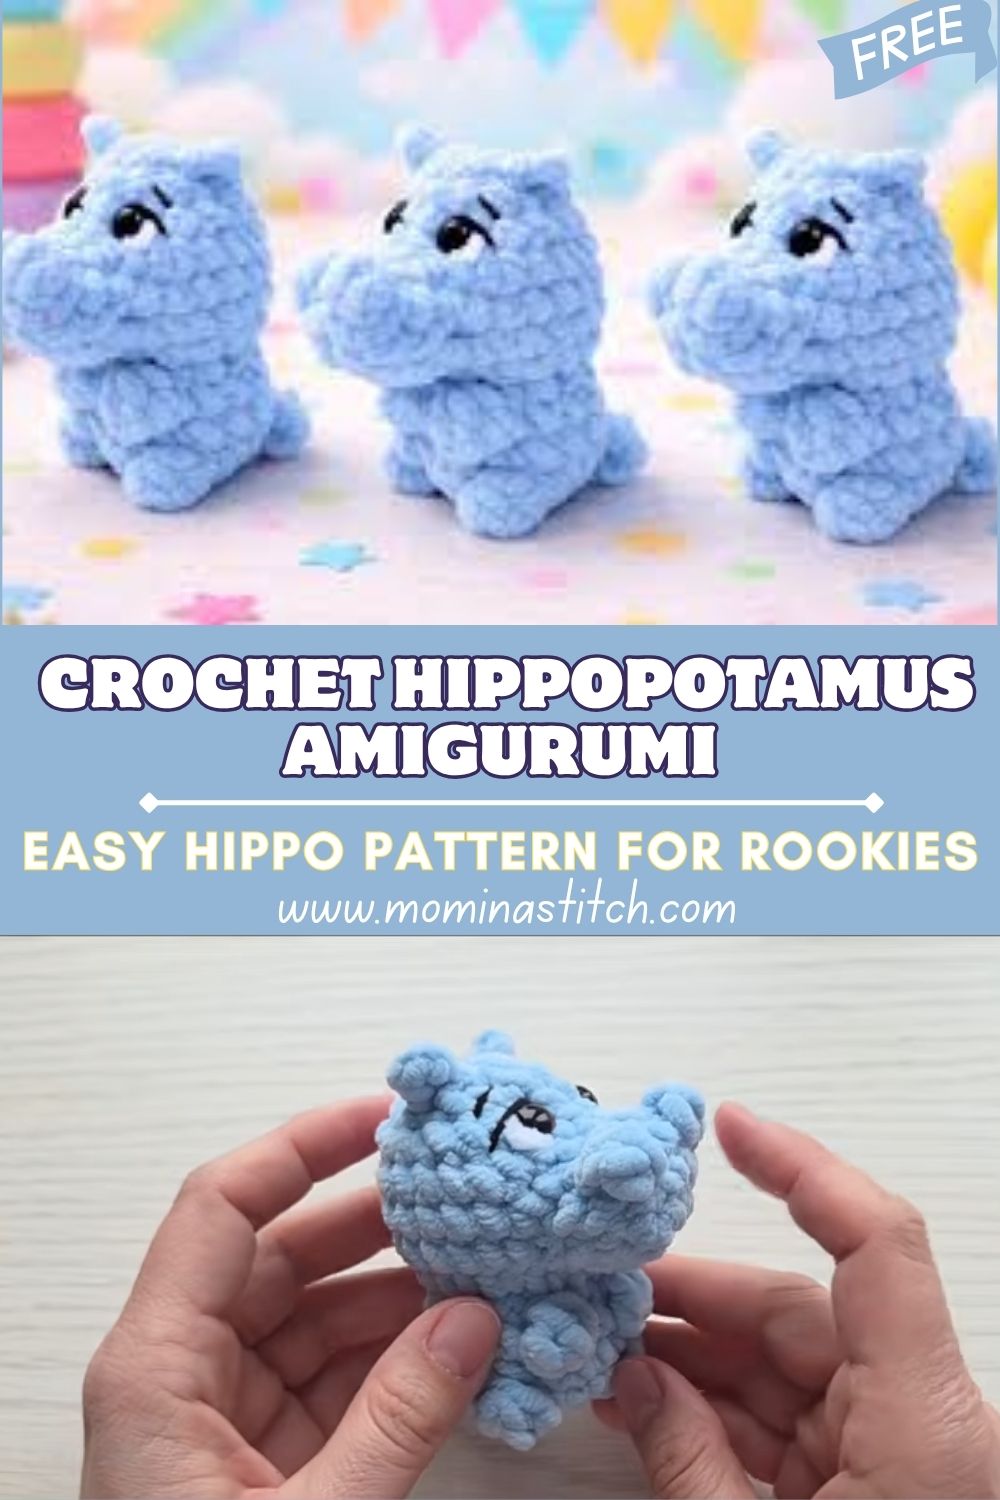
Meanwhile, crochet hippos have been popping up everywhere in the amigurumi world because they are naturally adorable. Their tiny ears, wide snout, and round “marshmallow” bodies look cute in almost any color. In addition, hippos suit minimalist details, so a beginner can keep the face simple and still get an expressive result.
This crochet hippopotamus pattern is especially beginner-friendly because the body is a single, chubby form with gentle shaping. Furthermore, it is a quick, calming project that helps build confidence with counting stitches. Later, the hippo becomes a perfect handmade gift, a soft plush toy for a nursery, or a cheerful desk buddy. Finally, the repetitive rounds feel relaxing, which makes the whole process a stress-relieving hobby from start to finish.
Materials Needed
- Yarn (body): Super bulky (6) plush/chenille yarn, 100 g / 120 m in pastel blue or soft gray
- If using worsted (4) acrylic/cotton instead, plan 50 g / 90–110 m
- Yarn (details):
- Black yarn (or embroidery floss) 5 g / 10 m for nostrils and smile
- White yarn 5 g / 10 m (optional) for tiny eye highlights
- Crochet hook: 5.0 mm (for super bulky plush yarn)
- Alternative: 3.25–3.5 mm if using worsted yarn for tighter stitches
- Safety eyes: 8 mm (small, plush-toy size)
- Alternative: 6 mm for a mini version
- Stuffing: Polyester fiberfill (polyfill) 25–35 g (adjust as needed)
- Stitch markers: 1–2 markers (or a scrap piece of yarn)
- Yarn needle: Blunt tapestry needle for sewing parts
- Optional: 2.5 cm (1 inch) keychain ring for a mini hippo
Skill Level: Beginner
Making Time (Overview)
Total estimated time: 2.5 to 4 hours, depending on yarn thickness, stitching speed, and assembly comfort.
Step-by-Step Instructions
Important notes before starting:
- Work in continuous rounds unless stated otherwise.
- Use a stitch marker to mark the first stitch of each round.
- Keep stitches tight and even to prevent stuffing from showing.
Abbreviations:
- MR = magic ring
- sc = single crochet
- inc = increase (2 sc in same stitch)
- dec = decrease (single crochet 2 together)
- st(s) = stitch(es)
- sl st = slip stitch
Body (Main Shape)
Making time: about 60–90 minutes
- Start with the base (round belly):
- Round 1: MR, 6 sc (6)
- Round 2: inc in each st (12)
- Round 3: (sc, inc) repeat 6 times (18)
- Round 4: (2 sc, inc) repeat 6 times (24)
- Round 5: (3 sc, inc) repeat 6 times (30)
- Build the body (chubby shape):
6. Rounds 6–10: sc around (30)- Round 11: (3 sc, dec) repeat 6 times (24)
- Round 12: sc around (24)
- Round 13: (2 sc, dec) repeat 6 times (18)
- Round 14: sc around (18)
- Round 15: (sc, dec) repeat 6 times (12)
- Stuff and close (smooth finish):
12. Begin stuffing firmly, then shape the sides with fingers so the body stays round.- Round 16: dec repeat 6 times (6)
- Cut yarn, leave a long tail, and close the opening neatly with a needle.
Beginner tip: Stuff in small pinches. After that, press and roll the body gently to remove lumps before fully closing.
Additional Parts
Head shaping (optional separate head)
This pattern can be made as a “one-piece body,” which is easiest. However, if a separate head is preferred, a small rounded head adds extra cuteness.
Making time: 35–50 minutes
- Round 1: MR, 6 sc (6)
- Round 2: inc around (12)
- Round 3: (sc, inc) repeat 6 times (18)
- Round 4: (2 sc, inc) repeat 6 times (24)
- Rounds 5–7: sc around (24)
- Round 8: (2 sc, dec) repeat 6 times (18)
- Round 9: (sc, dec) repeat 6 times (12)
- Start stuffing; then Round 10: dec repeat 6 times (6)
- Close and leave a sewing tail.
Attachment: Center the head on top of the body; next, pin it in place with a strand of yarn. After that, whip stitch around, pulling snugly for a clean seam.
Ears (make 2)
Making time: 10–15 minutes total
- Round 1: MR, 6 sc (6)
- Round 2: (sc, inc) repeat 3 times (9)
- Round 3: sc around (9)
- Flatten the ear; then sc through both layers across the top with 4 sc to seal.
- Leave a tail for sewing.
Placement tip: Place ears slightly to the sides rather than straight on top. As a result, the hippo looks softer and more “baby-like.”
Legs (make 4)
Making time: 25–35 minutes total
- Round 1: MR, 6 sc (6)
- Round 2: inc around (12)
- Rounds 3–4: sc around (12)
- Lightly stuff the bottom half only; then flatten the opening.
- Close with 6 sc through both layers. Leave a long sewing tail.
Balance tip: Keep all four legs the same height. Meanwhile, avoid overstuffing, because stiff legs can make the hippo wobble.
Face & Assembly
Making time: 30–45 minutes
- Attach safety eyes evenly
- Position eyes between Rounds 7–9 of the head/body area (depending on whether a separate head is used).
- Space them about 6–7 stitches apart.
- Then, check the expression from a distance before locking the backs.
- Add the hippo nose and tiny details
- Using black yarn, embroider two small nostrils centered below the eyes.
- After that, add a short curved mouth line (optional) for a gentle expression.
- If desired, stitch a tiny white highlight on one side of each eye.
- Sew on ears
- Pin ears first; next, stitch them securely with small, even whip stitches.
- Afterwards, weave the yarn tail inside the head and trim.
- Sew on legs
- Place two legs near the front underside and two near the back underside.
- Then, align them so the hippo sits flat.
- Finally, stitch each leg firmly, especially at the corners, for durability.
- Final shaping
- Adjust stuffing by pushing it gently into low spots with the blunt end of the hook.
- After that, tug seams lightly to smooth the surface.
- Lastly, hide all yarn ends inside the body so everything looks neat.
Beginner-friendly assembly tip: Use pins or temporary basting stitches first. As a result, parts can be repositioned before the final seam is tightened.
Special Features
- Texture: Soft, plush, and slightly textured, especially with chenille yarn
- Expression: Gentle baby-hippo look with wide-set eyes and simple stitched details
- Shape: Small, chubby body that enhances cuteness and makes the plush extra cuddly
Sizing Tips
Yarn thickness and hook size change the final hippo size dramatically. For example, super bulky plush yarn with a 5.0 mm hook typically creates a hippo about 12–16 cm (5–6.5 inches) tall. Meanwhile, worsted yarn with a 3.25 mm hook often creates a smaller, firmer hippo around 9–12 cm (3.5–5 inches). Additionally, using a smaller hook than recommended helps keep stitches tight, which prevents gaps and improves the toy’s shape.
Finishing Tips
- Keep stitches tight and even to avoid holes.
- Hide yarn ends neatly by weaving through several stitches, then trimming inside.
- Shape stuffing evenly; meanwhile, add more stuffing to the cheeks/belly for a rounded look.
- Ensure symmetrical placement of ears and legs by counting stitches and checking from the front, side, and back.
Common Mistakes to Avoid
- Loose stitches creating gaps: Switch to a smaller hook or tighten tension.
- Uneven stuffing: Add small pinches gradually; after that, smooth the surface by rolling the plush.
- Misaligned facial features: Place eyes first, then embroider the nose centered between them.
- Skipping stitch markers: Mark the start of each round; otherwise, round counts drift easily.
Variations & Customization Ideas
- Try pastel colors like pink, lavender, mint, or buttery yellow for a baby-hippo theme.
- Add blush cheeks using pink yarn or a tiny dab of fabric-safe blush.
- Create a mini keychain version by using thinner yarn, smaller eyes, and a keychain ring sewn to the top.
- Make a larger plush by using thicker yarn and scaling up the hook size.
- Add accessories like a small bow, a scarf, or a sleepy eye mask for extra personality.
Tutor Suggestions
- Maintain consistent tension throughout; then the body looks smooth and polished.
- Take extra care with small parts like ears and legs; after that, assembly becomes much easier.
- Practice basic stitches (sc, inc, dec) on a small swatch before starting.
- Stay patient and enjoy the process, because amigurumi improves quickly with each finished toy.
Conclusion for ( Crochet Hippopotamus Amigurumi )
A sweet crochet hippo is the kind of project that turns a simple ball of yarn into something genuinely comforting. First, the rounded body builds confidence; next, the tiny ears and legs add personality; finally, the gentle face brings the whole crochet hippopotamus amigurumi to life. Experiment with colors, adjust the size, and enjoy creating a soft little friend that feels special precisely because it is handmade.