Crochet Mini Cat Keychain Amigurumi Pattern Step-by-Step for Absolute Beginners
Tiny crochet cats have a special kind of charm small enough to fit in a palm, yet full of personality. First, the rounded little body gives that “squishy plush” look, and next, the soft yarn makes the whole cat feel extra cozy and fluffy.
Even better, a Crochet Tiny Cat keychain amigurumi is an everyday cuteness upgrade. After that quick crochet session, the finished cat can clip onto keys, backpacks, pencil cases, or gift bags, which makes it a perfect beginner project with a useful result.
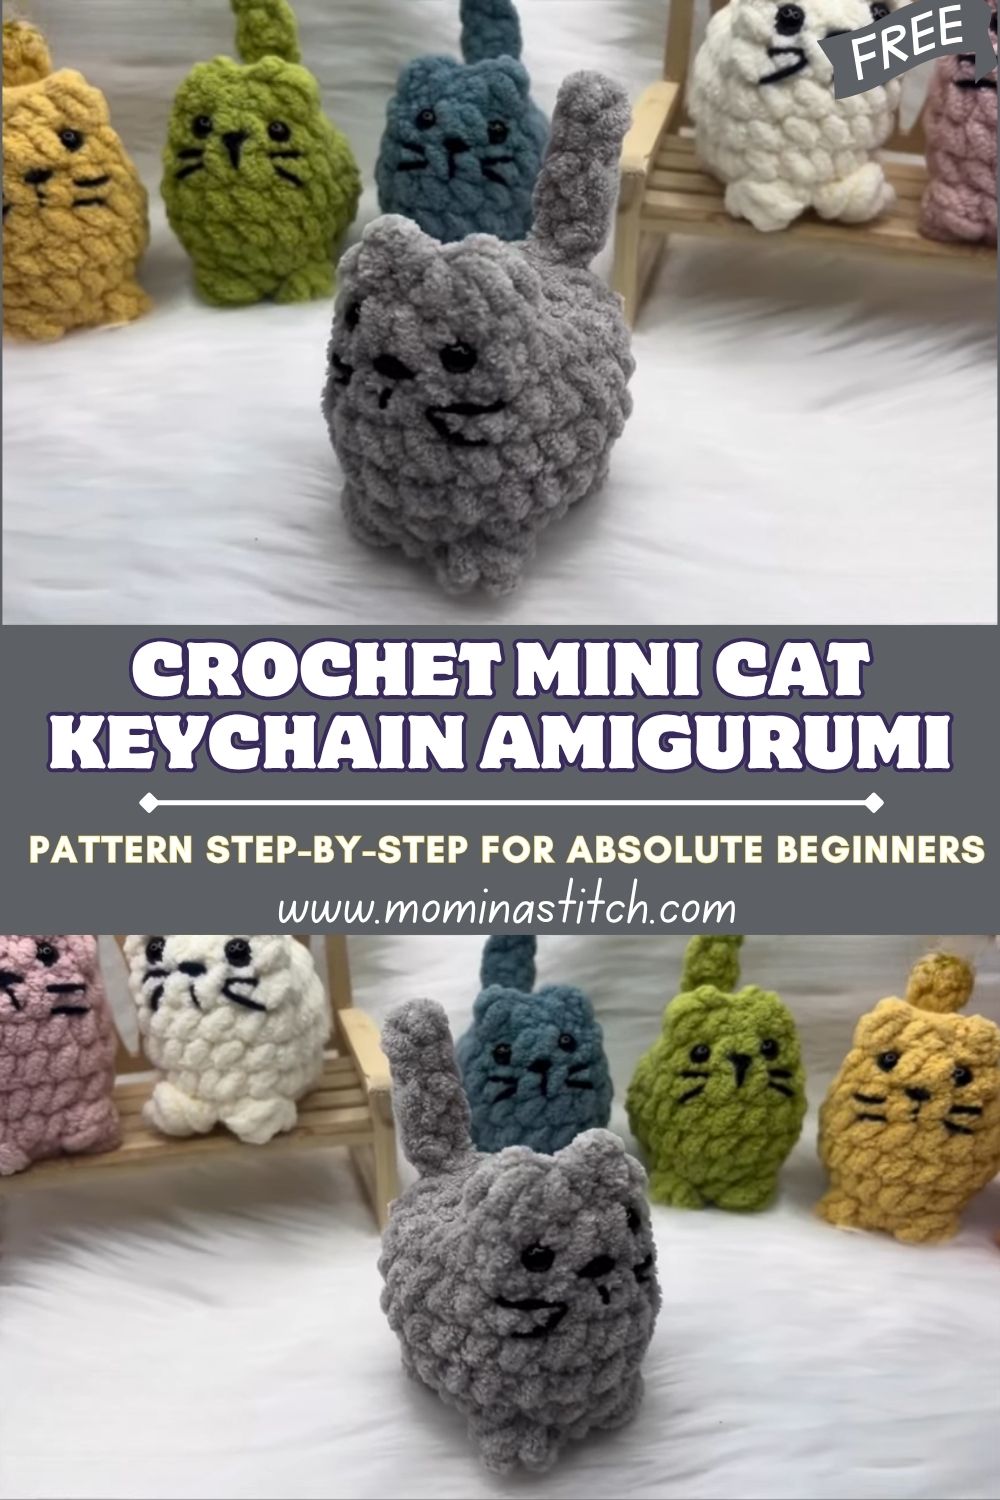
Tiny crochet cats are trending because they are fast, adorable, and easy to customize. Meanwhile, cats look cute in almost any color, so even leftover yarn can become something irresistible. As a result, beginners love cat patterns because they feel playful and forgiving.
This amigurumi cat pattern is especially beginner-friendly because it is mostly one piece with minimal sewing. First, the body is worked in rounds; next, simple bobble-style bumps can form tiny legs; after that, a small tail is added; finally, the opening is closed with a quick seam that also shapes the ears. The finished cat works as a keychain, a bag charm, or a sweet handmade gift.
Materials Needed
- Yarn (choose one option):
- Plush/chenille/super bulky yarn (#6) for a fluffy look: 20–30 g in main cat color
- Cotton or acrylic worsted (#4) for a neat finish: 15–25 g in main cat color
- Black yarn (for face embroidery): 1–2 g (small scrap)
- Crochet hook: 3.5 mm–5 mm
- Use 3.5–4.5 mm for worsted cotton/acrylic
- Use 4.5–5 mm for plush/chenille (or go 1–2 sizes smaller than the label for tighter stitches)
- Safety eyes: 6–10 mm (most keychain sizes look great with 7–8 mm)
- Stuffing: polyfill, 10–15 g
- Stitch markers: 1–2
- Yarn needle: for closing and weaving in ends
- Scissors
- Keychain ring or lobster clasp: 1 (optional but recommended)
Skill Level
Beginner / Easy (simple stitches, simple shaping, and low-sew finishing)
Making Time (Overview)
Around 1–2 hours from start to keychain-ready finish, depending on yarn type and embroidery details.
Step-by-Step Instructions
Quick Pattern Notes (Before Starting)
- Work in continuous rounds unless told otherwise.
- Keep stitches tight for a clean plush look.
- Common stitches:
- sc = single crochet
- inc = increase (2 sc in the same stitch)
- dec = decrease (single crochet two together / invisible decrease)
- sl st = slip stitch
- bobble = a small puff/bobble stitch used here as “leg bumps” (optional style)
Body (Main Shape)
1. Start with a magic ring
- First, make a magic ring.
- Next, crochet 8 sc into the ring.
- After that, pull tight and place a stitch marker in the last stitch.
If magic ring feels tricky, a beginner substitute works too: chain 2, then work the first round into the first chain.
2. Build the body
This cat is a tiny, compact plush, so the increases are small and controlled.
- Round 2: increase around (16 stitches total).
- Round 3: (sc, inc) around (24 stitches total).
- Rounds 4–6: sc around (keep 24 stitches each round).
Meanwhile, pause and gently squeeze the shape. At this stage, it should look like a small rounded block—perfect for a tiny cat plush.
3. Stuff and close
- Next, begin decreasing gradually so the top closes neatly:
- Round 7: (2 sc, dec) around (18 stitches).
- Round 8: (sc, dec) around (12 stitches).
- After that, add stuffing little by little, pushing it into corners and edges so the cat looks evenly rounded.
- Finally, decrease until the opening is small, then fasten off leaving a long tail for sewing.
Making time (body): about 35–55 minutes.
Additional Parts
Ears
This design can be low-sew because the top seam can create two ear points.
Option A (Low-sew ear shaping):
- First, flatten the top opening so it becomes a straight line.
- Next, stitch across the top to close.
- After that, add two small pinch stitches near the left and right edges to create ear points.
Option B (Separate ears, if preferred):
- Make 2 small triangles:
- Start with 3 sc in a magic ring, then increase slightly (tiny and simple).
- Next, sew them onto the top corners.
Making time (ears): 10–15 minutes.
Legs (Optional minimal style)
For a keychain cat, tiny legs can be made as small bumps instead of separate pieces.
Bump-leg method (no extra parts):
- First, add 4 bobble bumps around the lower body while crocheting one round.
- Next, flip the bobbles outward so they pop like tiny paws.
- After that, continue normal single crochet rounds.
Alternatively, if bobbles are not preferred, simply skip leg shaping entirely—the cat will still look adorable as a smooth plush.
Making time (optional legs): 10–15 minutes.
Face & Assembly
1. Attach safety eyes evenly
- First, decide the “front” of the cat.
- Next, place safety eyes between the mid and upper rounds, spacing them evenly (usually 5–7 stitches apart, depending on size).
- After that, check the expression before locking the backs.
Beginner symmetry tip: Count stitches from the center line so both eyes sit at the same height.
2. Embroider nose, mouth, and whiskers
- Next, use black yarn (or embroidery thread) to stitch a tiny nose.
- After that, add a simple mouth line and short whiskers on each side.
- Finally, keep stitches small and tidy so the face stays cute rather than crowded.
3. Final shaping before closing
- Meanwhile, adjust stuffing by adding tiny bits where the face looks flat.
- After that, smooth the body shape with gentle squeezing and rolling.
- Finally, close the opening securely and weave ends inside.
Making time (face + assembly): 20–35 minutes.
Special Features
- Texture: Soft, fluffy, and plush-like (chenille yarn makes it extra cuddly).
- Expression: Easily changed sleepy, curious, or playful—just by eye spacing and mouth curve.
- Shape: Tiny, rounded, and compact, which is ideal for pockets, bags, and keychains.
Sizing Tips
Yarn choice changes everything. First, plush or chenille yarn makes a larger, squishier cat with fewer visible stitches. Next, cotton yarn creates a smaller, more defined shape with crisp edges. Meanwhile, a smaller hook tightens stitches and reduces holes, which is especially helpful for keychain items that get handled often. Finally, if the cat looks too big for a keychain, switching to thinner yarn and a smaller hook will shrink it quickly.
Finishing Tips
- First, keep stitches tight and consistent so stuffing never shows.
- Next, hide yarn ends by weaving them through the inside and trimming carefully.
- After that, secure the tail and any ear shaping with a few extra stitches.
- Finally, shape evenly while stuffing by adding small pieces instead of one big clump.
Common Mistakes to Avoid
- Loose stitches causing holes: Use a smaller hook and keep tension steady.
- Uneven stuffing: Add stuffing in small layers and smooth as the body fills.
- Misaligned eyes or ears: Count stitches and pin placements before committing.
- Skipping stitch markers: Mark the last stitch of each round so increases and decreases stay perfectly placed.
Variations & Customization Ideas
- First, try classic cat shades like gray, white, orange, or black.
- Next, add stripes, spots, or a two-tone belly for extra character.
- After that, make a mini version for zipper pulls or a larger version for a desk plush.
- Finally, add accessories like a tiny bow, a little scarf, or a bell stitch on the collar area.
Tutor Suggestions
- First, maintain consistent tension from the start because small projects show uneven stitches quickly.
- Next, take extra care shaping the face, since tiny embroidery changes the whole personality.
- After that, practice bobbles and decreases on a small swatch if they feel new.
- Finally, stay patient and enjoy the process—tiny amigurumi is quick, satisfying, and perfect for skill-building.
Conclusion FOR ( Crochet Mini Cat Keychain Amigurumi )
A Crochet Tiny Cat keychain amigurumi is the kind of project that feels cute, useful, and relaxing all at once. First, the small size makes it beginner-friendly; next, the simple shaping keeps it stress-free; after that, the little face details bring it to life in seconds. Finally, try different colors, experiment with expressions, and keep a few finished cats ready for sweet handmade gifts and cheerful everyday charms.