Crochet Christmas Penguin Amigurumi – Step-by-Step Pattern
Looking for a Crochet Christmas Penguin Amigurumi project that’s cute, quick, and festive? This beginner-friendly amigurumi crochet tutorial shows you how to make a cozy winter penguin with a tiny hat—perfect for holiday decor, handmade gifts, or a sweet crochet winter toy.
Crochet Christmas Penguin Amigurumi is a fun way to combine holiday crafting with the adorable world of amigurumi. Amigurumi is a Japanese art form that involves crocheting small, stuffed yarn characters using simple stitches worked in the round. Penguins are especially popular for winter and Christmas crochet crafts because they naturally fit snowy themes, look charming in festive colors, and pair perfectly with extras like hats, scarves, and pom-poms.
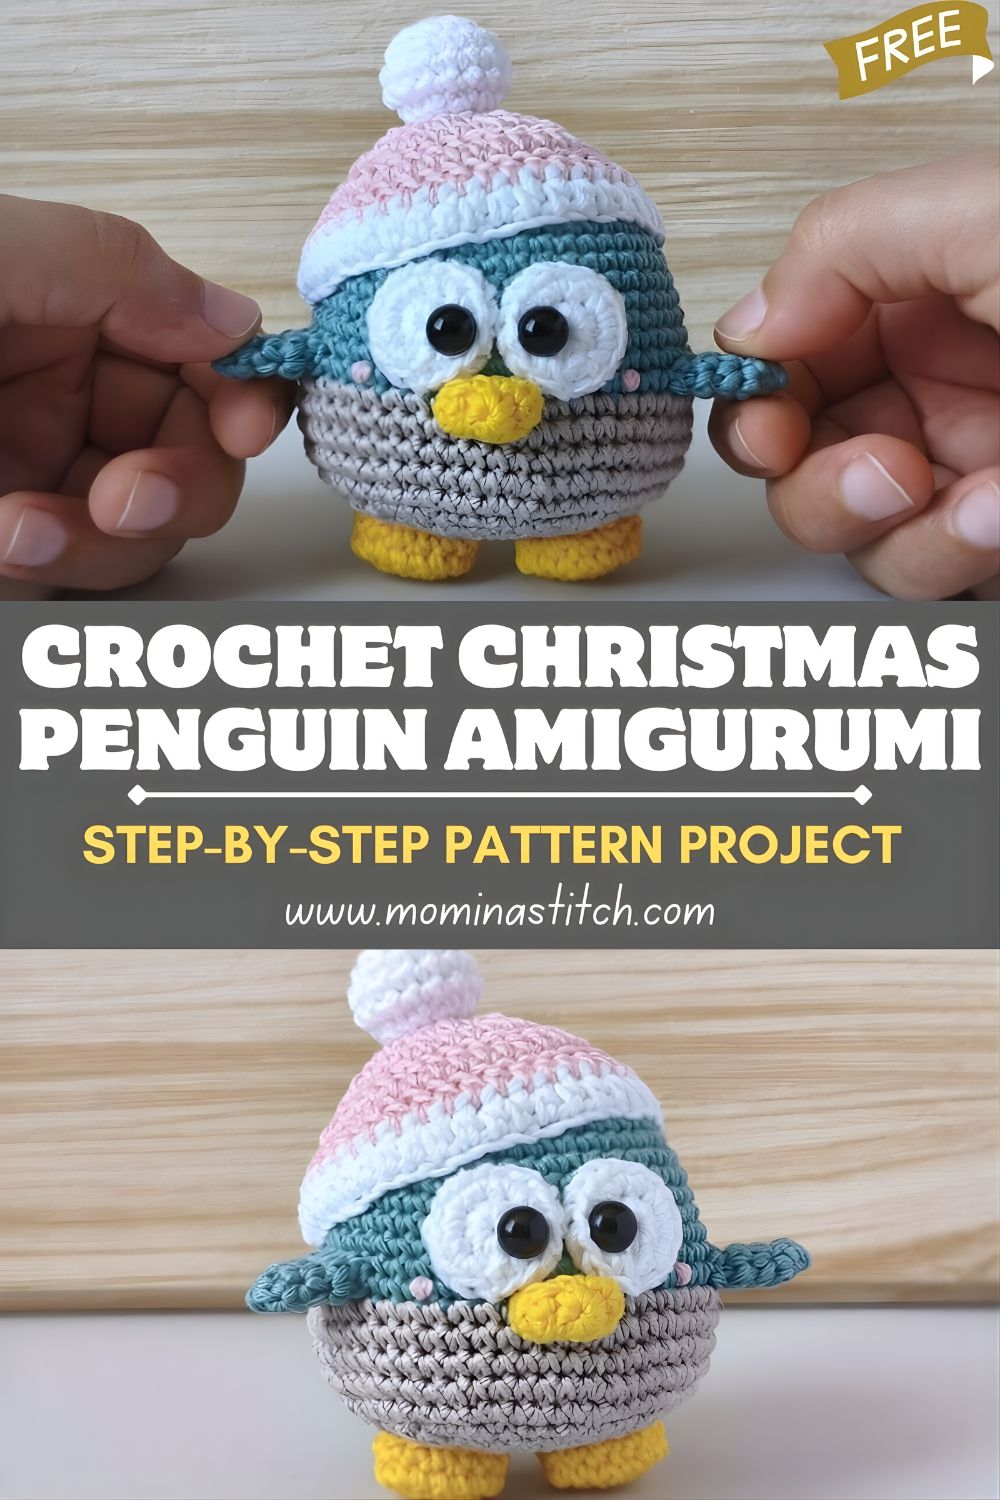
This crochet penguin pattern is beginner-friendly because it uses basic techniques—single crochet, increases, decreases, and simple sewing—while staying small and manageable. In this step-by-step tutorial, you’ll learn how to crochet the penguin’s body, belly patch, wings, feet, beak, and a Christmas hat, then assemble everything neatly so your penguin stands balanced and gift-ready.
3. Materials Needed
Here’s what you’ll need for this Christmas penguin amigurumi crochet project:
- Crochet hook (2.5 mm – 3.5 mm): Smaller hooks help create tight stitches, so stuffing won’t show.
- Yarn colors:
- Grey: main body color
- White: belly patch (and pom-pom/hat trim if desired)
- Yellow/Orange: beak and feet
- Pink/White: Christmas hat
Many amigurumi patterns work best with cotton or acrylic yarn for clean stitch definition.
- Safety eyes (8–10 mm): Gives a cute, polished look (or embroider eyes if preferred).
- Fiberfill stuffing: Fills the body so the penguin is plush and holds its shape.
- Yarn needle: For sewing parts together and weaving in ends.
- Stitch marker: Helps track rounds so beginners don’t lose their place.
- Scissors: For cutting yarn neatly.
4. Crochet Abbreviations
| Abbreviation | Meaning | Beginner Explanation |
|---|---|---|
| MR | Magic Ring | An adjustable loop to start crocheting in the round |
| sc | Single Crochet | Your main stitch for amigurumi |
| inc | Increase | Work 2 single crochets into the same stitch |
| dec | Decrease | Combine two stitches into one (single crochet two together) |
| ch | Chain | Creates a starting chain (used for the hat) |
| sl st | Slip Stitch | A joining stitch, often used to close rounds |
| st | Stitch | One completed crochet stitch |
| R | Round | One full circle of stitches |
5. Christmas Penguin Amigurumi Pattern (Step-by-Step)
Body (Grey)
Work in continuous rounds (use a stitch marker).
- R1: 6 sc in magic ring (6)
- R2: inc ×6 (12)
- R3: (1 sc, inc) ×6 (18)
- R4: (2 sc, inc) ×6 (24)
- R5: (3 sc, inc) ×6 (30)
- R6–10: sc around (30)
Start stuffing the body firmly but not overstretched.
- R11: (3 sc, dec) ×6 (24)
- R12: (2 sc, dec) ×6 (18)
- R13: (1 sc, dec) ×6 (12)
- R14: dec ×6 (6)
Fasten off, close the opening, and weave in the end.
Belly Patch (White)
- R1: 6 sc in MR (6)
- R2: inc ×6 (12)
- R3: (1 sc, inc) ×6 (18)
Fasten off, leave a long tail for sewing. Sew centered on the front of the body.
Wings (Make 2, Grey)
- R1: 6 sc in MR (6)
- R2: (1 sc, inc) ×3 (9)
- R3–4: sc around (9)
Fasten off, leave a tail. Flatten each wing and sew it to the sides of the body.
Feet (Make 2, Yellow/Orange)
- R1: 6 sc in MR (6)
- R2: inc ×6 (12)
- R3: sc around (12)
Fasten off, leave a tail. Lightly stuff if desired, then sew to the bottom so the penguin can sit/stand evenly.
Beak (Yellow/Orange)
- R1: 4 sc in MR (4)
- R2: (1 sc, inc) ×2 (6)
Fasten off, leave a tail. Sew to the face centered above the belly patch.
Eyes
- Attach 8–10 mm safety eyes between rounds 6–7 (spacing to your preference).
- If making for small children, embroider eyes with black yarn instead of using safety eyes.
Christmas Hat (Pink + White Pom-Pom)
With pink yarn:
- R1: ch 20 and join in round (be careful not to twist)
- R2–5: sc around
- R6: (3 sc, dec) repeat around
- R7: (2 sc, dec) repeat around
Close the top by threading the yarn tail through the remaining stitches and pulling tight. Add a white pom-pom (or a small crochet bobble) at the tip.
6. Assembly Instructions
To assemble your Christmas penguin amigurumi neatly:
- Sew the belly patch onto the front center of the body.
- Attach the wings on each side, slightly behind the belly patch edge, so that they look natural.
- Sew the feet to the bottom front area so the penguin sits balanced (check placement before final stitching).
- Attach the beak in the center of the face, below the eyes.
- Add the eyes (safety eyes or embroidered).
- Place the Christmas hat on top and sew a few small stitches to secure it.
Proper placement—especially of the feet—helps your penguin stand/sit without tipping.
7. Beginner Tips
- Use a stitch marker at the start of every round to avoid losing count.
- Stuff gradually (a little at a time) to prevent lumps and gaps.
- Keep stitches tight (use a slightly smaller hook if needed), so fiberfill doesn’t show through.
- Count stitches every round—most amigurumi issues come from missed increases/decreases.
8. Conclusion
This Christmas Penguin Amigurumi Crochet pattern is a cheerful project you can finish for the holidays and customize endlessly. Try different hat colors, add a tiny scarf, or even make a whole penguin family for your winter display.