Cute Crochet Bunny Keychain Easy Amigurumi Pattern for Beginners
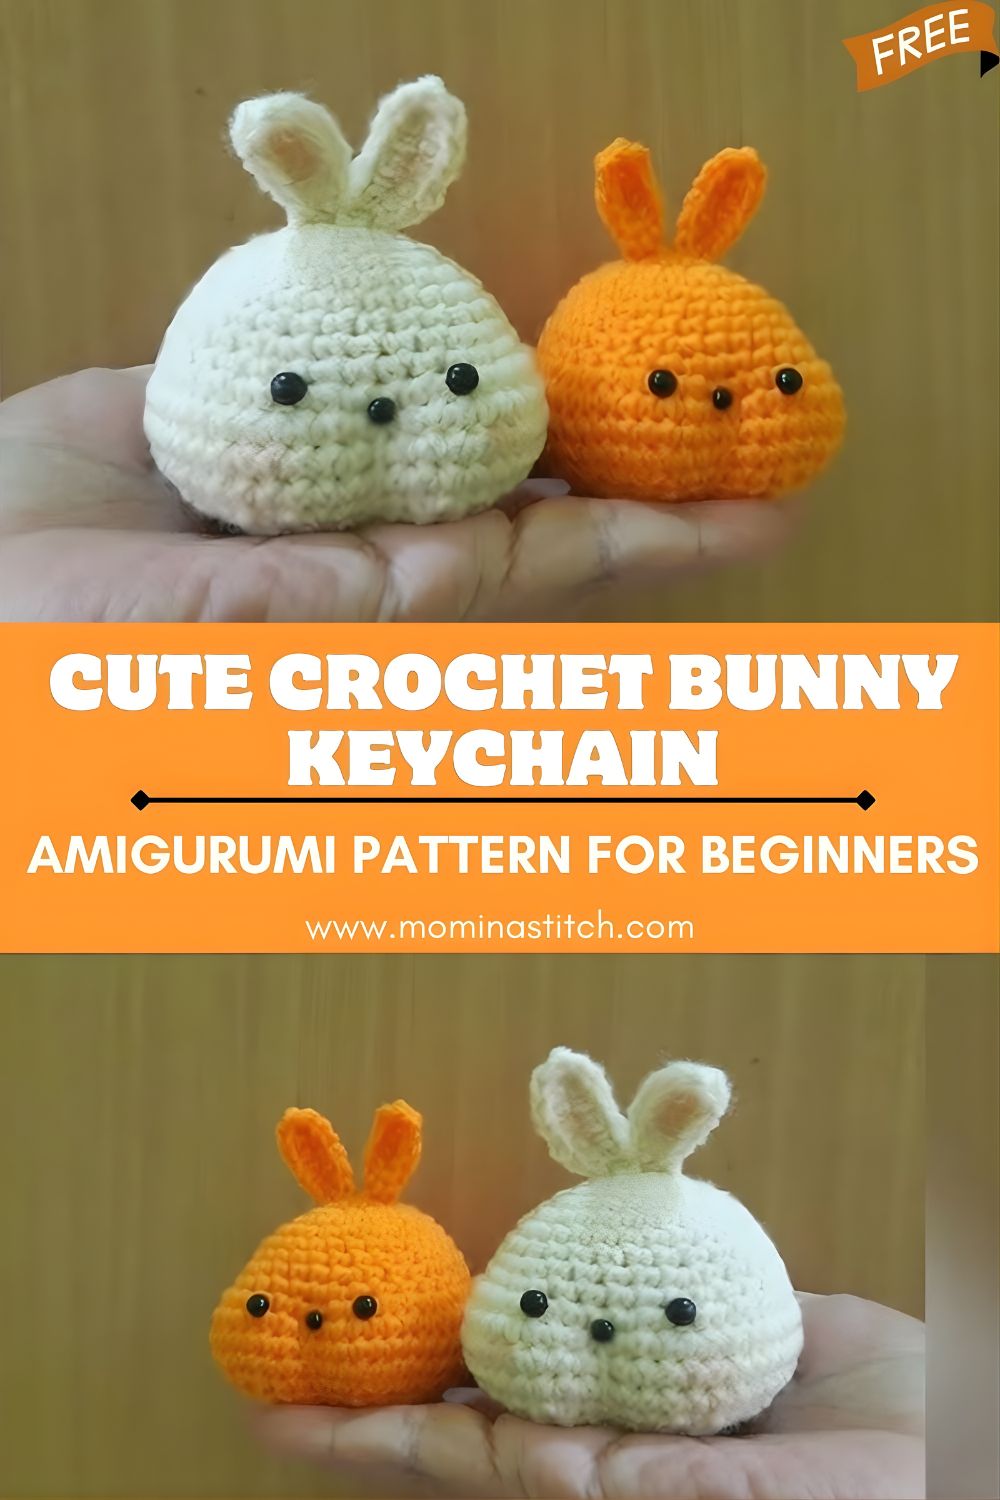
These tiny amigurumi bunny keychains are the kind of project you can make in one sitting, and they look irresistibly cute clipped to keys, backpacks, or pencil cases. With a simple round body, sweet safety eyes, and upright ears (just like in the Crochet Bunny Keychain Easy Amigurumi ), this is a beginner-friendly pattern that teaches core amigurumi skills without feeling overwhelming.
Amigurumi is the art of crocheting small, stuffed shapes, most often animals,s using tight single crochet stitches worked in the round. It’s popular because the pieces are small, portable, and quick to finish, yet they look impressively polished when done. Crochet bunny keychains are especially loved as handmade gifts: they’re cute, seasonal (hello spring and Easter), and practical since they double as a bag charm or key accessory.
This pattern is ideal for beginners who know basic stitches (single crochet, increases, decreases) and for intermediate crocheters who want a fast, satisfying make. In this tutorial-style post, you’ll learn how to crochet a small round bunny body, place safety eyes securely, stuff and close your amigurumi neatly, make upright bunny ears, and attach a keychain ring so your bunny is ready to travel everywhere with you.
Finished Size
Using DK or light worsted yarn with a 2.5–3.0 mm hook, your bunny keychain will be approximately 2.5–3.5 in (6–9 cm) tall (not including the keychain hardware). Size will vary depending on your yarn thickness and tension.
Materials Needed
- Yarn: DK/light worsted cotton or acrylic
- Colors shown in the image: cream/white and orange (use any colors you love)
- Crochet hook: 2.5 mm–3.0 mm (smaller hook = tighter stitches for amigurumi)
- Safety eyes: 6 mm black (or 5 mm for a smaller face)
- Fiberfill stuffing
- Yarn needle (tapestry needle)
- Stitch marker (or a scrap of yarn)
- Keychain ring (split ring or lobster clasp)
- Scissors
- Optional: pink embroidery floss for nose, blush/pastel chalk, thin thread for whiskers
Crochet Abbreviations
- MR – Magic Ring
- sc – Single Crochet
- inc – Increase (2 sc in same stitch)
- dec – Decrease (sc2tog; invisible decrease recommended)
- ch – Chain
- sl st – Slip Stitch
- st – Stitch
Notes (important for beginners):
- Work in continuous rounds (do not join) unless stated.
- Use a stitch marker in the first stitch of each round.
- Stitch counts are shown in parentheses: ( ).
Crochet Bunny Amigurumi Pattern (Step-by-Step)
Body / Head (one piece)
This bunny is a simple “ball body” with the face placed in the upper half—perfect for keychains.
Round 1: 6 sc in MR (6)
Round 2: inc in each st (12)
Round 3: (1 sc, inc) repeat x6 (18)
Round 4: (2 sc, inc) repeat x6 (24)
Round 5: (3 sc, inc) repeat x6 (30)
Rounds 6–8: sc in each st around (30)
You should now have a smooth, rounded cup shape forming.
Safety Eye Placement
- Insert 6 mm safety eyes between Rounds 7 and 8 (or 6 and 7 if you want them slightly higher).
- Place them about 5–6 stitches apart.
- Tip: Before clicking the backs on, make sure the face looks centered. You can pin the ears first to preview the expression.
Round 9: (3 sc, dec) repeat x6 (24)
Round 10: (2 sc, dec) repeat x6 (18)
Start Stuffing
- Begin stuffing firmly now.
- Push stuffing into the bottom and sides so the bunny stays round and not lumpy.
Round 11: (1 sc, dec) repeat x6 (12)
Add a little more stuffing—this is your last easy chance to shape it well.
Round 12: dec repeat x6 (6)
Fasten off, leaving a long tail. Thread the tail on a yarn needle, weave through the front loops of the last 6 stitches, pull tight to close, and weave in the end.
Bunny Ears Pattern (Make 2)
These ears are designed to stand upright like the bunnies in the image.
Round 1: 4 sc in MR (4)
Round 2: (sc, inc) repeat x2 (6)
Round 3: sc around (6)
Round 4: (2 sc, inc) repeat x2 (8)
Rounds 5–8: sc around (8)
Sl st to finish. Fastenoffo,ff leaving a long tail for sewing.
Optional ear shaping (recommended):
- Do not stuff the ears.
- Flatten the ear base and add 1–2 small stitches through the bottom edge to keep it slightly pinched—this helps it stand more neatly.
Assembly Instructions
1) Attach the Ears
- Pin the ears to the top of the head, roughly spanning Rounds 3–6 (adjust for your preferred look—closer together looks “kawaii,” farther apart looks more natural).
- Sew each ear on using the yarn tail. Stitch around the base of the ear securely.
- Make a few extra stitches at the back of each ear to encourage an upright position.
2) Add Face Details (Optional but adorable)
- Nose: embroider a small triangle or “V” shape between the eyes using pink floss or matching yarn.
- Blush: lightly rub blush/pastel chalk under the eyes.
- Mouth: a tiny straight stitch or small “Y” under the nose.
3) Attach the Keychain Ring
You have a few options:
Option A (sewn loop):
- With yarn, make a strong loop at the top center between the ears.
- Stitch through several stitches (like creating a little anchor), then pass through the keyring and knot securely.
- Hide ends inside the body.
Option B (chain loop):
- Insethe rt hook at the top of the head.
- Pull up a loop and ch 10–15, then sl st back into the same spot to form a loop.
- Thread the keyring through the crochet loop.
4) Final Shaping
- Roll the bunny gently between your palms to smooth the stuffing.
- If the eyes sink inward, add a pinch more stuffing behind them and massage the fiberfill into place.
Optional Customization Ideas
- Different yarn colors: pastel pink, chocolate brown, grey, or speckled yarn for a “spotted bunny.”
- Add embroidery details: sleepy eyes, eyelashes, or a tiny tooth.
- Make it a bag charm: use a lobster clasp and add a short chain extender.
- Turn it into a toy: skip the keychain hardware and embroider the eyes for a child-friendly plush (always follow toy safety guidelines).
- Mini accessories: a bow, a tiny scarf, or a little crocheted carrot.
Beginner Crochet Tips
- Use a smaller hook than usual. Tight stitches are key in amigurumi, so the stuffing doesn’t show.
- Count every round. A stitch marker saves so much frustration—move it up each round.
- Invisible decreases look cleaner. If you’re new to them, it’s worth practicing—your bunny will look smoother.
- Stuff gradually. Overstuffing stretches stitches; understuffing makes the bunny wrinkly. Aim for firm and rounded.
- Pin before sewing. Even a simpletwo-piecer project looks more professional when the pieces are symmetrical.
Conclusion
This little amigurumi bunny keychain is quick, cute, and beginner-friendly—perfect for gifts, craft fairs, party favors, or just making your everyday items more fun. Try it in cream and orange like the image, or create a whole rainbow bunny collection, and don’t forget to share your finished keychains!