Modern Chunky Mint Green Knit Sweater Pattern Beginner-Friendly
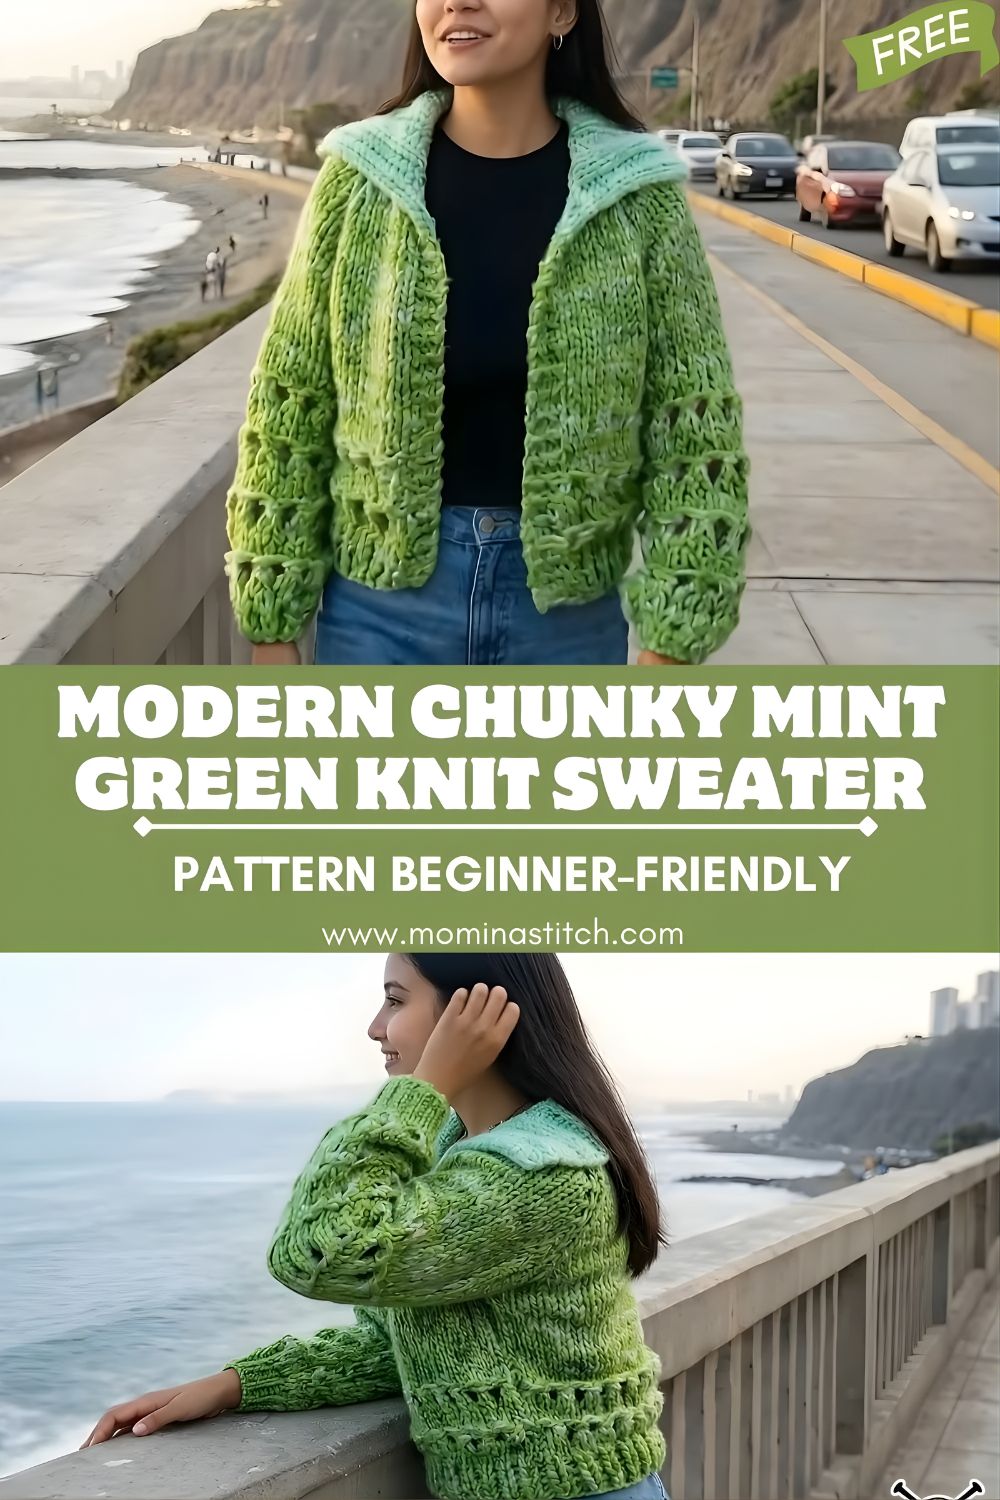
This Mint Green Knit Sweater Pattern is a modern, cozy staple with chunky texture, a relaxed fit, and an elegant, handmade look. If you’re searching for a knit sweater tutorial, a DIY knit sweater, or a beginner knitting sweater pattern, this project is right on trend.
Inspired by clean Scandinavian silhouettes and soft pastel palettes, this mint sweater blends simplicity with satisfying texture. As slow fashion and mindful making grow, knitwear is having a major comeback, especially modern pieces that look boutique, not “crafty.” This modern knit sweater is perfect for fall and winter layering, yet light enough for stylish casual outfits. With straightforward panels and minimal shaping, it’s an ideal handmade sweater tutorial for beginners and intermediates.
Materials Needed
- Yarn: Medium or chunky knitting yarn
- Suggested: Worsted (Category 4) held double for chunkier texture or Bulky (Category 5) held single
- Yardage estimate: 900–1400 yds (825–1280 m) depending on size and length
- Knitting needles: 6mm – 8mm (US 10–11)
- Use a circular needle (32–40″) even if knitting flat (helps hold stitches)
- Stitch markers (4–8 helpful)
- Yarn needle (tapestry needle)
- Scissors
- Measuring tape
- Optional: scrap yarn for holding stitches, blocking mat/pins, steamer, or spray bottle
Knitting Abbreviations
- k – knit
- p – purl
- k2tog – knit two together
- yo – yarn over
- st – stitch
- rep – repeat
Skill level: Beginner → Intermediate (simple texture + basic shaping)
Construction: Knit flat in pieces (back, front, two sleeves) then seamed.
Mint Green Knit Sweater Pattern (Step-by-Step)
Before You Start: Sizing + Gauge (Quick & Practical)
This pattern is written maker-friendly so you can match the “relaxed fit” from the tutorial video.
Fit guide
- Choose a finished bust with 4–10 in (10–25 cm) of positive ease for that modern oversized look.
- Panels are mostly rectangles—easy to adjust.
Gauge (recommended)
Because yarn and needle choices vary, aim for a fabric you love:
- Knit a 4″x4″ (10×10 cm) swatch in the textured stitch below.
- If fabric feels stiff → go up a needle size.
- If it feels floppy/loose with gaps → go down a needle size.
Signature Textured Stitch (Modern Chunky Texture)
This stitch gives a clean, elevated texture without complex cables.
Texture Pattern (multiple of 2 sts):
- Row 1 (RS): *k1, p1; rep from * to end
- Row 2 (WS): *k1, p1; rep from * to end
Yes—this is essentially 1×1 rib worked flat, which creates a beautifully bouncy, chunky texture and a polished “handmade but modern” look.
Edge tip: For neater seams, you may slip the first stitch of every row purlwise with yarn in front (optional). If you do, do it consistently on all pieces.
BACK PANEL
Step 1: Cast On
Cast on an even number of stitches to match your desired back width.
Back width target: about (½ bust measurement) + ease, then divide by 2 for flat panel width.
Example: If you want a 44″ finished bust, each panel width is about 22″.
Step 2: Work the Body Length
Work in Texture Pattern until the back measures your desired length from hem to shoulder:
- Cropped: 18–20″ (46–51 cm)
- Classic: 21–24″ (53–61 cm)
- Long: 25–28″ (64–71 cm)
Step 3: Bind Off
Bind off loosely (so shoulders aren’t tight). Set aside.
FRONT PANEL
The front matches the back, with optional neckline shaping for a more elegant finish.
Step 1: Cast On
Cast on the same number of stitches as the back panel.
Step 2: Knit to Upper Chest
Work in Texture Pattern until the front measures about:
(Back length – 2 to 4 in / 5–10 cm)
Step 3: Shape the Neckline (Beginner-Friendly)
Choose one of these two options:
Option A: Easy Straight Neck (beginner fast)
Continue in pattern to full length, then bind off. (You’ll make a collar that sits slightly higher.)
Option B: Classic Crew Neck Shaping (recommended)
When you reach neckline height:
- Bind off center stitches to create the neck opening (about 20–30% of total sts).
- Workthe left and right sides separately.
- At each neck edge, dec 1 st every other row 3–6 times (using k2tog on RS near the neckline).
- Continue straight until the front matches the back length.
- Bind off the remaining shoulder stitches.
Neck width tip: A relaxed sweater looks great with a slightly wider crew opening—just keep it comfortable.
SLEEVES (make 2)
Step 1: Cast On for Cuff
Cast on an even number of stitches for a comfortable wrist opening.
Step 2: Knit Cuff
Work 1×1 rib (same as texture) for 2–4 in (5–10 cm).
Step 3: Increase for Relaxed Sleeve
Continue in Texture Pattern and increase gradually for a modern, roomy sleeve:
- Place markers 1 stitch in from each edge (helps you remember where to increase).
- Increase row (RS): k1, yo, work in pattern to last st, yo, k1
- On the next row, work the yo through the back loop to avoid holes (or knit it normally if you like a subtle airy detail).
Rep increase row every 6–10 rows until the sleeve fits your upper arm comfortably.
Step 4: Knit to Sleeve Length
Continue straight until sleeve length reaches:
- 17–20″ (43–51 cm) from cuff (adjust to your arms)
Step 5: Bind Off
Bind off loosely.
Optional sleeve cap shaping (intermediate): If you prefer a more tailored shoulder, you can bind off a few stitches at the start of rows for a gentle cap. For a relaxed fit, straight sleeves work beautifully.
CUFFS (Finishing Edges)
If you want extra structure at the wrists (especially with worsted held double), you can knit a longer cuff:
- 4–6″ (10–15 cm) of 1×1 rib
Or keep it modern with a shorter cuff.
COLLAR / NECKLINE
Option 1: Pick Up + Knit Collar (most polished)
- Sew one shoulder seam first.
- With circular needles, pick up stitches evenly around the neckline (front + back).
- Pick up about 3 out of every 4 rows as a starting point to avoid rippling.
- Knit 1×1 rib for 1.5–3 in (4–7.5 cm).
- Bind off loosely (a stretchy bind-off is ideal).
Option 2: Simple Folded Collar (extra cozy)
Knit ribbing 3–5 in (7.5–12.5 cm), then fold inward and tack down at the inside neckline with a few stitches.
ASSEMBLY
Step 1: Block Pieces Lightly (Optional, but helps a lot)
Light steam or spray block panels flat to even out stitches and make seaming cleaner.
Step 2: Seam Shoulders
With right sides facing (or mattress stitch for invisible seams), sew front to back at the shoulders.
Step 3: Attach Sleeves
Lay the sweater body flat. Align the sleeve top to the shoulder seam. Pin/clip in place. Sew sleeve to body.
Step 4: Seam Sides + Sleeve Underarm
Fold the sweater with the right sides together. Sew from the hem to the underarm, then continue down the sleeve to the cuff.
Step 5: Finish Neckline
If you haven’t already, pick up and knit the collar now.
FINISHING TOUCHES
- Weave in ends neatly on the inside using a yarn needle.
- Block for a professional finish:
- Gently shape to measurements.
- Let dry fully flat.
- For acrylic: steam carefully (don’t press). For wool: wet block or steam lightly.
- Optional: Add a small side slit, a folded hem, or subtle embroidered initials for a boutique touch.
Beginner Tips
- Maintain even tension: chunky yarn exaggerates inconsistencies—relax your hands and keep stitches uniform.
- Count stitches regularly: especially after decreases/increases on sleeves and neckline.
- Use stitch markers: mark neckline edges, sleeve increase points, and right side rows.
- Blocking matters: it smooths texture, improves drape, and elevates your sweater from “homemade” to “handmade.”
Styling Ideas (Mint Green Sweater Outfit Inspo)
- With jeans: light-wash denim + white sneakers for a fresh, casual street look.
- With skirts: pair with a satin midi skirt and boots for soft, elegant contrast.
- Casual street outfits: layer over a collared shirt with wide-leg trousers for a modern knitwear vibe.
- Fall/winter layered fashion: add a long coat, scarf, and beanie—mint green pops beautifully against neutrals like cream, camel, and gray.
Conclusion
This Mint Green Knit Sweater Pattern is a feel-good project: modern texture, relaxed fit, and an elegant finish that looks amazing in everyday outfits. Whether you’re following a knit sweater tutorial for the first time or leveling up your skills with clean shaping, this cozy sweater is a stylish win. Pick your mint yarn, swatch once, and enjoy the process of making a sweater you’ll truly wear.