Natural Mini Crochet Glow Lamp Amigurumi Pattern
Light up your crochet queue with the Mini Crochet Glow Lamp Amigurumi Pattern, a charming, beginner-friendly make that whips up fast using scrap yarn. Clear, step-by-step instructions guide you to a cute lantern plush perfect for keychains, bedside decor, and thoughtful gifts. Cozy, calming, glowingly adorable.
Often soothing, the Natural Mini Crochet Glow Lamp Amigurumi Pattern turns scrap yarn into a pocket-size lantern with a gentle faux shine. Beginner-friendly and relaxing for seasoned makers, it features simple stitches, clear step-by-step guidance, and tidy shaping for a polished look.
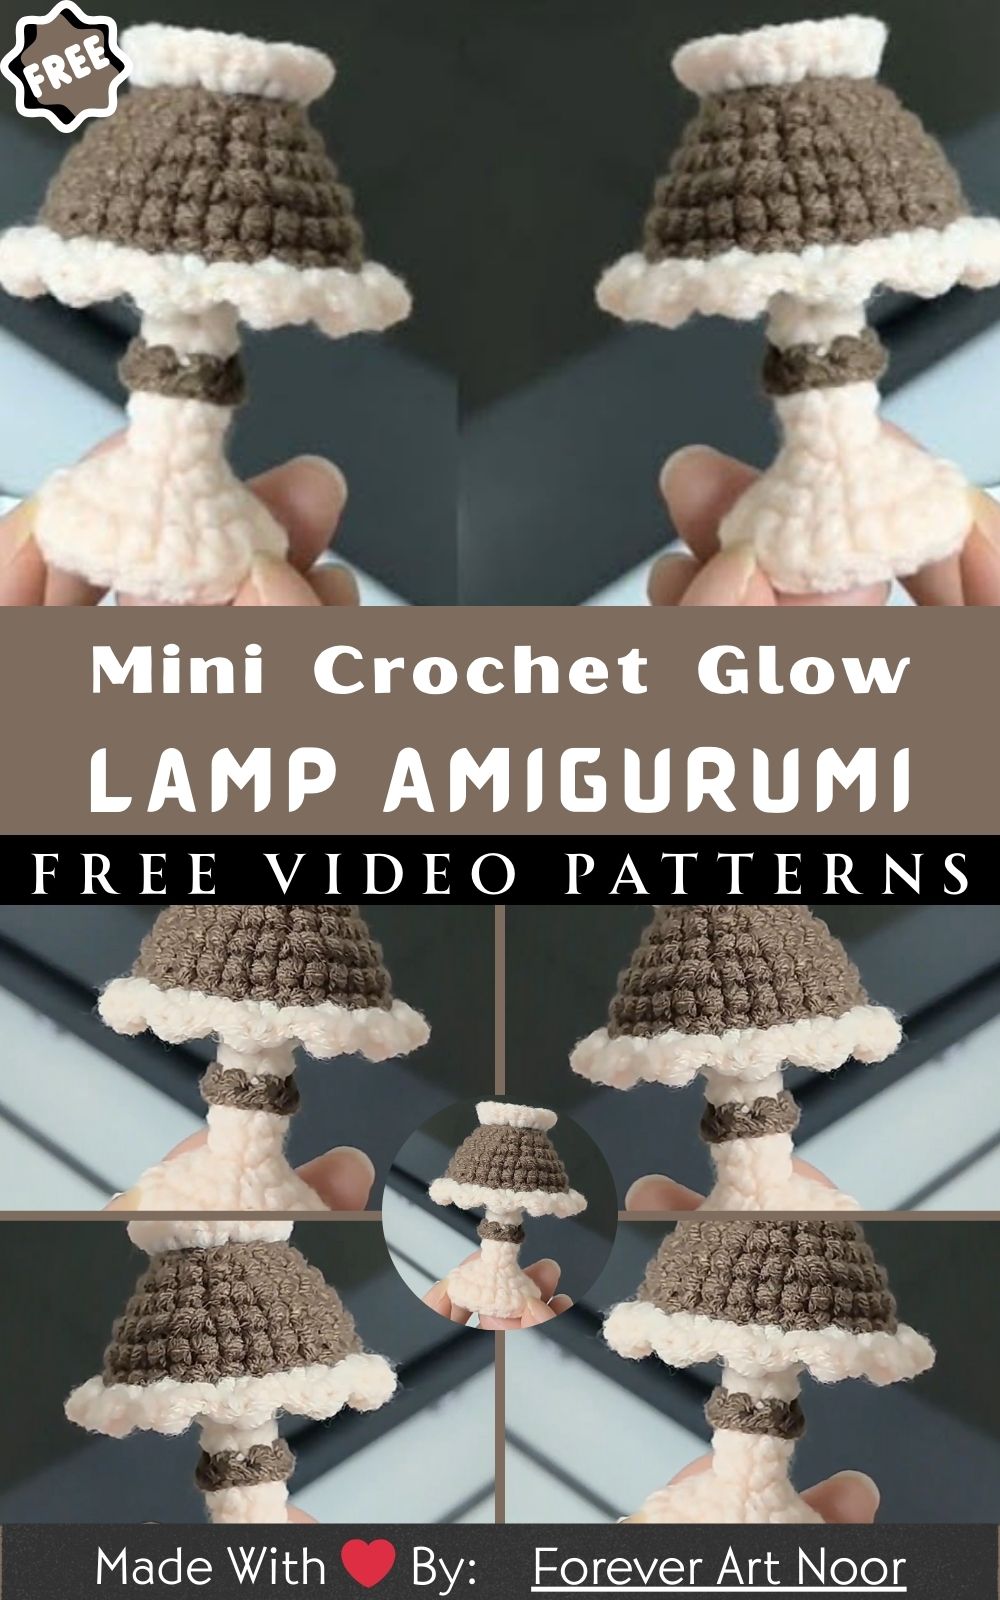
Customize the base, shade, and hanging loop to match any style, or keep it neutral for a calm, natural vibe. This quick, stash-busting crochet project finishes fast and makes a charming accent you’ll want to make on repeat, perfect for gifting, markets, or cozy decor.
Uses:
- Clip-on keychain or bag charm
- Bedside or desk decor
- Thoughtful handmade gift for friends, teachers, or coworkers
Natural Mini Crochet Glow Lamp Amigurumi Pattern (Beginner-Friendly, Scrap-Yarn Friendly)
Warm, soft, and irresistibly cute, this Natural Mini Crochet Glow Lamp Amigurumi Pattern brings cozy charm to your hooks in the most beginner-friendly way. Moreover, this palm-sized plush lamp works up quickly, looks adorable in neutral shades, and uses simple stitches you probably already know. Additionally, the “glow” effect is created with a sunny yarn color tucked beneath a softly flared shade, which makes the piece feel calm and organic. Furthermore, the pattern is seamless from base to brim, so you’ll avoid fiddly assembly and enjoy neat finishing. Consequently, this little lamp makes a thoughtful gift, a relaxing weekend project, and a perfect craft-fair bestseller.
Finished Size, Skill Level, and Total Time
- Finished size: approximately 3.5–4 in (9–10 cm) tall; base diameter about 2 in (5 cm); shade diameter about 2.5 in (6.5 cm).
- Skill level: confident beginner (knowledge of magic ring, single crochet, increases, and invisible decreases).
- Total time: about 1.5–2 hours, depending on your speed.
Materials (With Exact Measurements)
- DK (Light #3) cotton or acrylic yarn:
- Shade color (natural/cream): 15 g (about 37–45 m)
- Glow/light color (soft yellow): 8 g (about 20–24 m)
- Base color (wood/brown): 6 g (about 15–18 m)
- Accent color for hanging loop (optional): 1 g (about 2–3 m)
- Crochet hook: 2.75 mm (C-2) for tight stitches; alternatively, 3.0 mm if you tend to crochet tightly.
- Safety eyes: 6 mm (1 pair) or embroidered eyes if making for babies.
- Embroidery thread: black for mouth; blush or pale pink for cheeks (optional).
- Stuffing: 8–10 g polyester fiberfill.
- Stitch marker: 1 (to mark the first stitch of each round).
- Tapestry needle: size 18–20.
- Scissors: 1 pair.
- Optional base stabilizer: thin cardboard or plastic circle, 35 mm diameter.
- Optional hardware: 25 mm keyring and 12 mm lobster clasp with 8 cm chain for a bag charm.
Gauge (Approximate)
Because amigurumi prefers tight stitches, aim for a firm fabric that doesn’t show stuffing. Additionally, tightness matters more than exact gauge here. Nevertheless, for reference, 18–20 sc and 20–22 rows ≈ 10 cm with a 2.75 mm hook in the round using DK cotton. Consequently, if your fabric shows gaps, switch to a smaller hook.
Abbreviations (US Terms)
- MR: magic ring
- sc: single crochet
- inc: increase (2 sc in the same stitch)
- dec: invisible decrease (work 2 stitches together)
- sl st: slip stitch
- ch: chain
- BLO: back loop only
- FLO: front loop only
- st(s): stitch(es)
- R#: round number
Important Notes
- Work in a continuous spiral unless otherwise noted. Additionally, always use a stitch marker at the start of rounds.
- Stuff lightly as you go for smooth, even shaping. Moreover, add a touch more stuffing under the shade for a plump “glow.”
- Change colors by completing the last yarn-over of the previous stitch with the new color. Consequently, your transitions will look clean.
- Use invisible decreases to avoid bumps. Furthermore, keep your tension consistent to maintain a neat shape.
Step-by-Step Instructions (One-Piece Lamp With Optional Face)
Tip: Because you’ll add a face on the yellow “glow” section, place safety eyes before the shade flares out. Additionally, embroider the mouth before the opening narrows.
1: Make the Base (Brown/Wood) — Time: 15–20 minutes
- R1: With base color, MR, 6 sc into ring (6).
- R2: inc in each st around (12).
- R3: (sc, inc) x 6 (18).
- R4: (2 sc, inc) x 6 (24).
- R5: (3 sc, inc) x 6 (30).
- R6: BLO sc around (30) to turn the edge upward.
- R7: sc around (30) to build a shallow base wall.
Because this is the support, keep stitches snug and even. Additionally, if you want extra stability, cut a 35 mm circle of thin plastic or cardboard and set it inside after R7. Consequently, the lamp will stand flatter and resist wobbling.
2: Shape the Neck (Transition From Base) — Time: 5–8 minutes
- R8: (3 sc, dec) x 6 (24).
- R9: sc around (24).
Because the neck should gently taper, these rounds bring the diameter in slightly. Additionally, ensure the stitch marker remains straight for neat alignment. Consequently, your shade will sit centered later.
3: Crochet the Glow Body (Yellow) — Time: 15–20 minutes
- Switch to yellow on the last yarn-over of the final stitch of R9.
- R10: (2 sc, dec) x 6 (18).
- R11–R12: sc around (18) for two rounds.
Because this section creates the soft “glow,” avoid overstuffing at this stage. Additionally, keep stitches smooth and even to showcase the face. Consequently, your lamp will look cheerful and balanced.
3a: Add the Face (Optional but Adorable) — Time: 8–10 minutes
- Placement: Insert 6 mm safety eyes between R11 and R12, about 5 stitches apart, centered opposite the round seam line.
- Mouth: With black thread, embroider a tiny smile between the eyes on R12 using a simple curve.
- Cheeks: Optionally, stitch small blush dots with pink thread just below each eye.
Because eyes are small parts, skip safety eyes and embroider the entire face if making for children under 3. Additionally, always lock washers tightly and check for wiggle. Consequently, your plush remains cute and safe.
4: Transition to the Shade (Cream/Natural) — Time: 5 minutes
- Switch to cream/natural at the end of R12.
- R13: (sc, inc) x 9 (27).
Because the shade must widen, increases begin now. Additionally, keep your tension even to avoid ripples. Consequently, the flare will look crisp.
5: Build the Shade Sides — Time: 20–25 minutes
- R14: sc around (27).
- R15: (2 sc, inc) x 9 (36).
- R16–R18: sc around (36) for three rounds.
Because the shade should drape slightly, these rounds create gentle length and volume. Additionally, stuff the yellow body lightly at the start of R16 to support the shape without showing lumps. Consequently, the lamp will feel pleasantly squishy yet sturdy.
6: Flare the Brim and Finish — Time: 15–20 minutes
- R19: FLO (3 sc, inc) x 9 (45) to create a soft flare on the brim.
- R20: sc around (45), then sl st to the next st and fasten off, leaving a long tail to weave in.
Because FLO gives a natural fold line, the brim will tilt outward like a real shade. Additionally, after R19, add a final puff of stuffing beneath the shade if needed for a rounded profile. Consequently, your silhouette will be clean and lamp-like.
7: Add the Hanging Loop (Optional) — Time: 3–5 minutes
- With accent color, attach yarn at the top center of the shade using your needle (pick a discreet point).
- Ch 12 (or preferred length), then secure the chain loop back into the same point with several tight stitches.
- Weave ends securely inside the shade.
Because the loop is decorative, keep it small for proportion. Additionally, if you’re using hardware, sew the loop around your chain or key ring for extra strength. Consequently, the mini lamp becomes a perfect bag charm or keychain.
Step 8: Final Stuffing and Shaping — Time: 5–7 minutes
- Add or adjust stuffing so the base is firm, the glow body is softly filled, and the shade stays round but not rigid.
- Shape the brim by gently pinching the FLO edge outward all around.
Because even stuffing makes or breaks the silhouette, take a moment to tweak. Additionally, steam-block very lightly if using cotton (avoid acrylic) to smooth any ripples. Consequently, your mini crochet lamp will look polished in photos and in person.
Quick Recap of Rounds (For Reference)
- Base: R1–R7 (6 → 30 sts; walls formed in BLO at R6)
- Neck: R8–R9 (30 → 24 → 24)
- Glow body: R10–R12 (24 → 18 → 18 → 18)
- Shade start: R13 (18 → 27)
- Shade sides: R14–R18 (27 → 36 → 36 → 36 → 36)
- Brim flare: R19–R20 (36 → 45 → 45 + finish)
Basic Tips for Success
- Consistency: Keep your hook angle and pull-throughs consistent for smooth stitches. Additionally, rotate your work occasionally to prevent bias. Consequently, your round seam line will remain straight.
- Invisible decreases: Always use invisible dec to prevent bumps. Furthermore, insert your hook under the front loops of the next two stitches, then finish a single crochet. Consequently, decreases cleanly.
- Color changes: Complete the last yarn-over of the previous stitch with the new color. Additionally, pull the new color snug and carry the old tail inside a few stitches. Consequently, color joins look tidy.
- Stuffing: Use small pinches of fiber and place them precisely where shape is needed. Moreover, avoid overfilling the shade to preserve the gentle flare. Consequently, the lamp won’t bulge.
Common Mistakes (And How to Fix Them)
- Wobbly base: If the base bows or tilts, your tension may be loose. Additionally, consider the optional stabilizer circle or drop to a 2.5 mm hook. Consequently, the bottom will sit flat.
- Visible stuffing: If fiber peeks through, your stitches are too loose, or your yarn is too thin. Moreover, choose a smaller hook or switch to cotton for better structure. Consequently, the fabric will look solid.
- Rippling shade brim: If the brim ruffles excessively, your tension may be too loose during increases. Additionally, try blocking with a hint of steam (cotton only) or reduce one increase repeat. Consequently, the brim will relax and reform.
- Crooked face: If the face leans, you likely followed the spiral seam instead of centering opposite it. Moreover, mark the front before adding features and count stitches between the eyes precisely. Consequently, expressions will align.
Variations and Customizations
- Size changes: Use sport-weight yarn and a 2.25 mm hook for a tiny charm, or use worsted-weight yarn with a 3.5 mm hook for a larger plush. Additionally, keep the same stitch counts for proportional scaling. Consequently, the shape remains accurate.
- Color story: Try a natural linen shade with a golden-ombre glow or a warm terracotta base for earthy vibes. Furthermore, experiment with heathered cottons for subtle texture. Consequently, each lamp feels unique.
- Openwork shade: Replace R16–R18 with a simple mesh: (sc, ch 1, skip 1) around, then a round of sc to stabilize. Additionally, keep the glow portion more saturated to “shine” through. Consequently, the lamp looks airy and handcrafted.
- Embellishments: Add a tiny felt toggle on the base or embroider simple vertical shade ribs with matching thread. Moreover, attach a short chain and keyring to the loop for a stylish bag charm. Consequently, your mini lamp becomes gift-ready.
- Kawaii face options: Stitch sleepy eyes with small “U” shapes or add tiny felt circles for blush. Additionally, experiment with sparkly safety eyes for extra whimsy. Consequently, personality pops.
Care and Safety
- Care: Spot-clean with mild soap and cold water. Additionally, avoid soaking if you inserted cardboard in the base. Consequently, your lamp will keep its shape.
- Safety: Skip safety eyes for infants and embroider features instead. Furthermore, secure all ends thoroughly and test the loop strength before gifting. Consequently, your make remains both cute and safe.
SEO-Friendly Tips and Keywords (For Sellers and Bloggers)
- Suggested title: “Natural Mini Crochet Glow Lamp Amigurumi Pattern (Beginner-Friendly Lamp Plush).”
- Suggested keywords: mini crochet lamp, amigurumi lamp pattern, beginner crochet amigurumi, kawaii lamp plush, crochet lamp keychain, natural shade crochet, scrap yarn amigurumi.
- Product description idea: “Handmade mini crochet glow lamp with a soft natural shade and sunny inner glow; perfect desk charm, nursery accent, or gift.”
Troubleshooting Q&A
- My shade looks too tight; how can I fix it? Because your tension might be tight, switch to a larger hook just for R16–R20. Additionally, lightly steam-block if using cotton. Consequently, the brim will ease.
- Can I use worsted-weight yarn? Yes, you can follow the same counts with a 3.25–3.5 mm hook. Additionally, expect a slightly larger lamp and use 20–25 g for the shade. Consequently, your plush will scale up nicely.
- How do I make it stand better? Because stability matters, use the optional base insert and pack extra stuffing into the base cavity. Additionally, finish with a flat press against a table before weaving ends. Consequently, the base sits flush.
Estimated Time Breakdown
- Base (R1–R7): 15–20 minutes
- Neck shaping (R8–R9): 5–8 minutes
- Glow body (R10–R12): 15–20 minutes
- Face features: 8–10 minutes
- Shade sides (R13–R18): 20–25 minutes
- Brim flare + finish (R19–R20): 15–20 minutes
- Loop, stuffing, shaping, ends: 10–12 minutes
Because every crocheter works at a unique pace, treat these as guides. Additionally, batch-making multiple lamps can reducethe time per piece. Consequently, market prep becomes faster.
Why This Pattern Works for Beginners
- Clear shaping: Incremental increases and decreases keep counts predictable. Additionally, stitch markers and color changes provide visual checkpoints. Consequently, beginners can track progress easily.
- Seamless build: Working base-to-brim in one piece removes complex assembly. Furthermore, invisible decreases and BLO/FLO touches teach useful amigurumi techniques. Consequently, skills grow without frustration.
- Flexible styling: Neutral shades produce a natural aesthetic while bright “glow” colors add personality. Additionally, optional face and loop invite creative expression. Consequently, the project feels both accessible and customizable.
Share, Sell, and Gift
Because this make is petite and quick, it’s ideal for craft fairs and last-minute gifts. Additionally, please credit “Natural Mini Crochet Glow Lamp Amigurumi Pattern” when listing finished items for sale. Consequently, more makers can discover and enjoy the design. Finally, if you post on social media, consider tagging your photos with keywords like “mini crochet lamp,” “amigurumi lamp pattern,” and “kawaii lamp plush” for better reach.
Closing
Soft, simple, and soothing, this Natural Mini Crochet Glow Lamp Amigurumi Pattern turns a few grams of yarn into a glowingly sweet keepsake. Moreover, the neutral shade and gentle silhouette fit any decor, while the sunny inner color makes it feel alive. Additionally, the quick make time and minimal sewing make it an easy win for beginners and a relaxing stitch for experienced crocheters. Consequently, whether you clip it to your keys, perch it on a desk, or wrap it as a gift, this tiny lamp will brighten the day stitch by stitch.