DIY Crochet Pouch Wednesday Amigurumi Pattern
There’s something truly magical about picking up a ball of yarn, grabbing your favorite hook, and watching a character slowly come to life in your hands. Every stitch carries a little bit of your personality, making crochet one of the most enjoyable and rewarding forms of crafting. Whether you’re whipping up a tiny amigurumi, a stylish bag charm, or a cozy pouch, handmade projects always carry that warm, comforting sense of creativity and accomplishment.
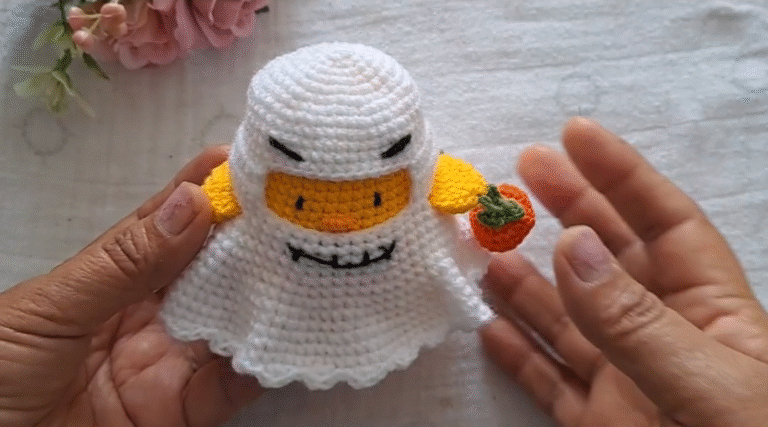
If you love amigurumi, cute accessories, or spooky-cute characters, then today’s project will make your heart skip a beat. In this tutorial, we’re diving into a DIY Crochet Pouch Wednesday Amigurumi Pattern — a fun and beginner-friendly pouch inspired by Wednesday’s iconic gothic charm. Combining cuteness with a touch of dark aesthetic, this pouch captures her signature braids, simple expression, and monochrome details.
This small amigurumi pouch is practical, adorable, and surprisingly quick to make. You can use it as a coin purse, mini makeup case, AirPods holder, key pouch, or even a mini pencil case depending on the size you create. It’s a great accessory for fans of Wednesday-style characters, spooky fashion lovers, or anyone who enjoys unique handmade items.
Best of all, this project is very beginner-friendly. It uses simple stitches, easy techniques, and no complicated shaping just basic rounds, simple detailing, and straightforward assembly. Whether you’re new to amigurumi or experienced and looking for a fun, relaxing pattern, this Wednesday-inspired pouch is the perfect weekend project.

2. Materials and Tools Needed
Here’s everything you’ll need to crochet your Wednesday pouch amigurumi:
Yarn (cotton or acrylic, light to medium weight)
Black yarn (main color for hair and outfit)
White yarn (collar or accents)
Skin-tone yarn (for the face)
Crochet hook (2.5mm or 3.0mm depending on yarn used)
Stitch markers (helpful for working in rounds)
Yarn needle (for sewing parts together)
Scissors
Safety eyes (6mm or 8mm) OR black yarn for embroidered eyes
Stuffing (optional — some pouches are lightly stuffed for structure)
Zipper (small size that fits pouch width) OR button for closure
Optional: keychain ring, lining fabric, small felt pieces, beads, or decorative charms
Beginner Tip:
If you’re new to amigurumi pouches, cotton yarn gives the cleanest stitch definition. Acrylic works well too, but cotton will hold its shape better. Choose a hook 0.5mm smaller than recommended for tighter stitches.
3. Basic Stitches and Techniques Used
This DIY Crochet Pouch Wednesday Amigurumi Pattern uses simple, beginner-friendly stitches:
Magic Ring (MR) — to begin the base or face.
Chain (ch) — used when shaping edges or starting rows.
Single Crochet (sc) — the main stitch for the entire pouch.
Increase (inc) — two single crochets in one stitch to make the base wider.
Decrease (dec) — single crochet two stitches together to shape smaller areas.
Slip Stitch (sl st) — for joining rounds or finishing edges.
Color Change Technique — switching to black for the hair and white for collar details.
Sewing on a zipper — simple hand-sewing onto crochet fabric.
Creating braids — using strands of yarn attached to the head portion.
The pouch is mostly worked in continuous rounds, making it seamless and smooth. No advanced shaping is required.
4. About the Wednesday Pouch Design
The charm of this pouch comes from its adorable, miniature interpretation of Wednesday’s iconic style. The pouch has a simple oval or roundish shape, depending on how wide you make the base. The face portion features a soft skin-tone color, while the top part transitions into glossy black yarn to represent Wednesday’s hair.
The most recognizable part of the design is the two long black braids, giving the pouch an immediate Wednesday-inspired look. Paired with small safety eyes and a subtle straight mouth, the facial expression remains serious, moody, and cute — just like her.
You can also add tiny details such as:
A white collar
Black dress accents
Embroidered eyebrows
Mini buttons
Slight shading for cheeks
This pouch is perfect for Wednesday fans, gothic-style lovers, Halloween creators, or anyone who enjoys spooky-cute creations.
5. Step-by-Step Crochet Instructions (Main Pouch Body)
Below is a beginner-friendly breakdown of how to crochet the main pouch. These steps are inspired by the concept shown in the reference video but rewritten into original, easy-to-follow instructions.
Step 1: Create the Base
Start with your skin-tone yarn.
Begin with a magic ring.
Increase gradually to form a small circle.
Continue increasing until the base reaches your desired width — usually the size of your palm for a small pouch.
Make sure the base is flat and even.
Tip: Use a stitch marker to mark the first stitch of each round.
Step 2: Build the Walls of the Pouch
Once your base is wide enough:
Continue single crocheting around without increasing.
This will slowly turn your flat circle into a cup or bowl shape.
Work several rounds until the pouch reaches about two-thirds of its final height.
Keep your tension even so the walls don’t tilt or curve awkwardly.
Step 3: Switch Colors for the Hair
To create Wednesday’s hair:
Switch from the skin-tone yarn to black yarn.
Continue working in rounds with black yarn.
Slightly reduce the stitch count near the top if you want a softer tapered finish.
Step 4: Shape the Opening
When you reach the height you like:
Create a smooth edge using slip stitches or a round of single crochet.
Fasten off and leave a long tail if you will sew the zipper later.
6. Crocheting the Face and Details
Now it’s time to bring Wednesday’s character to life!
Eyes
You can choose between:
Safety eyes: Insert them between the stitches before closing the top.
Embroidered eyes: Use black yarn to sew tiny oval or dot-shaped eyes.
For a Wednesday-inspired look, place the eyes slightly far apart with a neutral expression.
Mouth
Wednesday rarely smiles, so create a small straight line:
Use black yarn.
Make one or two short stitches for a minimal, moody mouth.
Hair Details
Even though the upper part is black, you can add:
A hairline (embroider a slight curve)
A middle parting using a thin sewn line
Extra strands for volume
Tip: Don’t overstuff the pouch — you need space for items.
7. Making the Wednesday Hair & Outfit Details
This is the fun part — giving Wednesday her signature hairstyle and outfit character.
Hair Cap (Optional)
If you want a more dimensional look:
Crochet a small black cap that fits around the head area.
Sew it securely.
Braids
The braids are essential!
Cut equal lengths of black yarn.
Attach them on both sides of the pouch using a latch-hook method.
Divide into three sections and braid tightly.
Secure with a knot or stitch at the bottom.
Outfit Details
To complete her gothic look:
Add a small white collar using white yarn.
Embroider tiny buttons on the front.
Add minimal contrast like a grey line or dot near the collar.
Keep the design simple yet iconic.
8. Adding the Closure (Zipper, Button, or Drawstring)
Depending on your preference, you can close the pouch in different ways.
Zipper
This gives the cleanest finish.
Choose a zipper slightly smaller than the pouch width.
Pin it inside the opening.
Use a needle and thread to carefully sew it around the crochet edge.
Work slowly to avoid crooked stitches.
Button Closure
If you prefer something simpler:
Crochet a small loop at the back.
Sew a button on the front.
The loop should be tight enough to hold the button securely.
Drawstring
Great for beginners:
Crochet small chain cords.
Thread them through the top round.
Pull to close.
9. Turning It into a Pouch or Keychain
This Wednesday crochet pouch can be used in many ways:
Coin pouch
AirPods case
Mini makeup pouch
Card holder
Sanitizer pouch
Key pouch
Backpack charm
Bag accessory
To convert it into a keychain:
Add a keychain ring or lobster clasp to one side of the pouch.
Reinforce the area with extra stitches so it holds well.
This makes a wonderful handmade gift for:
Birthdays
Halloween
Wednesday fans
Gothic-aesthetic lovers
Friendship gifts
Kids and teens who love cute accessories
10. Customization Ideas
You can personalize your DIY Crochet Pouch Wednesday Amigurumi Pattern with:
Pastel goth colors (lavender, baby pink, mint green)
All-black monochrome version
Purple or grey accents
Chibi-style face
Angry or sleepy expression
Bigger or smaller size
Glitter yarn
Beads for hair ties
Tiny embroidered stars
This project gives you tons of creative freedom!
11. Tips for Beginners and Common Mistakes
Crocheting a pouch is easy, but here are some helpful tips:
Count stitches every few rounds to avoid accidental increases or decreases.
Keep tension even for cleaner walls and a perfect shape.
Use stitch markers so you don’t lose track.
Avoid overstuffing if you plan to store items inside.
If the face looks crooked, lightly reposition the eyes before securing.
When sewing the zipper, keep the crochet fabric flat to avoid twisting.
Common mistakes include:
Crooked shape from uneven tension
Eyes placed too high or low
Braids attached too close together
Zipper sewn unevenly
Stitch count drifting due to not marking rounds
All of these are easy to fix with patience.
12. FAQs
Q1: Can I use a different yarn weight?
Yes! Thicker yarn makes a larger pouch, while thinner yarn makes a mini keychain version.
Q2: Is this pattern good for beginners?
Absolutely — it uses basic stitches and simple shaping.
Q3: How long does this pouch take to finish?
Most crocheters can complete it in 2–4 hours, depending on details.
Q4: Do I need safety eyes?
No. You can embroider eyes or use tiny felt circles.
Q5: Can I sell finished pouches made from this project?
Yes! Just make sure to credit the pattern inspiration.
Q6: Do I need to line the pouch with fabric?
Optional — lining adds durability but isn’t required for beginners.
13. Conclusion
Creating your own DIY Crochet Pouch Wednesday Amigurumi Pattern is a fun, relaxing, and creative project that brings together the charm of amigurumi and the practicality of a mini pouch. Whether you’re keeping it for yourself or gifting it to a friend, this spooky-cute Wednesday-inspired pouch is sure to bring smiles and compliments everywhere you go.
Don’t be afraid to play with colors, add personality, or adjust the size. Every handmade piece tells its own story and now it’s your turn to bring Wednesday’s iconic look to life through crochet.