Crochet Blue Monster Amigurumi With Green Spots
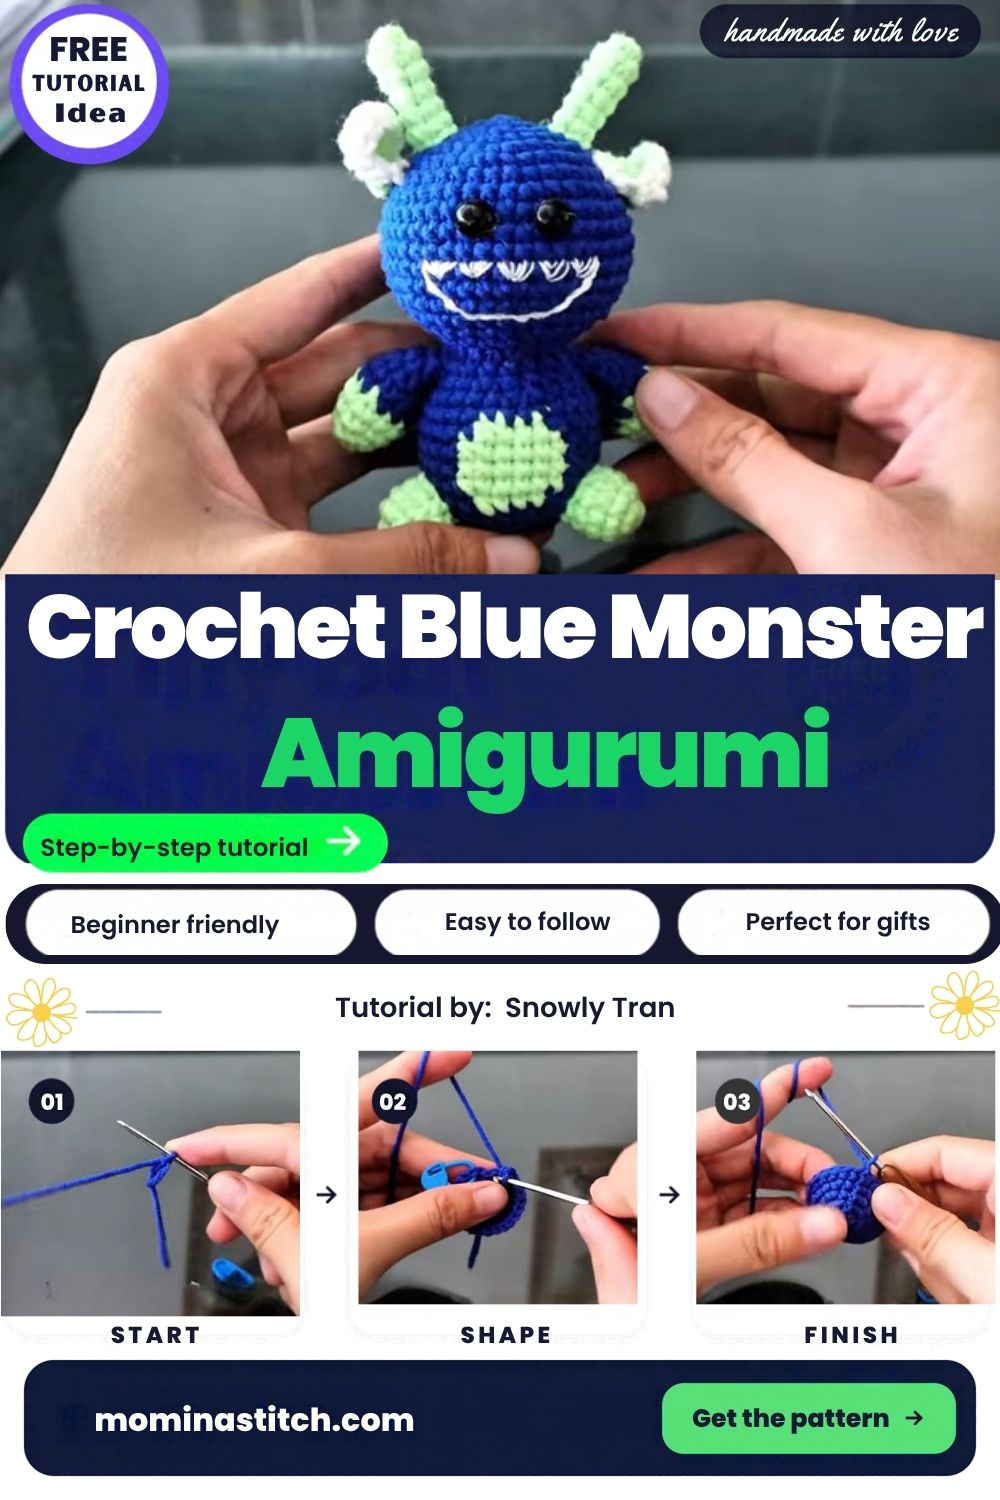
Pale green spots float across a round, deep blue body in the Crochet Blue Monster Amigurumi With Green Spots, a tiny plush with a big, friendly face. Because you work each spot directly into the fabric, you don’t need to sew anything on later, and the finished monster plush stays smooth all around.
Small plush monsters make great shelf buddies, desk pals, and quick gifts for kids. In the steps below, you will build a crochet blue monster amigurumi from the first loop to the stuffed body. Along the way, you will learn how to shape a round amigurumi body in continuous rounds. You will also practice a clean color change in amigurumi, which is what makes the green spots so crisp. What makes the pattern special is that the whole monster is a single piece, so there are no arms, legs, or seams to attach.
Crochet Blue Monster Amigurumi Pattern Overview
The body is worked in one piece using continuous rounds. First, you crochet a flat circle for the base. Next, the sides rise into a dome, and two green spots go in partway up.
After that, you set the eyes, stuff the body, and close the top with decreases. When it is done, the monster stands about 3.5 inches tall.
Time Box
- Prep: about 10 minutes to wind the yarn and set out your tools
- Stitching: about 2 hours for the body
- Finishing: about 20 to 30 minutes for the eyes, stuffing, and weaving in ends
Materials for Your Crochet Blue Monster Amigurumi
- DK-weight cotton or milk cotton yarn: about 25 g in royal blue
- DK-weight cotton or milk cotton yarn: about 5 g in pale green
- A short length of black yarn for the mouth
- 2.5 mm crochet hook
- One stitch marker
- 8 mm safety eyes
- Fiberfill stuffing
- Yarn needle
Not sure which yarns count as DK? The Craft Yarn Council’s standard yarn weight chart sorts every category by thickness and suggested hook size.
Abbreviations (US Terms)
- sc – single crochet
- inc – increase (2 sc in the same stitch)
- dec – decrease (sc two stitches together)
- st(s) – stitch(es)
- Rnd – round
Also, the number in brackets at the end of each round is your stitch count for that round.
How to Crochet the Blue Monster Amigurumi Step by Step
Step 1: Put the First Loop on Your Hook
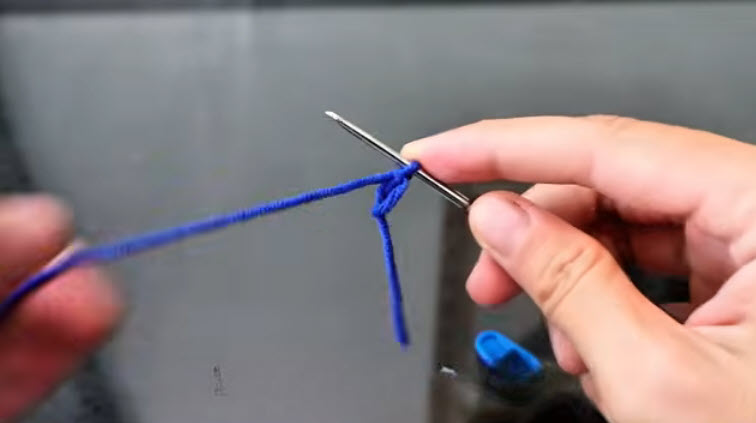
To begin your crochet blue monster amigurumi, start with a loop of blue yarn on your hook, leaving a tail about 4 inches long. You will weave the tail in later.
The loop should sit snugly on the hook shaft rather than hanging loose near the tip.
Step 2: Form the Magic Ring and Work Round 1
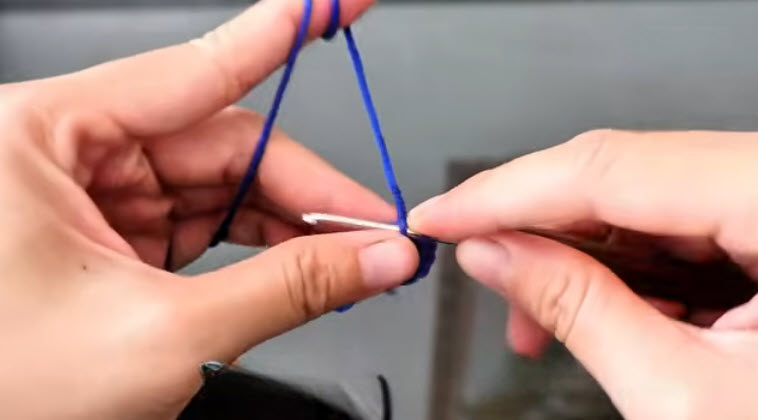
Next, wrap the yarn around your fingers to form a magic ring. Then work the first stitches into the ring, and pull the tail to close the center tightly.
- Rnd 1: 6 sc in magic ring [6]
Keep the working yarn over your index finger, since steady tension keeps the first stitches even.
Step 3: Build the Flat Base With Increases
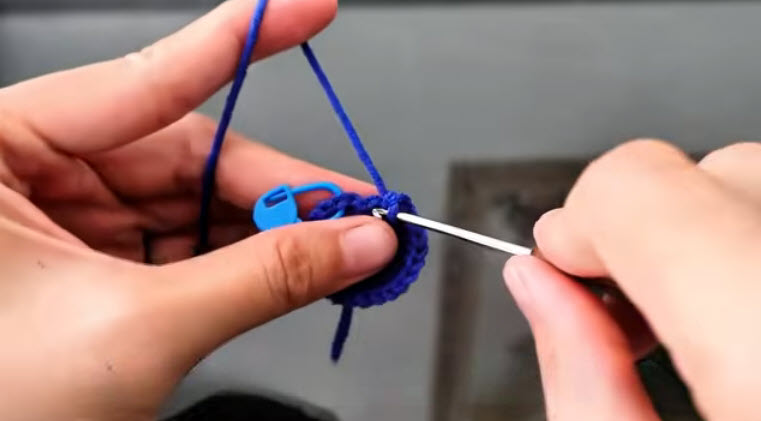
Now place your stitch marker in the first stitch of the round. After that, work the increase rounds to grow the circle.
- Rnd 2: inc in each st [12]
- Rnd 3: (sc, inc) x 6 [18]
- Rnd 4: (2 sc, inc) x 6 [24]
At the moment, your piece should be a small, flat circle with the marker sitting at the start of the round.
Step 4: Finish the Increase Rounds
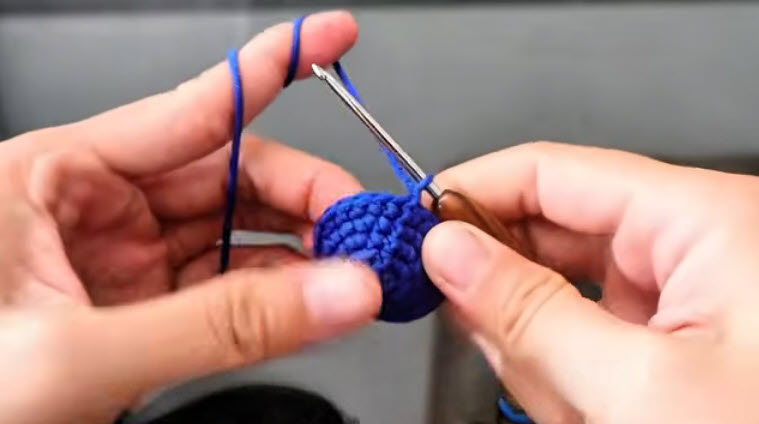
Keep increasing until the base reaches its full width. Meanwhile, move the marker up at the start of each new round and count your stitches at the end of every round.
- Rnd 5: (3 sc, inc) x 6 [30]
- Rnd 6: (4 sc, inc) x 6 [36]
- Rnd 7: (5 sc, inc) x 6 [42]
Stitch check: the disc may start to cup a little, which is normal. However, it should never ruffle or wave at the edge.
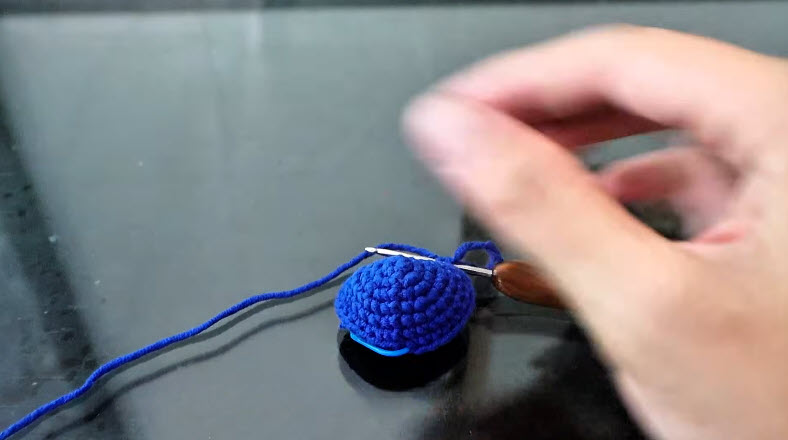
Step 5: Work Even Rounds for the Sides
Once you finish Rnd 7, stop increasing. As a result, the edge begins to curl up, and soon the piece turns into a shallow bowl.
- Rnds 8–11: sc in each st [42]
Set the piece down flat to check the shape. You want an even dome with no lumps on either side.
Step 6: Add the Green Spots to Your Blue Monster
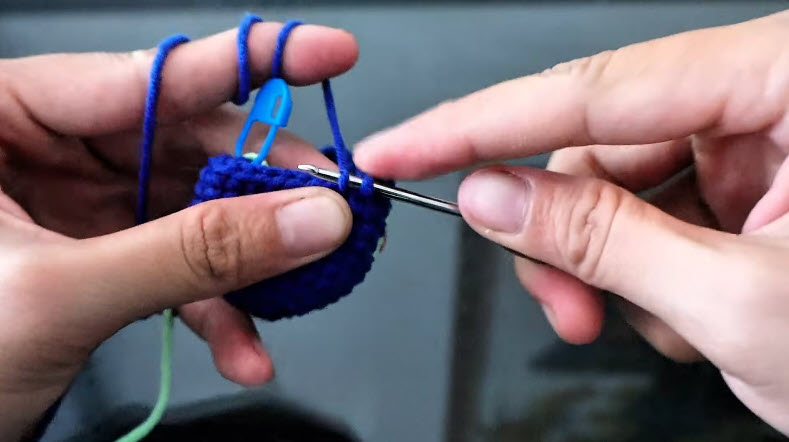
Over the next four rounds, you will add two pale green spots on opposite sides of the body. To switch colors, work the last yarn over of the stitch before the spot in the new color. Then carry the unused yarn loosely along the inside of the body.
- Rnd 12: 8 sc blue, 3 sc green, 17 sc blue, 3 sc green, 11 sc blue [42]
- Rnd 13: 7 sc blue, 5 sc green, 15 sc blue, 5 sc green, 10 sc blue [42]
- Rnd 14: repeat Rnd 13 [42]
- Rnd 15: repeat Rnd 12 [42]
After Rnd 15, cut the green yarn and tie it off on the inside. Be careful not to pull the carried strand tight, or the fabric will pucker.
Check where the green strand hangs. It belongs on the inside of the body, never on the outside.
Step 7: Set the Eyes, Then Decrease and Stuff
First, work the remaining even rounds in blue.
- Rnds 16–20: sc in each st [42]
Next, insert the safety eyes between Rnds 16 and 17, about 6 stitches apart. Snap the backs on firmly before you add any stuffing. Then begin the decreases.
- Rnd 21: (5 sc, dec) x 6 [36]
- Rnd 22: (4 sc, dec) x 6 [30]
- Rnd 23: (3 sc, dec) x 6 [24]
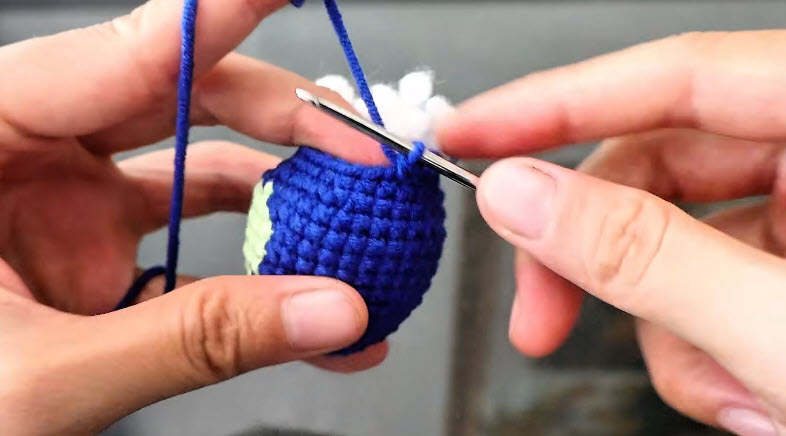
Now stuff your crochet blue monster amigurumi firmly, adding a little fiberfill at a time so the shape stays smooth.
Shape check: the green spots should sit flat on the sides by now. Push stuffing into the bottom edge as well, so the base does not sag.
Step 8: Close the Top and Finish
Finally, work the last decreases. Before the opening gets too small, top up the stuffing one more time.
- Rnd 24: (2 sc, dec) x 6 [18]
- Rnd 25: (sc, dec) x 6 [12]
- Rnd 26: dec x 6 [6]
Cut the yarn and thread the tail onto your needle. Then weave it through the front loops of the last round and pull to close the hole. After that, stitch a small smile with black yarn just below the eyes.
Tips for a Neat Crochet Blue Monster Amigurumi
- Crochet through both loops for the entire body.
- Use the invisible decrease, because it leaves fewer gaps than a standard decrease.
- Stuff in small pinches instead of big clumps.
- Before closing, roll the body on the table to find any flat spots.
Common Mistakes to Avoid
Losing the round start. Without a marker, your stitch counts drift quickly. So move the marker up every single round.
Stuffing too late. Once the opening is tiny, the top becomes hard to fill. Instead, start stuffing right after Rnd 23.
Carrying the color too tightly. A tight green strand pulls the fabric inward. As a result, the spot can look dented.
Bonus Section: Give Your Monster Its Own Personality
Once the basic body is done, small details can change the whole mood of your crochet blue monster amigurumi. For example, place the eyes a little closer together for a curious look, or farther apart for a sleepy, goofy one. Similarly, a crooked smile or a single eye gives the plush a playful, quirky feel.
You can also swap the spot color. Pale green keeps the look soft, while bright yellow or coral makes the monster pop on a shelf. If you enjoy characters with big expressions, the kawaii monster amigurumi pattern is a fun next step.
How to Hide the Jog on the Green Spots
Spots worked in the round often look slightly stepped at the edges. To reduce that stair-step effect, always change color on the stitch before the spot begins. In addition, when you switch back to blue, gently pull the green tail from the inside to snug up the last stitch.
Still see a small gap? Use the green tail to add a tiny straight stitch over it from the outside. Once the monster is stuffed, nobody will notice it.
Crochet Blue Monster Amigurumi FAQs
What yarn works best for a crochet blue monster amigurumi?
DK cotton or milk cotton works best. Both show clear stitch definition and hold their shape well after stuffing.
Can I sew the green spots on instead?
Yes. Simply crochet two small green circles and sew them onto the body. The spots will stand out more, and you can skip the color changes entirely.
Is the monster safe for babies?
Skip safety eyes for children under 3. Instead, embroider the eyes with black yarn so nothing can come loose.
How do I stop stuffing from showing through the stitches?
Go down one hook size and keep your tension even. Also, avoid overstuffing, because it stretches the stitches open.
Your Monster Is Ready for a New Home
Once the base is set, the blue body, soft dome shape, and pale green spots come together quickly. From here, try a second crochet blue monster amigurumi in a new color pair and start a small monster crew. Looking for another creature to make next? The worry monster amigurumi pattern and the crochet goblin amigurumi both make great companions for your new plush.