Free Crochet Bia Crop Top Pattern for a Chic Summer Look
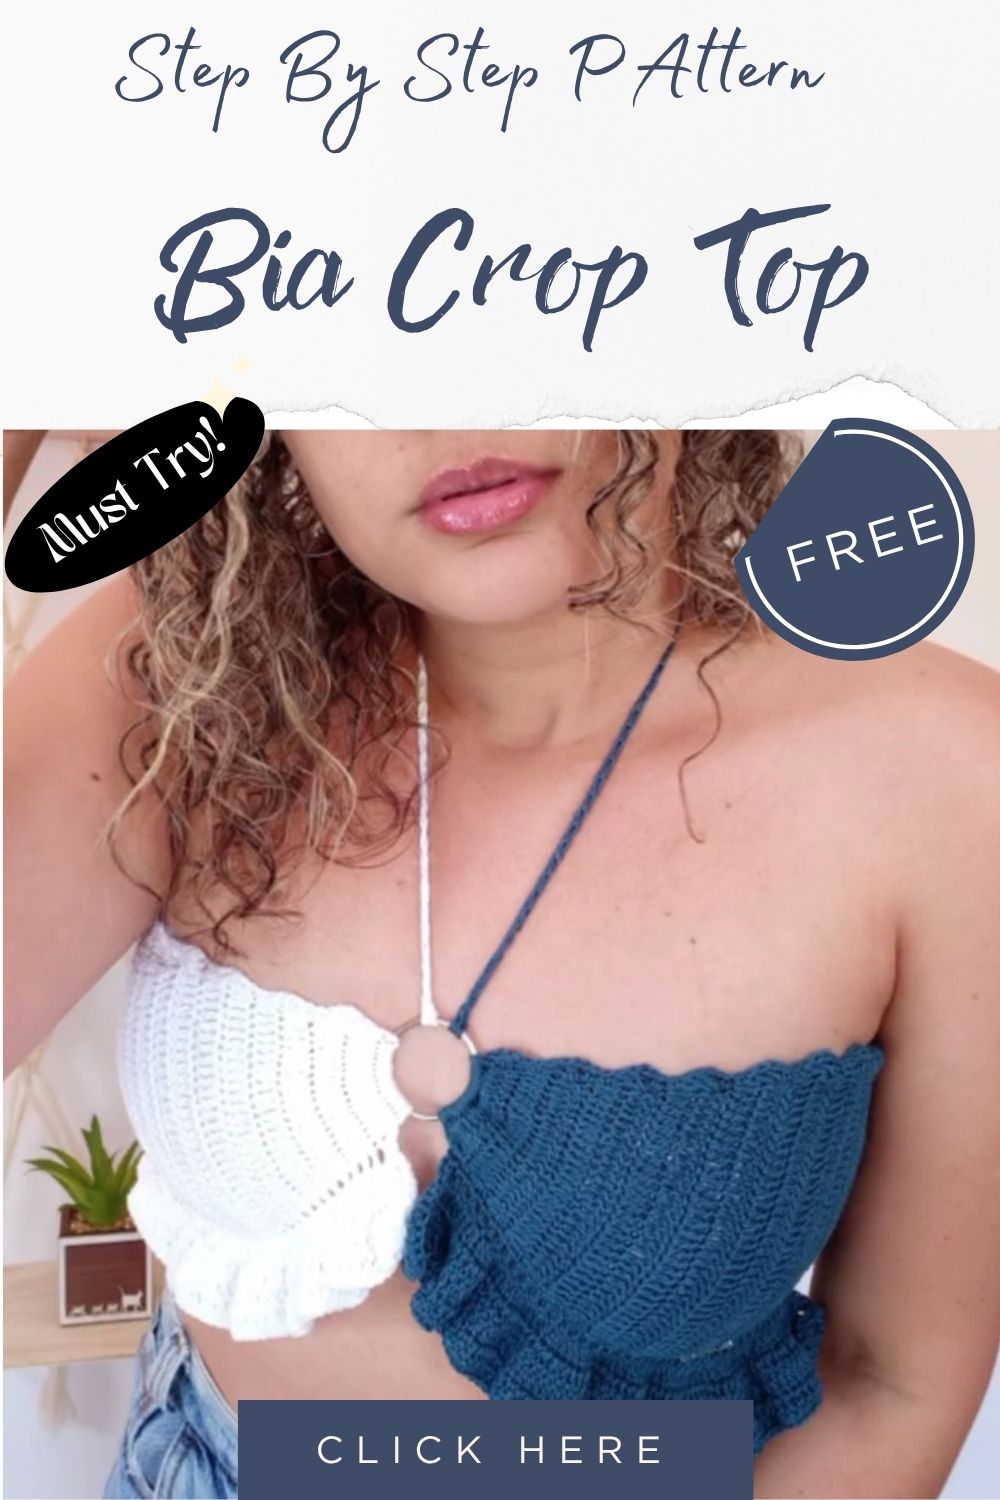
Two triangles of single crochet, each one built straight off a slim metal ring instead of a foundation chain, tie together at the sides and neck to form the Free Crochet Bia Crop Top Pattern for a Chic Summer Look. The ring-anchor method skips a fitted bodice altogether, so the fabric drapes rather than clings.
Built from a metal ring rather than a slip knot, this crop top pattern grows in straightforward single crochet rows until each triangle reaches the width you want, then a matching second panel repeats the shape before both get knotted together at the straps and sides no zipper, no buttonholes, no set-in armholes to fuss over.
Time Box
- Prep: 10 minutes (gathering rings, checking gauge)
- Stitching: 3–4 hours total for both panels
- Finishing: 30–40 minutes (weaving ends, attaching ties, joining panels)
Materials
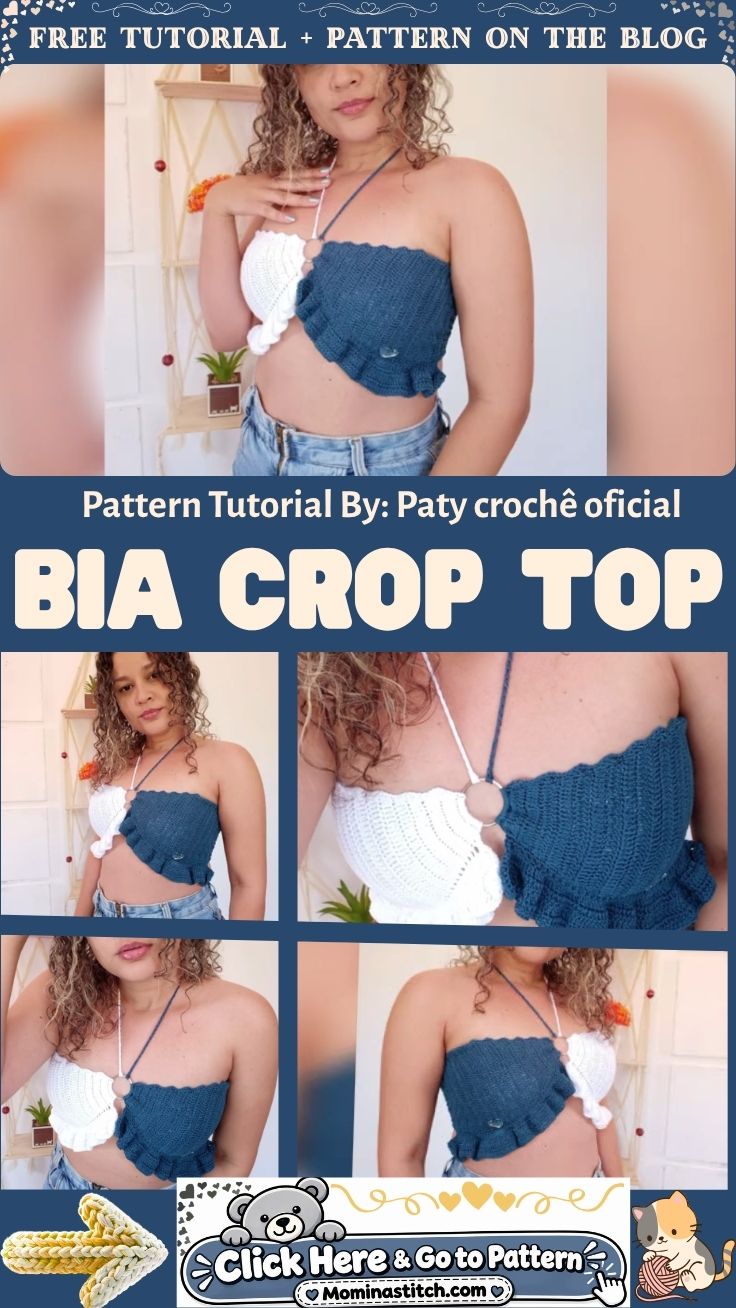
Yarn: A worsted weight (#4) cotton or cotton-blend yarn holds its shape against skin and washes well plan on roughly 300–350 yards total. Your photos show a two-tone version, one panel in white and one in navy, so budget yarn by color if you’re splitting the top that way.
Hook: A 4.0mm–4.5mm hook keeps the fabric firm enough to hold its shape without gaps between stitches — sizing down slightly from what the yarn label suggests is worth doing here.
Rings: Two metal O-rings or split rings, roughly 1–1.5 inches across, anchor each triangle’s point and double as the loop the ties pass through later.
Abbreviations
sc — single crochet · sl st — slip stitch · ch — chain · rnd — round · st(s) — stitch(es) · rep — repeat · sc2tog — single crochet two together
Special Techniques
The pattern opens with stitches worked directly around a metal ring rather than into a chain — essentially crocheting over the ring’s edge until it’s fully covered, the same principle used for purse handles or bag straps. From there, the triangle grows through turned rows of single crochet with an increase at one or both edges, rather than joined rounds.
Before You Start
Swatch a few rows before committing to a full panel a loose gauge here won’t just look sloppy, it’ll let the fabric sag once the ring takes the garment’s weight. Confirm your rings fit comfortably inside the hook’s stitch size, and if you’re working the two-color version shown in the photos, wind both skeins so you’re not stopping mid-row to find yarn.
Panel Construction
Step 1 – Wrap the Ring
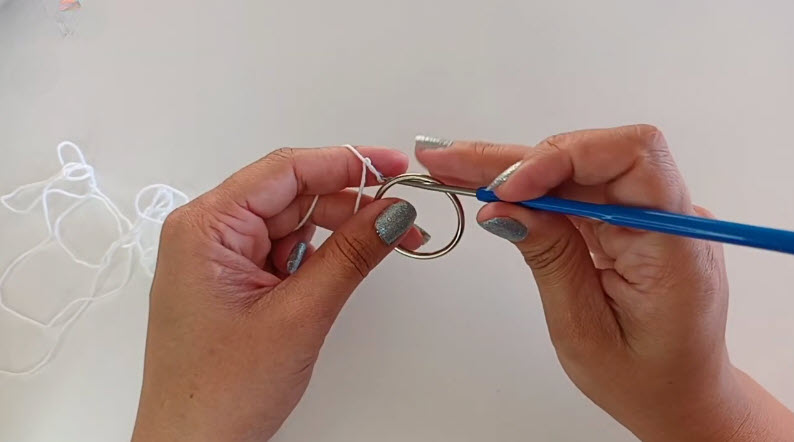
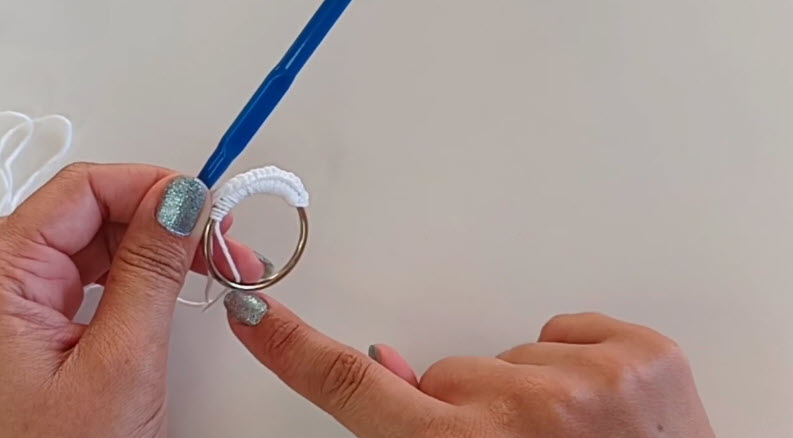
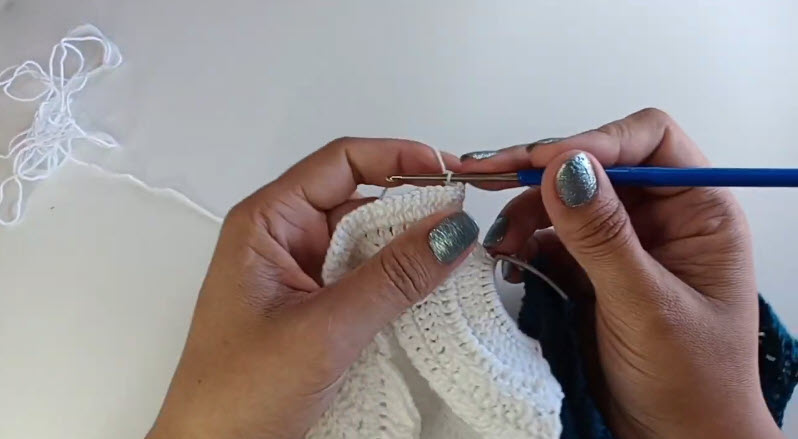
Attach the yarn to the ring with a slip knot, then single crochet around the ring’s circumference until it’s completely covered in stitches, packing them close enough that no metal shows through.
Pro-Tip: Keep your first few stitches snug against each other as you wrap a gap left here at the very start is the one spot the finished top can’t hide.
Step 2 – Build the First Row
Turn and work a row of single crochet across the wrapped ring, treating the covered ring as your foundation row.
Step 3 – Increase the Triangle
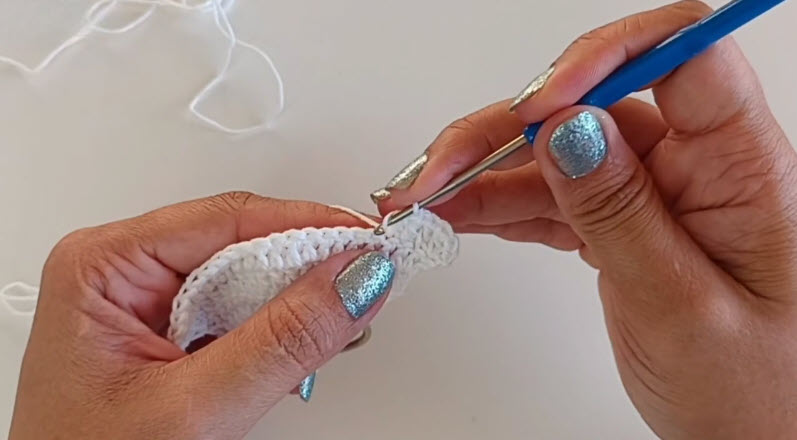
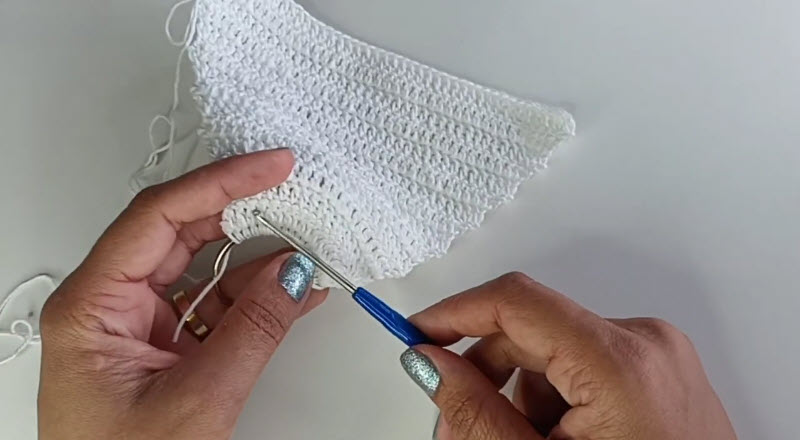
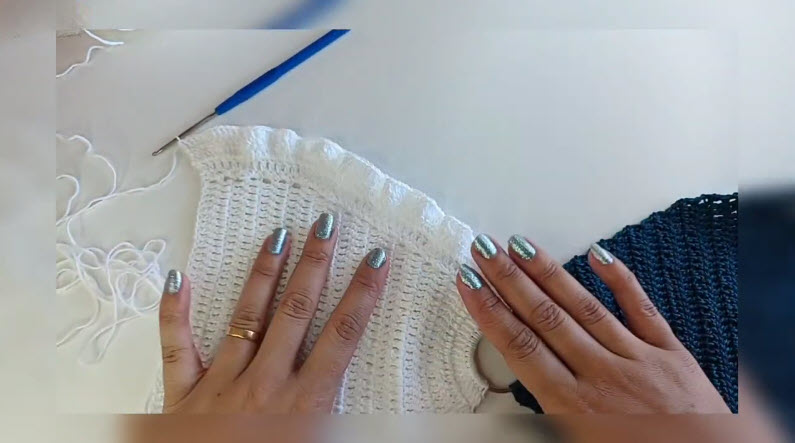
Continue in turned rows, adding a stitch at the start or end of each row (or both) so the fabric widens evenly with every pass, forming the triangle shape visible once several rows are stacked.
Stitch check: count the stitches across your widest row before moving to the next one a triangle that widens unevenly on one side is easiest to fix a row or two in, not after the panel is finished.
Step 4 — Repeat for the Second Panel
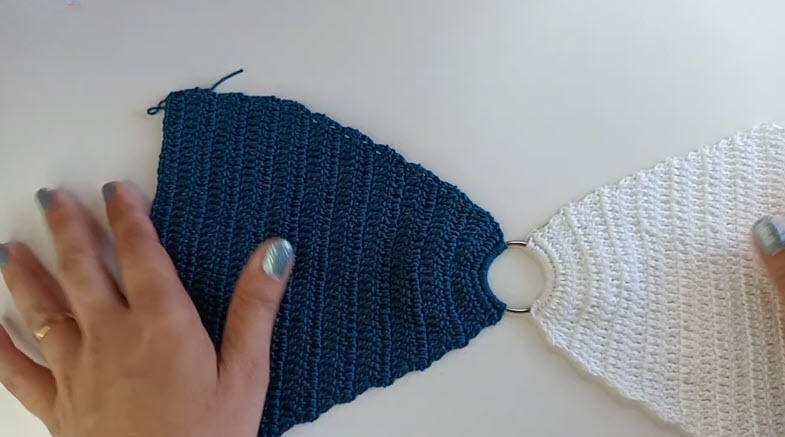
Work a matching triangle from a second ring, either in the same color or a contrasting one as shown in the given pattern.
Fit check: lay both panels flat, ring to ring, before joining anything matching width and row count now means the finished top hangs even on the body.
Joining the Panels and Attaching the Ties
Once both triangles match, the rings become the anchor points for cord or chain ties: work a length of chain (or a twisted cord) from one ring, up and over the neck, down to the second ring, then repeat lower down for the band that wraps the ribcage.
Measure now: try the ties against your own measurements before fastening off, since this is the step that actually sets the fit.
Common Mistakes
The most common snag is a ring left partly bare where stitches spread too thin during Step 1 go back and tuck in a stitch or two if you spot gaps rather than pushing forward. A second frequent issue is mismatched panels in a two-color set, usually from losing count on the increase rows; a stitch marker clipped at the start of each row heads that off. Loose ties are the third culprit a twisted cord holds its shape and grip far better than a plain chain against skin.
Troubleshooting
A panel that curls at the edges usually means the tension loosened partway through — frog back to where the curl starts and rework it slightly tighter. If the ring spins loosely inside the wrapped stitches, add a few extra single crochets directly through the ring itself to lock it in place. Twisted ties untwist themselves after a wash and a stretch, so don’t rework them for that alone.
Size Modification
For a larger fit, add one or two extra rows before the increase point on each panel, or start with a slightly bigger ring for more coverage at the base. For a smaller fit, stop the increase rows a round early and compensate with slightly shorter ties.
Uses & Benefits
The finished top layers over a swimsuit, pairs with high-waisted bottoms for a festival look, or stands on its own for warm-weather evenings. Because the panels tie rather than zip, the same top adjusts across a wider size range than most fitted garments, and it packs flat for travel without losing shape. The open ring-and-tie construction also means repairs are simple a snapped tie gets replaced without unpicking a single stitch of the panels themselves.
Beginner Tips
Work your gauge swatch slightly tighter than usual; garments worn against skin show gaps that a blanket or amigurumi would hide. Mark the start of every row with a stitch marker while you’re still building the increase rows — losing your place here is the single easiest way to end up with mismatched panels.
Personalization Ideas
Color-Block Panels
Swap colors partway up each triangle for a two-tone effect within a single panel, not just between the two.
Fringe Trim
Add a fringe row along the base of each triangle for movement.
Bead Accents
Thread a few beads onto the tie cords before finishing for a subtle detail at the shoulder.
Care Instructions
Hand wash in cool water and lay flat to dry; cotton yarn holds water and can stretch out of shape if hung wet. Skip the dryer and skip wringing; press gently in a towel instead.
FAQs
Can I use a bigger ring?
Yes — a larger ring simply gives the panel a wider starting point, which shortens how many increase rows you need to reach your target width.
Can I skip the rings entirely?
The rings do double duty as a rigid anchor for the fabric and an attachment point for the ties, so swapping them out means finding another sturdy loop a wooden ring or a firm crocheted loop both work as substitutes.
What if my panels come out different sizes?
Unravel back to the last row where the stitch counts matched and rework from there rather than trying to fudge the difference at the tie stage.
Does the yarn weight matter for fit?
A worsted weight holds structure well; a lighter yarn will need a smaller hook and extra rows to reach the same finished measurements.
Conclusion
Built from two rings and a pair of expanding triangles, the finished top skips every set-in seam, leaving tension and tie length as the true levers for fit and comfort.