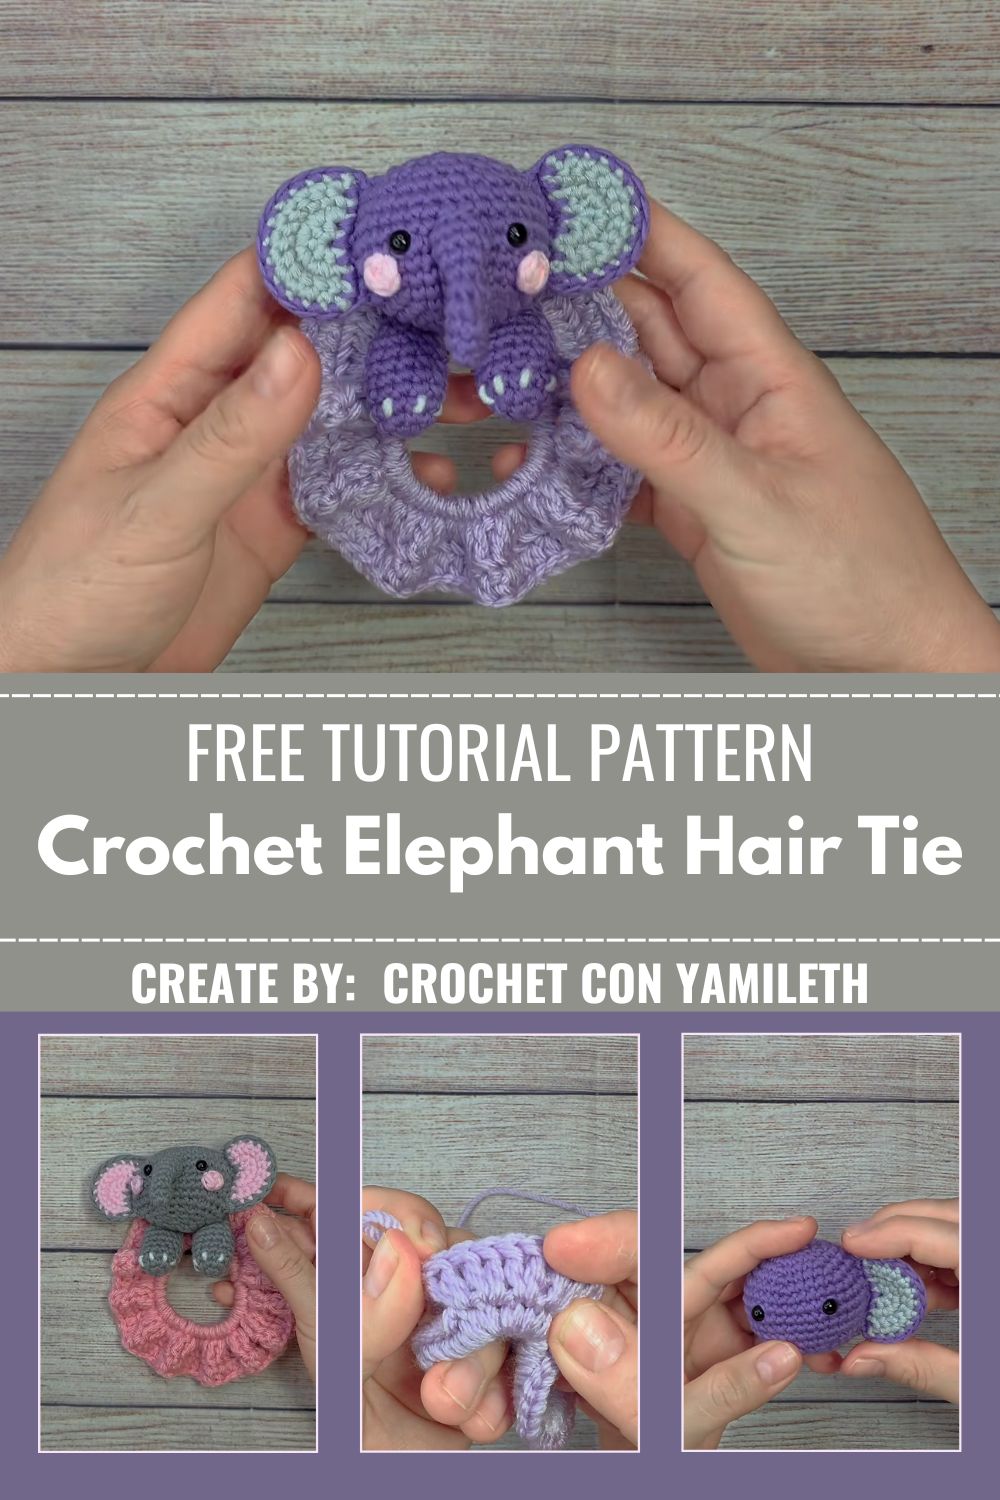
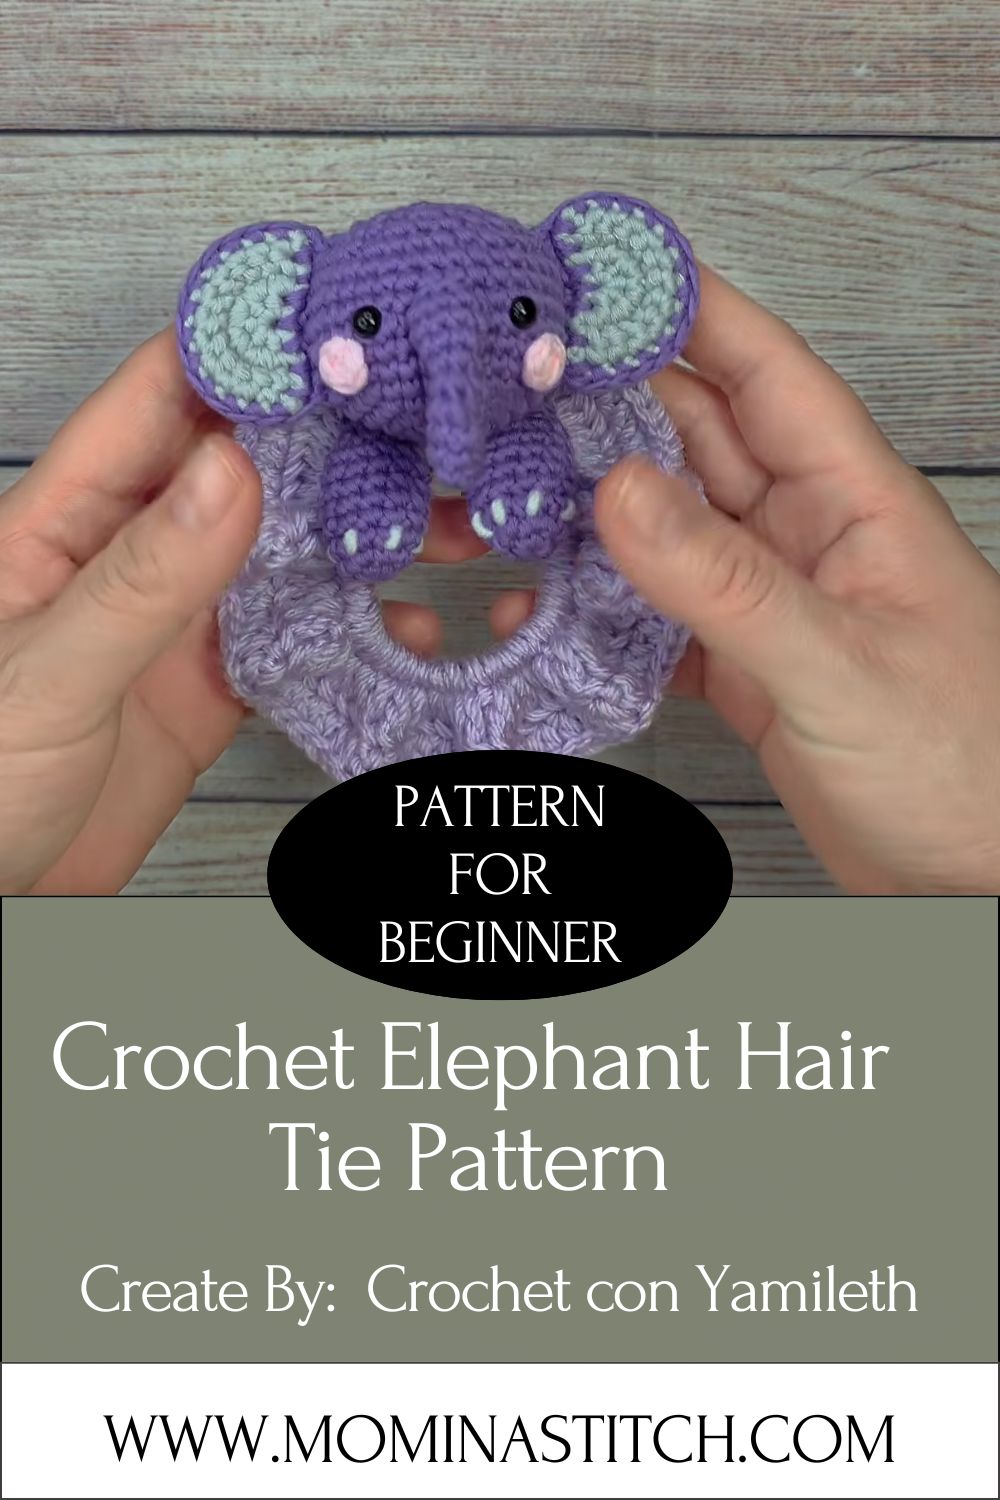
Free Crochet Elephant Hair Tie Pattern for a Everyday Look
An elephant hair tie is a small crochet accessory that wraps around a ponytail elastic and turns it into a playful little elephant face. Honestly, it’s one of those projects that looks way more impressive than the effort it actually takes. The elephant’s trunk sits right where your ponytail falls, so from the front it looks like a cute bow with floppy ears and a curling trunk.
Crochet lovers enjoy making this amigurumi because it’s fast, fun, and useful all at once. Unlike a plushie that sits on a shelf, this little elephant gets worn every single day. It’s also a great stash-buster project since it only needs a small amount of yarn in one or two colors.
This pattern is beginner-friendly. It uses only single crochet, chains, and slip stitches, so if you know those three stitches, you’re ready to start. No joke, most crocheters finish their first elephant hair tie in under an hour.
Pattern Overview
- Finished Size: Approximately 3 inches wide and 2 inches tall (excluding trunk length)
- Difficulty Level: Beginner
- Time Required: 30 to 45 minutes
- Project Type: Amigurumi hair accessory
This project falls into the amigurumi accessory category rather than a full plushie, since the elephant is built directly onto a hair elastic instead of being stuffed as a standalone toy.
Materials Needed
- Worsted weight (medium 4) yarn in gray, plus a small amount of pink or a contrast color for the ears
- 4.5mm or 5mm crochet hook
- Small amount of polyester stuffing
- Yarn needle for weaving in ends
- Stitch markers
- Scissors
- Hair elastic band
- Safety eyes (optional; embroidered eyes work too)
Crochet Abbreviations
- sc – single crochet
- inc – increase (2 sc worked into the same stitch)
- dec – decrease (2 stitches worked together as one)
- ch – chain
- sl st – slip stitch
- FO – finish off
Step-by-Step Crochet Pattern
Base Band (Around the Elastic)
Round 1: Attach yarn to the elastic with a slip knot, then work 24 sc evenly around the elastic. Sl st to join. (24 sts)
Round 2: Ch 1, *2 sc in next st, sc in next 3 sts, repeat from * around. Sl st to join. (30 sts)
Keep your stitches snug here since a loose base band means the elephant slides around on the elastic later.
Ears (Make 2)
Row 1: Ch 2, 6 sc in the second chain from hook. (6 sts)
Row 2: Inc in each st around. (12 sts)
Row 3: *Sc in next st, inc in next st, repeat from * around. (18 sts)
FO, leaving a long tail for sewing. Trust me, longer tails now save you frustration during assembly.
Trunk
Row 1: Ch 6, sc in second chain from hook and each chain across, ch 1, turn. (5 sts)
Rows 2–20: Sc in each st across, ch 1, turn.
FO, leaving a tail. Adjust the number of rows if you want a shorter or longer trunk, since this part covers the actual ponytail length.
Face Panel
Round 1: Ch 2, 6 sc in second chain from hook. (6 sts)
Round 2: Inc in each st around. (12 sts)
Round 3: *Sc, inc, repeat from * around. (18 sts)
Round 4: Sc in each st around, no increases. (18 sts)
FO and set this piece aside; it becomes the front of the elephant’s face.
Assembly Instructions
Low-key, this is the part beginners worry about most, but it’s simpler than it looks.
- Center the trunk piece over the front of the base band, right where the ponytail elastic hangs, and sew it in place along the top edge.
- Position both ears slightly above and to either side of the trunk, then stitch them down using the tail left from each ear.
- Attach the face panel behind the ears and trunk for a fuller, rounded look, tucking a small amount of stuffing behind it before closing.
- Add safety eyes or embroider small eyes above the trunk for the classic elephant expression.
- Weave in every loose end with your yarn needle so nothing unravels during wear.
Beginner Tips
- Use a stitch marker at the start of every round so you never lose track of where you began.
- Keep your tension tight and even, especially around the base band, so the elastic stays covered.
- Stuff evenly and in small amounts rather than one big clump, which helps the face panel stay smooth.
- A common mistake is skipping the stitch count checks; count your stitches after every round while you’re learning.
Customization Ideas
- Swap gray for pink, lavender, or pastel yarn for a softer everyday look.
- Skip the elastic entirely and attach a jump ring to the base band for a keychain version.
- Make it smaller with fingering weight yarn and a 3mm hook for a mini plushie charm.
- These make sweet handmade gifts for birthdays, party favors, or teacher appreciation gifts.
- Pin a finished elephant onto a ribbon board or nursery wall for a bit of home decor charm.
Care Instructions
Hand wash your elephant hair tie in cool water with a gentle detergent, swishing softly instead of scrubbing. Press out extra water in a clean towel rather than wringing it, then lay it flat to air dry away from direct heat. Store it in a small pouch or drawer separate from sharp accessories so the stitches don’t snag.
FAQ Section
Which yarn is best for this pattern?
A smooth worsted weight cotton or acrylic yarn works best since it holds its shape well around the elastic.
Can beginners make this?
Yes, this pattern only uses basic stitches, making it a great first amigurumi accessory project.
How long does it take to finish?
Most crocheters complete one elephant hair tie in 30 to 45 minutes, trunk length included.
Can I sell finished products made from this Crochet Elephant Hair Tie pattern?
Selling finished items is generally fine, but always check the individual designer’s terms before selling, since some free patterns restrict commercial use.
Conclusion
This Crochet Elephant Hair Tie is honestly such a fun little project to keep in your crochet rotation. It’s quick enough for a weekend afternoon and sweet enough to become someone’s new favorite hair accessory. Give this pattern a try, and don’t forget to share a photo of your finished elephant with the crochet community.