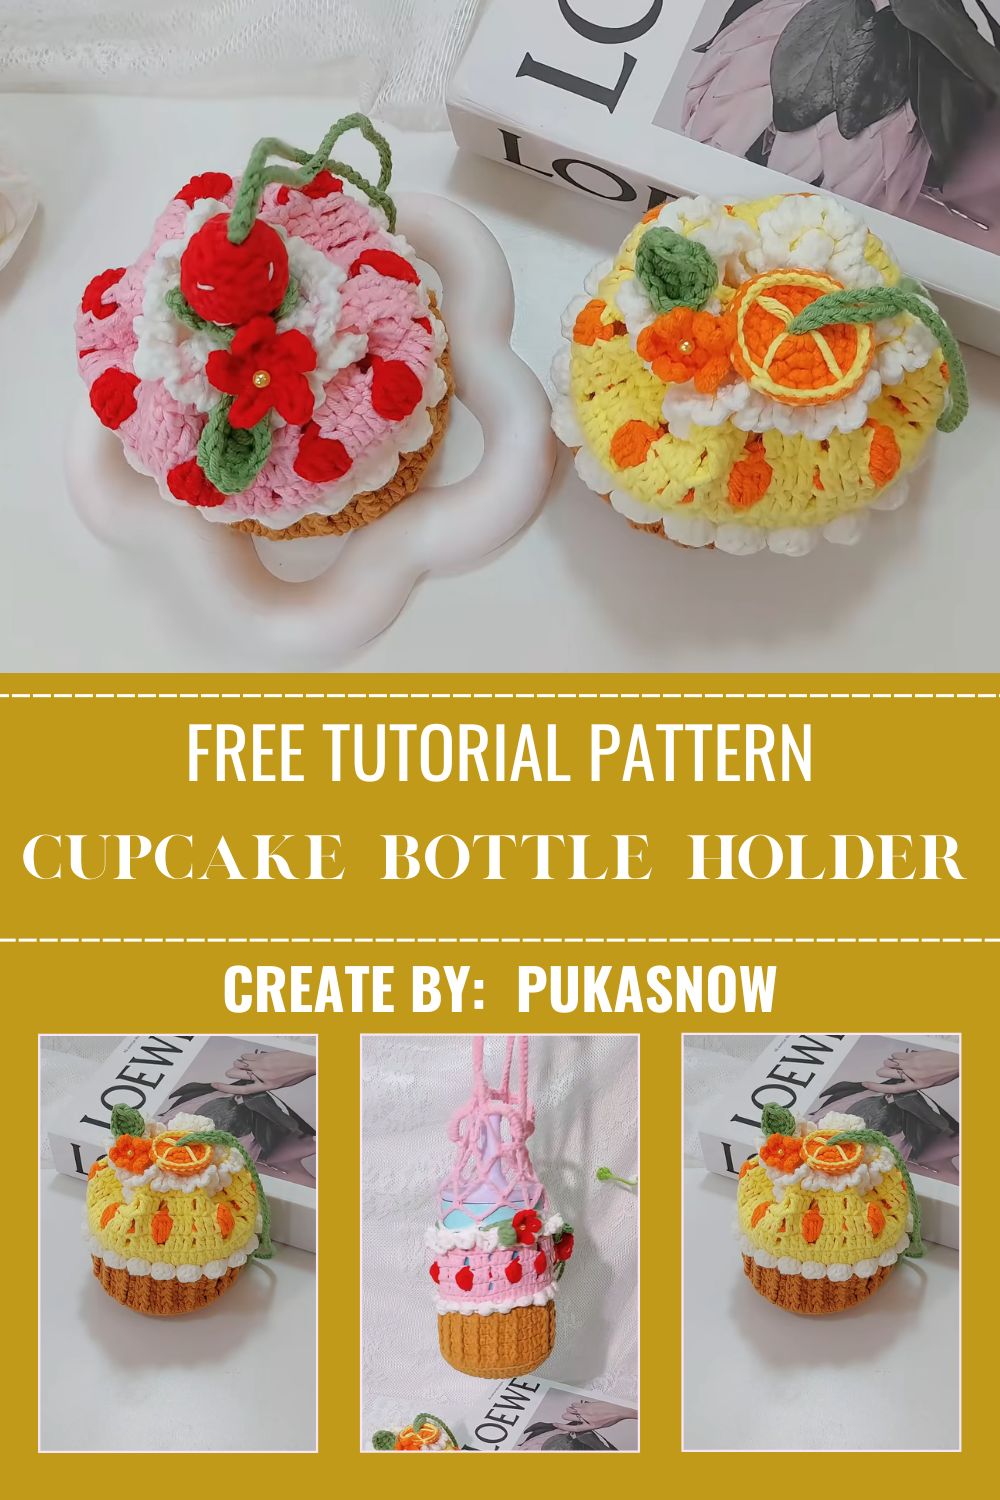
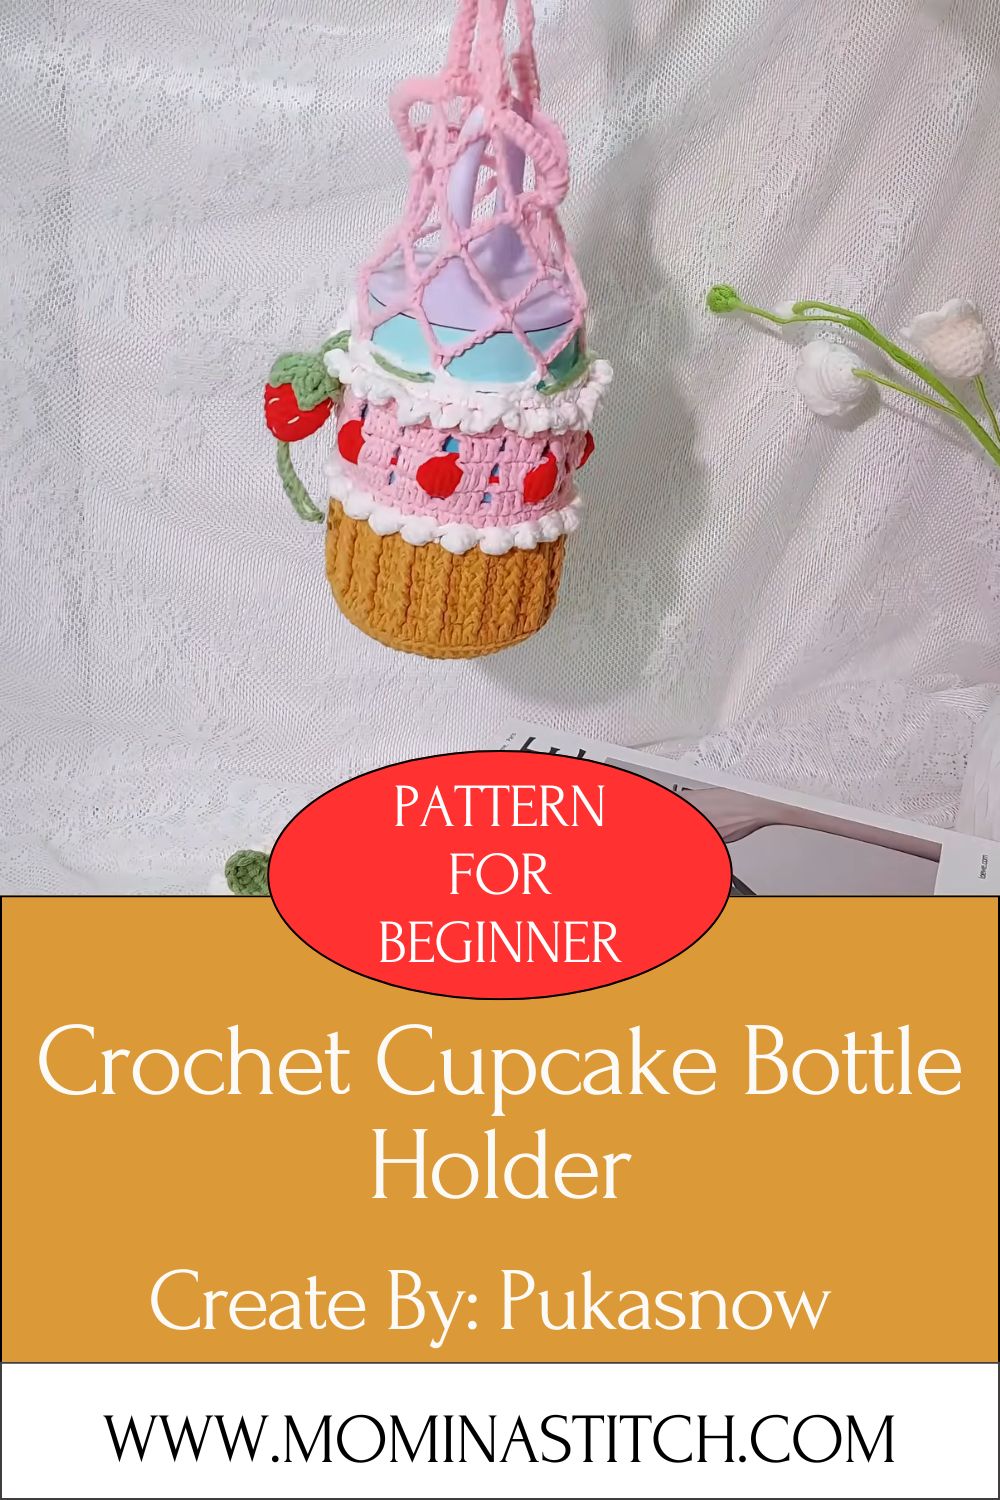
Crochet Cupcake Bottle Holder Pattern You’ll Love to Make
A cupcake you can crochet that actually holds your water bottle? Yes please. Sweet, practical, and quick to stitch, the crochet cupcake bottle holder turns an ordinary bottle into something adorable you genuinely want to carry around with you everywhere.
Cupcakes bring instant joy, and that same cheerful feeling carries straight into your yarn projects. A crochet cupcake bottle holder borrows the rounded cup, the swirled frosting, and the bright cherry on top, then wraps it all snugly around your favorite drink so everyday hydration feels a little more fun.
Beyond the cute factor, a handmade holder earns its place in your bag. It cushions glass and metal bottles against bumps, soaks up cold-drink condensation before it reaches your hands, and gives you a comfy grip on the go. Crocheters love the project because it stitches up fast, uses leftover yarn from the stash, and makes a thoughtful gift that always gets a smile.
What Is a Crochet Cupcake Bottle Holder?
A crochet cupcake bottle holder is a soft sleeve shaped like a frosted cupcake that slips over a water bottle. The lower half forms the cup, the upper half puffs out into frosting, and a tiny cherry sits proudly on top.
Slide your bottle inside and the holder hugs it gently, keeping drinks within easy reach. Many crocheters add a strap or drawstring so the whole thing clips to a backpack, gym bag, or stroller. Honestly, once you carry one around, plain bottles start to feel a bit boring.
The design also doubles as a cozy. It guards your bottle against scratches, keeps icy drinks from sweating all over your bag, and adds a splash of handmade charm wherever you go.
Skill Level
Beginner to intermediate.
If you can work in continuous rounds and stitch a basic single crochet, you can absolutely make this. The cup body uses simple increases and a straight section, which keeps things relaxed for newer crocheters. The frosting and cherry introduce a little shaping, so they offer just enough challenge to keep the project interesting without overwhelming anyone.
Materials and Supplies You’ll Need
Gather everything before you start so you can stitch without stopping mid-row.
Yarn:
- Cup base color (worsted weight cotton works great, around 50 to 70 grams)
- Frosting color (white, pink, or any shade you love)
- Cherry topper color (red is classic, but go wild)
- Sprinkle accents (small amounts of two or three bright colors)
Hook and tools:
- Crochet hook size 4.0 mm (G/6) or 4.5 mm (7) for a firm, sturdy fabric
- A bottle to fit the holder (a standard 500 ml to 750 ml bottle suits the pattern below; measure yours first)
- Tapestry needle for sewing and weaving ends
- Sharp scissors
- Stitch markers to track your rounds
- Fiberfill or a little stuffing for a plump cherry
Optional carrying extras:
- A button for closing a flap or strap
- Drawstring cord or ribbon
- Strap hardware, a swivel clip, or a keychain ring for easy attaching
A quick note on sizing: crochet stretches, so aim for a holder slightly smaller than your bottle’s widest part. A snug fit stops the bottle from sliding out.
Crochet Techniques Used in This Pattern
You only need a handful of skills here, and each one shows up in the steps below.
- Working in continuous rounds: You’ll spiral around without joining, which gives the cup a smooth, seamless shape.
- Single crochet (sc): The main stitch for almost the whole holder. Tight and dense, it keeps the fabric supportive.
- Increase (inc) and decrease (dec): Increases widen the base to fit your bottle, while decreases curve the top and shape the cherry.
- Shell or bobble stitch (optional): Either one adds that bumpy, swirled frosting texture. Treat it as a design choice rather than a must.
- Making and attaching a strap: A simple chain or a slim sc band becomes your carry handle.
- Joining and sewing: A tapestry needle helps you fasten the cherry, sprinkles, and strap neatly in place.
Step-by-Step Crochet Cupcake Bottle Holder Pattern
Grab your cup color and let’s begin. Stitch counts appear in brackets at the end of each round.
Starting the Base of the Cup
Begin with a magic ring to keep the center tight.
- Round 1: 6 sc into the magic ring [6]
- Round 2: 2 sc in each st around [12]
- Round 3: (1 sc, inc) repeat around [18]
- Round 4: (2 sc, inc) repeat around [24]
- Round 5: (3 sc, inc) repeat around [30]
- Round 6: (4 sc, inc) repeat around [36]
Keep increasing in the same pattern until the flat circle matches the diameter of your bottle’s base. Pop your bottle on top now and then to check.
Building the Cup Body to Fit the Bottle
Once the base is the right size, stop increasing and build the walls straight up.
- Work 1 sc in each st around, round after round, with no increases.
- Slip a stitch marker in the first stitch of each round so you never lose your place.
- Continue until the cup reaches the height you want, usually two-thirds of the way up your bottle.
Try the holder on as you go. The fabric should feel snug but slide on without a fight.
Creating the Frosting Layer
Switch to your frosting color and let the fun begin.
For a smooth frosting, simply keep working sc rounds and add a couple of increases every few rounds so the top flares out slightly over the cup edge.
For a textured frosting, swap in shell stitches or bobbles:
- Shell version: Skip a stitch, work 5 double crochet in the next stitch, skip a stitch, then sc. Repeat around for a scalloped, piped look.
- Bobble version: Work a bobble (5 unfinished double crochet drawn together) every two or three stitches to mimic creamy dollops.
Work two or three frosting rounds, then finish off and weave in the tail.
Making the Cherry Topper and Any Sprinkles
Time for the crowning touch. Grab your cherry color.
- Round 1: 6 sc into a magic ring [6]
- Round 2: 2 sc in each st [12]
- Rounds 3 to 4: 1 sc in each st [12]
- Round 5: (2 sc, dec) repeat around [9]
Stuff lightly with fiberfill, then continue decreasing until the hole closes. Leave a long tail for sewing.
For the stem, chain 5 in brown or green yarn and fasten off.
Sprinkles are easy. Chain 4 to 6 in assorted bright colors, fasten off, and set them aside for the next step.
Adding the Strap or Drawstring for Carrying
Pick whichever carry style suits you.
- Strap: Chain a length that loops comfortably over your shoulder or clips to a bag, then work 1 sc in each chain back along the row for strength. Fasten off and leave tails.
- Drawstring: Make a long chain, weave it through the top frosting round, and add a clip or ring to the ends.
Trust me, a quick try-on here saves you from a too-short strap later.
Assembling and Finishing Touches
Now bring all the pieces together.
- Sew the cherry firmly to the center of the frosting using its long tail.
- Attach the stem just beside the cherry.
- Scatter and stitch your sprinkles across the frosting in a fun, random pattern.
- Sew the strap securely to opposite sides of the cup.
- Weave in every loose end so the inside stays smooth against your bottle.
Pop your bottle inside, step back, and admire your sweet new creation.
Helpful Beginner Tips
A few small habits make a big difference on this project.
- Keep your tension even. Steady, slightly firm stitches help the holder hug the bottle instead of sagging.
- Use stitch markers. Mark the first stitch of every round so you always know where each round starts and ends.
- Measure as you go. Slide your bottle in often. Catching a sizing issue early beats frogging later.
- Weave in ends neatly. Bury each tail along a few stitches and snip close so nothing peeks out.
- Block lightly if needed. A gentle steam helps the frosting sit flat and the cup hold its round shape.
Design Customization Ideas
Half the fun of a cupcake holder lives in the color play, so let your imagination run wild. Swap the classic white frosting for soft pink, mint green, or chocolate brown, then pair it with a cup base that pops, like teal, lavender, or sunny yellow. Sprinkles open up endless options too. Stitch tiny chains in rainbow shades, sew on a handful of seed beads, or french-knot bright specks across the frosting for an instant burst of charm.
Not feeling the cherry? Top yours with a crochet strawberry, a small star, or a chunky pom-pom instead. You can resize the whole holder to hug slim flasks, wide tumblers, or tall sports bottles simply by adding or removing rounds. Prefer a desk-friendly version? Skip the strap entirely and stitch a plain cozy that slips on and off. Mix, match, and make the design feel completely and uniquely yours.
Frequently Asked Questions
What is the best yarn for a crochet bottle holder?
Cotton yarn wins for durability and washability. It holds its shape, resists stretching when wet, and survives frequent washing. Acrylic works too if you want extra softness and budget-friendly colors.
How do I make the holder fit snugly on the bottle?
Crochet the cup slightly smaller than your bottle’s widest spot and keep your tension firm. The natural stretch grips the bottle and stops it from slipping out.
How long does the project take?
Most crocheters finish in two to four hours. Beginners may take a bit longer, and adding lots of sprinkles or a textured frosting can stretch the time slightly.
How do I wash and care for the holder?
Hand wash in cool water with mild soap, then reshape and lay flat to dry. For cotton holders, a gentle machine cycle in a mesh bag works fine. Skip the dryer so the shape stays crisp.
Final Thoughts
There you have it, a sweet little project that mixes simple craft with everyday usefulness. Your crochet cupcake bottle holder keeps drinks comfy in hand, adds a real pop of personality to any bag, and happily uses up those odd yarn scraps you’ve been saving. Grab your hook, pick your favorite frosting shade, and start stitching today. Once friends spot yours, expect a few requests for one of their own.