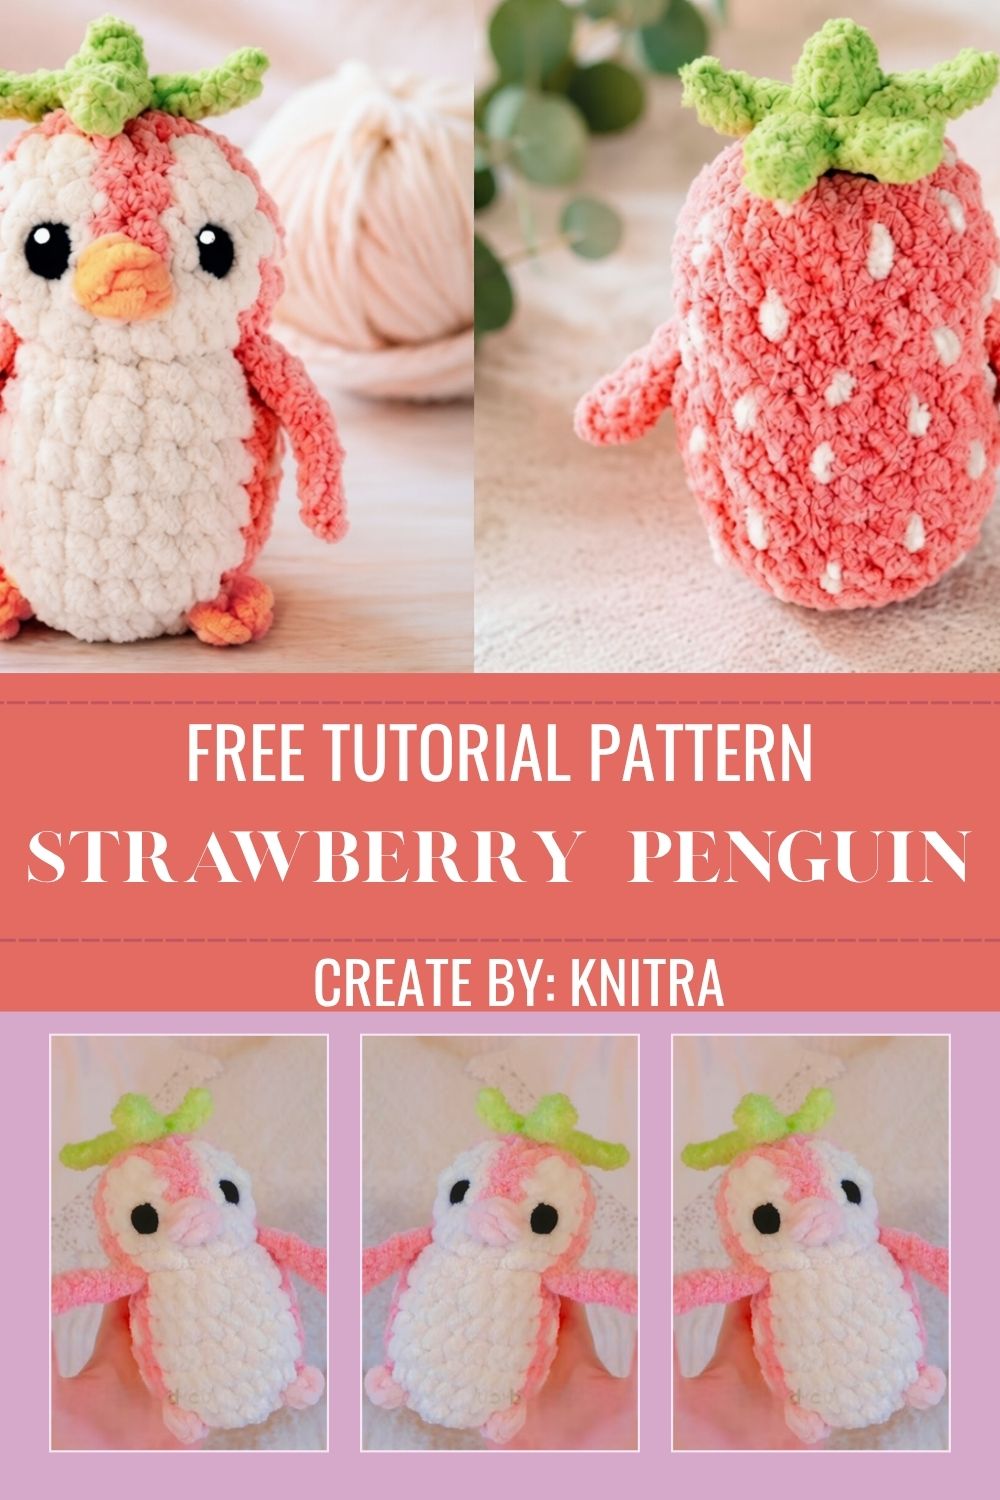
Free Crochet Strawberry Penguin Amigurumi Pattern
Have you ever seen something so cute that you just had to make it? That is exactly how I felt the first time I spotted a Free Crochet Strawberry Penguin. Picture a chubby little penguin wearing a strawberry costume a round red body covered in tiny seeds, a soft white tummy, two little flappy wings, and the sweetest green leafy hat sitting on top. One look and you cannot help but smile.
The best news? You do not need to be an expert to make one. This free crochet strawberry penguin amigurumi pattern is simple, quick, and so much fun. It works up in just a few hours, uses only a handful of supplies, and turns out adorable every single time.
In this step-by-step Free Crochet Strawberry Penguin guide, I will walk you through everything from start to finish the exact materials, the stitches you will use, the shaping round by round, and all my favorite little tips to make the process smooth and stress-free. Whether this is your very first amigurumi or your fiftieth, you will feel right at home here.
Why You’ll Love This Crochet Project
This strawberry penguin is one of those makes that feels rewarding from the very first round. It works up small, so you are not stuck on one project for weeks. It uses simple shapes, so there is no scary math. And it looks absolutely adorable on a shelf, a desk, or in the hands of someone you love.
Here is why this little plushie is such a winner:
- It is a fast, satisfying make, perfect for a cozy weekend afternoon.
- It is a wonderful, easy crochet project for using up small scraps of yarn.
- It makes a thoughtful handmade gift for birthdays, Valentine’s Day, or “just because.”
- It is beginner-friendly but still cute enough to wow more experienced crafters.
If you love collecting handmade crochet ideas, this penguin deserves a spot on your hook list.
Skill Level
This pattern sits comfortably at the easy beginner to confident beginner level.
You do not need years of experience to finish it. As long as you can crochet in a round and make basic increases and decreases, you are ready. The one part that asks for a little patience is the color change for the penguin’s white belly, but I will share tips below to make that smooth and stress-free.
If this is one of your first amigurumi projects, do not worry. This is exactly the kind of beginner crochet make that helps your skills grow without overwhelming you.
Materials and Supplies You’ll Need
One of the best things about this project is how few supplies it takes. You likely have most of them already in your craft basket.
Yarn Type
- Light worsted (DK) or worsted-weight yarn works beautifully.
- You will need these colors:
- Red (the main strawberry body) a slightly darker and a slightly brighter red looks lovely if you have both, but one red is totally fine.
- White or cream (for the penguin’s belly and face).
- Green (for the little leafy hat on top).
- A small amount of black yarn or safety eyes for the face.
- Optional: a touch of pink or yellow embroidery thread for the strawberry seeds and cheeks.
Cotton yarn gives crisp, neat stitches, while acrylic yarn is soft and budget-friendly. Both are great choices.
Hook Size
- A 3.0 mm to 3.5 mm crochet hook is ideal for DK yarn.
- Use a hook one size smaller than the yarn label suggests. This keeps your stitches tight so the stuffing does not peek through.
Extra Tools
- Polyester fiberfill stuffing
- A yarn needle (tapestry needle) for sewing and weaving in ends
- Stitch markers (or a scrap of contrasting yarn)
- Safety eyes (6 mm) or black yarn for embroidered eyes
- Small sharp scissors
- Optional: pink blush or chalk for rosy cheeks
That is it! Nothing fancy, nothing expensive.
Abbreviations Used:
- MR — Magic ring
- ch — Chain
- sc — Single crochet
- inc — Increase (2 sc in one stitch)
- dec — Decrease (single crochet two together)
- sl st — Slip stitch
- st / sts — Stitch/stitches
- FO — Fasten off
Everything is written in US crochet terms. If you usually crochet in UK terms, just remember that the US single crochet is the UK double crochet.
Step-by-Step Crochet Instructions
We will make the penguin in separate pieces, then sew them together at the end. Work in continuous spirals (no joining each round) and use your stitch marker to track the start of every round.
Step 1: The Body
The body is one smooth, rounded shape no separate head needed, which keeps things simple.
- Start with a magic ring and work 6 sc into it.
- Increase evenly over the next several rounds until you have a wide circle for the base.
- Work straight rounds (one sc in each stitch) to build the height of the body.
- About halfway up, this is where the belly color change happens. Carry the white yarn across the front to create the penguin’s tummy and switch back to red on the sides and back.
- Near the top, begin decreasing to round off the head shape.
- Pause to add the safety eyes before the opening gets too small.
- Stuff firmly as you close, then finish the final decreases and fasten off.
Tip: Stuff the body a little at a time. It is much easier than trying to cram it all in at the end.
Step 2: The Wings (x2)
The little wings are quick and add so much character.
- Start with a magic ring and 6 sc.
- Work a couple of short rounds, shaping a small flat oval.
- Flatten the piece and leave a long tail for sewing.
- Make two matching wings.
These usually do not need stuffing flat and floppy is exactly the look we want.
Step 3: The Strawberry Hat (Calyx)
This green leafy top is what turns a penguin into a strawberry penguin.
- With green yarn, start with a magic ring.
- Work a small round, then create little pointed leaves by chaining and slip stitching back down each point.
- Aim for four or five leaf points around the edge.
- Leave a tail for attaching it to the head.
If your first leaf looks a little wonky, keep going. Once they are all attached, they look perfectly charming together.
Step 4: The Beak and Feet (Optional Details)
- For a tiny beak, embroider a small triangle in yellow or orange, or crochet a mini piece and sew it on.
- For feet, make two small ovals in orange or yellow and attach them to the base of the body.
Step 5: Assembly
This is the magic moment when your penguin comes to life.
- Sew the wings onto each side of the body.
- Attach the green strawberry hat to the top of the head.
- Embroider the eyes (if not using safety eyes), beak, and a sweet smile.
- Add little yellow or white French knots across the red body for strawberry seeds.
- Brush on some pink blush for rosy cheeks.
- Weave in all loose ends and give your penguin a gentle squish.
And just like that you have your very own strawberry penguin!
Helpful Tips for Beginners
A few small habits make amigurumi so much smoother:
- Always use a stitch marker. Move it up at the start of each round so you never lose your place.
- Keep your tension tight. Loose stitches let the stuffing show through.
- Count your stitches at the end of each round to catch mistakes early.
- Stuff firmly but not so much that the shape distorts. You want squishy, not lumpy.
- Watch your hands, not just the hook — a relaxed grip prevents sore fingers.
If a round goes wrong, frogging (pulling it out) is part of the journey. Every crocheter does it.
Common Mistakes and Easy Solutions
Even the cutest project has a few tricky spots. Here are the most common ones and how to fix them.
- Problem: Stuffing peeks through the stitches. Solution: Go down a hook size or use a slightly heavier yarn next time.
- Problem: The body twists or spirals oddly. Solution: Double-check that you are not accidentally adding or skipping stitches. Your stitch marker is your best friend here.
- Problem: The color change leaves a messy bump. Solution: Pull the new color a little snug on the first stitch and carry the unused yarn loosely inside the body.
- Problem: The wings sit unevenly. Solution: Pin them in place with stitch markers before sewing, and count rounds from the base so both sit at the same height.
- Problem: The face looks “off.” Solution: Eye placement makes a huge difference. Try placing them closer together and a little lower for that sweet baby look.
Pattern Customization Ideas
This is where you get to make the project truly yours. A few fun twists:
- Seasonal versions: Try a blueberry penguin in blue and green, or a pumpkin penguin in orange for fall.
- Tiny keychain version: Make it with thinner yarn and a smaller hook, then add a keyring.
- Scarf or bow tie: Add a little accessory for extra personality.
- Sleeping penguin: Embroider closed, curved eyes for a dreamy, cozy expression.
- Glow-up garden: Make a whole fruit family — strawberry, lemon, and watermelon penguins side by side.
There are no rules here. Experimenting is half the fun of any crochet tutorial.
Size and Color Suggestions
The finished size depends entirely on your yarn and hook.
- DK yarn + 3.0 mm hook: about 4 inches (10 cm) tall the classic palm-sized cutie.
- Worsted yarn + 3.5 mm hook: a slightly bigger, huggable version.
- Lace or thread + tiny hook: a mini version perfect for keychains or earrings.
For colors, classic red and green is iconic, but soft pastel pink with mint green gives a dreamy, modern look. White strawberries with pale pink seeds are trending and adorable too.
Frequently Asked Questions (FAQ)
Is this pattern really free?
Yes! The full Free Crochet Strawberry Penguin is available for free in the linked video. You only need basic supplies to get started.
How long does it take to make?
Most beginners finish in about two to three hours. Experienced crocheters can whip one up in under an hour.
Can I sell the finished penguins?
Many designers allow you to sell finished items with proper credit, but please always check the original designer’s terms first. The pattern itself should never be copied or resold.
What if I don’t have safety eyes?
No problem. Embroidered eyes with black yarn look just as cute and are safer for very young children.
Can I machine wash it?
Hand washing in cool water and air drying is the gentlest. Acrylic yarn handles washing better than cotton if you expect lots of cuddles.
I’m a total beginner, can I really do this?
Absolutely. If you can make a magic ring and single crochet, you have everything you need. This is a fantastic first amigurumi.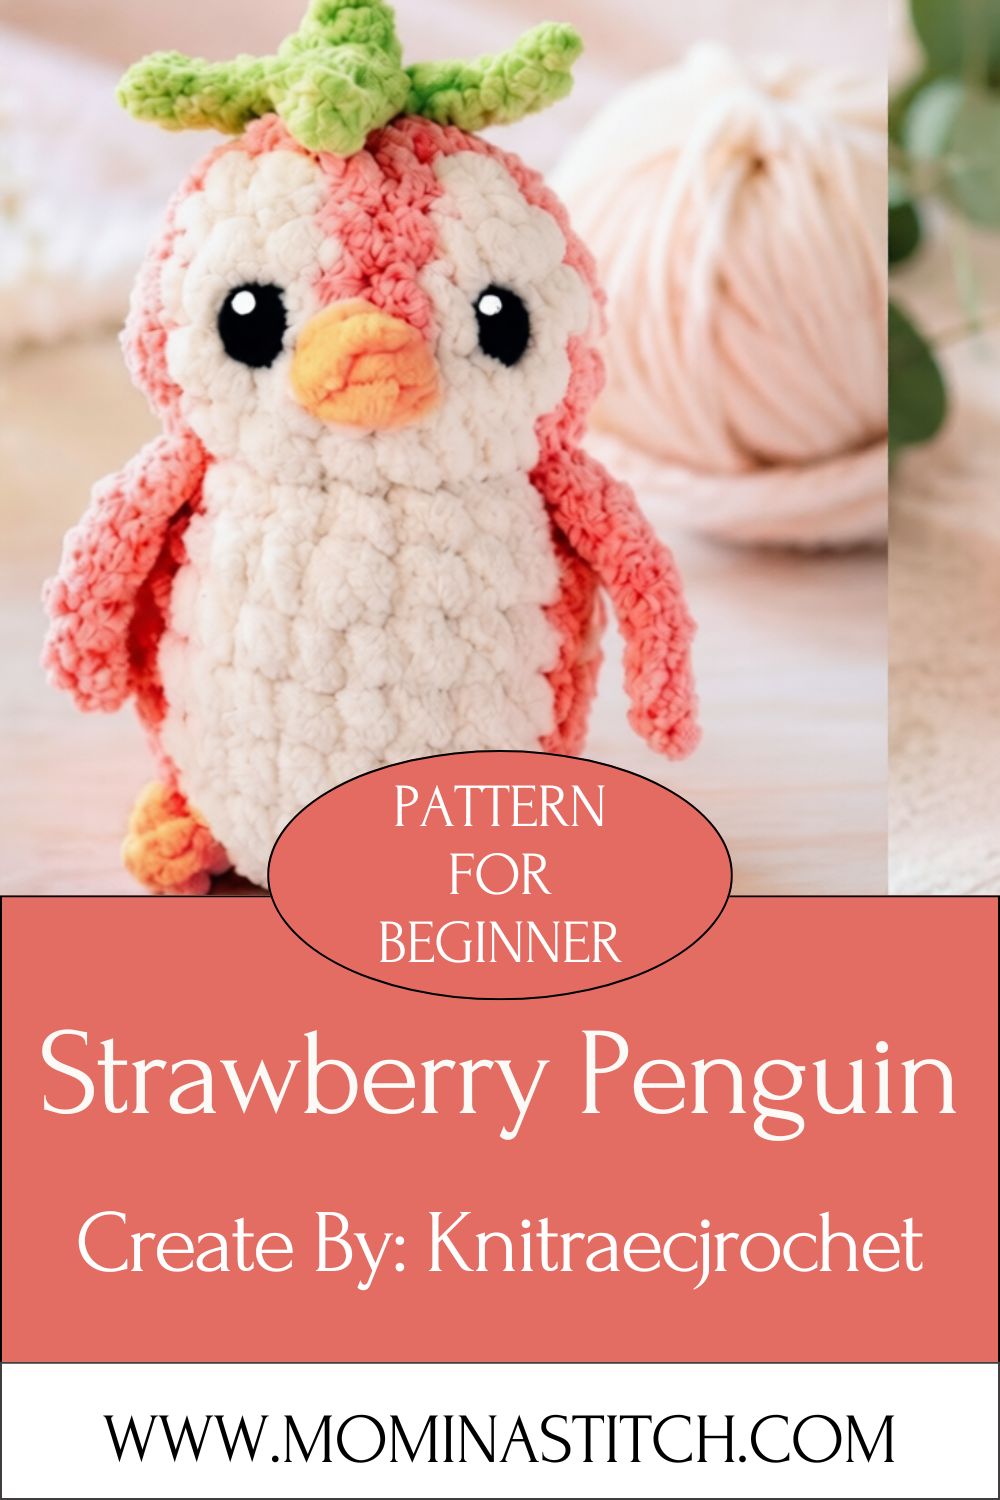
Final Thoughts
There you have it your very own free crochet strawberry penguin amigurumi pattern, start to finish. From a simple magic ring to a finished plushie with rosy cheeks and a leafy little hat, you have created something completely handmade and full of charm.
The best part of crochet is that every project teaches you something new. So if your first penguin is a little lopsided, love it anyway. The next one will be even better, I promise.