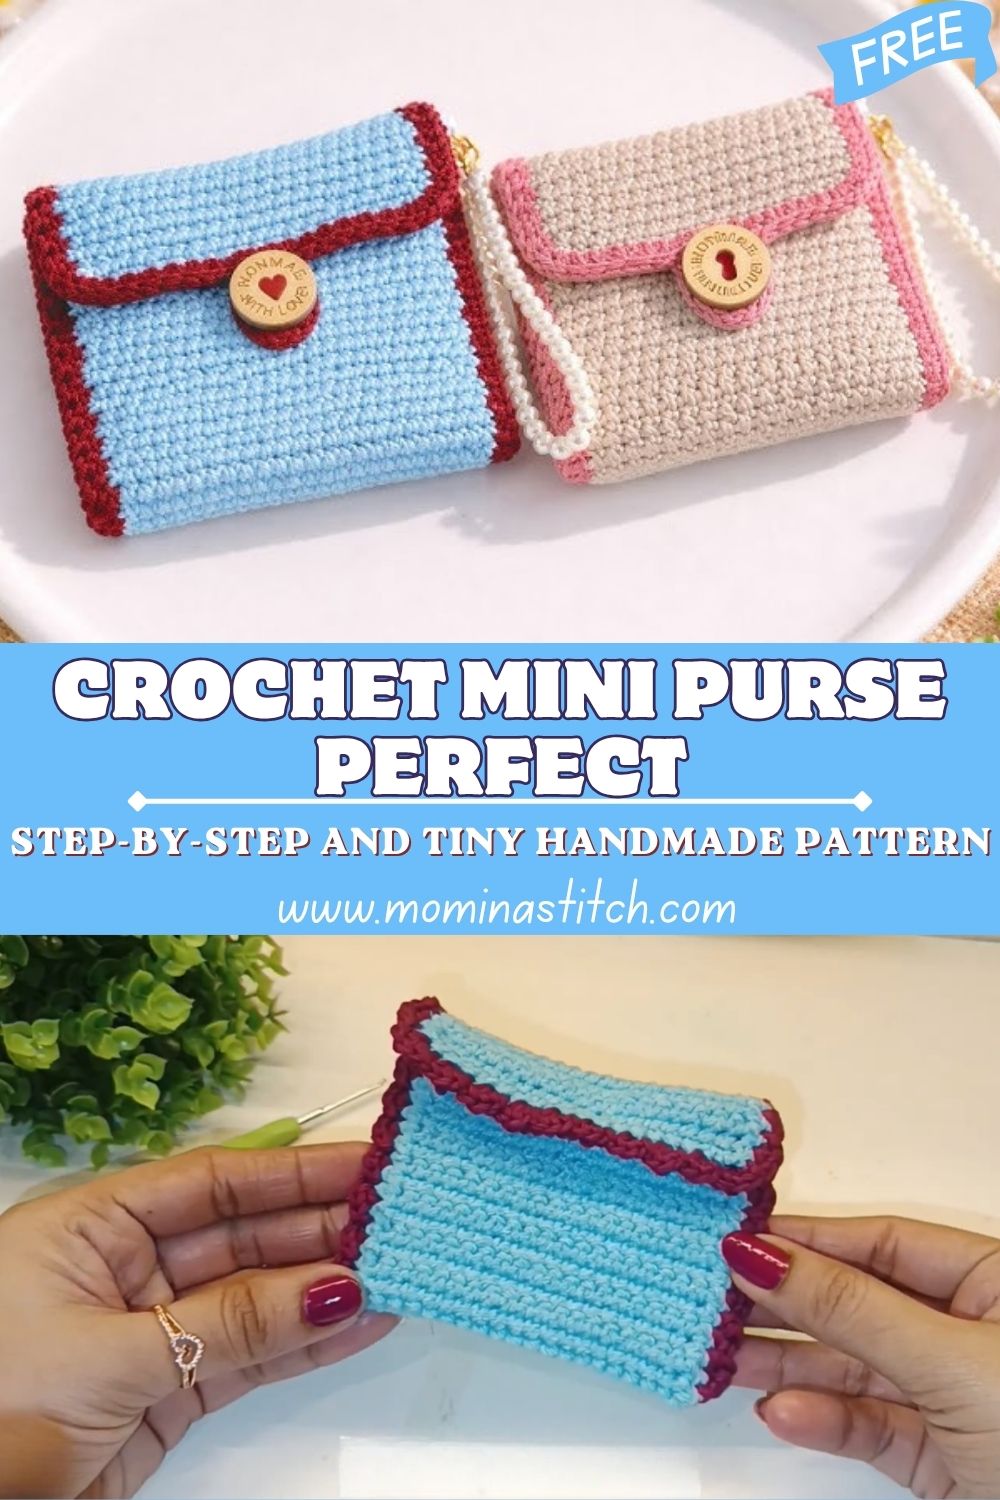
Sparkling Crochet Mini Purse Perfect Step-by-Step and Tiny Handmade Pattern
The feeling of completing a small crochet project and holding it in your hands is truly something special. Since it is entirely handmade, it reflects your hard work, creativity, and personal style in every stitch.And when that same project becomes a sparkling crochet mini purse that beautifully catches and reflects light with every movement, it does not just turn into a stunning accessory, it also becomes a source of joy and pride for you.
This little gem of a crochet pattern has been winning hearts all over the crafting community. Whether you want to gift it, use it as a coin purse, attach it to a bag, or display it as a decorative accessory, this tiny handmade purse delivers big on charm. It is the kind of easy crochet project that looks impressive but is actually very manageable, even for newer crocheters.
In this crochet pattern, we will walk through everything you need to know from materials to stitches, step-by-step instructions, beginner tips, and creative customization ideas. Let’s get started.
What Is the Sparkling Crochet Mini Purse?
This is a small, structured handbag-style purse crocheted using sparkle or metallic yarn. It features a classic purse shape with a flat base, defined sides, and a top opening often finished with a zipper, snap button, or magnetic clasp. The shimmer in the yarn gives it a luxurious, almost jewel-like appearance.
It is a beginner crochet pattern at heart, relying mostly on basic stitches worked in rows or rounds. The “mini” in the name is not an exaggeration. This purse is tiny, adorable, and perfect for carrying small essentials like lip gloss, coins, or earphones.
The original tutorial for this pattern is shared on YouTube and has inspired thousands of crocheters to try their hand at this dazzling little project.
Skill Level
Beginner to Intermediate
If you already know how to chain, single crochet, and work in rows or rounds, you are ready for this project. A few techniques like working into the back loop only or joining rounds might be new to some beginners, but they are easy to learn and this project is a great way to practice them.
Required Materials and Supplies
Getting your materials ready before you start makes the whole process smoother. Here is what you will need:
Yarn Type
- Sparkle or metallic yarn – Look for yarn labeled “glitter,” “shimmer,” or “metallic.” A fingering or sport weight sparkle yarn works beautifully for this mini purse.
- You can also use regular DK or worsted-weight yarn if you want a non-sparkle version. The stitch definition still looks lovely.
- Approximately 50–80 grams of yarn is enough for this small project, so it is also a great stash-buster.
Hook Size
- 3.0 mm to 4.0 mm crochet hook – The right hook size depends on your yarn weight. Check your yarn label for the recommended hook, and go slightly smaller than suggested for a tighter, more structured fabric that holds its purse shape well.
Extra Tools
- Scissors – For cutting yarn ends
- Yarn needle/tapestry needle – For weaving in ends neatly
- Stitch markers – Helpful when working in rounds to mark the beginning of each round
- Measuring tape – To check your dimensions as you go
- Zipper or snap closure – A 10–15 cm zipper or a small magnetic snap works perfectly
- Sewing needle and thread – To attach the zipper or clasp
- Optional: lining fabric – A small piece of satin or cotton fabric can be hand-sewn inside for a polished finish
- Optional: bag handle or chain strap -To convert it into a wristlet or crossbody style
Crochet Stitches and Abbreviations Used
Before diving into the pattern, let’s review the stitches used. This is a standard crochet pattern that uses common stitches you may already know:
- ch — Chain
- sl st — Slip stitch
- sc — Single crochet
- hdc — Half double crochet
- dc — Double crochet
- BLO — Back loop only
- FLO — Front loop only
- MR — Magic ring
- st(s) — Stitch(es)
- rep — Repeat
- rnd — Round
Most of this pattern uses single crochet (sc) and half double crochet (hdc), which makes it very approachable for beginners.
Step-by-Step Crochet Instructions
Follow these instructions carefully and take it one step at a time. You’ve got this!
1: Make the Base
Start with a magic ring or a foundation chain.
- Chain 12 (adjust for a larger or smaller base).
- Row 1: SC in the 2nd chain from the hook and in each chain across. (11 sc)
- Row 2: Chain 1, turn. SC in each stitch across. (11 sc)
- Repeat Row 2 for 6–8 rows until you have a small rectangle.
This rectangle forms the flat bottom of your purse. The tighter your tension, the better the structure.
2: Build the Sides
Now you will work around the base to build up the walls of the purse.
- Join yarn at one corner of the base rectangle with a slip stitch.
- Round 1: Work sc evenly around all four sides of the rectangle, placing 2–3 sc in each corner to keep it flat and square. Join with a slip stitch.
- Rounds 2–10: SC in each stitch around, working in BLO (back loop only) from Round 3 onwards. This creates a subtle ridge that mimics the structure of a real handbag.
- Continue until the sides reach your desired height, approximately 8–10 rounds give a nice purse depth.
3: Shape the Top Edge
- Work one final round of hdc around the top edge for a slightly firmer, cleaner opening.
- Slip stitch to join, fasten off, and weave in ends.
4: Attach the Closure
- If using a zipper: Hand-sew it along the inside of the top opening using a sewing needle and thread. Use small, neat stitches and work slowly this step makes a big difference in the final look.
- If using a snap button or magnetic clasp: Position it centered on the front and back inside of the top edge, mark the spots, and attach according to the clasp’s instructions.
5: Add the Strap (Optional)
- Crochet a chain of your desired length (about 80–100 chains for a wristlet, more for crossbody).
- Work one row of sc along the chain for strength.
- Attach to each side of the purse with slip stitches or sew on securely.
- Alternatively, clip on a metal chain strap for an extra glamorous look.
6: Optional Lining
- Cut two pieces of fabric slightly smaller than the inside dimensions of your purse.
- Sew them together on three sides, leaving the top open.
- Slip the fabric lining inside the purse and hand-stitch it to the top edge for a clean, professional finish.
Your sparkling mini purse is now complete.
Finishing Tips
Once your mini purse is crocheted, the finishing steps make all the difference:
- Weave in all yarn ends neatly using a tapestry needle so nothing unravels later
- Block your purse lightly by spraying it with water and reshaping it with your hands
- Let it dry flat to give it a clean, structured look
- Press the zipper gently with a cool iron for a polished final finish
- Trim any loose threads carefully with small scissors do not pull them
- Add a fabric lining inside for a neat, professional interior finish
- Sew the lining by hand using small, even stitches along the top edge
- Attach the strap securely by double-stitching at both ends so it does not loosen with use
- Give it a final shape check — stuff it lightly with tissue paper while drying to keep the form
- Store it flat or stuffed to help the purse hold its shape over time
Variations & Customizations
This pattern is super flexible and easy to personalize. Try these fun ideas:
- Change the yarn color for a totally different vibe gold for glam, pastels for cute
- Add a tassel or bow on the zipper pull for extra charm
- Crochet a longer strap to turn it into a wristlet or crossbody bag
- Use two colors for a stylish color-blocked look
- Stitch on a small flower or heart as a front decoration
- Make it bigger by simply starting with a longer foundation chain
Helpful Beginner Tips
If this is one of your first beginner crochet projects, these tips will save you a lot of time and frustration:
- Swatch first. Make a small test square to check your tension and see how the yarn looks with your hook size.
- Count your stitches. After every row or round, count to make sure you have not accidentally added or dropped any stitches.
- Use stitch markers. Place one at the beginning of each round so you always know where you started.
- Tight tension is your friend here. Unlike a blanket or shawl, a purse needs to hold its shape. Crochet slightly tighter than usual.
- Do not rush the finishing. Sewing in the zipper neatly takes time but makes the purse look professional and polished.
- Watch the video tutorial alongside these written instructions. Visual learning helps a lot when you are figuring out how pieces fit together.
Common Mistakes and Solutions
Even experienced crocheters run into little snags. Here are the most common issues with this project and how to fix them:
Problem: The base is curling up. Solution: This usually means your tension is too tight. Try going up a hook size or loosening your grip slightly.
Problem: The sides are flaring out instead of going straight up. Solution: Make sure you are not accidentally adding extra stitches at the corners when working the side rounds. Count every round.
Problem: The purse looks floppy and does not hold its shape. Solution: Try using a smaller hook, a stiffer yarn, or adding a fabric lining. You can also lightly block the purse by spraying it with water and letting it dry in shape.
Problem: The sparkle yarn is splitting and is hard to work with. Solution: Metallic yarns can be slippery. Slow down, use a hook with a good grip, and make sure your stitches are not too tight — this makes it harder to insert your hook.
Problem: The zipper looks uneven. Solution: Pin the zipper in place before sewing. Baste with a quick running stitch first, check the look, then sew permanently.
Tutorial Suggestions
If you are following along with the video tutorial, here are a few tips to get the most out of it:
- Watch the full video once before starting so you know what to expect
- Pause and rewind freely there is no rush, go at your own pace
- Turn on captions if the audio is unclear or in another language
- Watch at 0.75x speed when learning tricky stitch sections
- Keep your materials ready before pressing play so you can crochet along in real time
Pattern Customization Ideas
One of the best things about this handmade Sparkling Crochet Mini Purse project is how easily you can make it your own. Here are some fun ways to personalize it:
- Add a tassel at the zipper pull for a boho look
- Crochet a flower or bow and sew it on the front as decoration
- Use two colors — one for the base and one for the sides — for a color-blocked effect
- Make it bigger by simply starting with a longer foundation chain and working more rounds up the sides
- Add beads or sequins by threading them onto your yarn before you start crocheting
- Crochet a fringe trim along the bottom edge for a festival-style feel
- Use glow-in-the-dark yarn for a novelty version that is perfect for kids
Size and Color Suggestions
Size Guide
- Tiny Coin Purse – Start with 8 ch, work 6 side rounds. Finished size: approx. 6 x 5 cm
- Standard Mini Purse – Start with 12 ch, work 10 side rounds. Finished size: approx. 10 x 8 cm
- Small Clutch – Start with 18 ch, work 14 side rounds. Finished size: approx. 15 x 10 cm
Color Suggestions
- Gold or silver metallic – Classic and glamorous, perfect for evening events
- Rose gold shimmer – Feminine, trendy, and universally flattering
- Midnight blue glitter – Elegant and a little mysterious
- Iridescent white – Bridal or fairy-tale vibes
- Rainbow sparkle – Fun and playful, great for kids or festival accessories
- Black with gold flecks – Chic, versatile, and goes with everything
Frequently Asked Questions
Q: How long does this project take to make?
A: Most crocheters finish the crocheted part in 2–4 hours. Adding the zipper and lining might take another hour. It is a great weekend project!
Q: Can I use regular yarn instead of sparkle yarn?
A: Absolutely! Any yarn in the recommended weight will work. You will just get a matte finish instead of a sparkly one which is equally lovely.
Q: I am a complete beginner. Can I still make this?
A: Yes! If you can chain and single crochet, you have the foundation skills. Take it slowly, follow the video tutorial, and you will be fine.
Q: What if I do not know how to sew in a zipper?
A: You can skip the zipper and use a magnetic snap or even a simple button and loop closure instead. Or use fabric glue as a temporary option while you practice your sewing.
Q: Can this pattern be used for a larger bag?
A: Yes! Scale it up by starting with a longer chain and adding more rounds. Keep the same proportions and the structure will hold.
Q: How do I care for my finished mini purse?
A: Most acrylic sparkle yarns are machine washable on a gentle cycle. Always check your yarn label. Lay flat to dry to preserve the shape.
Q: Where can I find the video tutorial?
A: The original tutorial is available on YouTube. Search for “Sparkling Crochet Mini Purse” or visit the link provided with this article.
Pro Tip
Use a slip-proof crochet hook when working with metallic or sparkle yarn. Yarns with glitter or metallic threads tend to slide off hooks more easily. Ergonomic hooks with a rubber grip give you much better control and reduce hand fatigue, especially important for a tighter tension project like this mini purse. Also, work near good lighting so you can clearly see your stitches in the sparkly yarn!
Conclusion
You now have everything you need to crochet your own sparkling mini purse. From materials to step-by-step instructions, this Sparkling Crochet Mini Purse has covered it all. It is a quick, satisfying, and fun easy crochet project perfect for any skill level.
Pick up your hook, choose your favorite sparkle yarn, and enjoy the process. Every stitch brings you closer to a beautiful, handmade crochet bag you will absolutely love.