Crochet Large Turtle Pattern with Colourful Shell
This crochet large turtle pattern is for anyone who loves big, squishy toys. The shell is pink and purple, and the head and flippers are blue-grey. Thick yarn makes it quick to finish, and the steps are easy for beginners.
Here is a turtle you will want to keep on your bed or sofa. This crochet large turtle pattern uses thick yarn, so it grows very fast and looks chunky. You can finish it in under two hours. The shell is pink and purple, and the head and flippers are blue-grey. All the pieces are made in joined rounds, which beginners can follow with ease. You make each piece, stuff it and sew them together. It also works as a handmade gift for kids or friends who love cute things.
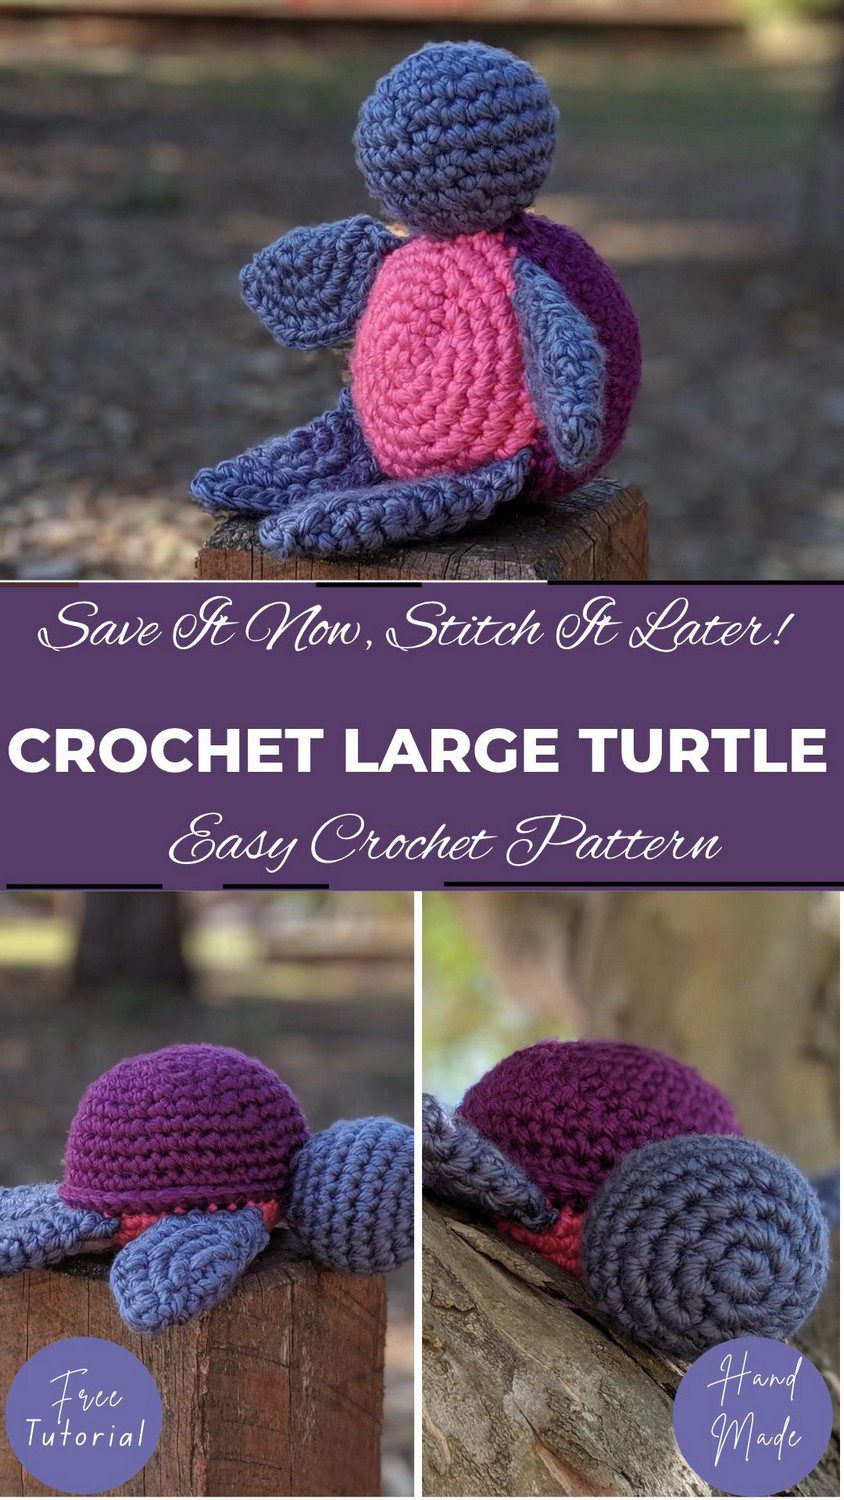
Crochet Large Turtle Pattern Overview
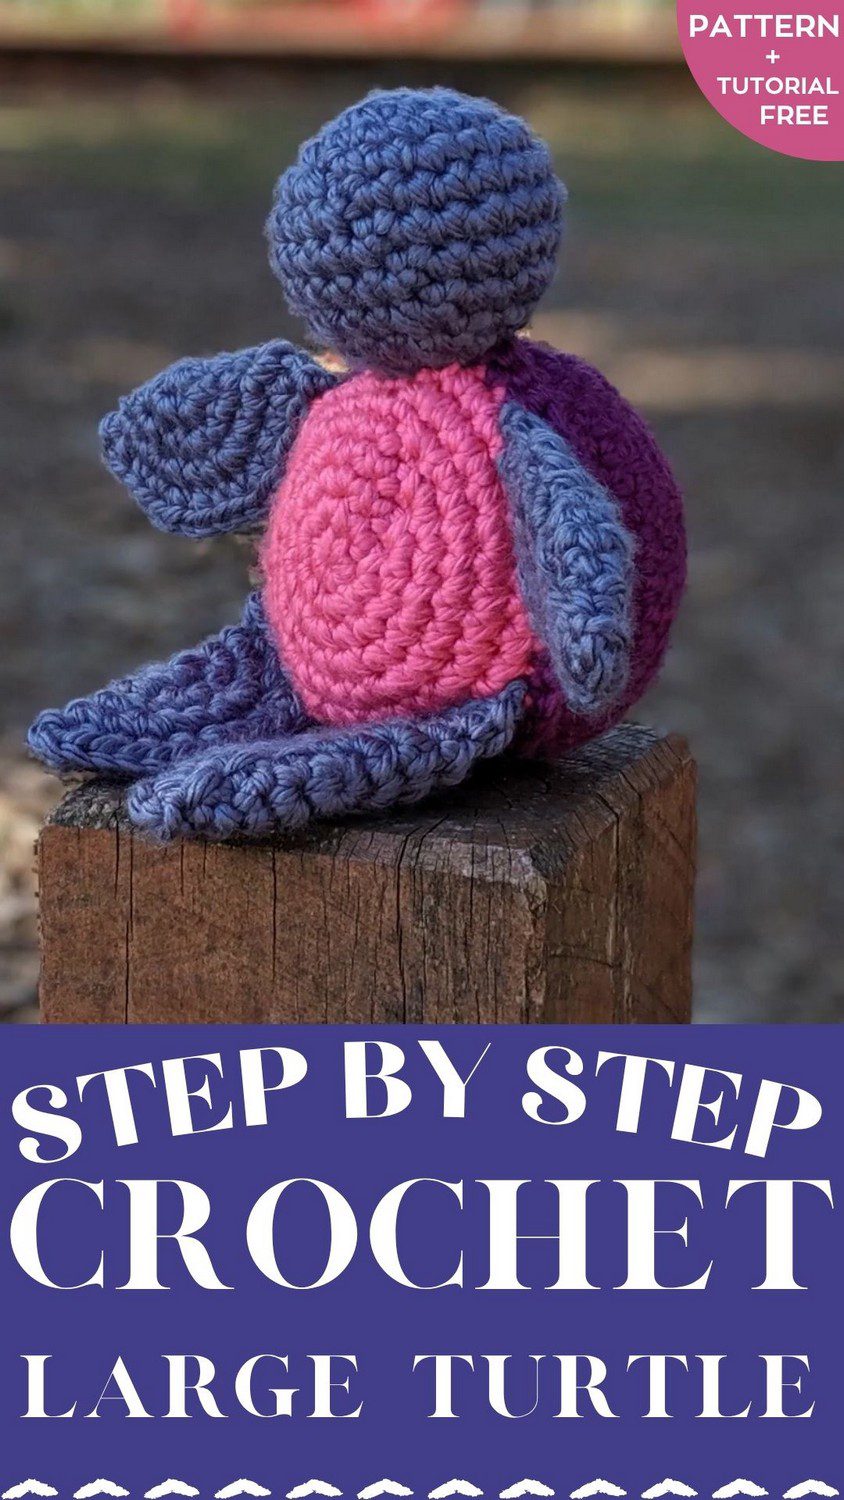
This turtle is big, soft and made for hugging. The shell has a bright pink front and a deep purple domed back, while the head and flippers are a soft blue-grey. Each colour is its own piece, so you never switch yarn in the middle of a round. A round head sticks out at the front, and four semicircle flippers complete the shape. Finally, all the pieces are sewn together.
Super bulky yarn makes the stitches grow fast, and the whole project can be done in under two hours. If you want an easy turtle amigurumi that still looks bold, this crochet large turtle pattern is a good pick. It also works well as a beginner crochet plushie, since the rounds are simple and joined.
Skill level: Beginner to advanced beginner
Finished size: The shell is about 5 inches across, and the whole turtle is about 8 to 9 inches with the head and flippers. Size will change with yarn and tension.
Materials and Tools for the Crochet Large Turtle Pattern
- 14-ply / super bulky weight yarn (the video uses Lion Brand Hometown USA Super Bulky)
- 6.0 mm crochet hook
- Polyfill stuffing (scrap yarn or fabric scraps also work)
- Large yarn needle (tapestry needle)
- Scissors
- Stitch markers (optional)
- Pliers to help pull the needle through dense stitches (optional)
- Safety eyes or embroidery thread for the face (optional)
First, gather everything before you begin. For this crochet large turtle pattern, a 6.0 mm hook with super bulky yarn gives firm, dense stitches, so the stuffing stays hidden inside the shell and head.
Yarn and Colours for the Crochet Large Turtle Pattern
You need three colours for this turtle. Color 1 is the shell front, Color 2 is the shell back, and Color 3 is the head and flippers. Small to medium balls of super bulky yarn are enough for one plushie. In short, thick 14-ply yarn builds up a chunky crochet turtle fast.
Pink, purple and blue-grey are the colours used here, but any trio you like will work. Also, try to pick three colours that contrast well. When the shell front, shell back and head each stand out, the finished turtle looks bright and clear. If super bulky yarn is hard to find, hold 2 or 3 strands of 8-ply / DK yarn together and crochet them as one.
Abbreviations
This pattern uses US terms, and the UK equivalents are listed next to each one.
MC: magic circle (magic ring)
Ch: chain
Sl st: slip stitch
SC: single crochet (UK double crochet)
SCInc: single crochet increase, 2 SC in the same stitch (UK double crochet increase)
SCDec: single crochet decrease, 2 SC worked together (UK double crochet decrease)
Stitches and Techniques for the Crochet Large Turtle Pattern
Here is a quick guide to every stitch and step in this crochet large turtle pattern.
Magic Circle (MC)
Wrap the yarn tail around your fingers to make a loop. Put the hook into the loop, yarn over and pull up a loop. Chain once to lock it. Work the first stitches into the center of the ring, then pull the tail tight to close the hole. It can feel tricky the first time, so go slowly and hold the ring steady while you work the stitches.
Chain (Ch)
Yarn over and pull through the loop on the hook. In this pattern, you chain 1 at the end of each round before starting the next.
Single Crochet (SC)
Put the hook into the stitch, yarn over and pull up a loop. You will have 2 loops on the hook. Yarn over again and pull through both loops. In fact, you will use this stitch more than any other, so it is worth getting comfortable with it.
Single Crochet Increase (SCInc)
Work 2 SC into the same stitch. This is what makes the circle grow.
Single Crochet Decrease (SCDec)
Put the hook into the front loop of the first stitch, then into the front loop of the next stitch. You will have 3 loops on the hook. Yarn over and pull through the first 2 loops. Yarn over again and pull through the last 2 loops. Go slowly here. After all, the decrease rounds are what shape the head, so each stitch counts.
Slip Stitch (Sl st)
Put the hook into the stitch, yarn over, and pull through both the stitch and the loop on the hook in one smooth motion. It is used to close each round. Keep this stitch relaxed so the edge stays neat.
Joined Rounds
These rounds are joined, not worked as a continuous spiral. At the end of every round, slip stitch into the first stitch, then chain 1 and start the next round.
Fastening Off
Cut the yarn and pull the tail through the last loop, then pull it tight. Leave a 6 to 8 inch tail to weave in, or a longer tail if you will use it to sew.
Color Changes
Colors change between pieces, not in the middle of a round. Hide the starting tails inside the piece, or sew them in during assembly.
Keeping Your Count
Count your slip stitch and chain 1 at the end of each round, and check your total against the bracketed number. A stitch marker in the first stitch of each round helps you see where you started.
Pattern Pieces for the Crochet Large Turtle Pattern
You will make 4 types of pieces for this crochet large turtle pattern. Each one uses its own colour, so keep your three balls of yarn close.
- Shell front (flat circle)
- Shell back (domed circle)
- Head
- Flippers (4 pieces: 2 front, 2 back)
Crochet Large Turtle Pattern Steps
These are the key steps for this project. Use your 6.0 mm hook and the matching colour for each piece, and keep the bracketed stitch counts in view as you go.
Step 1: Finish the Shell Front (Color 1)
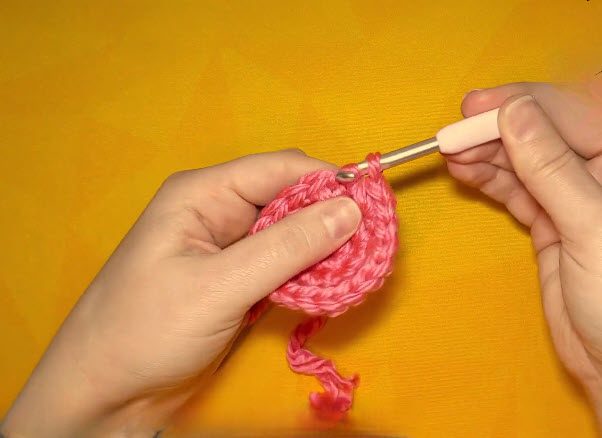
Start with the flat pink circle, which is the front of the shell. The last round is the one that finishes it, so keep your count steady.
Work the last round around the flat pink circle: (5 SC, SCInc) x 6. Sl st to join. Cut the yarn, pull it through the last loop and fasten off, leaving a tail. (42)
Step 2: Work the Shell Back (Colour 2)
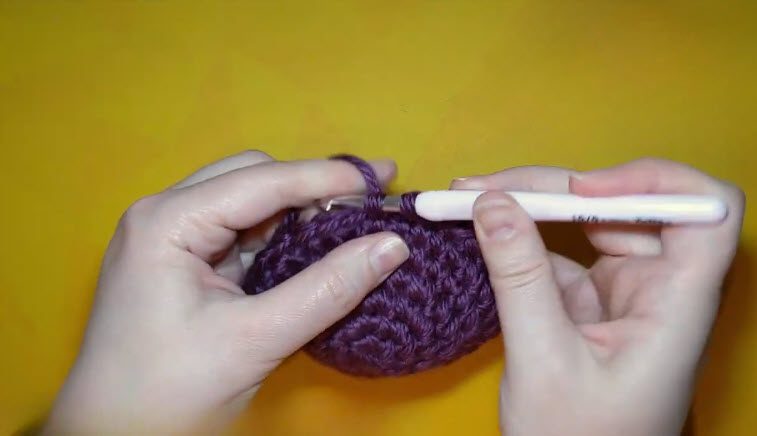
Next comes the purple back. These even rounds have no increases, so they add height without making the piece wider.
Work SC in each stitch around the purple dome. Sl st to join and ch 1 at the end of each round. Repeat for 3 rounds. (42 in each round)
Step 3: Shape the Head (Color 3)
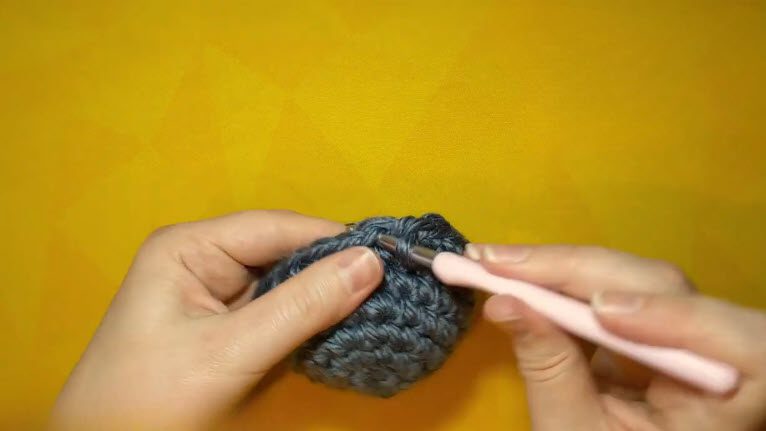
The head is the blue-grey ball that sticks out at the front. The decrease round starts to close it in, so stuff it right after.
Work (1 SC, SCDec) x 6. Sl st to join, ch 1. (12) Then stuff the head firmly with polyfill.
Step 4: Finishing the Crochet Large Turtle Pattern
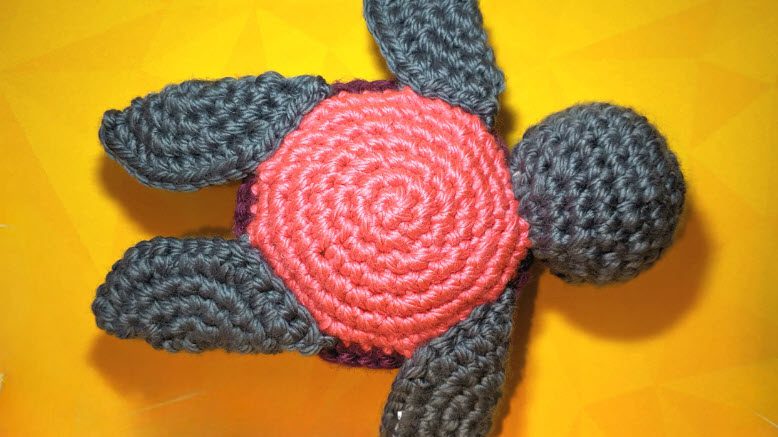
Finally, the pieces come together. Take your time with the sewing, and use the tails you left for it.
Sew the head onto the front of the shell using its long tail. Next, sew the four flippers onto the sides of the shell, two on each side. Lastly, weave in any loose tails, and your chunky turtle is done.
Helpful Tips for This Crochet Large Turtle Pattern
A few small habits make this pattern go smoothly. Try these as you work.
- Choose super bulky yarn if you can. For example, the thick stitches are easy to see, which makes counting simpler. It also helps a super bulky turtle plushie grow quickly.
- Stuff the shell and the head firmly with polyfill. A firm fill helps the shapes hold up, and scrap yarn or fabric scraps can fill in if you run short.
- Keep a pair of pliers nearby. For instance, they help pull the needle through dense stitches when it gets stuck, and they save your fingers.
- Place a stitch marker in the first stitch of every round. Then you will always know where you began. This is a big help when you pick the work up again after a break.
- Count your stitches at the end of each round and compare them with the bracketed number. After all, a small mistake is easier to fix early.
- No super bulky yarn? Hold 2 or 3 strands of 8-ply / DK yarn together and work them as one. Keep the strands even so the stitches look smooth.
Care and Cleaning Tips for Chunky Plushies
A little care keeps a big, soft turtle looking fresh. However, these tips are general, so adjust them to your yarn.
- First, read the yarn label. It tells you how the fibre likes to be washed. If the label is missing, test a hidden spot first.
- Next, spot clean with a damp cloth and a little mild soap. Dab the mark gently instead of rubbing, and avoid soaking the whole piece.
- Then let the plushie dry fully in open air, away from direct heat. Thick stuffing holds water for a long time, so turn it now and then to dry it evenly.
- If a loose strand appears, snip it with scissors. Pulling it, however, can unravel the stitches.
- Finally, store it in a clean, dry spot, away from rough surfaces. If you added safety eyes, check now and then that they are still snug.
Frequently Asked Questions
What skill level is this crochet large turtle pattern?
It suits beginners and advanced beginners. If you can work a magic circle, single crochet and a simple decrease, you can make it. In addition, the rounds are joined, and only a few stitches are used.
Here Is What I Think
So here is the deal. This crochet large turtle pattern is big, squishy and really fun to make. Besides, the thick yarn means it works up fast. Pink, purple and blue-grey look great together too. Just grab your hook and start with the shell. Go one round at a time and check your count. After that, you will soon have a chunky turtle to hug. Honestly, I would not be surprised if you make a second one.