Crochet Wrist Warmers Pattern Winter Cuffs
Looking for a warm yet simple make? These crochet wrist warmers are easy to stitch, even if you are new to crochet. They cost less than shop gloves, keep your hands cozy, and leave your fingers free to type or hold a cup.
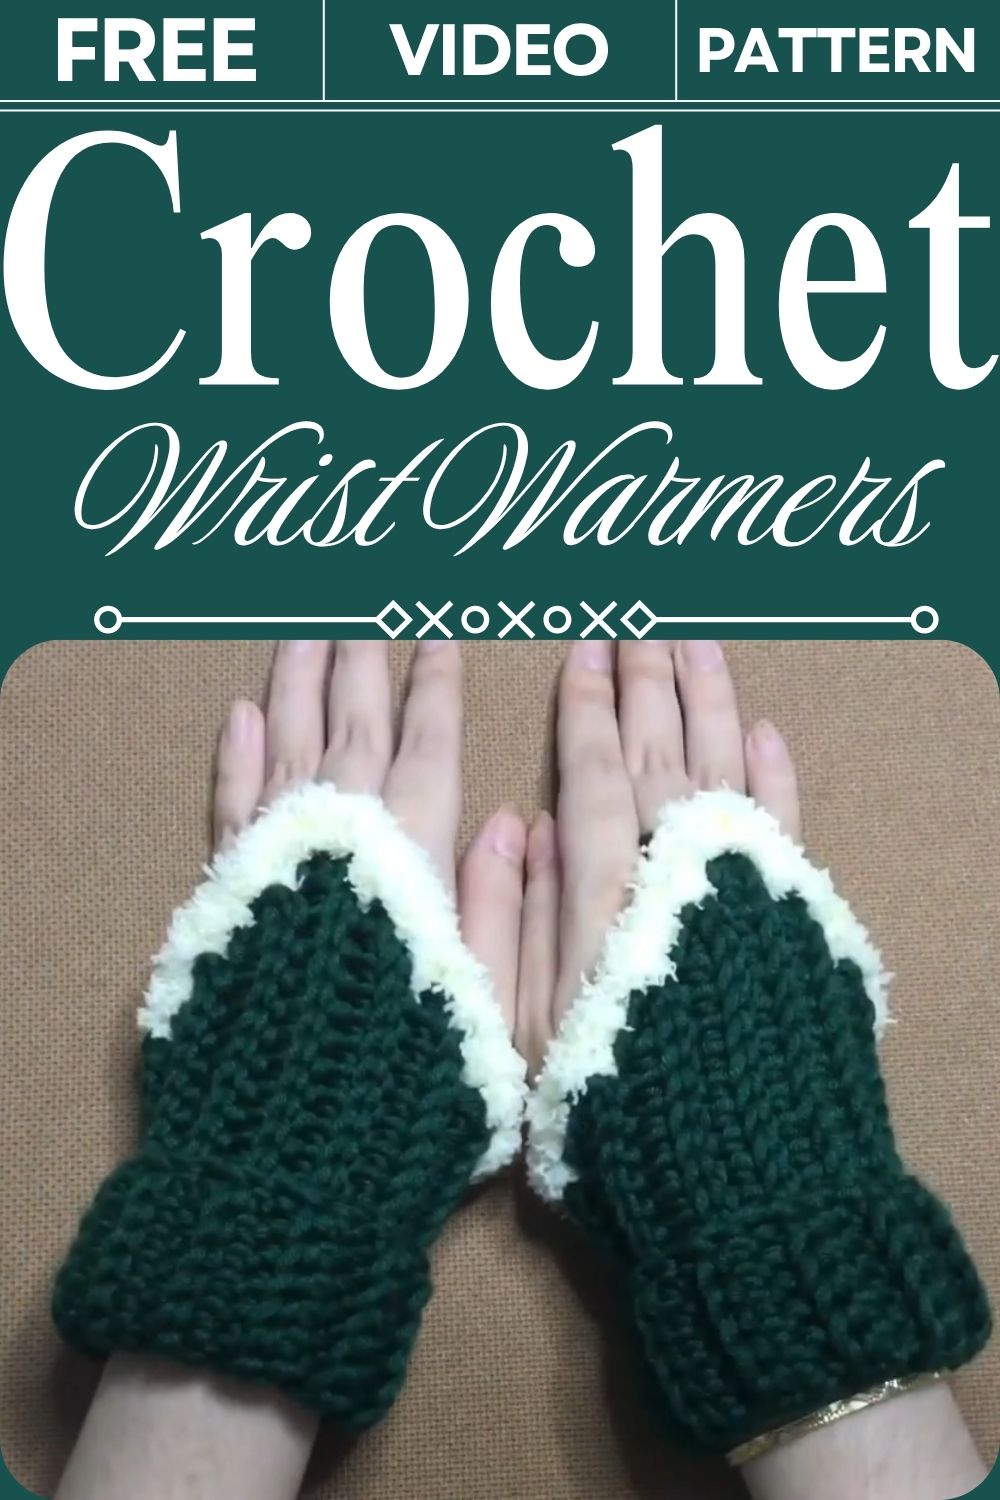
Want a cozy project you can finish without stress? Our crochet wrist warmers pattern uses simple stitches, so beginners can follow it easily. It costs much less than gloves from a shop. Dark green cuffs with a soft cream edge look stylish and feel warm. The cuff stretches, so it fits your wrist well. Your fingers stay free for typing, scrolling, or holding a hot cup. You can pick your size and change the colors you like. They also make a sweet handmade gift for your family and close friends.
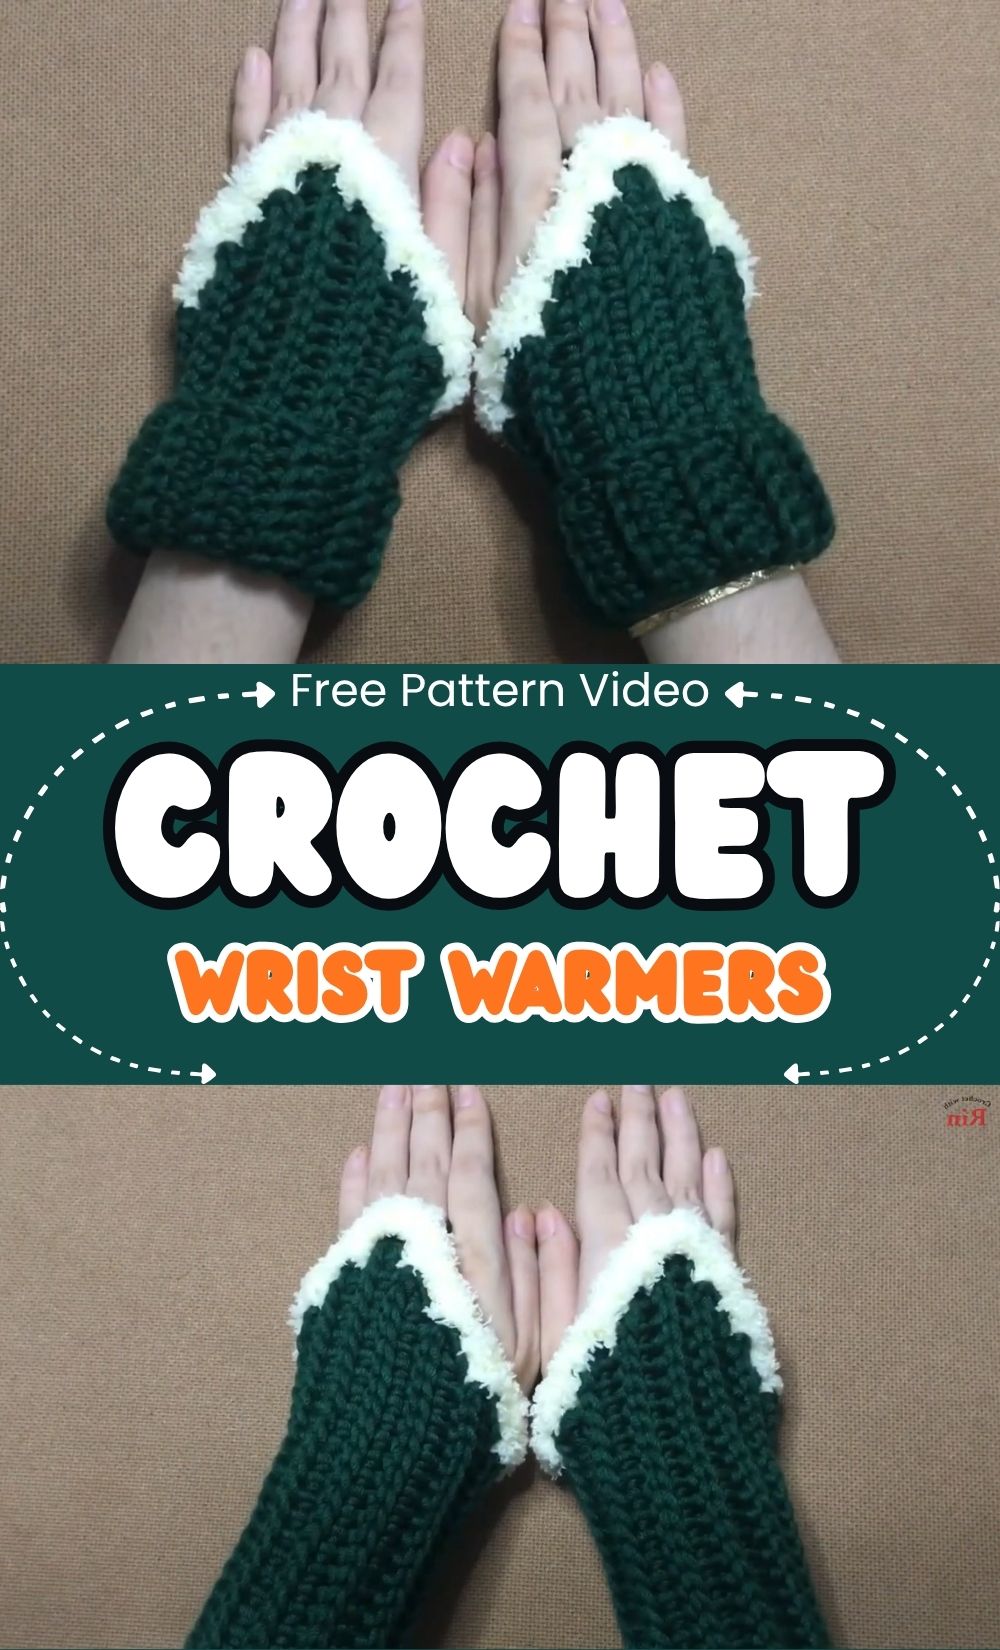
Crochet Wrist Warmers Pattern Overview
Skill level: Easy and beginner-friendly. In fact, basic chains, single crochet and half double crochet do all the work. Therefore, if you have been looking for a simple fingerless gloves crochet pattern, the steps below will feel very approachable.
Finished size (standard adult medium):
- Cuff height: about 2.5 inches
- Total glove length: about 6.5 to 7 inches
- Palm width (flat): about 3.75 inches
Materials for This Crochet Wrist Warmers Pattern
First, gather these supplies before you start:
- Main color: dark green yarn, medium or Aran weight (or 2 strands of DK held together)
- Accent color: fluffy cream or white novelty yarn, either faux fur or plush
- 5.5 mm crochet hook
- Stitch markers
- Tapestry needle
- Scissors
Also, the plush cream yarn gives a faux fur trim crochet look with almost no extra effort.
Crochet Abbreviations (US Terms)
Before you begin, note that this pattern uses US terms throughout:
- ch = chain
- sl st = slip stitch
- sc = single crochet
- hdc = half double crochet
- BLO = back loop only
- st(s) = stitch(es)
- rnd = round
Special Techniques for the Wrist Warmers
BLO Ribbing
First, work each single crochet into the back loop of the stitch below. This leaves stretchy vertical ridges, much like knit ribbing, so the cuff gives a little when you slip it on.
Joining Seam
Next, slip stitch the short ends of the cuff together through both layers. Because of this join, the flat strip turns into a band.
Thumb Gap
Later, you will skip a few stitches in a round and chain across the gap. Afterward, that chain becomes the opening for your thumb.
Sizing Guide for This Crochet Wrist Warmers Pattern
Before you start, measure three spots on your hand:
- Wrist: around the wrist bone
- Palm: around the widest part of the hand, across the knuckles, not counting the thumb
- Wrist to knuckle: from the inner wrist fold to the base of the fingers
The pattern is written for adult medium. However, for other sizes, only the number of cuff rows changes:
- Child: wrist 5 in, palm 5.5 to 6 in, 20 to 22 cuff rows
- Small adult: wrist 5.5 to 6 in, palm 6.5 to 7 in, 24 to 26 cuff rows
- Medium adult: wrist 6 to 6.5 in, palm 7.5 to 8 in, 28 to 30 cuff rows
- Large adult: wrist 7 to 7.5 in, palm 8.5 to 9 in, 32 to 34 cuff rows
Order of Work
In short, the gloves come together in this order:
- First, crochet the ribbed wrist cuff in flat rows.
- Next, seam the cuff ends into a circle.
- Then, pick up stitches along the cuff edge and crochet the palm in rounds.
- After that, make the thumb opening by skipping stitches and chaining across.
- Afterward, work the upper palm rounds over the thumb bridge.
- Finally, switch to fluffy cream yarn and work the top border.
Crochet Wrist Warmers Pattern Instructions
Use the 5.5 mm hook throughout. Green yarn makes Steps 1 to 4, while cream yarn finishes Step 5.
Step 1: Ribbed Cuff for the Crochet Wrist Warmers Pattern
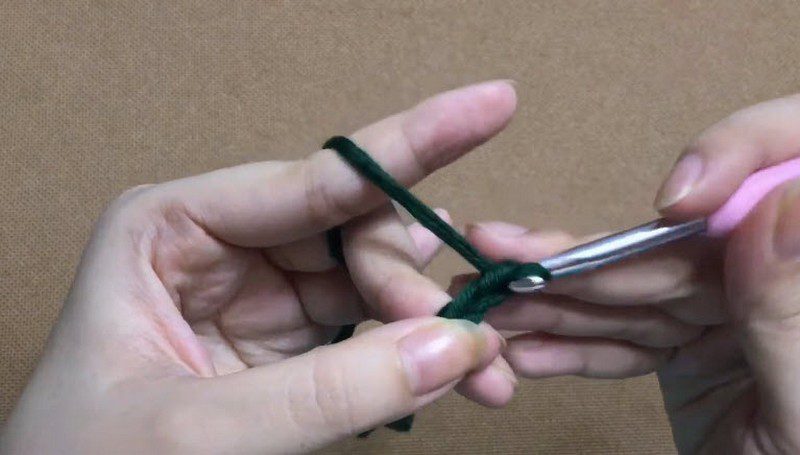
Foundation: Ch 11. Keep the chain loose, because a tight chain makes the wristband pull.
Chain loosely: Hold the yarn over your finger so that each chain stays relaxed.
Row 1: Start in the 2nd ch from the hook and sc in each ch across. Turn. (10 sts)
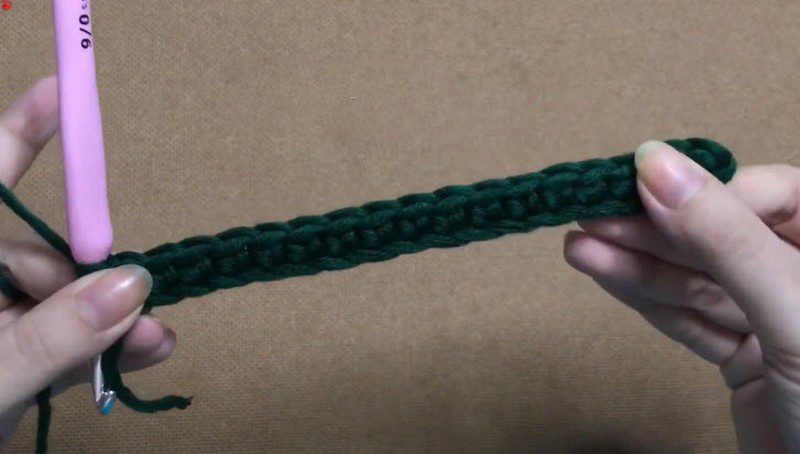
Flat strip: Since each stitch sits snugly beside the last, the strip stays even.
Rows 2 to 28: Ch 1, sc in the BLO of each st across. Turn. (10 sts)
Turn and repeat: Turn after every row, then ch 1. The small loop at the edge is the turning chain.
Ridges appear: As you keep working into the back loop, the ridges stack up and form the ribbed cuff.
Count carefully, because the 28 rows in total give you the 28 palm stitches later.
Seam the cuff: Fold the short ends together. Ch 1, then sl st through both layers to join the cuff into a ring. (10 sl sts)
Pro-Tip: Check the band before you slip stitch, because a twisted cuff stays twisted. So, keep the ends lined up.
Fit check: Once joined, the ribbed band should sit snugly around your wrist.
Step 2: Palm and Hand Body
Rnd 1: Ch 1. Work 1 sc evenly into the edge of each cuff row around. Join with a sl st to the first sc. (28 sts)
Put exactly 1 sc into each row end. Otherwise, the glove may flare or pucker.
Rnds 2 to 5: Ch 1, hdc in each st around. Join with a sl st. (28 sts)
Try it on: After Rnd 5, slip the tube onto your hand. The height should reach right up to the base of the thumb.
Step 3: Thumb Opening for the Crochet Wrist Warmers Pattern
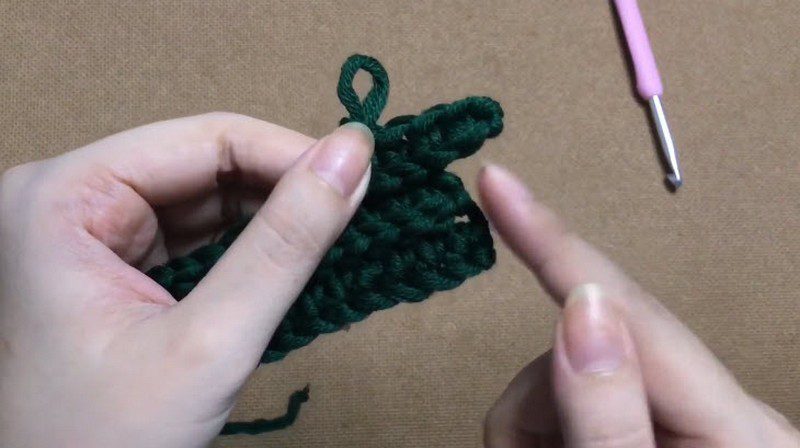
Rnd 6 (right glove): Ch 1, hdc in the first 2 sts, ch 5, skip 5 sts, hdc in the remaining 21 sts. Join with a sl st. (2 + 5 + 21 = 28 sts)
Rnd 6 (left glove, mirrored): Ch 1, hdc in the first 21 sts, ch 5, skip 5 sts, hdc in the last 2 sts. Join with a sl st. (28 sts)
Rnd 7 (right glove): Ch 1, hdc in the first 2 sts, work 5 hdc into the ch-5 space, then hdc in the remaining 21 sts. Join with a sl st. (28 hdc)
Rnd 7 (left glove, mirrored): Ch 1, hdc in the first 21 sts, work 5 hdc into the ch-5 space, then hdc in the last 2 sts. Join with a sl st. (28 hdc)
Work right into the chain space. That way, the corners have no gaps or holes.
Pro-Tip: Keep the thumb chain relaxed, because a tight chain makes the thumb feel stuck.
Test the thumb: Before moving on, slip your thumb through the opening to check comfort and movement.
Step 4: Upper Palm
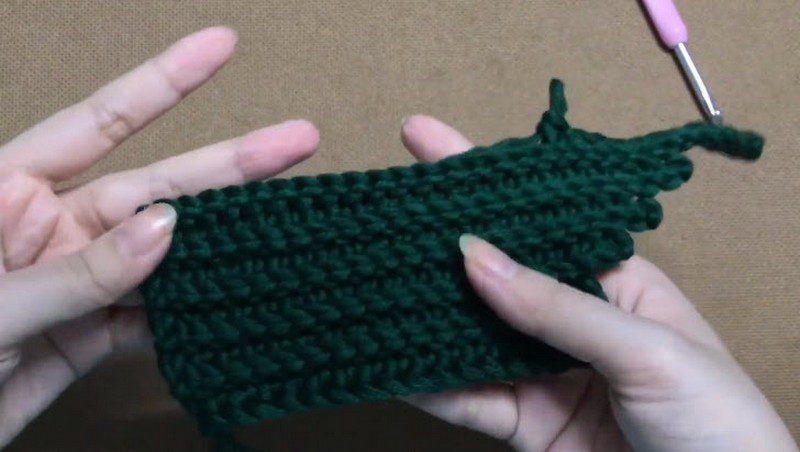
Rnds 8 and 9: Ch 1, hdc in each st around. Join with a sl st. Fasten off the green yarn. (28 sts)
After Rnd 9, the green part is complete, so only the cream border is left.
Step 5: Fluffy Cream Top Edging
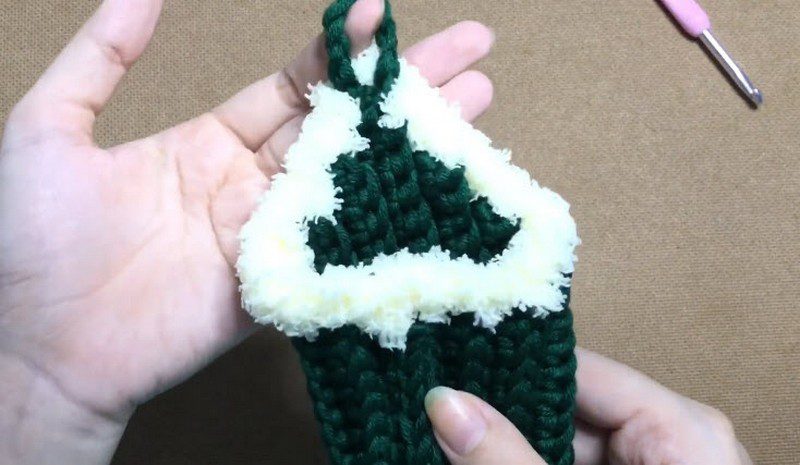
Rnd 10: Join the fluffy cream yarn in any st with a sl st. Ch 1, sc in each st around. Join with a sl st. Fasten off. (28 sts)
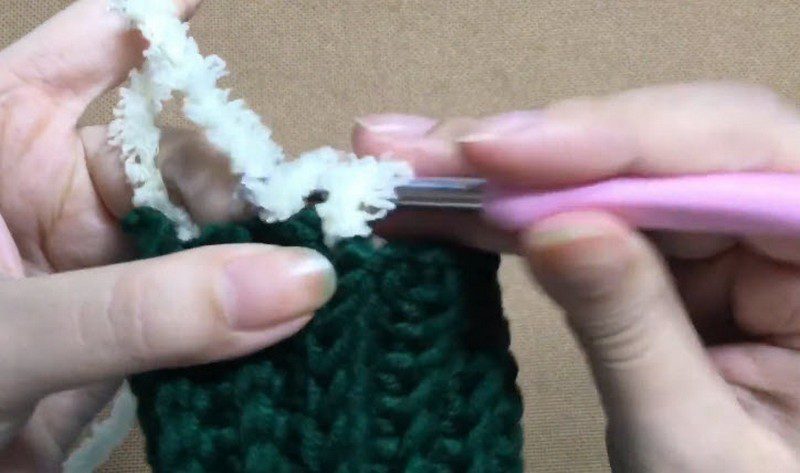
Join the cream: Pull the cream yarn through a stitch gently, then ch 1. Because the fluffy strands hide the loops, work by feel.
Finish the round: Sc in each st around, join, and fasten off. As a result, the soft cream frames the green, a bit like snow resting on a hill.
Left and Right Glove in This Crochet Wrist Warmers Pattern
For the right glove, place the thumb gap at the start of Rnd 6. For the left glove, however, place it near the end of Rnd 6. Otherwise, make both gloves the same way and flip only the thumb placement on the second one.
Finishing Your Crochet Wrist Warmers Pattern
Fasten off, leaving a 6-inch tail. Then, use the tapestry needle to weave all ends into the inside ridges of the glove.
Stitch Count Check
Use this list to confirm your work, since each round should match the number below:
- Cuff: 10 sts in every row, 28 rows
- Palm Rnd 1: 28 sc, one per cuff row
- Rnds 2 to 5: 28 hdc
- Rnd 6: 28 sts (2 + ch 5 + 21)
- Rnd 7: 28 hdc (2 + 5 + 21)
- Rnds 8 and 9: 28 hdc
- Rnd 10: 28 sc
If your count is off, the cuff row count is almost always the reason.
Common Crochet Wrist Warmers Pattern Mistakes and Fixes
Mistakes to Watch For
- Twisting the cuff band: Straighten the strip first, because the twist stays once you join it.
- Miscounting the cuff rows: As a result, the palm will not come out to 28 stitches.
- Pulling the thumb chain too tightly: This limits thumb movement, so keep the chain loose.
Quick Rescues for Common Snags
- Cuff feels tight: Redo the foundation chain looser. Alternatively, go up half a hook size for the cuff only.
- Palm flares out: More than 1 sc went into a row end, so frog Rnd 1 and count again.
- Thumb hole too small: Chain 6 instead of 5 and skip 6 stitches. Then add 1 extra stitch in Rnd 7 to keep the total at 28.
- Fluffy yarn hides the stitches: Work the last round with slightly looser tension and go by feel.
Why This Crochet Wrist Warmers Pattern Works
Fingerless gloves keep your wrists and palms warm while your fingertips stay free. For example, you can type an email, scroll your phone, or hold a hot cup without taking anything off. Since the cuff stretches and the palm stays smooth, they also feel comfortable for long stretches.
They make a thoughtful gift, too. Because the dark green and cream colors look like a snowy hillside, a pair suits almost anyone on your list. Of course, you can also keep them for chilly mornings and desk days.
Beginner Tips for This Crochet Wrist Warmers Pattern
- The cuff repeats one stitch in every row, so it is easy to remember.
- The body is basic hdc, which keeps the rounds quick.
- The thumb hole is only a chain and a skip, so there is nothing tricky to learn.
- The second glove goes much faster because you already know the steps.
- Count the 28 cuff rows carefully, since they decide the 28 palm stitches.
Personalization Ideas for Your Crochet Wrist Warmers Pattern
Color Swaps
Swap the dark green and cream for any two colors you love. Every row, round and stitch count stays exactly the same. Still, green and cream crochet gloves make a classic winter pair.
Resize Your Crochet Wrist Warmers Pattern with Cuff Rows
First, measure your hand. Then, pick the matching line in the sizing guide, because only the cuff rows change.
Gifting
One evening is enough to finish a pair. So, choose colors the receiver loves, and your winter crochet gift is ready.
Bonus: Easy Ways to Wear Your Crochet Wrist Warmers
- At your desk: Wear them while typing, since the cuff keeps your wrists warm and your fingers free.
- On a walk: Pull them on over the sleeves of a light jacket, because they add a little extra warmth.
- With a hot drink: Hold your cup comfortably, since the palm stays smooth and the fingers stay bare.
- As a set: Pair the green and cream gloves with a scarf in a matching shade, and you have a ready-made gift bundle.
FAQs About This Crochet Wrist Warmers Pattern
Is this crochet wrist warmers pattern really beginner-friendly?
Yes. The cuff repeats one stitch, the body is basic hdc, and the thumb hole is only a chain and a skip.
How do you choose the right size?
First, measure your wrist, palm and wrist to knuckle. Then, match them to the sizing guide, because only the cuff rows change.
Which yarn works best for fingerless gloves?
Use dark green yarn in medium or Aran weight, or 2 strands of DK held together. Then, add fluffy cream or white novelty yarn for the top edge.
How do you make a left glove?
Follow the same steps, but use the mirrored Rnd 6 and Rnd 7 lines. In other words, only the thumb placement flips on the second glove.
What if the thumb hole is too small?
Chain 6 instead of 5 and skip 6 stitches. Then, add 1 extra stitch in Rnd 7 so that the total stays at 28.
Why does the pattern use 28 stitches?
The cuff has 28 rows. Since Rnd 1 puts 1 sc into each row end, the palm has 28 stitches.
Time to Chain 11
So that’s the whole pair. The cuff is just one stitch, over and over, and the body is plain hdc. Besides, the thumb hole is only a chain and a skip. Once the first glove is done, the second one goes much faster. So grab your green yarn, chain 11, and start the first cuff tonight.