Crochet Daisy Car Coaster Pattern and Hanger Set
Do your car cup holders get dirty again and again? This daisy car coaster crochet pattern keeps them clean, and it looks cute too. It is free and easy for beginners. Handmade car accessories and easy crochet gifts are trending next month.
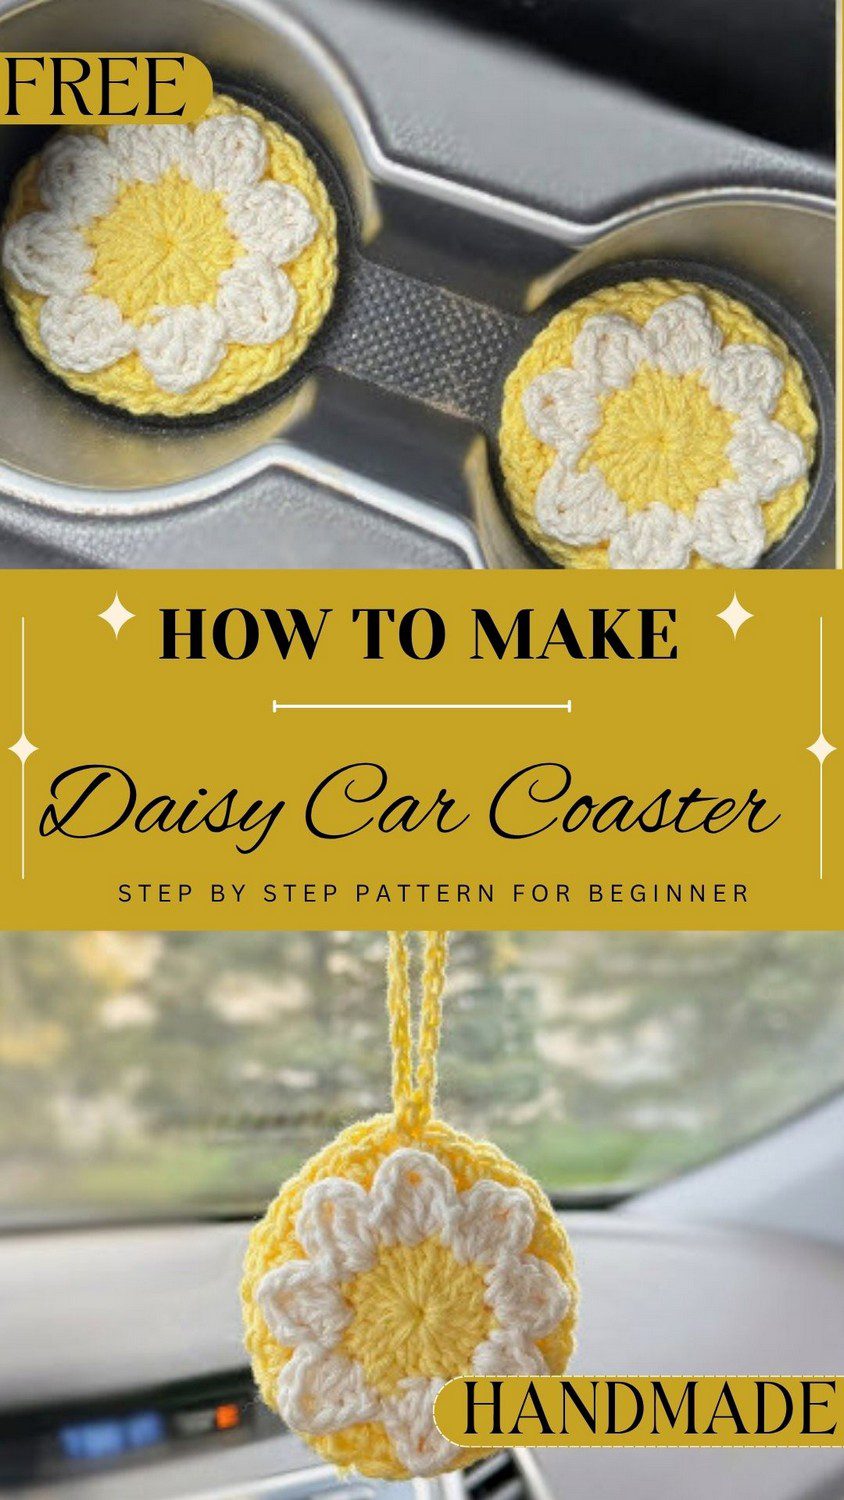
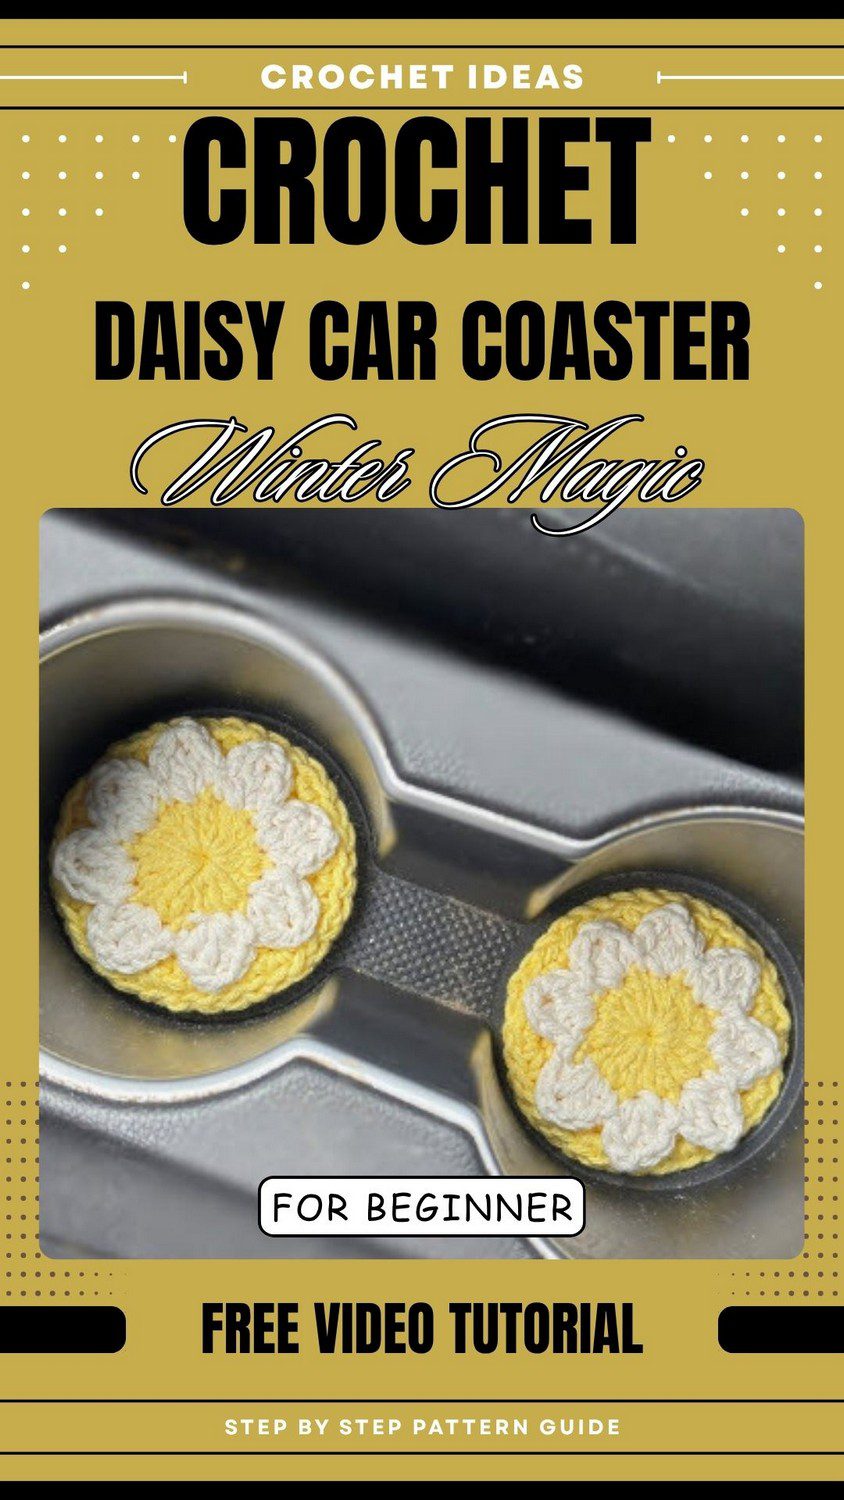
Yellow and white yarn come together in this daisy car coaster with soft white petals around a sunny center. It fits inside a cup holder, and a chain at the top turns it into a hanging car charm. This free beginner crochet pattern has easy steps and makes a sweet handmade gift. Handmade car accessories and easy crochet gifts are trending next month. Crochet stocking stuffers and quick gift ideas will trend the month after.
Daisy Car Coaster Crochet Pattern Overview
This daisy car coaster crochet pattern builds every piece as a flat circle worked outward from a magic ring. First, the coaster stacks two circles. The front one carries the daisy, while a plain circle is sewn underneath to hide the stitching and add body.
In addition, the hanger and the air freshener are variations on that same build. Likewise, the final base round can be worked in single crochet for a smaller coaster or double crochet for a larger one.
Skill Level and Supplies
A magic ring is the one skill worth practicing first. Otherwise, everything else is basic, and the tutorial slows down for each tricky sequence. Therefore, a confident beginner can handle it, although the sewing stages call for patience.
Gather these supplies:
- Cotton yarn in white, yellow, and a base color of your choice
- 4.5 mm hook for the coaster base
- 3.5 mm hook for the daisy
- Darning needle and scissors
Besides these, the air freshener needs 100% wool yarn or unfinished wood pieces, essential oils, and a sealed container.
Yarn Notes
Cotton gives the petals a clean edge, which suits a flower this small. However, no yarn weight was supplied with the tutorial, so the original pattern is the place to confirm it before buying.
Thick yarn lets the maker skip joining the two bases. On the other hand, thinner yarn benefits from the back layer, since it covers the wrong side of the front base and makes the coaster sturdier for daily use.
Meanwhile, wool is reserved for the scent disc. The tutorial calls for 100% wool and warns against synthetic blends.
Finished Size
The estimated size is about 3 inches (7.5 cm) across for the small coaster, and about 3.5 inches (9 cm) for the large one. Likewise, the hanger and pouch come out close to the small size.
Tips Before Starting the Daisy Car Coaster Crochet Pattern
- First, leave a tail of about 12 inches on the second base and on the daisy, since both are used for sewing.
- Next, check the counts as the base grows: 12 double crochets in round 1, then 24 in round 2.
- Then switch to the 3.5 mm hook once the daisy begins.
- Also, for a cleaner color change, tie off the yellow and join the white with a fresh slip stitch.
- Finally, decide on the coaster size first, because the last round differs.
Daisy Car Coaster Crochet Pattern Step-by-Step Instructions
Step 1: Make the Base Rounds
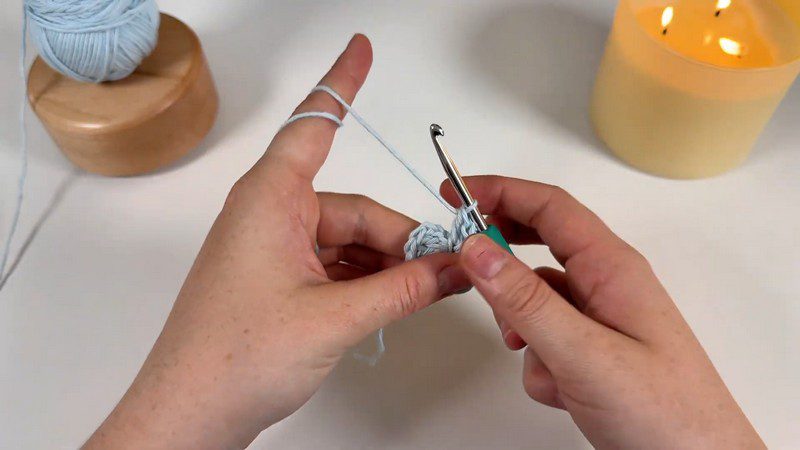
Using the 4.5 mm hook and the base color, make a magic ring. Then chain 2, which does not count as a stitch, and work 12 double crochets into the ring. After that, slip stitch into the first double crochet to close the round.
Round 2 begins with chain 2 as well. Next, work two double crochets into every stitch, which gives 24 double crochets, then join with a slip stitch.
Step 2: Finish and Repeat the Base
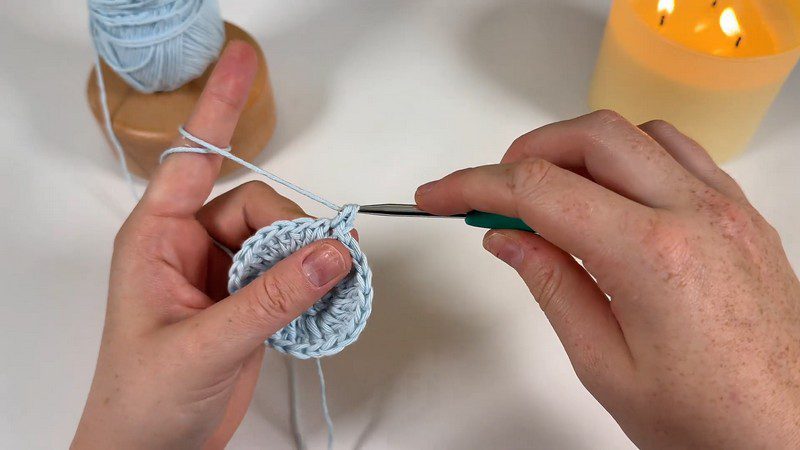
For the smaller coaster, chain 1 and work two single crochets in the first stitch. Then work one single crochet in the next stitch, and repeat that two-then-one sequence all the way around. In contrast, a larger coaster uses double crochets for this round instead.
Next, join to the first single crochet with a slip stitch, pull the yarn through, and weave in the ends. Finally, make a second base the same way, but leave a tail of about 12 inches for sewing.
Step 3: Crochet the Daisy
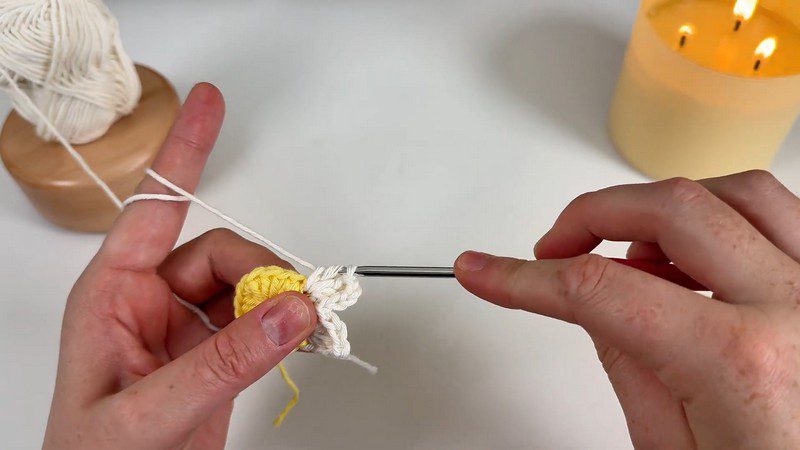
First, change to the 3.5 mm hook and pick up the yellow yarn. Make a magic ring, chain 2, and work 16 double crochets into it. Then join with a slip stitch.
Next, attach the white yarn. Chain 1, then work a half double crochet in the same stitch, followed by a double crochet. After that, chain 2, add another double crochet, and close the petal with one more half double crochet. Finally, slip stitch into the very next stitch.
Repeat this sequence eight times around. Then slip stitch into the first half double crochet, and fasten off with a tail of about 12 inches.
Step 4: Sew the Daisy onto the First Base
Thread the long tail onto the darning needle and center the daisy on the first base. Then stitch through one or two stitches on each petal, working all the way around. Going through every stitch is unnecessary, and this approach looks crisper than stitching through the gaps inside the petals.
Afterward, weave the ends through the back. Passing the needle through the yarn itself, rather than just under it, helps the ends stay put.
Step 5: Join the Two Bases
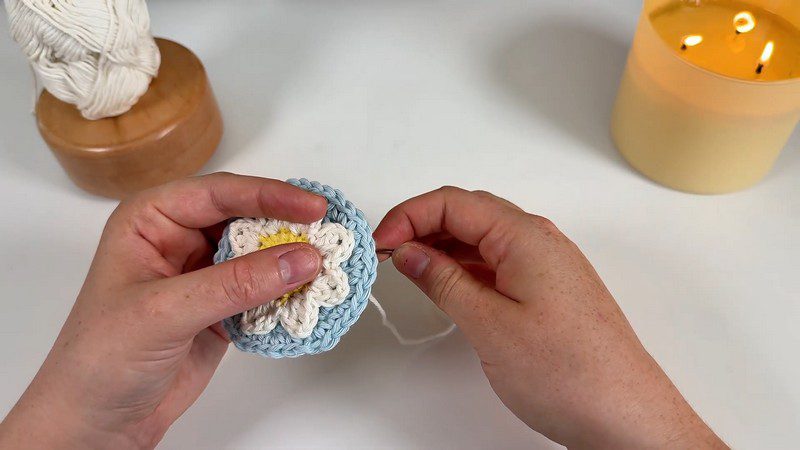
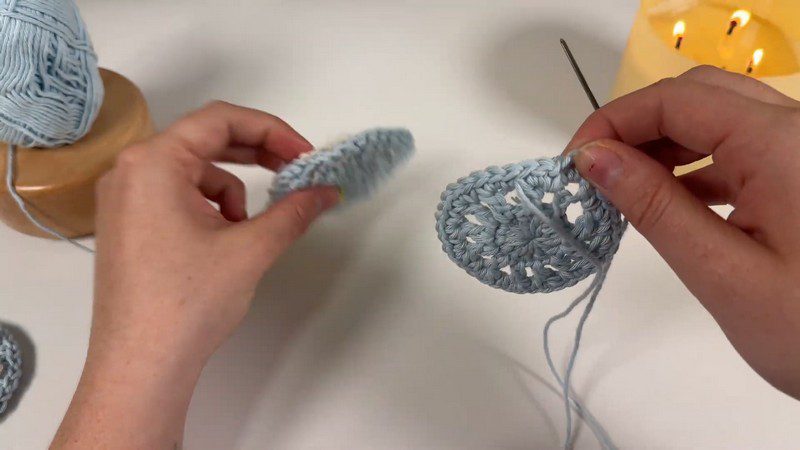
First, line up the stitches of both bases. Then, using the long tail from the second base, weave the needle through one loop only: the back loop of the stitch closest to you, then the front loop of the stitch farthest from you. Continue until the circles are joined all the way around, then weave in the ends. As a result, that completes the coaster.
Daisy Car Coaster Crochet Pattern as a Car Hanger
First, make two bases and crochet a daisy onto each one. Next, join them as described in step 5. Then slip stitch yarn into any spot on the coaster, chain 50, and slip stitch back into the same spot. As a result, the chain forms the loop that hangs the piece.
Using the same color on both flowers keeps the hanger balanced. Still, two different base colors would also look cheerful.
Daisy Car Coaster Crochet Pattern Air Freshener Pouch
Crochet the Open Back
First, make a magic ring, chain 2, and work 12 double crochets into it. Then slip stitch to the first double crochet.
Next, chain 4, then double crochet into the next stitch. After that, continue with chain 1 and one double crochet into each following stitch. Finally, finish by slip stitching into the third chain of the starting chain.
Then chain 1, work two single crochets into the stitch, and add one single crochet in the chain space. Repeat around, using the same stitch type as the coaster’s final round. Afterward, slip stitch to the first single crochet, chain 3, and slip stitch into the next stitch to form a small loop. Finally, fasten off with a tail of about 12 inches.
Sew the Pocket and Add the Chain
Leave about 10 stitches unsewn, five on each side of the small loop. Then weave the tail through the first five stitches, and join the layers with the same back-loop and front-loop method used for the coaster. Stop when five stitches remain on the other side. As a result, the gap becomes a pouch for the scent disc.
Next, weave in the ends, slip stitch the same color into the stitch directly in front of the loop, chain 50, and slip stitch back into that spot. Above all, secure every end well, since this piece hangs and moves.
Scent Disc and Essential Oil Blend
Crochet a small disc from 100% wool: magic ring, 12 double crochets, slip stitch to the first double crochet, and fasten off. Unfinished wood pieces also work. However, the tutorial found wool performed best.
The blend needs at least one base note oil, such as vanilla, cedarwood, or frankincense, plus one top note oil from the citrus or herbal group. A 3:2 ratio of base to top is suggested. For example, the tutorial uses about 15 drops: nine of cedarwood and six of eucalyptus. Exact amounts are flexible, and the goal is a well-saturated disc.
Next, seal the disc in a container for 24 hours before placing it in the pouch. Because top notes fade first, a few extra drops of that oil about once a week can revive the scent. Once the aroma disappears, wash the disc or make a fresh one.
Color Ideas for the Daisy Car Coaster Crochet Pattern
Color choice changes the whole look of a daisy car coaster crochet set. For instance, soft blue under white petals and a yellow center is one combination, while a sage or cream base would shift the mood toward earthy. Likewise, a darker charcoal base makes the white petals stand out against a car’s dark interior.
In addition, sets made in several colorways let friends and family carry matching accessories. Besides that, the sunflower applique can replace the daisy on one piece for variety.
Common Problems With the Daisy Car Coaster Crochet Pattern
- Edges ruffle or cup. Therefore, recheck the counts: 12 stitches in round 1 and 24 in round 2.
- Petals look uneven. Keep the chain 2 at the tip of each petal consistent, and count up to eight.
- Flower sits loose. Add a stitch or two on each petal, then pull the yarn snug without puckering.
- Ends keep slipping. Instead, weave through the yarn itself and double back.
- Pouch opening is too tight. Recount the unsewn stitches, about five on each side of the loop.
Care
Daisy car coaster crochet pieces made from cotton can usually be spot cleaned with mild soap and water, then reshaped flat to dry. However, the yarn label has the final say. In addition, the wool disc can be washed once the scent fades, and it should dry fully before fresh oil goes on.
FAQs About the Daisy Car Coaster Crochet Pattern
Can the second base be skipped?
With very thick yarn, yes. However, thinner yarn looks and holds up better with the back layer.
How do the small and large coasters differ?
The final round uses single crochet for the small size and double crochet for the large one.
Does the hanger need the pouch?
No. Two flowered bases joined together with a 50-chain loop make a standalone hanger.
Why use 100% wool for the disc?
The tutorial warns against synthetic blends for the oil-soaked disc.
How long should the disc rest?
Twenty-four hours in a sealed container.
Pick a Color and Start Hooking
One daisy, three accessories, and a short list of basic stitches make this set easy to plan around. In short, the daisy car coaster crochet pattern keeps the stitch list simple. So start with the coaster, since it teaches the flower and the joining method. Then move on to the hanger and pouch whenever a matching trio sounds appealing.