Charming Crochet Flower Market Bag Pattern for casual days
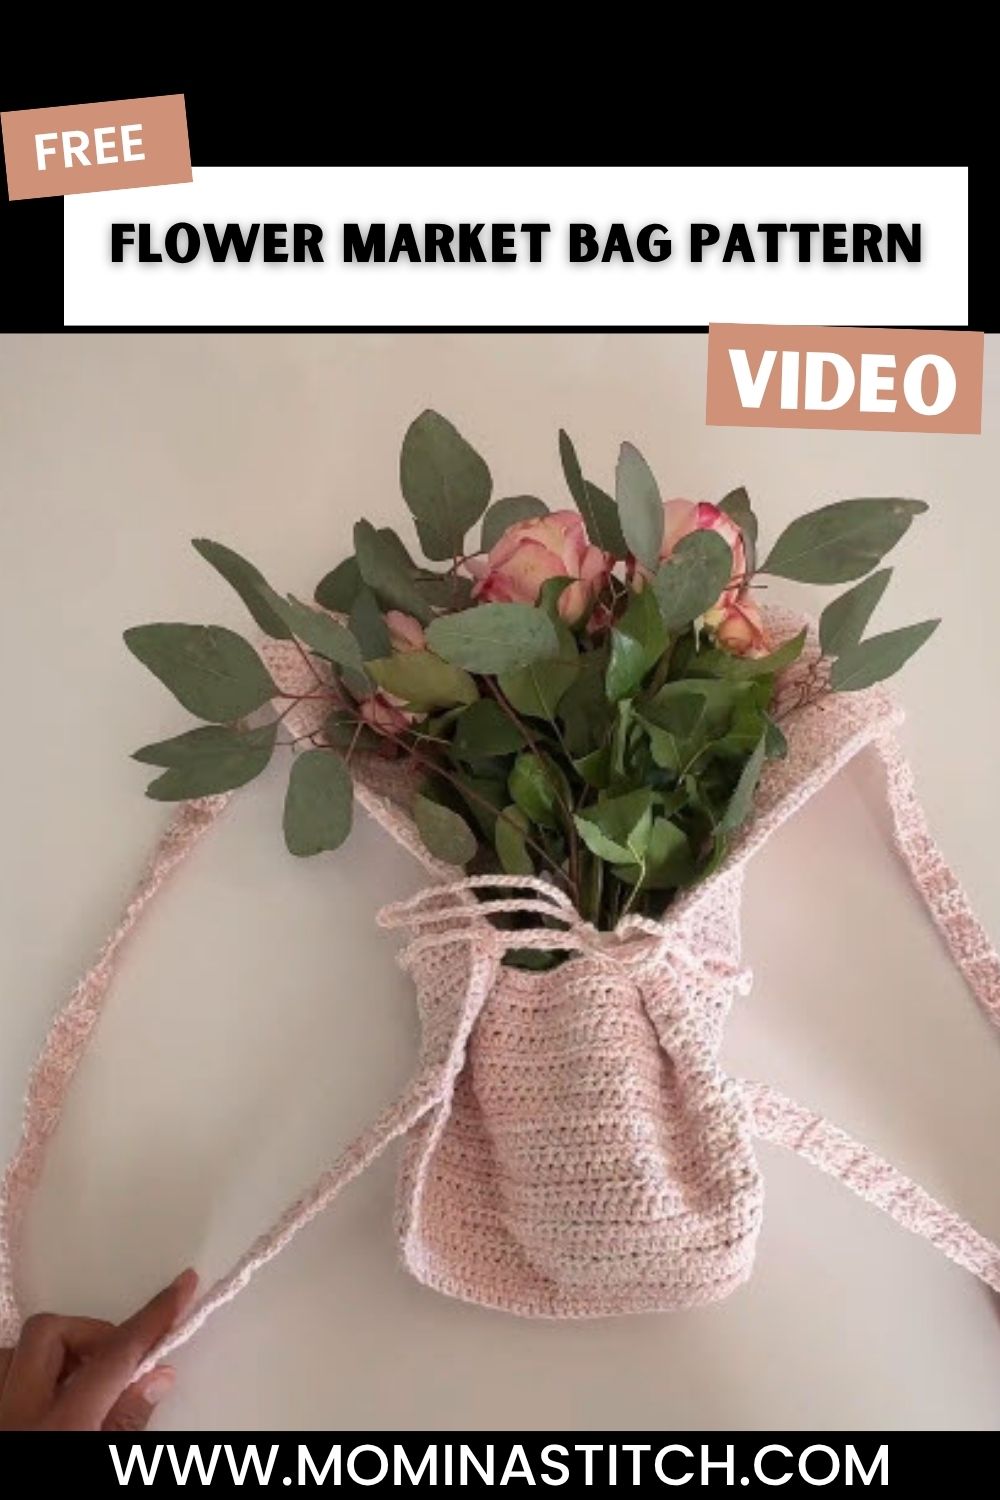
A sturdy blush panel meets a beautiful marled contrast strap in this charming Crochet Flower Market Bag Pattern, made for relaxed days. A simple yet standout floral detail gives it a lovely, practical look that suits everyday shopping and weekend market trips beautifully.
Soft blush stitches build into a sturdy, structured panel in this bag, creating a piece designed specifically for carrying fresh blooms home from a weekend market run. This pattern exists to give crocheters a practical, good-looking handmade tote bag that holds its shape while still feeling light and breezy for everyday errands. Anyone who loves market-style totes will appreciate how this design balances durability with a soft, romantic color palette.
About This Crochet Pattern
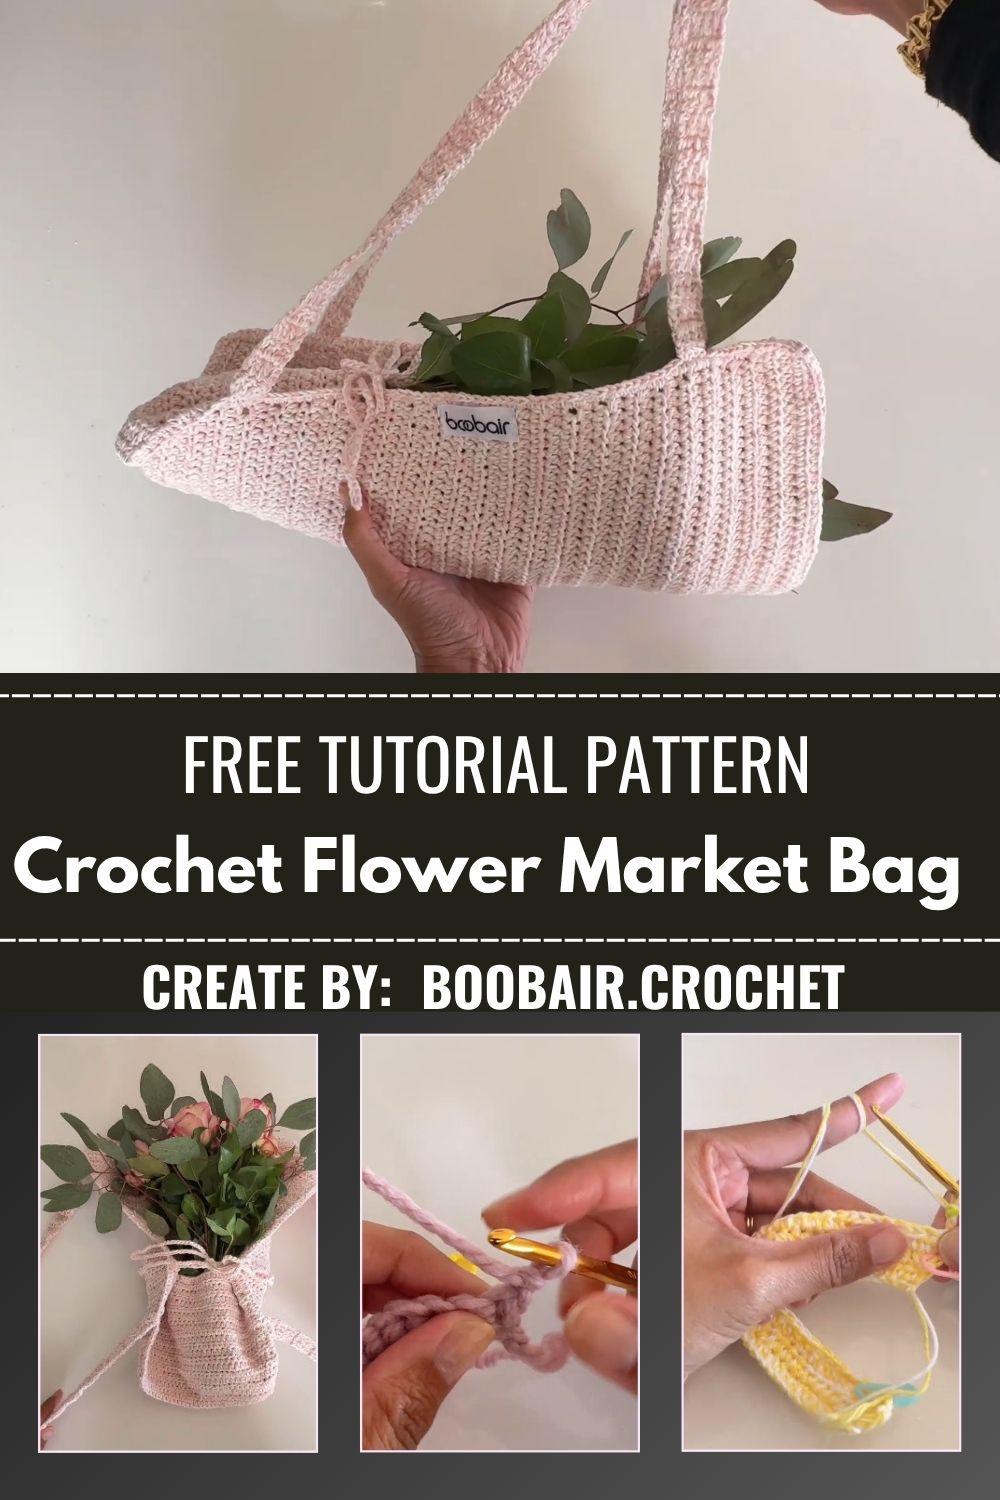
Built from a single dense panel worked in rows, this bag folds and seams into shape before a cheerful marled yellow-and-white strap gets attached to complete the design. The contrast between the solid blush body and the textured, multicolor handle gives the finished piece a lovely handmade charm.
What makes this design so practical is the dense, tightly worked fabric of the main panel, since that solid stitch structure gives the bag enough sturdiness to actually carry groceries, flowers, or everyday essentials without stretching out of shape. Because the body works as one continuous panel before folding, this bag stays approachable even for someone newer to bag-making, while the contrasting strap adds a playful, boutique-style detail that elevates the whole design.
Project Details
- Time Box: 15 minutes on the foundation chain and starting rows, 2.5 hours building the main panel, 45 minutes crocheting the strap and joining everything together
- Finished Size: Approximately 12×10 inches (adjustable based on foundation width)
- Recommended Yarn Weight: Worsted or aran weight cotton
- Crochet Hook Size: 4.5mm–5mm
Materials Needed
- Yarn in blush pink (main bag body)
- Yarn in yellow and white marled or variegated (strap)
- Crochet hook (4.5mm–5mm)
- Tapestry needle for seaming
- Stitch markers
- Scissors
- Measuring tape for sizing the panel and strap
Crochet Stitches & Techniques
- Foundation Chain
- Single Crochet (sc)
- Fastening Off
- Sewing Pieces Together
Keeping this project down to just a couple of core stitches means the dense, sturdy fabric comes purely from consistent tension and row count, not complicated technique.
Pattern Instructions
This bag builds from a long foundation chain into a tall panel that later folds and seams into its final tote shape, with a separate contrasting strap crocheted and attached afterward. Working through the stages below in order keeps the panel consistent and makes the folding and seaming far easier once the main piece is complete.
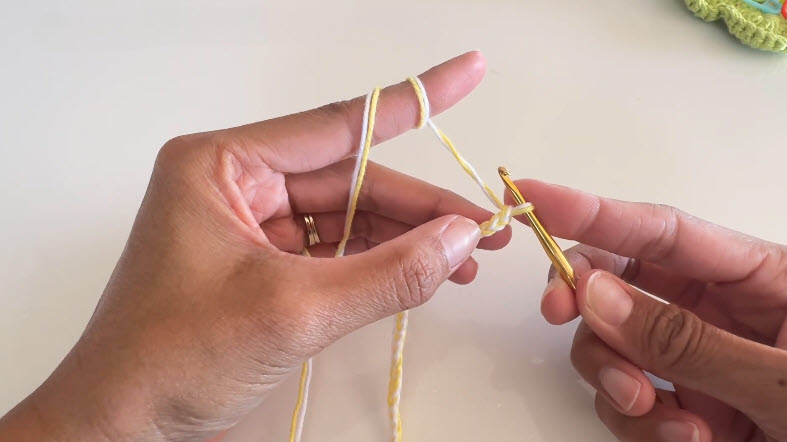
Step 1: Starting the Strap With a Foundation Chain
Begin with a slip knot and chain a foundation row in your marled yellow-and-white yarn, sizing the chain length to match your intended strap length. Keep tension relaxed here, since a tight foundation chain can pull the strap narrower than planned once the rows build up. This starting chain becomes the base the entire handle grows from.
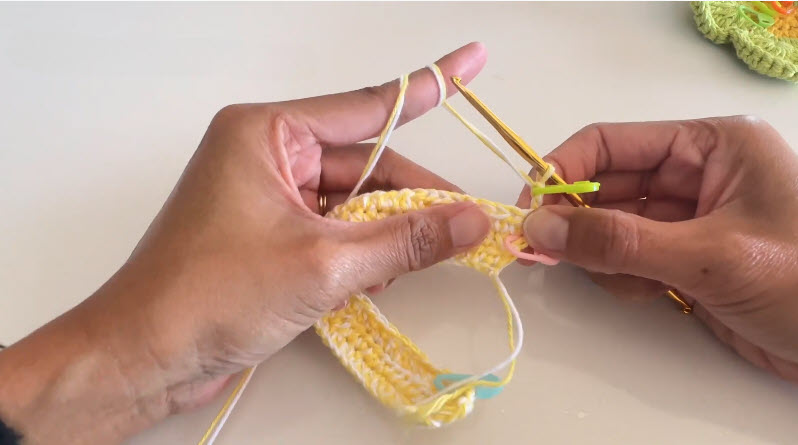
Step 2: Working the First Rows of the Strap
Begin working single crochet stitches into the foundation chain, turning at the end of each row to build up the strap’s width and thickness. Notice how the marled yarn creates a subtly speckled, textured look as the rows stack, giving the strap its own quiet visual interest against the plain bag body. Keep your tension even throughout, since straps benefit from a slightly firmer fabric to handle everyday carrying weight.
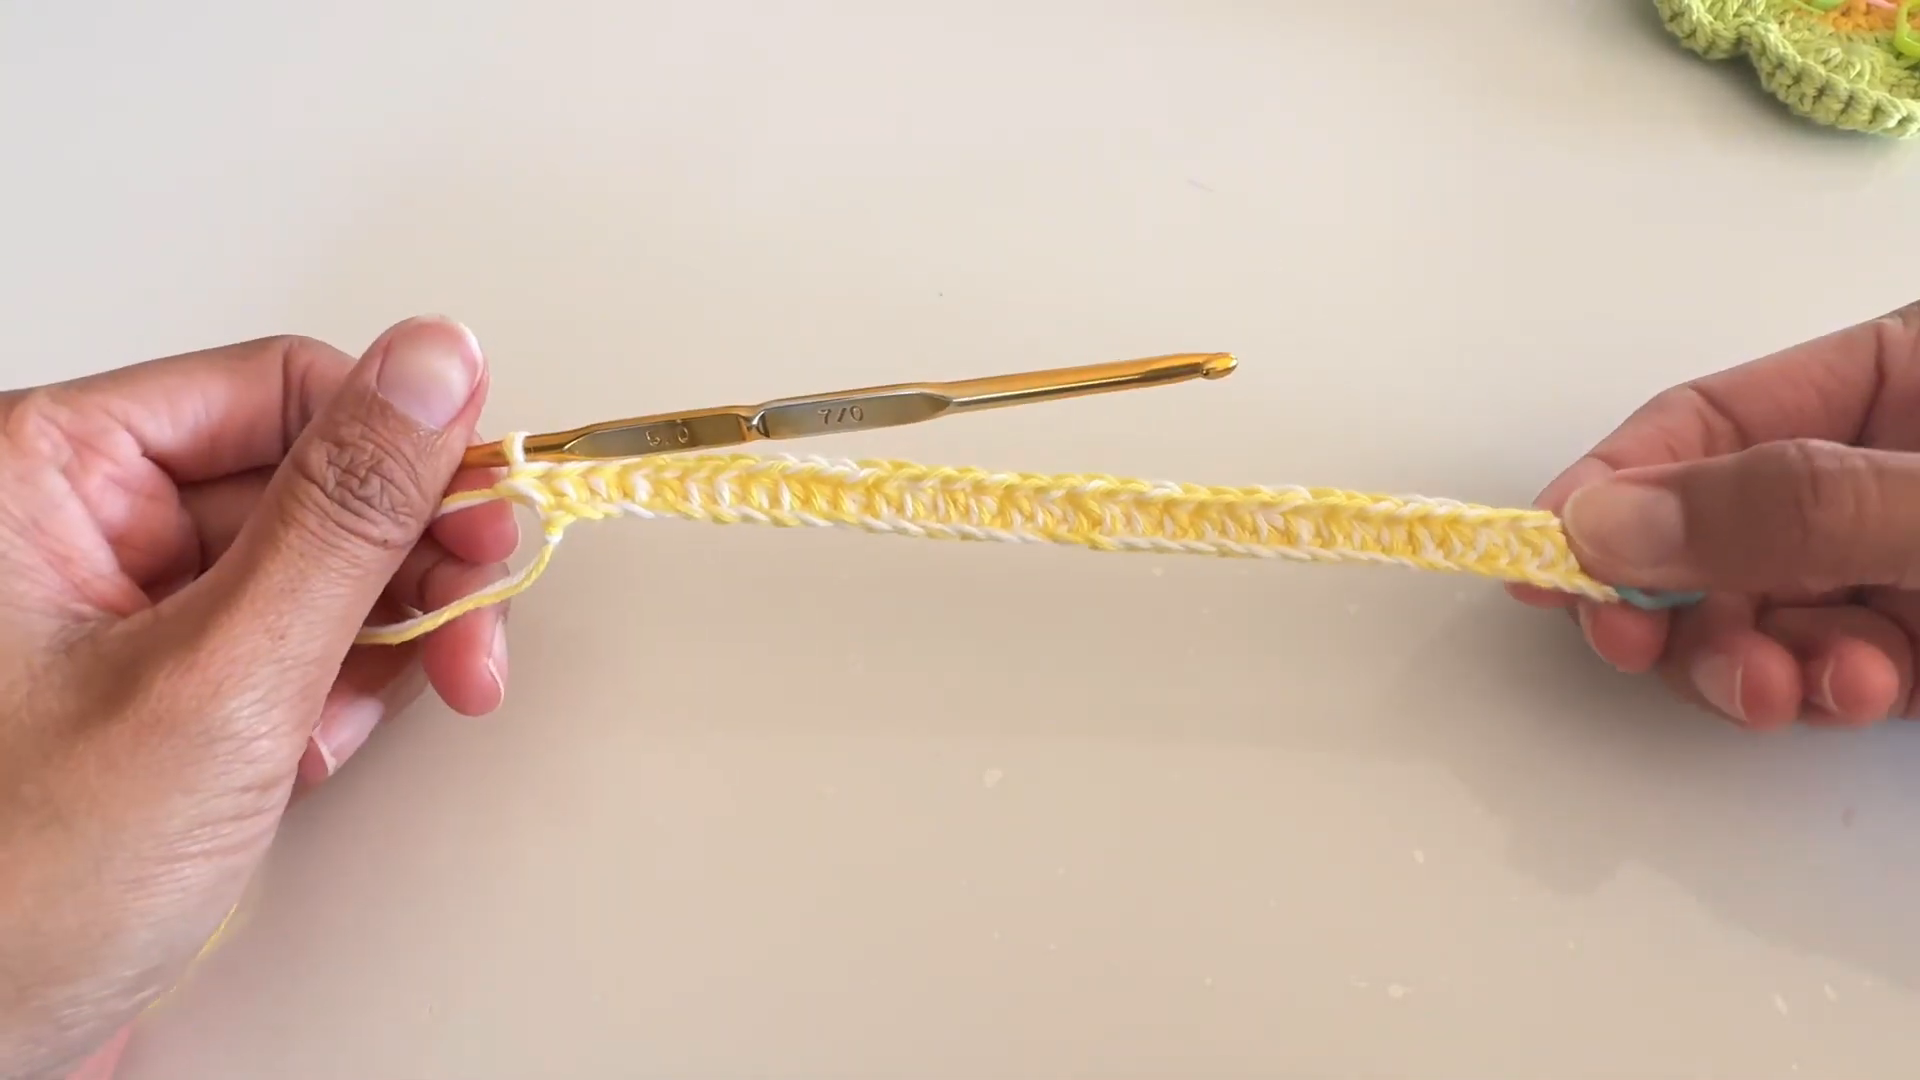
Step 3: Completing the Full Strap Length
Continue working rows steadily until the strap reaches its full intended length, checking periodically against a measuring tape or by holding it up over your shoulder for a comfortable carrying height. Fasten off once the length feels right, leaving a workable tail for attaching it to the bag body later. Set the finished strap aside while you move on to building the main bag panel.
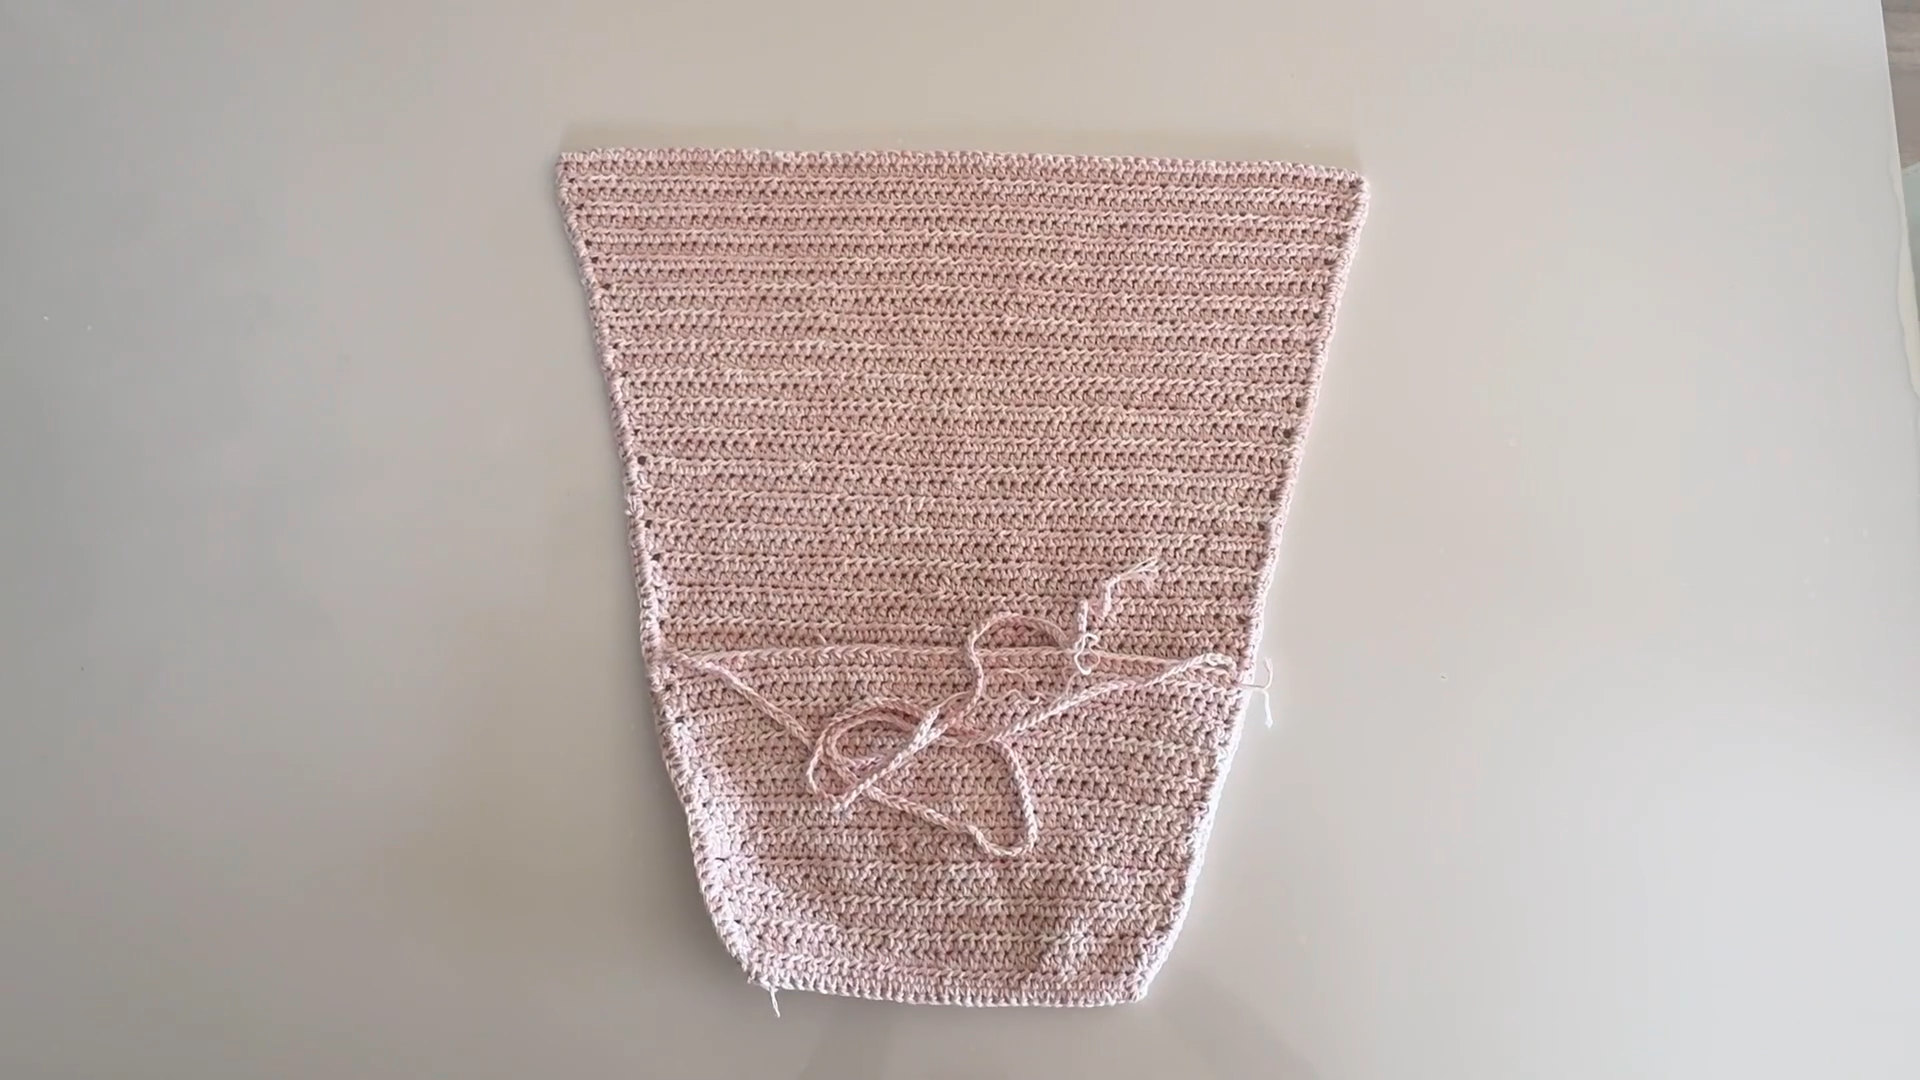
Step 4: Building and Shaping the Main Bag Panel
Work a long foundation chain in blush pink yarn, then build single crochet rows steadily upward until the panel reaches a length long enough to fold in half and form the bag’s front and back. Continue working until the piece reaches your desired finished height, keeping tension consistent throughout so the fabric stays dense and sturdy. Fold the panel in half and seam up the sides, then gather and tie off the bottom corners to create that structured, slightly tapered market bag silhouette.
Joining All Pieces
Position the finished strap at the top edges of the folded bag, checking that it sits centered and symmetrical on both sides before stitching it securely into place with a tapestry needle. Reinforce the strap attachment points with a few extra passes of stitching, since this area carries the most weight whenever the bag is in use.
Final Assembly
Weave in every loose yarn end neatly through the back of the stitching once the strap and body are fully joined. Check the tied bottom corners for security, adjusting and re-tying if needed for a neat, finished look. Give the whole bag a gentle shaping by hand so the panel sits evenly and the silhouette looks balanced when carried.
Tips for Success
- Keep your foundation chain relaxed so the panel and strap reach their full intended dimensions.
- Work the main panel with firm, even tension for a sturdy, structured fabric.
- Measure the strap against your body for a comfortable carrying height before fastening off.
- Fold and seam the panel carefully, checking alignment before stitching sides permanently.
- Reinforce strap attachment points with extra stitching for long-term durability.
- Shape the bag gently by hand after assembly to help it hold a balanced silhouette.
Personalization Ideas
Changing the blush pink to deep terracotta or sage green gives the bag a different seasonal feel. A solid-color strap also creates a simpler, more streamlined look. This is a great option for anyone who prefers a clean, monochrome design.
Adding a small interior pocket makes the bag more practical for holding keys or a phone securely while carrying larger items like produce or flowers. A shorter strap length also turns this into a handheld market basket style instead of a shoulder tote.
Common Mistakes to Avoid
- Tight foundation chain: Keep the starting chain loose so the panel and strap reach their full intended width and length.
- Uneven panel tension: Keep stitches consistent throughout to avoid a warped or lopsided bag shape.
- Mismeasured strap length: Check strap length against your body before fastening off to avoid an uncomfortable fit.
- Weak strap attachment: Reinforce the strap join with extra stitching since it carries the bag’s full weight.
- Loose bottom ties: Double-check and re-tie the gathered bottom corners for a secure, finished look.
Frequently Asked Questions
What yarn works best for this market bag?
Worsted or aran weight cotton yarn gives the panel enough structure and durability to hold everyday market items securely.
How long does this Crochet Flower Market Bag project usually take to complete?
Most crocheters finish within three to four hours, often working the panel and strap across separate sessions.
Can I make the bag larger or smaller?
Yes, simply adjust your foundation chain length and row count to scale the finished bag size up or down.
Is this pattern good for someone newer to bag-making?
Yes, since the main body uses just single crochet throughout, it’s an approachable project for building confidence with garment-adjacent construction.
What’s the best way to keep the bag from stretching out of shape?
Work the main panel with firm, consistent tension, since a denser fabric holds its structure far better than a loose one.
Can I use a solid color strap instead of a marled yarn?
Absolutely, a solid contrasting color or even a matching blush strap both work beautifully with this design.
How do I keep the strap from twisting while carrying the bag?
Attach it flat and check that it lies smoothly against the bag body before securing the final stitches.
Best Ways to Style and Use This Bag