Free Crochet Diamond Cardigan Pattern for Beginners
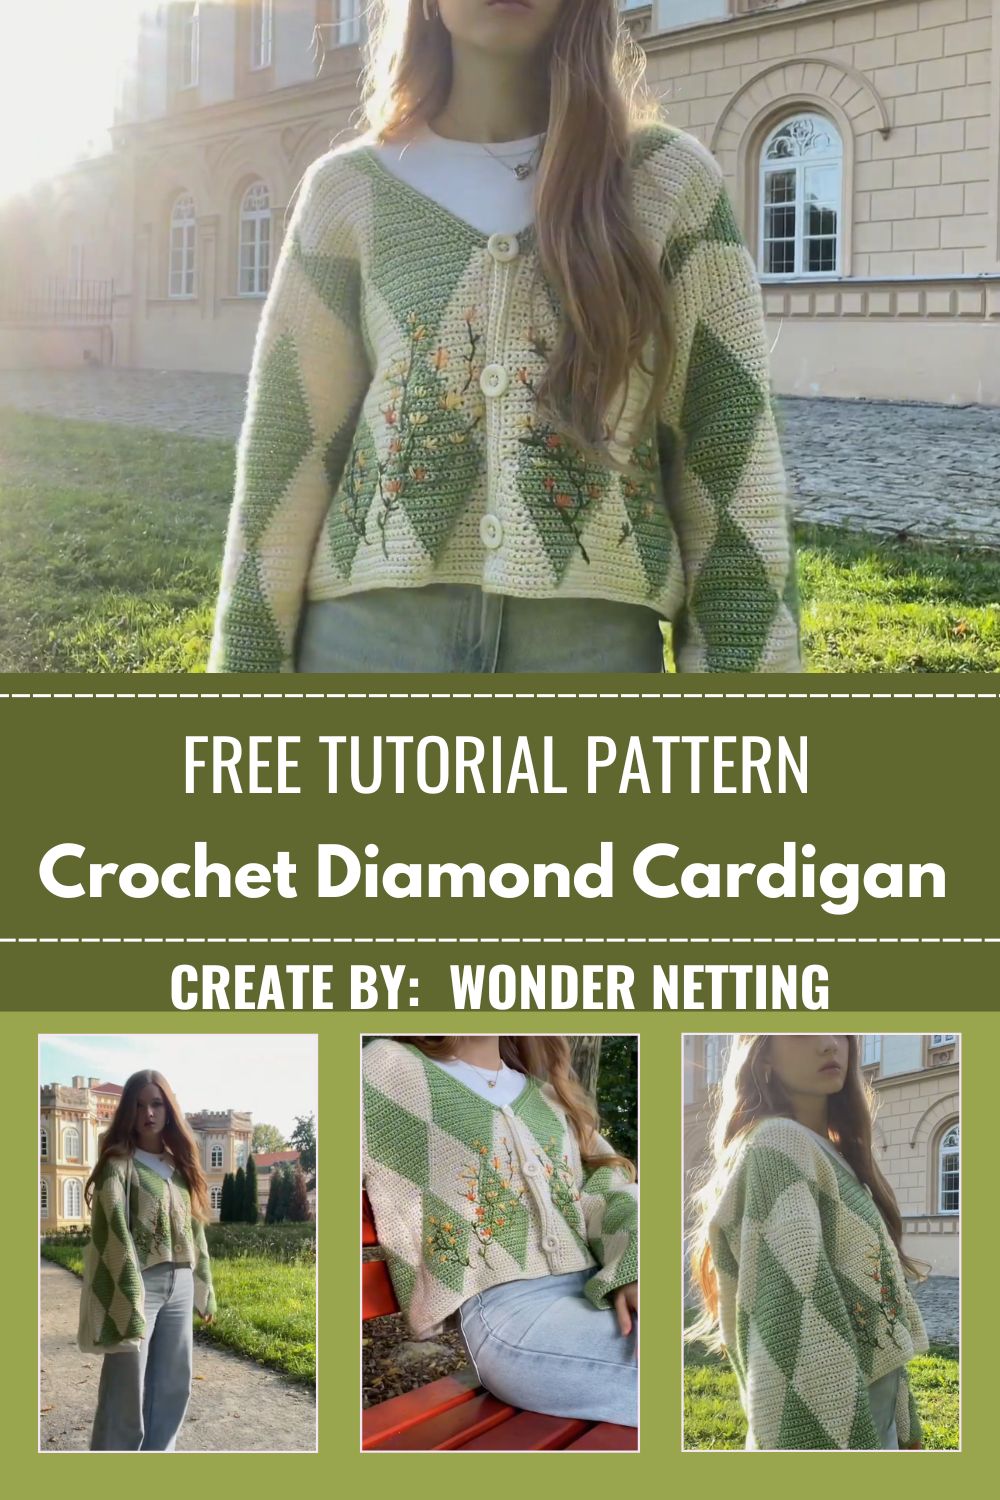
What sets this cardigan apart is its modular construction, since the whole garment builds from small, repeatable triangle pieces rather than large complicated panels worked all at once. That approach makes it especially forgiving for beginners easing into garment-making, because sizing adjustments simply mean adding or removing a triangle here and there rather than reworking an entire panel from scratch.
Project Details
- Skill Level: Beginner-friendly (comfortable with basic shaping and color changes)
- Finished Size: Customizable based on triangle count and panel arrangement
- Estimated Time Required: 15–20 minutes per triangle, several hours total for the full cardigan
- Recommended Yarn Weight: DK or worsted weight cotton or cotton-blend
- Crochet Hook Size: 4mm–5mm
Materials Needed
- Yarn in sage green and cream
- Crochet hook (4mm–5mm)
- Tapestry needle for joining triangles
- Stitch markers
- Scissors
- Measuring tape for sizing panels to fit
Crochet Stitches & Techniques
- Foundation Chain
- Single Crochet (sc)
- Increase (inc)
- Decrease (dec)
- Color Changes
- Fastening Off
- Sewing Pieces Together
The technique list stays short and manageable here, which is part of what makes tackling a full garment feel far less intimidating than it might sound.
Pattern Instructions
Every triangle in this cardigan follows the same building sequence, growing from a narrow point into a wider base before joining its neighbors to form the diamond pattern. Working through the stages in order keeps every triangle consistent, which becomes especially important once it’s time to arrange them into matching panels.
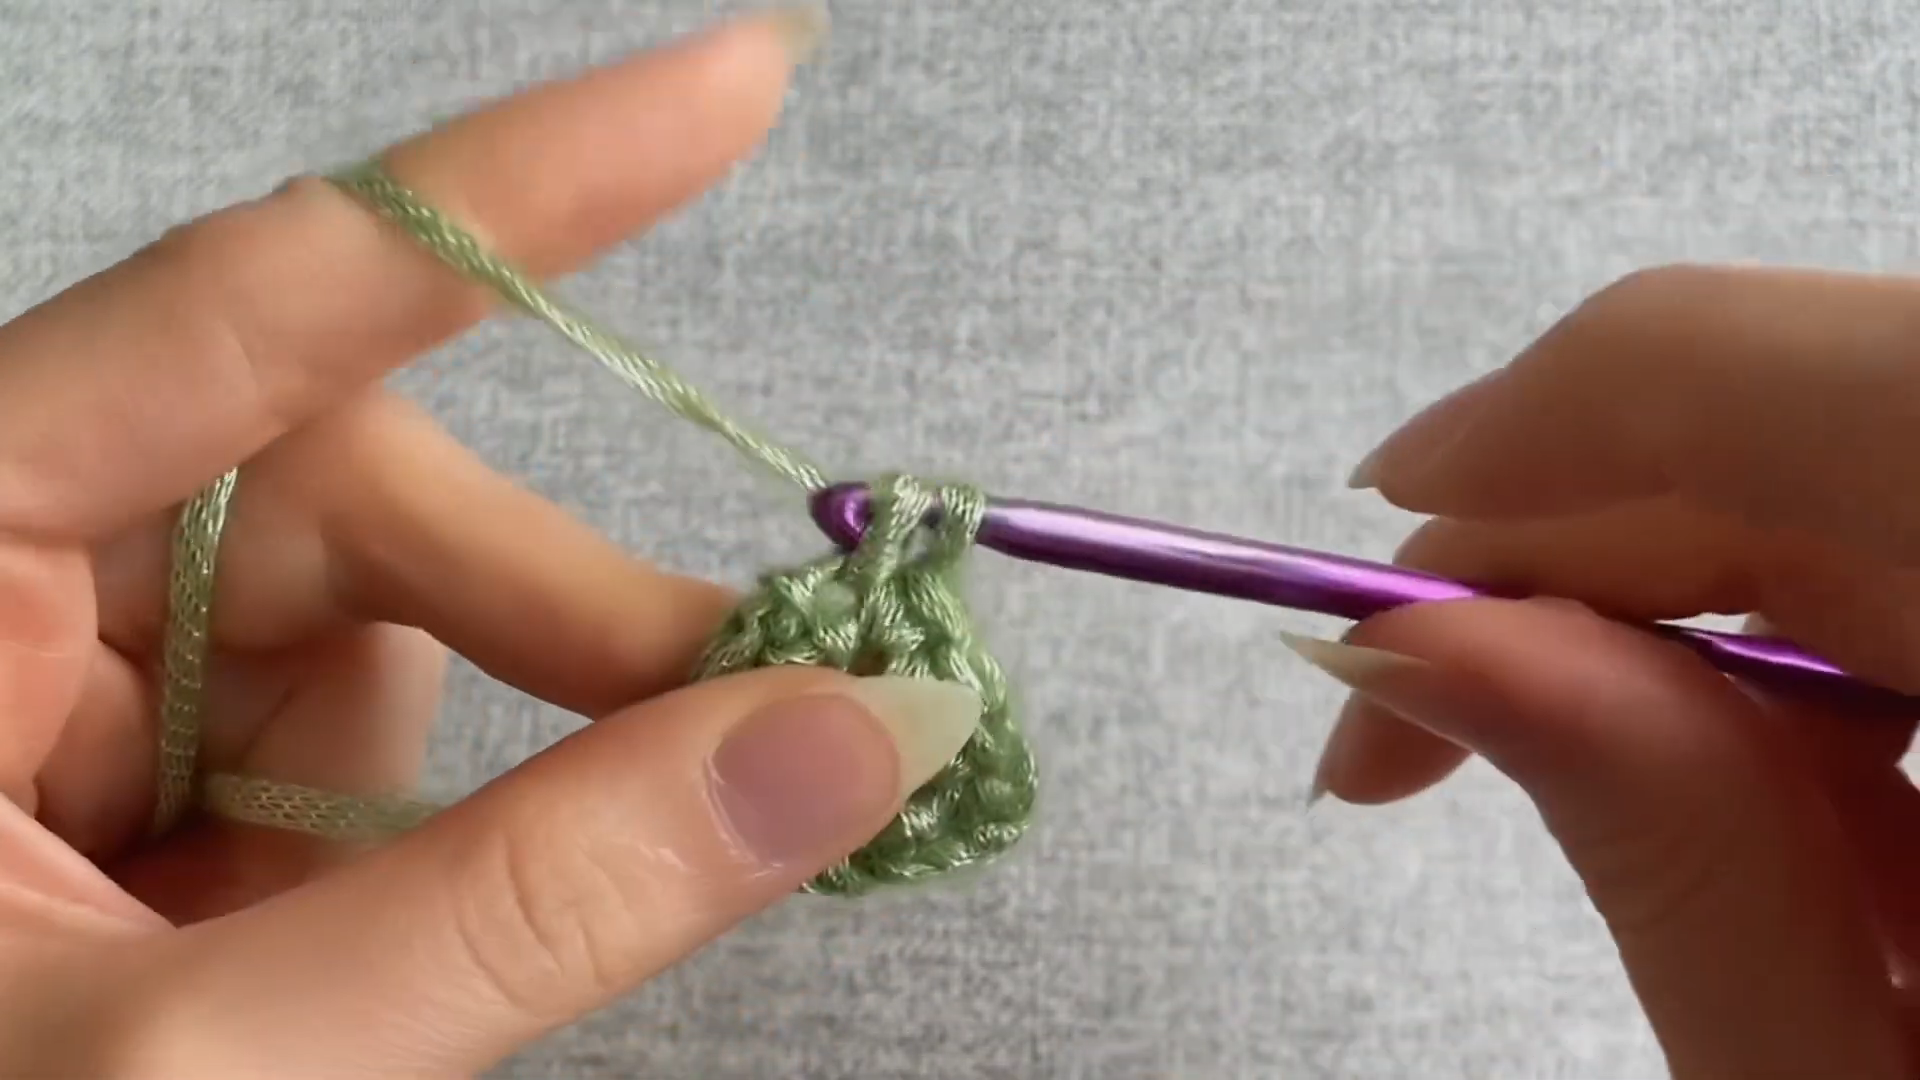
Step 1: Starting the Triangle Point With a Foundation Chain
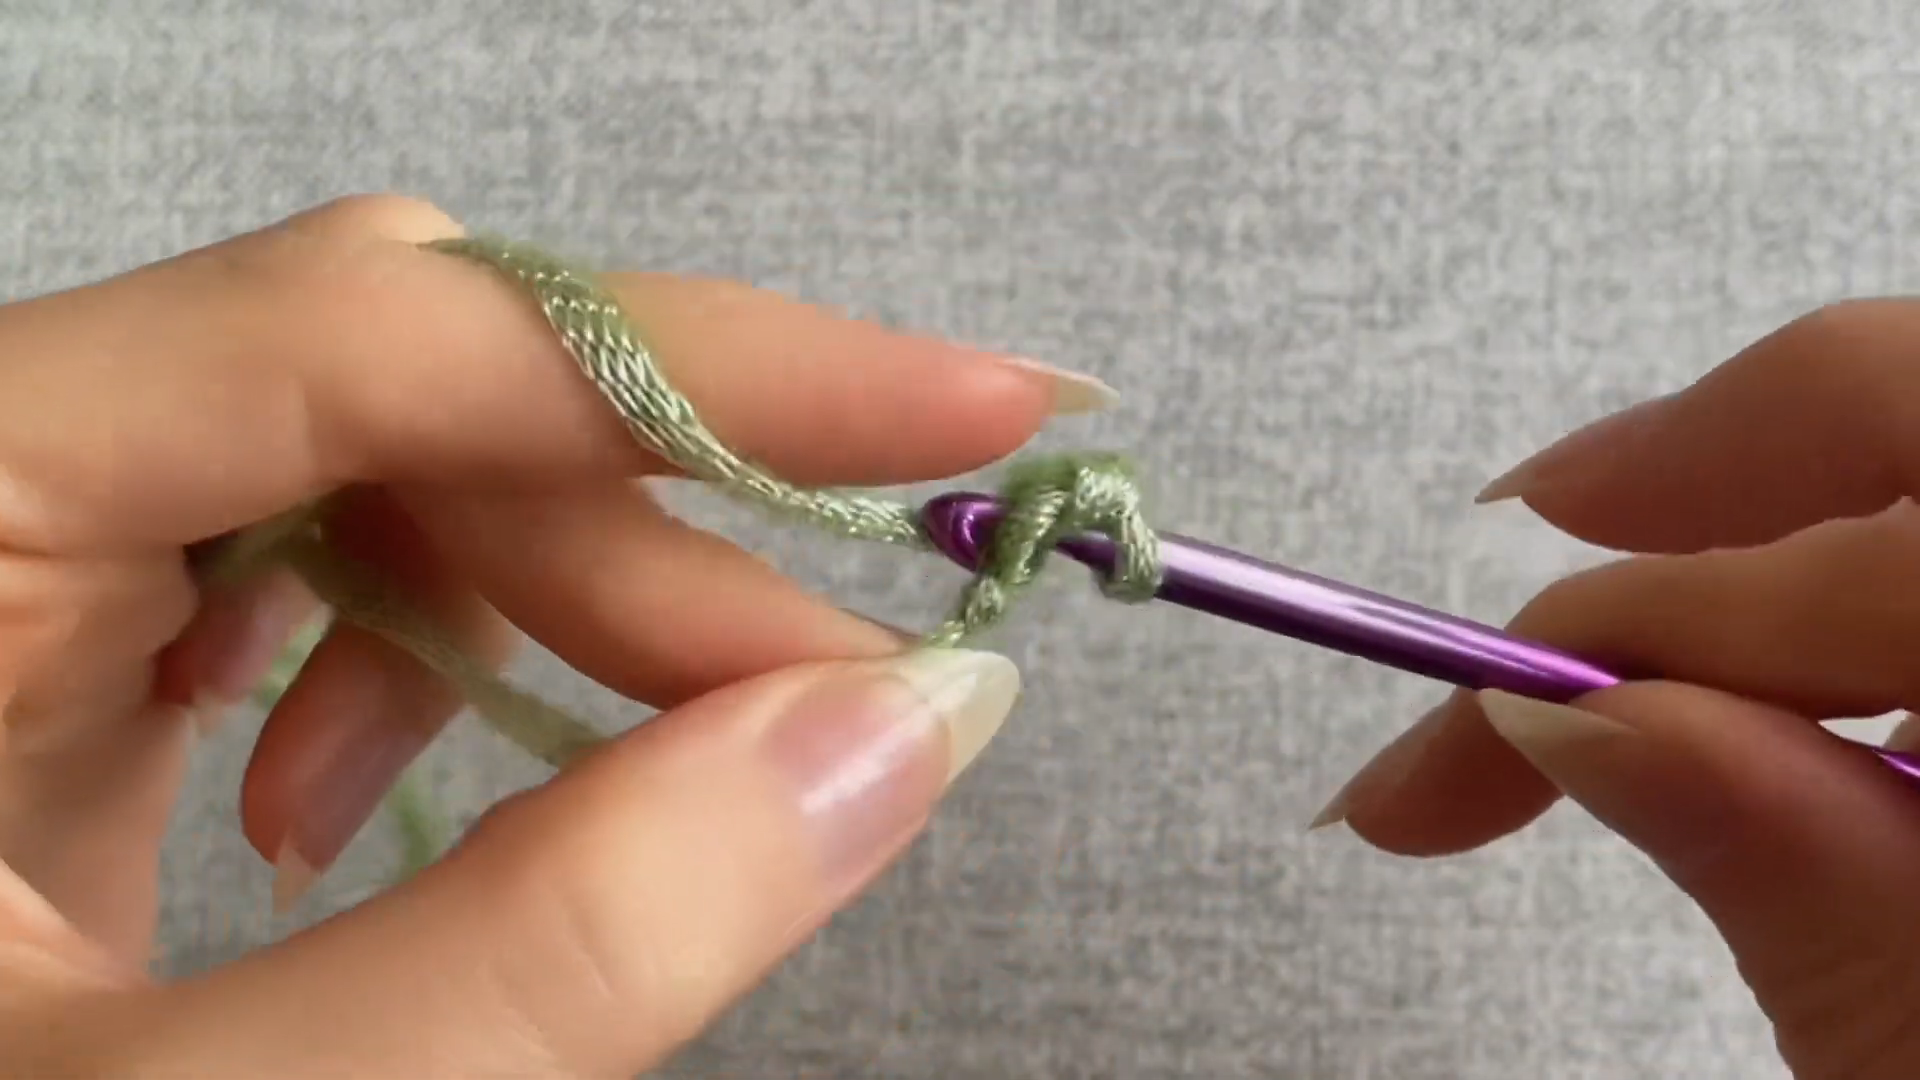
Begin with a short foundation chain in your first color, working the initial row of stitches to establish the narrow tip of the triangle. Keep tension firm at this stage, since the point needs to stay sharp and defined rather than rounding out. This tiny starting edge becomes the anchor that the rest of the triangle grows from.
Step 2: Increasing Outward to Build the Triangle Shape
Continue working rows outward, adding a stitch on each side at the start of every row to widen the shape steadily. Watch how the piece grows from that narrow point into a proper triangular silhouette as the rows stack up. Counting stitches at the end of each row helps keep both edges growing at matching angles, which is essential for a clean final shape.
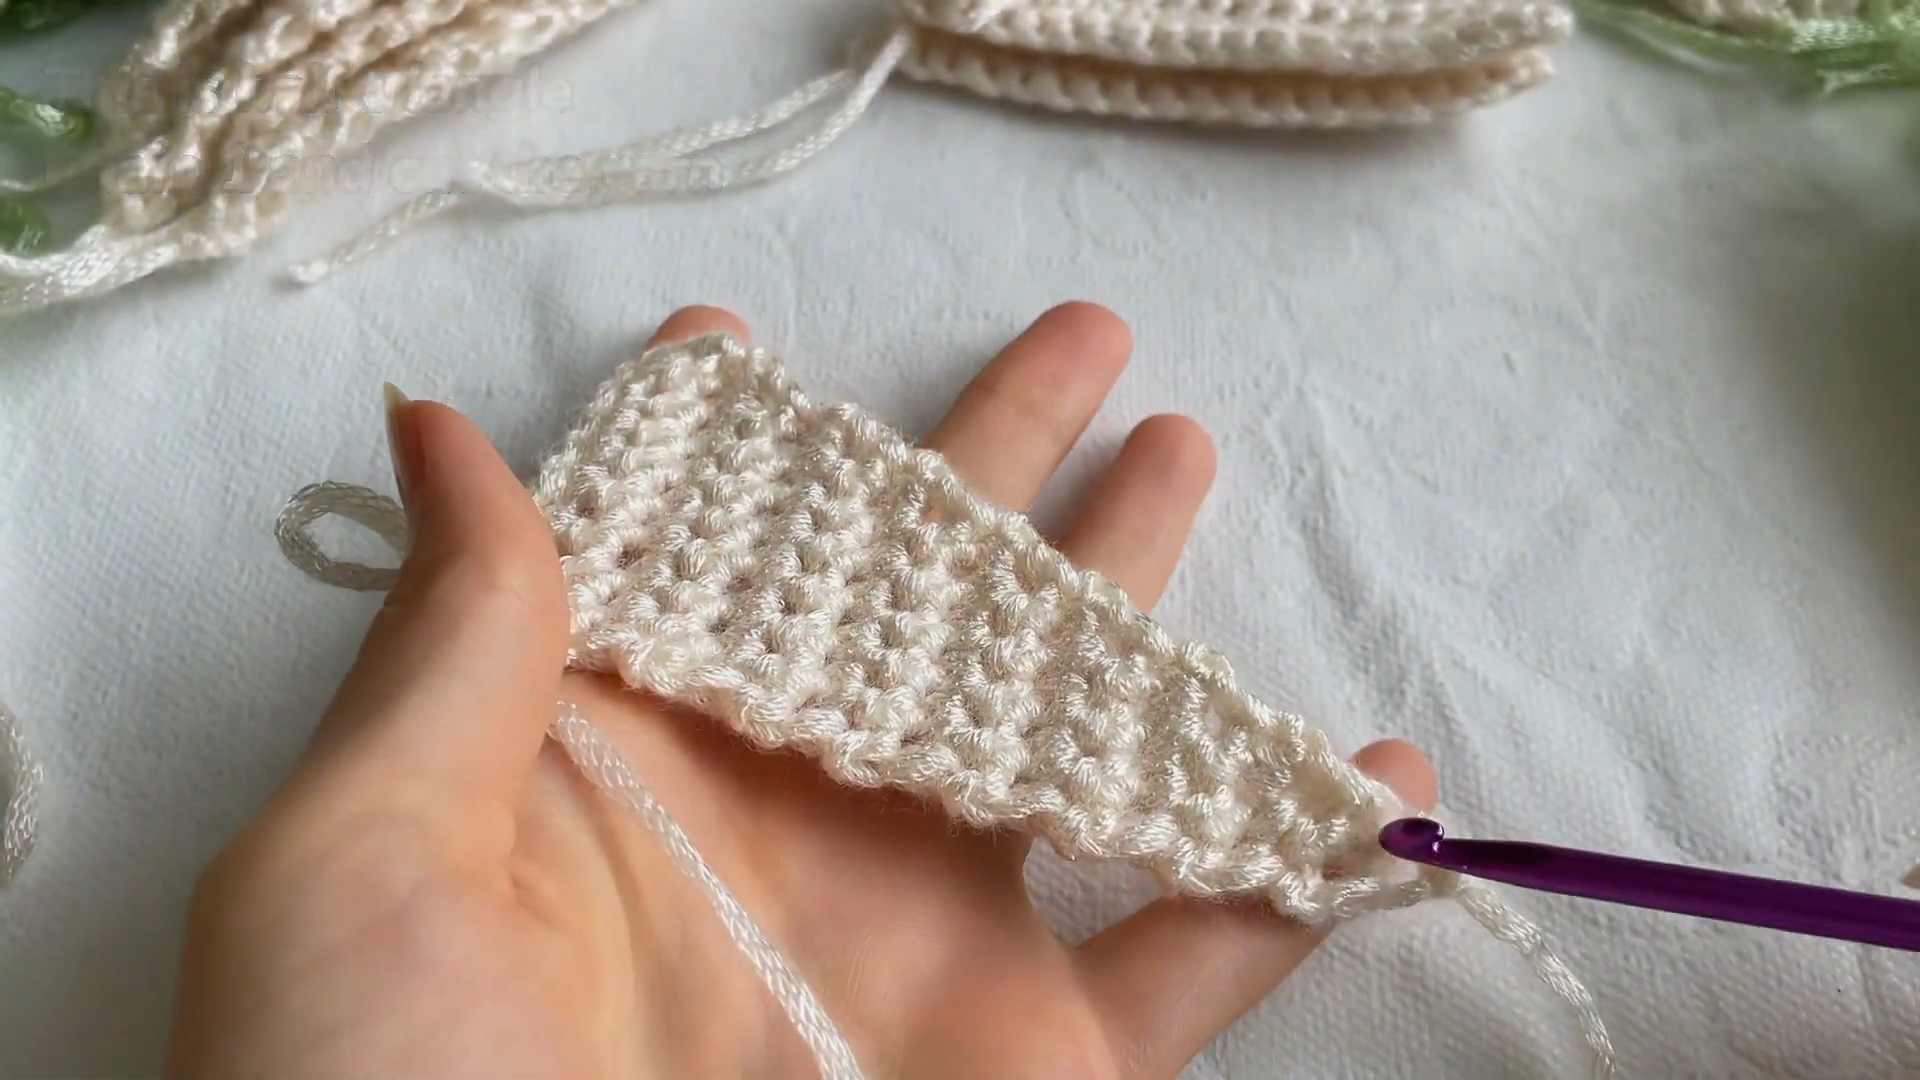
Step 3: Completing and Fastening Off Each Triangle
Work the final rows until the triangle reaches your target width, then fasten off, leaving a workable tail for joining later. Lay the finished piece flat and check that both slanted edges appear symmetrical before setting it aside. Repeat this entire sequence, alternating between sage and cream yarn, until you’ve built enough triangles to cover your intended panel size.
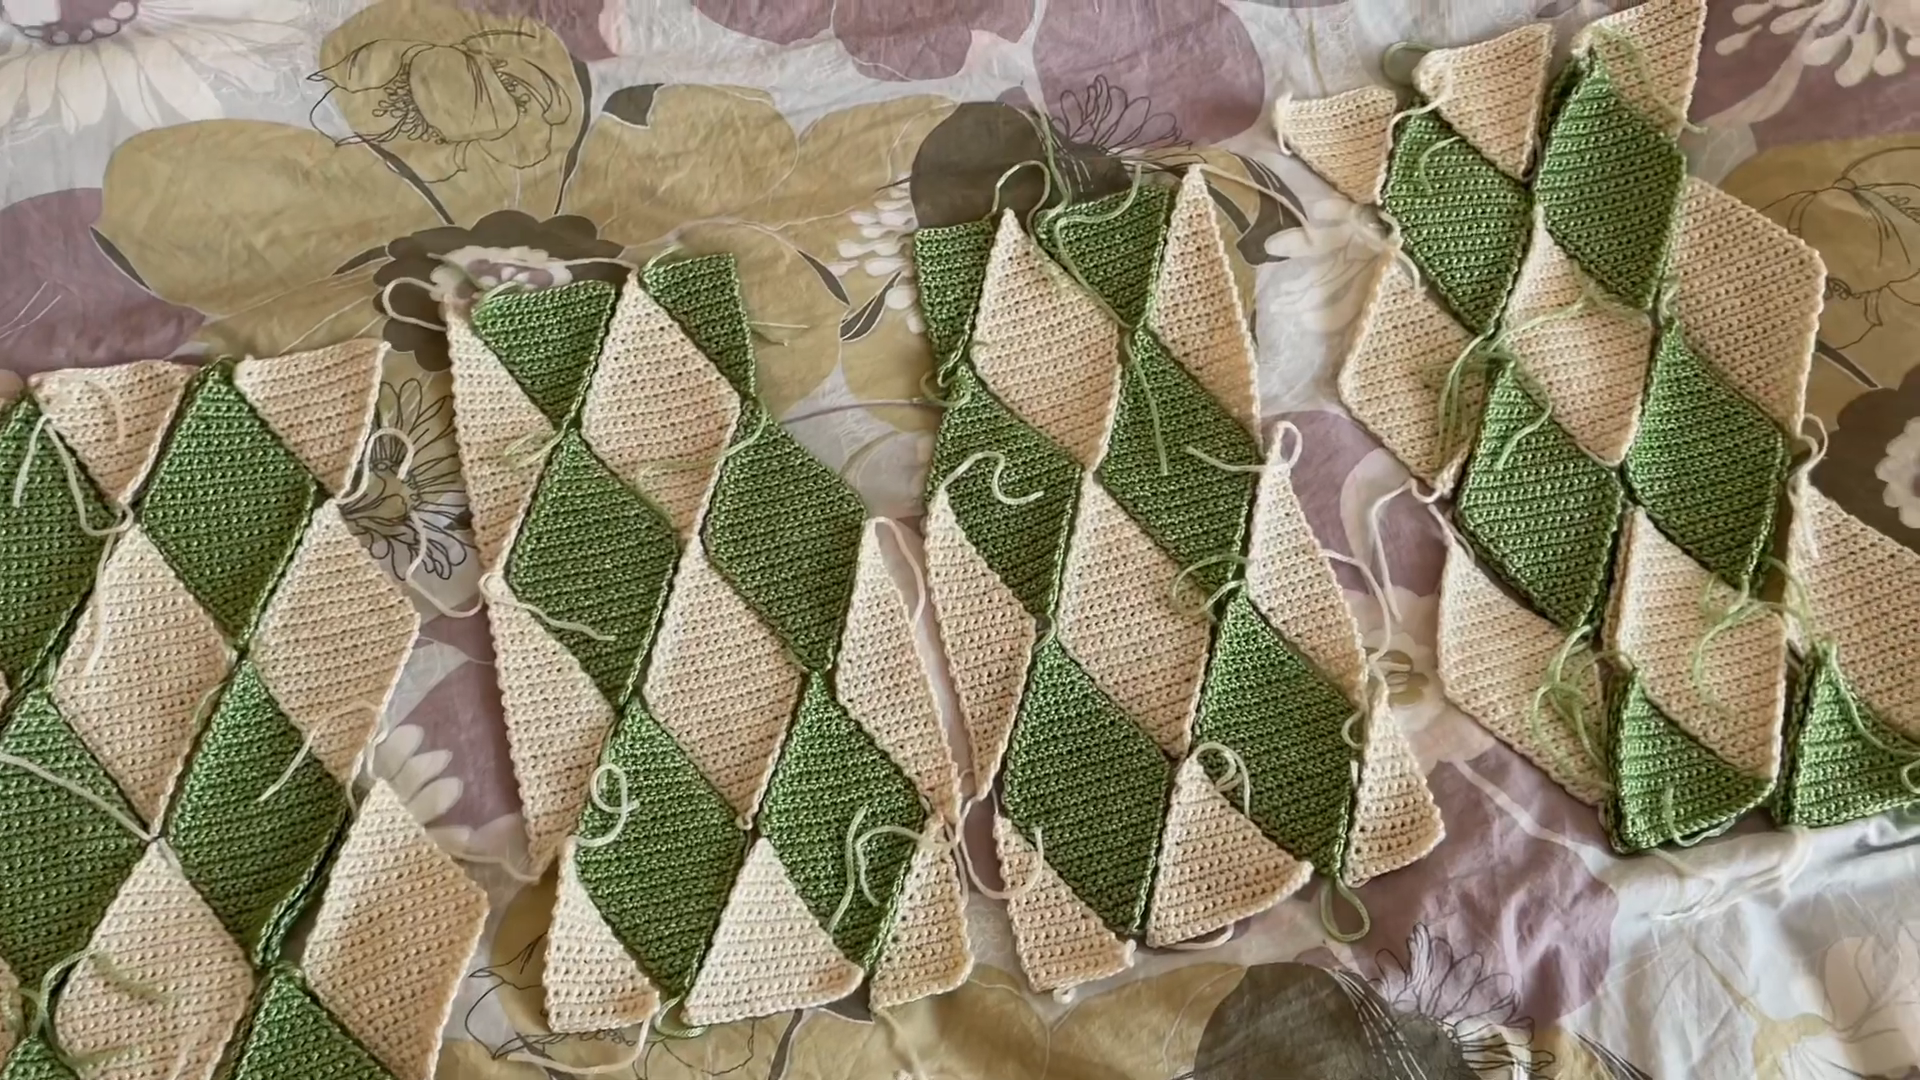
Step 4: Arranging and Joining Triangles Into Diamond Panels
Lay your finished triangles out on a flat surface, alternating colors so that adjoining pieces form the diamond shapes running across the fabric. Whipstitch or single crochet along each shared edge, working steadily across the row to keep the seams tight and the diamond points meeting cleanly at their centers. Continue joining rows of triangles together until the panel reaches the width needed for the cardigan front, back, or sleeve section.
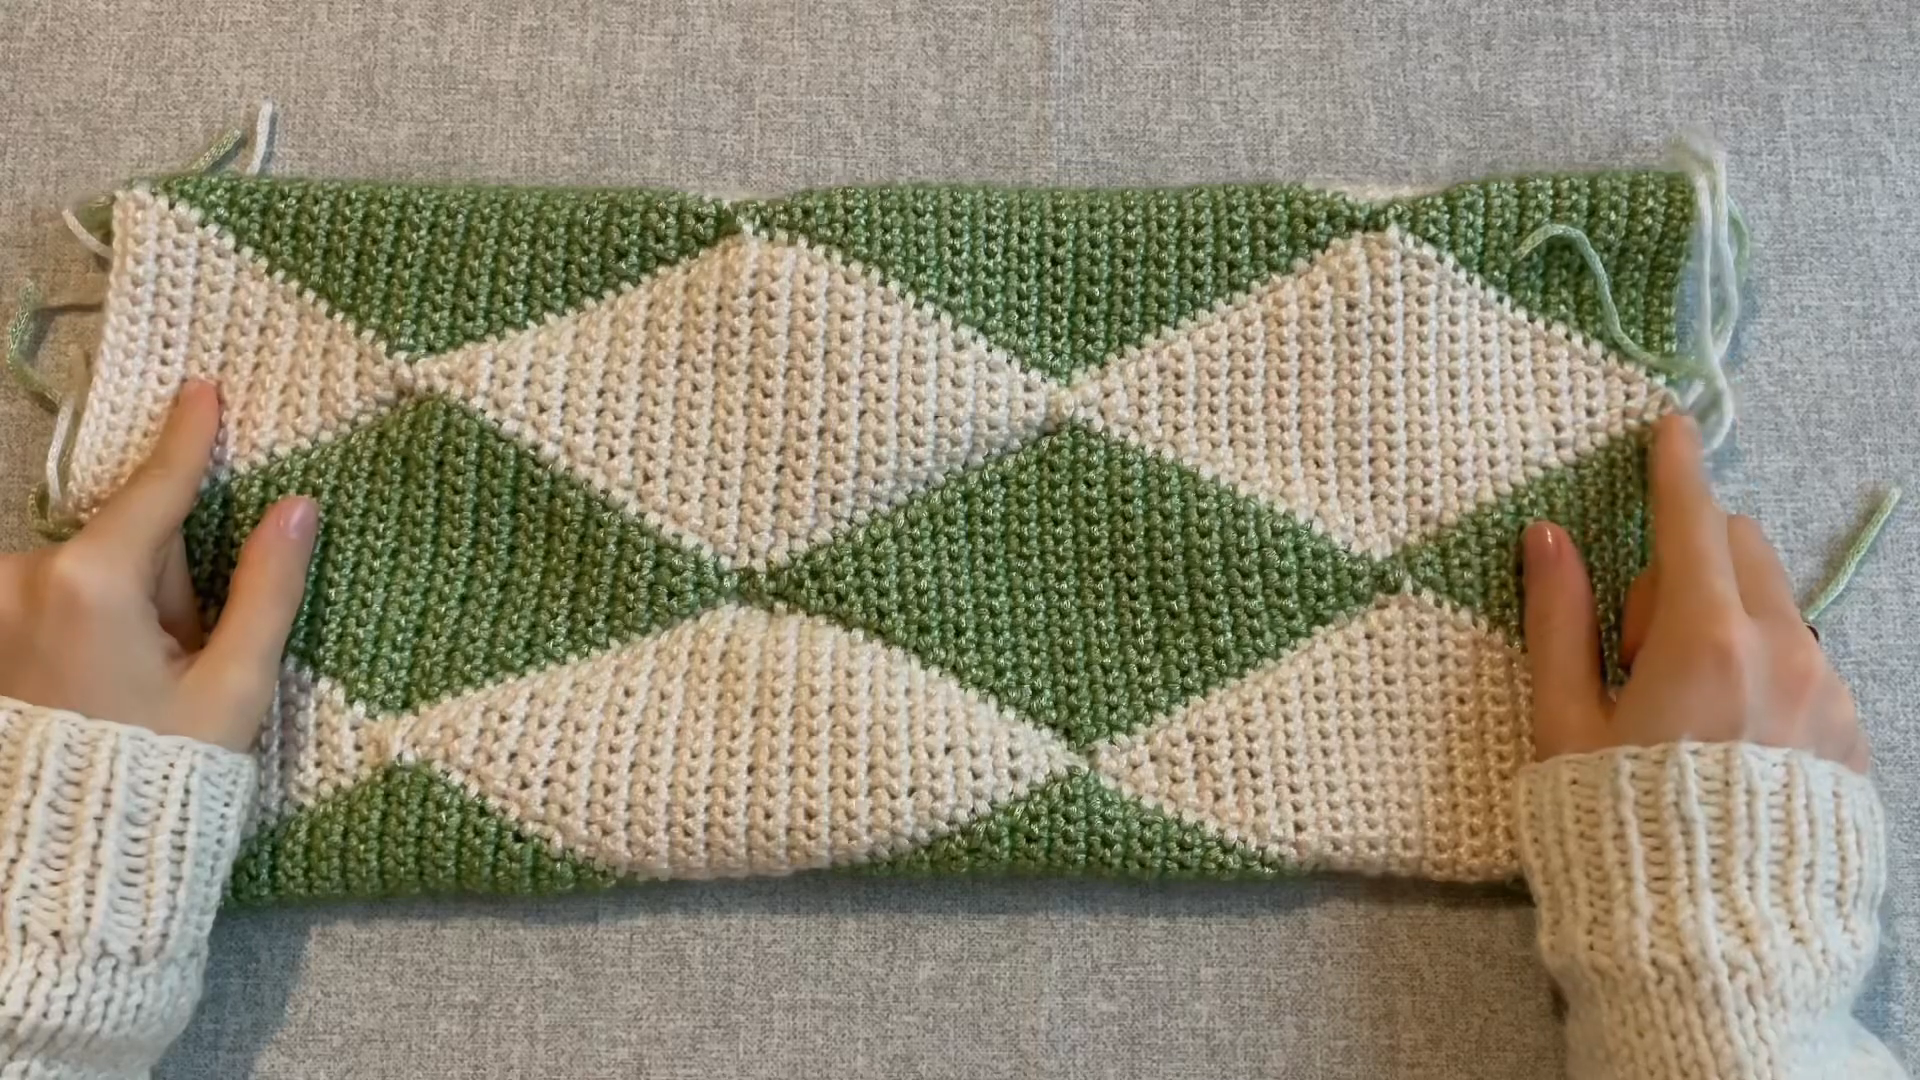
Step 5: Assembling the Finished Panel
Once a full panel is joined, lay it flat and check that the diamond pattern lines up evenly across the entire piece, adjusting any loose seams before moving forward. Compare the panel dimensions against your desired cardigan measurements, adding extra rows of triangles if more width or length is needed. This finished panel becomes one of several pieces that will eventually come together to form the complete garment.
Joining All Pieces
Sew the front and back panels together at the shoulders and sides, matching the diamond points across the seams. This keeps the pattern looking continuous and unbroken. Attach the sleeve panels using the same joining technique. Check that the argyle motif flows smoothly from the body into each sleeve.
Final Assembly
Weave in every loose yarn end neatly through the back of the stitches, trimming excess close to the fabric once all panels are joined. Work a simple border round along the cuffs, hem, and front edges for a clean, polished finish, and give the whole cardigan a gentle steam block so the seams lie flat.
Tips for Success
- Keep tension consistent across every triangle so the finished panels look uniform.
- Count stitches at the end of each row to keep both triangle edges symmetrical.
- Lay triangles out in your intended layout before joining to double-check color placement.
- Measure panels against your body regularly while assembling to catch sizing issues early.
- Join seams snugly but not too tight, so the fabric still drapes naturally.
- Block finished panels individually before final assembly for the flattest results.
Personalization Ideas
Swapping the sage and cream palette for navy and mustard gives the cardigan a completely different, more autumnal feel, while a soft blush and white combination leans into a gentler, romantic look. A bold black and white version creates striking, high-contrast diamonds for anyone wanting a statement piece.
Shortening the sleeve length turns this into a cropped cardigan style, and adding a wide ribbed collar changes the overall silhouette into something cozier for colder months. A vest version without sleeves also works beautifully if a shorter project timeline sounds appealing.
Common Mistakes to Avoid
- Uneven triangle points: Keep tension tight at the narrow tip to prevent it from rounding out.
- Mismatched triangle sizes: Count rows carefully so every triangle grows to the same dimensions.
- Misaligned diamond points: Lay pieces out and check alignment before joining permanently.
- Skipping fit checks: Measure panels against your body throughout construction, not just at the end.
- Loose or puckered seams: Keep joining stitches even in tension across the entire seam length.
Frequently Asked Questions
What yarn works best for this diamond cardigan?
DK or worsted weight cotton blend yarn holds the triangle shapes crisply while still giving the finished garment good drape.
How many triangles do I need for a full cardigan?
This depends on your size and desired panel width, but most adult sizes require several dozen triangles across all pieces combined.
Can I make this Crochet Diamond Cardigan without color changes?
Yes, though the diamond effect relies on contrasting colors, so a single color version will look more textured than patterned.
Is this Crochet Diamond Cardigan pattern truly beginner-friendly?
Yes, since each triangle is small and repeatable, it’s a gentle introduction to garment construction without overwhelming complexity.
How do I keep the diamond points aligning correctly?
Lay triangles out in your intended arrangement before joining, checking that opposite color points meet cleanly at each seam.
Can I resize this Crochet Diamond Cardigan for a different fit?
Absolutely, simply add or remove rows of triangles from each panel to adjust the overall width and length.
What’s the best way to keep the seams from puckering?
Keep your joining stitches relaxed and evenly spaced rather than pulling the yarn too tight as you work.

Conclusion
This Crochet Diamond Cardigan proves that small triangle motifs can transform into a striking, tailored-looking garment. Take your time building each triangle and enjoy watching the diamond pattern emerge as the panels grow. Don’t hesitate to experiment with your favorite color pairing along the way. Once finished, this cardigan makes a wonderful addition to any handmade wardrobe. Pick up your hook and share your finished creation with fellow crochet lovers.