Harmonious Crochet Sea Octopus Keychain Amigurumi Pattern for Newbie
A little octopus hanging from your keys makes it feel like you’re carrying a little piece of the ocean with you. This Crochet Sea Octopus Keychain project is easy, especially for beginners, but still has beauty and interest. Amigurumi is an art form that involves making animals, dolls, and various characters. People often give these cute items as gifts, making them into keychains so they can be easily carried around.
Mass-produced plastic toys always look perfect, but they rarely feel personal. A crocheted amigurumi toy tells a different story your hands shape every curve, stitch, and little detail, which gives the finished piece warmth that factory items can’t imitate. When you build a beginner amigurumi pattern like this sea octopus, you control the color palette, the expression, and even the squishiness based on your stuffing choice. That creative freedom turns a simple craft session into a small act of self-expression. Handmade gifts also land differently; the receiver knows you spent time making something just for them. This crochet keychain pattern works as a first dive into ocean amigurumi, and it leaves room for playful upgrades once you feel confident.

Required Supplies
Here’s what you’ll want on your table before you start:
- Yarn (main color): Cotton or cotton-blend yarn works great for crisp stitches and durability on a keychain. Acrylic also works if you want a softer finish.
- Yarn (accent color): Optional for cheeks, underside, or tiny details.
- Crochet hook: Pick a hook slightly smaller than your yarn label suggests so the fabric stays tight and stuffing won’t show. Many keychain amigurumi use a 2.0–3.5 mm hook depending on yarn weight.
- Stuffing: Polyester fiberfill holds shape well and stays lightweight.
- Safety eyes or embroidery thread: For a keychain, embroidered eyes often hold up better in a bag.
- Tapestry needle: For sewing parts and weaving in ends.
- Scissors: Sharp enough to cut cleanly.
- Stitch marker: A locking marker saves you from losing the start of each round.
- Keychain hardware: Split ring, lobster clasp, or a swivel keychain clip.
- Optional: Small piece of felt, blush, or fabric paint for tiny face accents.
Research Method
Step 1: Build the octopus head (the “dome”)
Start with a magic ring and crochet in continuous rounds to shape a smooth cap. You’ll increase gradually so the head rounds out instead of forming a cone. Keep your tension firm and consistent; tight stitches matter most on tiny projects. For the exact round counts and pacing, follow the full walkthrough in the video tutorial.
Step 2: Shape the body and add stuffing at the right moment
Once the head reaches its widest point, you’ll work a few even rounds to keep the sides straight. Then you’ll begin decreasing to close the shape slightly near the base. Add stuffing before the opening gets too small, and press it into the curves so the head stays rounded instead of lumpy. The video shows the best moment to pause and stuff without fighting the hole.
Step 3: Create the tentacles with simple curling texture
Most beginner octopus designs use curled tentacles made by chaining and then working multiple stitches into each chain to force a natural spiral. That technique looks fancy, but it feels repetitive in a calming way once you get the rhythm. Make several tentacles in the same length for a neat look, or vary lengths if you want a more playful “sea creature” vibe. Check the video for the tentacle style used so your finished octopus matches the tutorial’s look.
Step 4: Attach tentacles evenly for balance
Sew each tentacle around the base, spacing them so the octopus sits evenly and doesn’t look lopsided. Use a tapestry needle and yarn tail, and pinch the base as you stitch so the joins look clean. If you prefer less sewing, you can sometimes crochet tentacles directly into the base stitches, depending on the pattern style shown in the video. Either way, keep the attachment points consistent so the keychain looks polished.
Step 5: Add the face and keychain hardware
Place eyes first once they sit correctly, the whole octopus expression suddenly “clicks” into place. Embroider a small smile or a tiny mouth in a contrasting thread for personality. Then secure the keychain ring or clasp at the top with a strong yarn loop, and stitch it down firmly so it won’t loosen with daily use. The video tutorial demonstrates the finishing approach and helps you avoid weak attachment points.
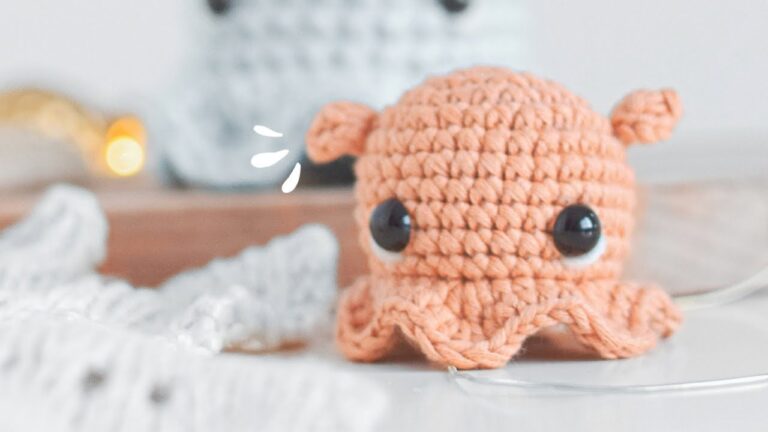
Design & Look
- Soft ocean silhouette: Rounded dome head with bouncy, curled tentacles for a compact, palm-sized shape.
- Movement in the design: Spiraled legs create a “floating” look when clipped to a zipper or bag.
- Color styling options: Teal/seafoam/navy for classic ocean; add pale underside or rosy cheeks for contrast.
- Vibe shift with yarn choice: Pastels (lavender, peach, baby blue) feel kawaii, while dark tones look nautical and bold.
Uses & Benefits
- Everyday keychain charm: Adds a soft, tactile grip to keys you handle all day.
- Easy, space-free gift: Clips onto backpacks, pencil cases, totes, or keys without needing shelf space.
- Small décor accent: Works on a desk hook, craft-room pegboard, or rearview mirror (where allowed).
- Skill-building mini project: Practices rounds, increases/decreases, and neat stitching—plus a quick win that builds confidence.
Time & Skill Level
- Skill level: Beginner-friendly (newbie suitable), especially if you already know single crochet, increases, and decreases.
- Time estimate: About 1.5 to 3 hours depending on your speed, sewing comfort, and how detailed you make the face.
Yarn & Tools
- Best yarn choice: Cotton yarn handles keychain wear well and keeps stitches defined. If you choose acrylic, pick one that doesn’t fuzz too easily.
- Hook sizing tip: Use a smaller hook than the yarn label suggests to prevent gaps. A tight fabric hides stuffing and keeps the octopus looking crisp.
- Must-have tool: A stitch marker. Beginners lose rounds quickly without it, especially on small pieces.
- Finishing tool: A sturdy needle for sewing tentacles and reinforcing the keychain loop so it survives daily tugging.
Final Size & Look
Expect a palm-sized octopus small enough to stay lightweight, big enough to show clear tentacle curls and a readable face. The exact height depends on yarn weight and hook size, but most keychain amigurumi land around 2–4 inches tall (not counting the keychain hardware). The finished look should feel symmetrical from the top, with tentacles spreading evenly around the base.
Usage Ideas FOR ( Crochet Sea Octopus Keychain)
- Clip it to a backpack zipper so you spot your bag fast at school or work.
- Use it as a “bag buddy” on a travel suitcase zipper for quick identification.
- Attach it to a pencil pouch as a fun tactile charm during study breaks.
- Make two in matching colors for best friends or siblings.
- Create a set in ocean shades and use them as party favors for a sea-themed birthday.
Common Mistakes
- Loose stitches that show stuffing: Tighten tension and size down your hook so gaps disappear.
- Losing the start of the round: Use a stitch marker every round; don’t rely on memory.
- Overstuffing the head: Too much stuffing stretches stitches and distorts the shape; add small pinches and check often.
- Understuffing the head: A floppy head looks deflated; pack stuffing into the curve so it holds a dome shape.
- Uneven tentacle placement: Measure spacing or pin positions first so the octopus doesn’t lean to one side.
- Weak keychain attachment: Reinforce the loop with extra stitches and weave in ends thoroughly; daily pulling tests weak joins fast.
Care Instructions FOR ( Crochet Sea Octopus Keychain)
- Hand wash gently in cool water with mild soap.
- Press in a towel to remove moisture; don’t wring or twist.
- Air dry completely before attaching back to keys or a bag.
- Avoid high heat—heat can warp fibers and soften stitches.
- If it gets fuzzy, trim stray fuzz carefully with small scissors.
Customization Ideas
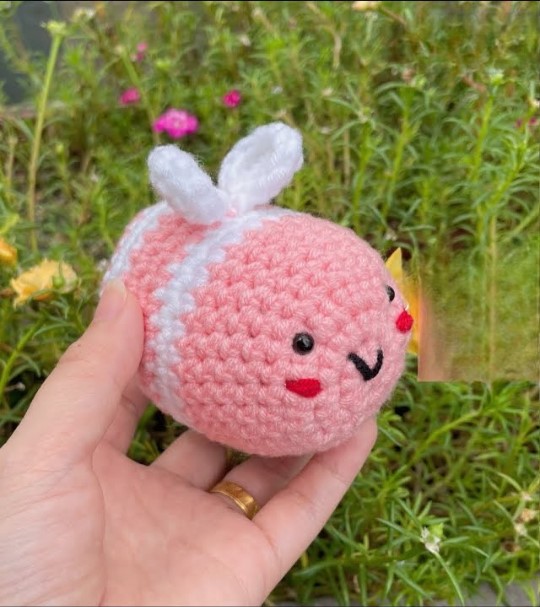
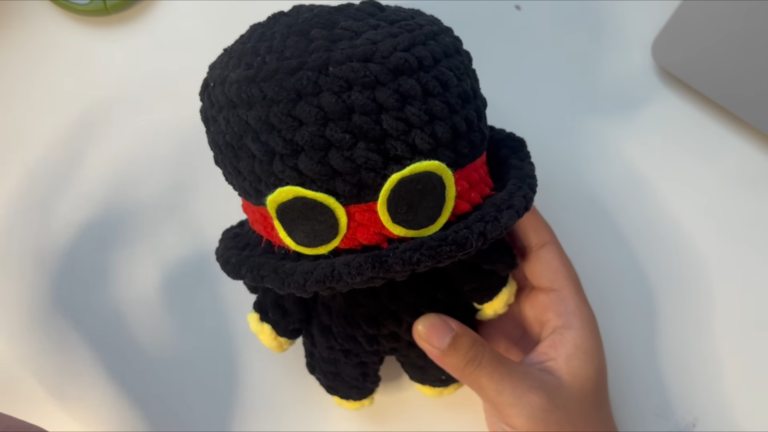
- Swap colors: navy + white for a nautical vibe, or pastel rainbow for a playful look.
- Add a tiny sailor hat, bow, or mini shell charm to the keychain ring.
- Embroider sleepy eyes, a wink, or tiny lashes to change the personality.
- Make tentacles longer for extra bounce or shorter for a chubby “dumpling” style.
- Add speckles with surface embroidery to mimic reef textures.
Safety Tips
- Skip safety eyes for small children; embroider eyes instead to prevent choking hazards.
- Secure all knots and weave ends inside the body so nothing unravels.
- Use a sturdy keychain clasp to avoid accidental drops in public places.
- Keep scissors and needles stored safely, especially if you craft around kids or pets.
- Test the hardware by tugging firmly before you start using it daily.
Why It’s Trending
- Detailed look, simple build: Tentacles add texture and charm without complex shaping.
- Highly photogenic: Textured spirals photograph well, making them popular for social posts and marketplaces.
- Practical, portable format: Keychains travel daily, so handmade items get used not just displayed.
- Always-popular theme + repeat makes: Ocean crafts stay trendy, and quick finishes lead to multi-color mini collections and gifts.
FAQs FOR ( Crochet Sea Octopus Keychain)
Q1: Can a complete beginner make this octopus keychain?
Yes. You just need basic stitches: single crochet, increase, and decrease. The video helps with pacing and assembly, which usually causes the most beginner stress.
Q2: Should I use safety eyes or embroidery for the face?
For a keychain, embroidery often holds up best because it won’t loosen in a bag. If you still prefer safety eyes, install them securely before stuffing and closing the head.
Q3: Why do my tentacles curl too tightly (or not at all)?
Curling depends on how many stitches you work into each chain. More stitches create tighter spirals, fewer stitches create gentler waves. Follow the video’s method first, then adjust once you see the result.
Q4: How do I stop the top loop from stretching?
Use tighter stitches, reinforce the loop with extra passes of yarn, and weave the tail through multiple interior stitches. If you expect heavy use, consider adding a small metal jump ring anchored through the fabric.
Q5: What yarn weight works best for a neat keychain finish?
DK or sport weight yarn often gives the cleanest detail at a small size, especially with a smaller hook. Worsted weight works too, but it creates a chunkier octopus and may require extra attention to keep stitches tight.
Conclusion FOR ( Crochet Sea Octopus Keychain)
This harmonious sea octopus keychain gives you a gentle entry into amigurumi without sacrificing personality. You get to practice shaping in the round, creating lively tentacles, and finishing small details that bring a character to life. More importantly, you end up holding something that carries emotion because the stitches reflect your time, choices, and care in a way plastic never can. Keep the first one simple, then experiment with ocean colors, facial expressions, and tiny accessories as you improve. Every new octopus becomes a small signature of your creativity and handmade beauty.