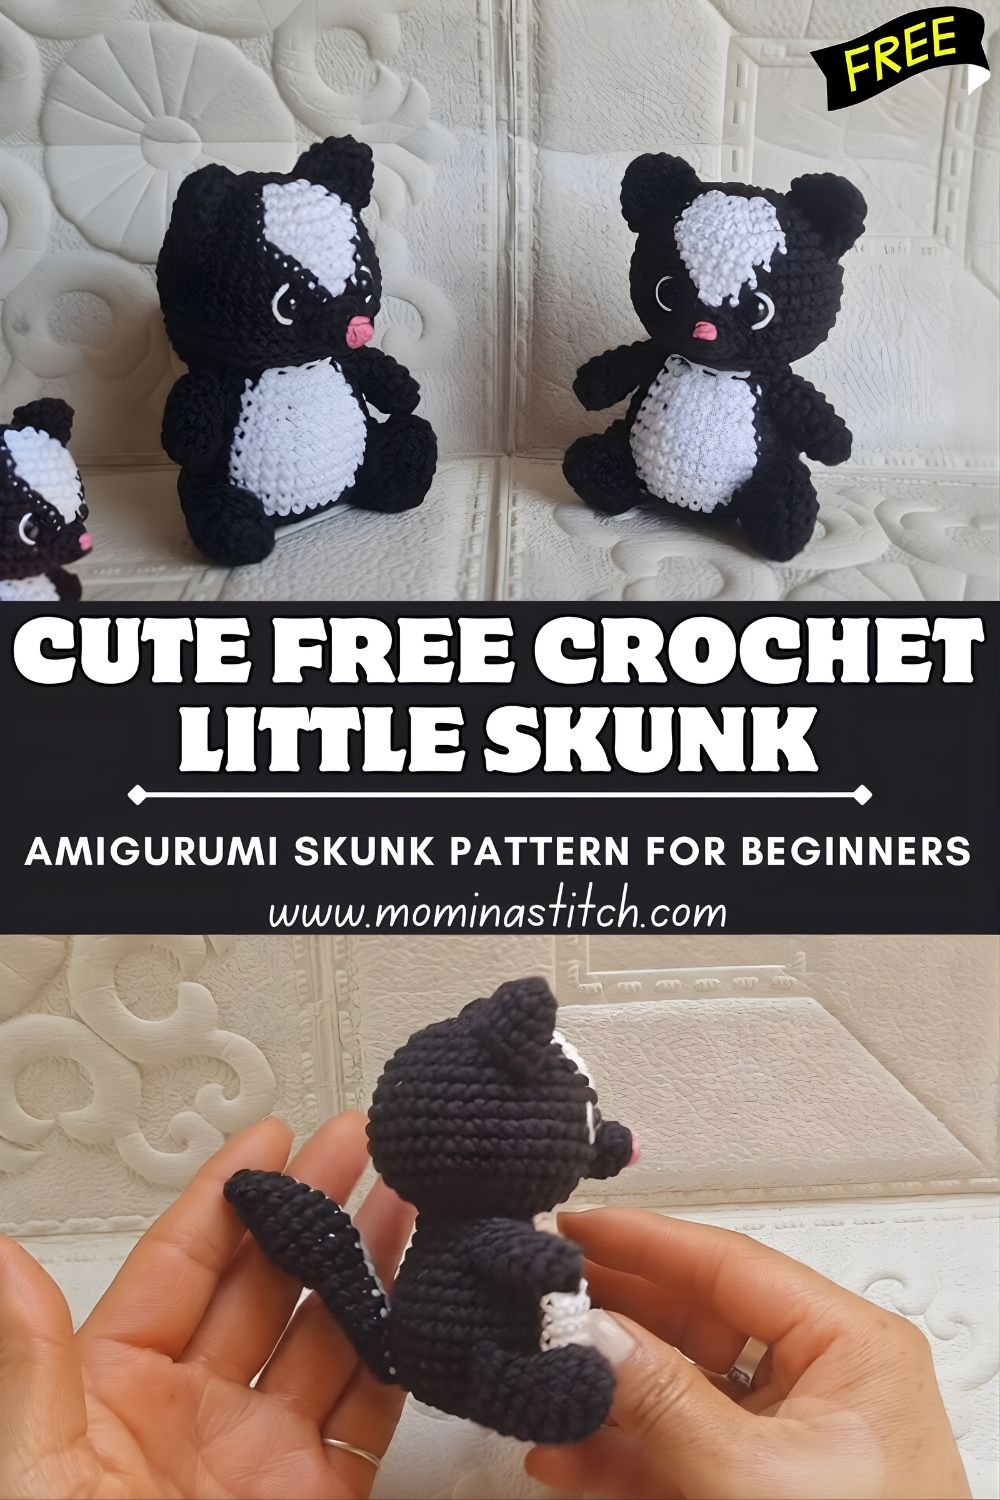
Cute Free Crochet Little Skunk – Amigurumi Skunk Pattern for Beginners
This Crochet Little Skunk is tiny, soft, and full of personality, especially that fluffy tail with the classic white stripe. If you’re looking for a beginner crochet animal, this is a sweet, simple project that comes together faster than you’d think.
A crochet skunk (amigurumi style) is a small stuffed animal made with yarn, crocheted in tight stitches, then gently stuffed to create a cute 3D shape. This amigurumi skunk has all the classic features: a round head, a small body, tiny legs, little ears, and that signature striped tail that makes it instantly recognisable.
It’s a great beginner project because the shapes are simple—mostly spheres and small tubes—and the details are easy to add with a little stitching. Plus, small crochet animals are popular for a reason: they’re quick, giftable, and they let you practice the basics without needing a huge time commitment.
Here are a few ways to use your finished skunk:
- A cuddly, easy crochet toy for kids (with embroidered eyes for safety)
- A cute handmade gift for animal lovers
- A shelf or desk decoration
- A collectable for your growing crochet animal collection
If you’ve been wanting a crochet animal pattern that feels fun and doable, this little skunk is a perfect starting point.
Materials Needed
Gather your supplies before you start—it makes the whole project feel calmer and easier.
- Yarn:
- Black (main colour)
- White (stripe + tail detail)
- Grey or pink (optional for inner ears or cheeks)
- Crochet hook: size is flexible (choose what matches your yarn; many beginners like 3.0–4.0 mm for amigurumi)
- Stuffing (fiberfill)
- Safety eyes (or black embroidery thread/yarn for stitched eyes)
- Yarn needle (for sewing pieces and weaving ends)
- Stitch marker (very helpful for rounds)
- Scissors
Crochet Abbreviations & Basic Stitches
These are the only stitches you need for this crochet skunk pattern:
- MR (magic ring): an adjustable loop to start crocheting in the round
- ch (chain): creates a starting chain or small spaces
- sc (single crochet): the main stitch for amigurumi (tight and sturdy)
- inc (increase): 2 sc in the same stitch (adds stitches)
- dec (decrease): combines two stitches into one (reduces stitches)
- sl st (slip stitch): used to join or finish neatly
Finished Design Overview
Your finished skunk will be small, soft, and slightly chubby in the cutest way:
- A rounded head with a sweet little face
- A compact body that sits nicely on a shelf
- Tiny ears stitched on top
- Short legs that keep it stable
- A curvy, ed fluffy tail that points upward
- The star of the show: a white stripe running on the head and into the tail for that classic skunk look
Step-by-Step Crochet Pattern (Beginner-Friendly)
This pattern is written for beginners and uses continuous rounds (so you won’t join rounds unless noted). Use a stitch marker to mark the first stitch of each round.
Step 1: Head
Use black yarn. Colour A). Start with an MR.
Round 1: 6 sc in MR (6)
Round 2: inc around (12)
Round 3: (sc, inc) around (18)
Round 4: (2 sc, inc) around (24)
Round 5: (3 sc, inc) around (30)
Rounds 6–9: sc around (30)
Now start decreasing to close the sphere:
Round 10: (3 sc, dec) around (24)
Round 11: (2 sc, dec) around (18)
Round 12: (sc, dec) around (12)
Stuff the head firmly but not rock-hard.
Round 13: dec around (6)
Fasten off, leaving a tail for sewing.
Beginner note: If your head looks a little pointy, add one more “sc around” round before decreasing. That tiny change smooths the shape.
Step 2: Body
Use black yColourColor A). Start with an MR.
Round 1: 6 sc in MR (6)
Round 2: inc around (12)
Round 3: (sc, inc) around (18)
Round 4: (2 sc, inc) around (24)
Rounds 5–7: sc around (24)
Slight shaping:
Round 8: (2 sc, dec) around (18)
Round 9: sc around (18)
Stuff the body lightly (you want it soft, not overfilled).
Round 10: (sc, dec) around (12)
Round 11: dec around (6)
Fasten off, leaving a tail for sewing.
Step 3: Ears (Make 2)
Use blackColour (Colour A). Optional: add a tiny inner grey in grey or pink.
Round 1: 4 sc in MR (4)
Round 2: (sc, inc) around (6)
Round 3: sc around (6)
Fasten off, leaving a tail for sewing.
If you want inner ears, stitch a small patch of grey/pink thread on the front of each ear after sewing.
Step 4: Legs (Make 4)
Use black yarn (Colour A). These are quick little cylinders.
Round 1: 6 sc in MR (6)
Rounds 2–3: sc around (6)
Fasten off, leaving a tail for sewing.
No need to stuff the legs unless you want extra firmness—the stitches alone usually give enough shape.
Step 5: Tail (With White Stripe Detail)
The tail is where your skunk really comes to life. You can do the stripe in a simple, beginner-friendly way: crochet the tail in black, then add a white stitch afterwards, or change colours as you go.
Option A (Simplest): Crochet a tail in black, stitch a stripe on top
Use black yarn (Colour A).
Round 1: 6 sc in MR (6)
Round 2: (sc, inc) around (9)
Rounds 3–7: sc around (9)
Round 8: (sc, dec) around (6) (helps taper the tip slightly)
Fasten off, leave a tail for sewing.
Stuff the tail lightly so it stays fluffy and holds a curve.
Then, using white yarn Colour B), embroider a stripe down the length of the tail with long stitches.
Option B: Colour or change stripe): Crochet part of tail in white
Crochet the first few rounds in white, then switch to black and embroider a small stripe extension if needed.
Tail shaping tip: To make it curve upward, stuff it and gently bend it as you sew—amigurumi likes to “pose” based on how you attach it.
Step 6: Assembly
Take your time here. Neat assembly makes even a simple pattern look polished.
- Sew the head to the body-centred
- Attach the ears on top of the head, slightly angled outward.
- Sew the legs evenly under the body: two front legs, two back legs.
- Attach the tail near the back/top of the body and angle it slightly upward.
Tail placement tip: If you stitch it higher on the body, it naturally stands up and looks extra playful.
Step 7: Face Details
Keep it simple and cute.
- Add safety eyes between the head rounds where they look balanced (usually around the mid-face area).
- If making for a small child, use embroidered eyes instead.
- Stitch a small nose using black yarn (or dark grey).
- Add a tiny mouth with one or two simple stitches.
Optional: Add a faint blush with pink yarn or a touch of fabric-safe blush to the cheeks.
Step 8: Final Touches
- Weave in all ends securely.
- Adjust stuffing by gently pressing and shaping with your fingers.
- Make sure the head sits straight, and the skunk can stand or sit nicely.
- Add the white stripe on the head (optional but adorable): stitch a thin white line from the forehead backwards toward where the tail begins.
That stripe is the little detail that makes everyone instantly say, “A skunk!”
Pattern Notes
- Work in continuous rounds unless you choose otherwise.
- Use a stitch marker so you don’t lose your place.
- Keep your tension consistent for a smooth fabric.
- Stuff gradually—adding a little at a time helps avoid lumps.
Beginner Tips
- Count stitches every round, especially after increase and decrease rounds.
- Use tight stitches (and an appropriate hook size) to prevent stuffing from showing through.
- Practice the magic ring a couple of times with scrap yarn—it gets easier fast.
- Start with a plain skunk first, then add the stripe and face details once you feel comfortable.
- When sewing, pin pieces in place first (or use stitch markers) so everything sits evenly.
Customisation Ideas
Make your skunk your own—this is where crochet gets really fun.
- Try different colours:
- Realistic black/white
- Pastels for a “cute plush” look
- Bright colours for a playful collectable style
- Add accessories: a tiny bow, a scarf, or a little flower by one ear
- Stitch on blush cheeks or freckles
- Turn it into a keychain by adding a small loop on top
- Make different sizes by changing yarn weight and hook size
- Create a mini animal collection with matching style (bunny, cat, bear, skunk)
Why This Project Is Great for Beginners
This amigurumi skunk is a beginner favourite because it’s:
- Small and fairly quick to finish
- Built from basic stitches (sc, inc, dec)
- A confidence booster—you’ll learn shaping without feeling overwhelmed
- Easy to customise, so every skunk can look a little different
- A genuinely giftable,e easy crochet toy and cute keepsake
Conclusion
If you’ve been looking for a friendly crochet skunk pattern that’s cute, simple, and actually doable as a first plush, this little skunk is a perfect pick. Take it one piece at a time, enjoy the process, and don’t stress about tiny imperfections—they’re part of the handmade charm.
When you finish, fluff that tail, straighten the stripe, and give your skunk a proud little spot on your desk or shelf. And if you make one, you’ll probably want a second… they’re seriously hard to stop crocheting.