Cute Crochet Pusheen Hello Kitty Cat Onesie Pattern for Beginners
This Crochet Pusheen Hello Kitty Pattern turns two iconic, cute characters into one cosy, kawaii plush: an Amigurumi Hello Kitty wearing a grey Pusheen-style cat onesie. If you know basic stitches, this cat onesie crochet tutorial is a fun, beginner-friendly way to make an adorable crochet plushie for gifts, décor, or collecting.
The Pusheen x Hello Kitty crochet plush is a mashup amigurumi featuring Hello Kitty in a chubby grey cat onesie inspired by Pusheen’s signature style. Instead of making a standard Hello Kitty doll, this design adds a whole extra layer of cuteness: a rounded, plushy “cat suit” with a hood and tiny ears, giving the finished toy that extra-soft, snuggly look.

What makes this project unique is how it blends recognisable features from both characters in a clean, beginner-friendly build—Hello Kitty’s classic white face panel, black eyes, yellow nose, and whiskers, paired with a Pusheen-like round body and a cosy cat hoodie silhouette. It’s the kind of pattern that looks impressive on your desk or shelf but is still approachable if you’re comfortable with basics like single crochet, increasing, decreasing, and sewing parts together.
You’ll enjoy making this if you love kawaii amigurumi, character mashups, Sanrio-style plushies, or cute crochet décor. It’s also a great handmade gift idea—especially for friends who collect Hello Kitty or Pusheen-themed items.
Skill Level and Project Overview
- Skill level: Beginner (confident beginner)
You should know basic stitches: sc, inc, dec, and simple sewing/assembly. - Estimated project time: ~3 to 8 hours
(Varies based on yarn type, your speed, and how detailed your face embroidery is.) - Approximate finished size: About 5–8 in (12–20 cm) tall using worsted/DK yarn and a small hook
(Size changes depending on yarn and hook.) - Why it’s beginner-friendly:
The plush is built from simple amigurumi shapes—rounded head/body pieces, small limbs, and beginner-level surface details like whiskers and a bow.
Materials List
Here’s a practical materials list for the Pusheen x Hello Kitty plushie style shown:
Yarn Colors
- Grey yarn (cat onesie / main body suit)
- White yarn (Hello Kitty face panel and/or head details)
- Pink yarn (bow)
- Black yarn (whiskers + optional embroidered eyes)
- Yellow yarn for the nose or a small piece of yellow felt
Tools & Notions
- Crochet hook: typically 2.75 mm–4.0 mm
Use a smaller hook than the yarn label suggests for tighter stitches (prevents stuffing from showing). - Fiberfill stuffing (polyester)
- Stitch markers (at least 1–2)
- Yarn needle/tapestry needle (for sewing parts and weaving ends)
- Safety eyes (optional) in black
Note: If the plush is for a child under 3, embroider eyes instead of using safety eyes. - Scissors
- Felt or embroidery thread (optional for facial details like nose, whiskers, or mouth)
- Pins or clips (optional but helpful for symmetrical assembly)
Crochet Abbreviations
- MR – Magic Ring (Magic Circle)
- ch – chain
- sc – single crochet
- inc – increase (2 sc in the same stitch)
- dec – decrease (use invisible decrease for cleaner amigurumi shaping)
- sl st – slip stitch
- hdc – half double crochet
- BLO – back loop only
- FLO – front loop only
Finished Plush Description
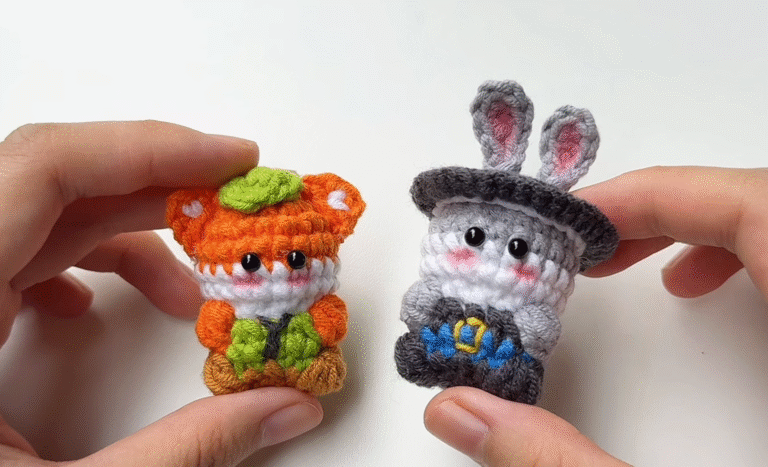
The finished plushie looks like Hello Kitty wearing a grey Pusheen-style cat onesie. The body is round, chubby, and soft, giving it that classic Pusheen plush shape. On the front/top, you’ll see a white face panel with simple kawaii features: black eyes, a small yellow nose, and stitched whiskers.
The grey Onesie includes a hood that frames the face, plus small cat ears on top. A bright pink bow sits on one ear, keeping the unmistakable Hello Kitty vibe. Overall proportions are cute and compact—a big head/face area, small body details, and smooth amigurumi curves that make it look like a collectable desk buddy.
Pattern Construction Overview
This plush is typically constructed in separate amigurumi pieces and assembled at the end:
- Head (round, with a white face panel added or integrated)
- Body (round/chubby Pusheen-inspired shape)
- Legs/Base (small feet or a rounded base for sitting)
- Arms (small, simple tubes/ovals)
- Hood / Onesie (grey hood that frames the face)
- Ears (two small cat ears on the hood)
- Bow (pink bow on the ear)
- Facial details (eyes, nose, whiskers)
- Final assembly (sew everything symmetrically)
Step-by-Step Crochet Pattern Explanation
Important note: The tutorial is video-based, and exact stitch counts are not provided here. The steps below explain the shaping process and crochet logic so you can follow along confidently without relying on written stitch counts.
1) Head
Purpose: Create the rounded Hello Kitty head base that supports the face panel and hood framing.
General shaping process:
- Start with MR and work in continuous rounds using sc.
- Increase evenly over multiple rounds to form a smooth dome.
- Work several even rounds (no increases) to build height.
- Begin decreases to close the sphere.
Face panel approach (common methods):
- Option A: Separate face panel (recommended for clean contrast):
Crochet a white oval/round panel, then sew it onto the front of the head. - Option B: Colour change panel:
Change to white for the front area and continue shaping (more advanced to keep edges neat).
When to stuff:
Stuff the head firmly as it nears closure, then finish decreasing.
2) Body
Purpose: Achieve the chubby, Pusheen-like round body that makes the plush extra squishy.
General shaping process:
- Start with MR ingreyy.
- Increase to create a wide, rounded base.
- Add height with even rounds.
- Decrease slightly near the top if you want a narrow connection point to the head.
Stuffing tip:
Stuff evenly—keep the body full but not stretched. A slightly flatter bottom helps it sit nicely.
3) Legs (or Lower Base)
Purpose: Provide a stable sitting base and cute tiny feet.
Two common construction options:
- Separate feet: Make two small, rounded pieces (tiny spheres/ovals), lightly stuff them, and sew them to the bottom front.
- Integrated base: Shape the bottom of the body wider and flatter so it sits without extra pieces.
Beginner-friendly approach:
Separate feet to make them easier to position for balance—pin them first, then check the sitting angle.
4) Arms
Purpose: Add small side details without overpowering the plush’s rounded silhouette.
General shaping process:
- Crochet two small tubes/ovals in grey.
- Keep them short and slightly rounded at the end.
- Lightly stuff (or leave unstuffed for a softer look) and close.
Symmetry tip:
Count rows/rounds visually and keep both arms identical in length.
5) Cat Hood (Onesie Hood)
Purpose: Create the “cat onesie” look—this is what sells the Pusheen mashup.
General shaping process:
- Crochet a grey hood/cap shape that fits around the head.
- Build it like a hat: increase to match head circumference, then work even rounds for coverage.
- The opening should frame the face panel neatly.
Fit check:
Try the hood on the head as you go. It should be snug but not tight—tight hoods can distort the face.
Clean edging idea:
Finish the hood opening with a round of sc or sl st for a polished frame.
6) Cat Ears
Purpose: Add tiny cat ears on top of the hood for the onesie effect.
General shaping process:
- Make two small triangles/cones:
- Start small (MR or tiny ring)
- Increase gradually to form a short cone
- Flatten the base for sewing
Placement tip:
Place ears evenly on the hood top—use the hood seam/centre as a reference line.
7) Hello Kitty Bow
Purpose: Signature Hello Kitty detail—adds colour contrast and character recognition.
General shaping process (simple bow):
- Crochet a small rectangle in pink (rows of sc or hdc).
- Cinch the middle tightly with yarn to form bow “lobes.”
- Optional: add a small centre wrap piece for a neat finish.
Attach:
Sew near one ear area (traditionally Hello Kitty’s left ear from her perspective; right side when facing her).
8) Face Details
Purpose: The face makes it unmistakably Hello Kitty.
Eyes:
- Use safety eyes OR embroider simple oval/dot eyes with black yarn.
- Keep your eyes level with each other; place them before finalising.
Nose:
- Embroider a small oval with yellow yarn, or sew a tiny yellow felt oval.
Whiskers:
- Stitch 3 short whisker lines on each side of the face panel using black yarn.
- Keep whiskers symmetrical in angle and spacing.
Optional mouth:
Many Hello Kitty styles omit the mouth; if you add one, keep it tiny and subtle.
9) Final Assembly
Recommended order:
- Add face panel (if separate).
- Place the eyes and nose.
- Add whiskers.
- Sew the head to the body.
- Fit the hood over the head and tack it in place with hidden stitches.
- Sew ears onto the hood.
- Attach arms and legs.
- Sew the bow last (so you can balance the look).
Assembly Instructions (How to Attach Parts + Symmetry Tips)
Attaching Ears
- Pin both ears to the hood first.
- Measure: keep an equal distance from the centre line.
- Sew around the ear base with tight, even stitches.
Attaching Arms
- Pin arms at the same height on both sides of the body.
- Sew with a whip stitch through the outer stitches to keep the seam clean.
- Angle arms slightly forward for a cuddly pose.
- Place the bow on the ear/hood area where it looks balanced from the front.
- Sew securely through the centre wrap so it doesn’t shift.
- If using a separate white face panel, sew it first and keep it centred.
- Add the nose next, then the hikers.
- For the whiskers, stitch them at matching positions on both sides—count the rows visually or mark them with pins.
Pro symmetry tip:
Before sewing anything permanently, take a quick photo from the front. Crooked placement is easier to spot on camera.
Beginner Crochet Tips
- Count stitches and rounds: Even simple shapes can drift if you lose count.
- Use stitch markers: Mark the first stitch of each round to stay oriented.
- Keep tension consistent: Tight stitches make amigurumi look smooth and prevent stuffing from showing.
- Stuff slowly and evenly: Use small pieces of fiberfill to avoid lumps.
- Pin before sewing: Pins/stitch markers help you place ears, arms, and the bow evenly.
- Weave in ends securely: Hide yarn tails inside the plush so nothing pops out later.
Common Mistakes to Avoid
- Uneven ears (different height or angle)
- Crooked bow placement (off-centre or too low)
- Overstuffing (creates stretched gaps and a distorted shape)
- Loose stitches (stuffing shows through)
- Uneven facial placement (eyes/nose not centred; whiskers mismatched)
- Hood too tight (pulls the face panel and changes the expression)
Customization Ideas
- Pastel versions: light lavender onesie, baby pink bow, cream face panel.
- Mini keychain version: use thinner yarn + and a smaller hook, and add a loop on top of the hood.
- Bigger plush version: use chunky/plush yarn and scale up hook size (same shaping concept).
- Sleepy eyes version: embroider curved “sleepy” eyes instead of dots.
- Rainbow Pusheen hoodie: Use colourful stripes on the hood/body suit for a playful twist.
- Add tiny details: a little heart patch, a small collar, or blush cheeks.
FAQ Section (7)
1) Is this pattern beginner-friendly?
Yes—this plush uses basic amigurumi techniques (single crochet in rounds, increases, decreases, and simple sewing).
2) What yarn works best for plushies like this?
Smooth worsted or DK yarn is easiest for beginners. Plush/chenille yarn looks extra soft, but it can make stitch counting harder.
3) Can I resize the pattern?
You can resize by changing yarn weight and hook size. Thicker yarn + bigger hook = larger plush, while the same shaping logic applies.
4) Can I embroider the eyes instead of using safety eyes?
Absolutely. Embroidered eyes are also safer for toys intended for babies and toddlers.
5) How do I keep the face centred and cute?
Mark the head centre line on the face panel first, then place the eyes and nose evenly before sewing anything permanently.
6) My hood doesn’t fit—what should I do?
If it’s too tight, add an extra increase round or a few stitches spaced evenly. If it’s too loose, reduce slightly by making fewer increases or by a tighter edge round.
7) How long will it take to make?
Most makers finish in about 3–8 hours, depending on experience, yarn type, and the level of detail in the assemblies.
Conclusion
A Pusheen x Hello Kitty mashup plush is the perfect project if you love kawaii crochet and want something different from a standard character doll. With a round Pusheen-style body, a classic Hello Kitty face, and aa cosy greycat onesie hood (plus that signature pink bow), this amigurumi makes an adorable gift, desk buddy, oor collectable Follow the video step by step, use the shaping logic in this guide to stay on track, and don’t forget to pin parts first for a polished, symmetrical finish.