Easy Crochet Bunny Ears for Beanie Beginner Pattern + How to Attach
This easy crochet bunny ears for beanie tutorial is a beginner-friendly way to add a cute, cozy touch to any hat. With simple stitches and basic shaping, you’ll create adorable crochet beanie accessories, perfect for Easter hats, kids’ winter wear, and cosplay looks.
Adding crochet bunny ears for a beanie is one of the simplest ways to transform a plain hat into a playful, photo-ready accessory. Crochet beanie accessories like ears, flowers, bows, pom-poms, and appliqués are popular because they’re quick to make, use small amounts of yarn, and let you customize store-bought or handmade hats in minutes. Bunny ears are especially loved for kids’ outfits, cute winter fashion, and themed events because they instantly read as fun and cozy.
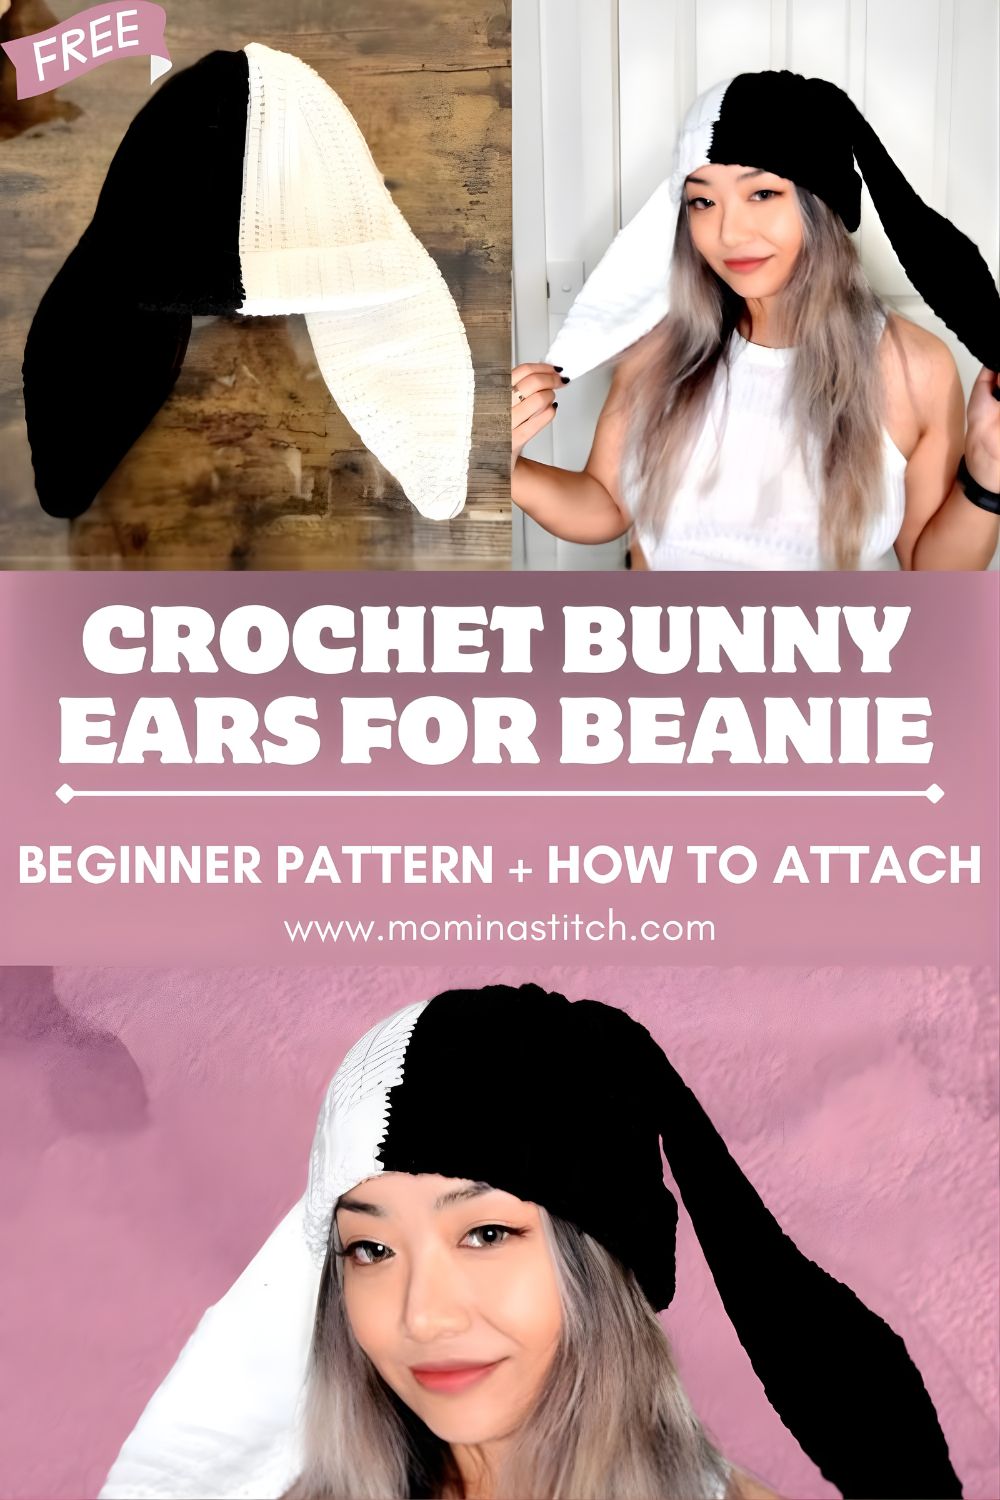
These crochet bunny ears also work beautifully for Easter bunny hats, springtime gifts, and school dress-up days. For older kids and adults, bunny ears are a classic cosplay and festival accessory, soft, warm, and more comfortable than plastic headbands. In this tutorial, you’ll crochet two matching ears with easy increases and decreases to create a smooth ear shape. Then you’ll learn how to attach them securely to a beanie so they stand up (or flop down) just the way you want.
Materials NeededMedium-weight
- t yarn worsted-weight (#4) (white or any color)
- Crochet hook: 5.0 mm (adjust if you crochet tight/loose)
- Stitch marker (or a scrap of yarn)
- Yarn needle (tapestry needle)
- Scissors
- Optional: pink yarn for inside ears
- Optional: a tiny bit of stuffing or scrap yarn to shape ears
Crochet Abbreviations
- ch = chain
- sc = single crochet
- hdc = half double crochet
- dc = double crochet
- inc = increase (2 stitches in the same stitch)
- dec = decrease (single crochet 2 together)
- sl st = slip stitch
Skill Level
Beginner
Step-by-Step Crochet Bunny Ear Pattern
Notes:
- The pattern is worked in rows, turning after each row.
- Ch 1 at the start of a row does not count as a stitch.
- Make two identical ears using the same instructions.
- For a larger ear, use thicker yarn or add a couple of middle rows.
Foundation Row (Create the starting chain)
Ch 9.
Row 1: Sc in 2nd ch from hook and in each ch across. (8 sc)
Ch 1, turn.
Ear Base (Work rows to create width)
Row 2: Sc in each stitch across. (8 sc)
Ch 1, turn.
Row 3: Sc in each stitch across. (8 sc)
Ch 1, turn.
Increase Section (Gradually widen the ear)
Row 4: Sc, inc, sc 4, inc, sc. (10 sc)
Ch 1, turn.
Row 5: Sc in each stitch across. (10 sc)
Ch 1, turn.
Row 6: Sc 2, inc, sc 4, inc, sc 2. (12 sc)
Ch 1, turn.
Middle Rows (Maintain the ear shape)
Row 7: Sc in each stitch across. (12 sc)
Ch 1, turn.
Row 8: Sc in each stitch across. (12 sc)
Ch 1, turn.
Row 9: Sc in each stitch across. (12 sc)
Ch 1, turn.
Decrease Section (Shape the tip of the ear)
Row 10: Sc 2, dec, sc 4, dec, sc 2. (10 sc)
Ch 1, turn.
Row 11: Sc 1, dec, sc 4, dec, sc 1. (8 sc)
Ch 1, turn.
Row 12: Dec, sc 4, dec. (6 sc)
Ch 1, turn.
Row 13: Dec, sc 2, dec. (4 sc)
Ch 1, turn.
Final Round (Finish and fasten off)
Row 14: Dec, dec. (2 sc)
Ch 1, turn.
Row 15: Dec. (1 sc)
Fasten off, leaving a long tail (12–16 in / 30–40 cm) for sewing onto the beanie.
Make the second ear
Repeat all rows exactly to create a matching pair. Tip: Count rows as you go so both ears are the same height.
How to Attach the Bunny Ears to the Beanie
Placement idea: Put the ears centered on the front half of the beanie, spaced about 2–3 inches (5–7.5 cm) apart (adjust for baby vs. adult sizes).
Option 1: Sew the ears on (most secure)
- Put the beanie on a pillow or folded towel to hold its shape.
- Pin or clip each ear in place.
- Thread the long yarn tail onto a yarn needle.
- Sew along the bottom edge of the ear using whip stitch or mattress stitch, going through the ear and the beanie stitches.
- Knot on the inside of the hat and weave in ends.
Option 2: Crochet the ears on (fast and sturdy)
- Hold the ear base against the beanie.
- Insert your hook through the beanie fabric and the ear edge.
- Join yarn and sl st or sc across the ear base to attach.
- Fasten off and weave in ends.
To help ears stand up: lightly stuff the lower half of each ear or sew a few extra anchoring stitches up the center base.
Tips for Beginners
- Keep tension even: Consistent tension makes both ears match and helps them look smooth.
- Use stitch markers: Mark the first stitch of each row if you tend to lose edges.
- Count rows (not just stitches): Matching row count = matching ear size.
- Shape if needed: Add a tiny bit of stuffing or scrap yarn at the base, or steam-shape gently (if yarn allows).
Customization Ideas
- Add pink inner ears: Crochet a smaller ear shape in pink and sew it onto the front of each ear.
- Make floppy ears: Add 2–4 extra middle rows and use a softer yarn; attach ears slightly farther apart.
- Turn it into an Easter bunny hat: Add a small pom-pom tail on the back and embroider a cute face or add sleepy eyelashes.
- Change the look: Use speckled yarn, velvet yarn, or add a bow between the ears.
Conclusion
These easy crochet bunny ears for a beanie are a quick beginner project that adds instant personality to any hat. Make them in classic white for an Easter bunny vibe or match the hat color for a subtle, cozy winter accessory. Once you’ve made one pair, you’ll want to add bunny ears to every beanie in the family.
Crochet Half n Half Flappy Ear Beanie