Precious Crochet Pig Doll Plush Amigurumi Pattern
You hold your yarn and quietly fix the same stitch again. You know crochet, but you feel a little stuck today. This Precious Crochet Pig Doll Plush Amigurumi Pattern offers a calm crochet pattern with step-by-step guidance. You can pause and breathe.
Work this Precious Crochet Pig Doll Plush Amigurumi Pattern at an unhurried pace, letting soft yarn and clean shaping do the talking. The crochet pattern suits confident beginners who want a tidy amigurumi finish, with clear stitch flow and a plush, balanced silhouette. Choose muted cotton for handmade decor, or a velvety skein for a nursery shelf companion.

It also translates beautifully into personalized gifts and custom gifts—thoughtful for baby showers, birthdays, or a curated gift box. Expect an easy crochet experience that still feels polished, from snout to ears.
Precious Crochet Pig Doll Plush Amigurumi Pattern
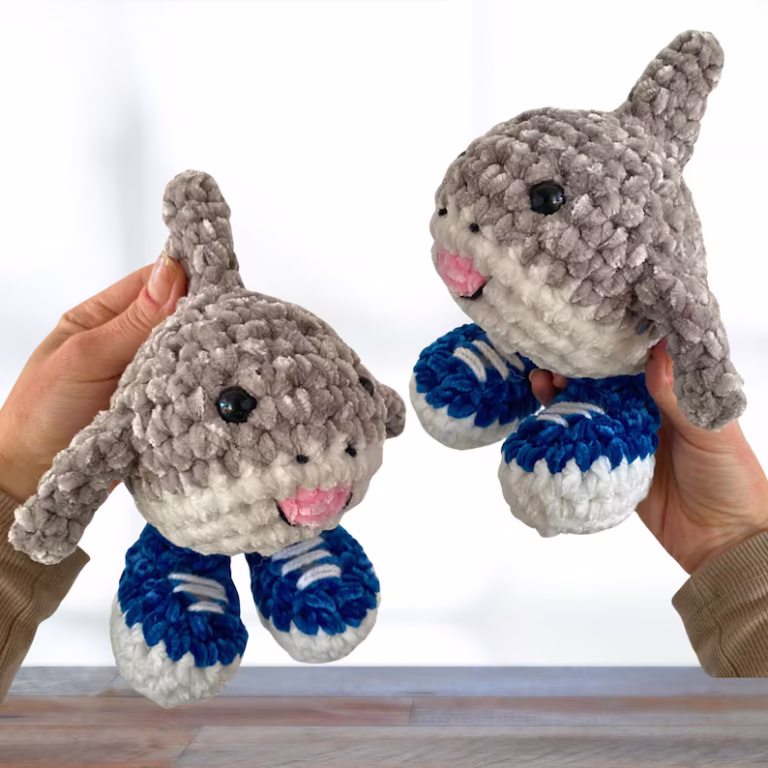
A sweet pig doll plush is one of those amigurumi projects that looks fancy on the shelf but still feels gentle in the hands. First, the round shapes build quickly, and next, the little details, snout, ears, and tiny arms bring the character to life. Meanwhile, the stitches stay simple, so beginners can focus on rhythm instead of stress. Later, during assembly, the plush suddenly “turns into a friend,” which is the most satisfying part. Finally, with a few small choices in yarn and expression, this pig can become nursery decor, a custom gift, or a comforting desk buddy.
Items Needed
- Yarn (Type and Weight)
- Main color (pig pink): Worsted / DK (Category 3–4), 120–150 g (about 220–300 m depending on weight)
- Accent color (snout/cheeks optional, lighter pink): 15–25 g (about 25–50 m)
- Optional details (black/white for embroidery): 5–10 g scrap yarn
- Hook Size
- 3.0 mm hook for DK yarn or
- 3.5–4.0 mm hook for worsted yarn
(Choose a smaller hook than the yarn label suggests to keep stuffing from showing.)
- Notions
- Safety eyes: 10–12 mm (or embroider eyes for small children)
- Stuffing: 40–70 g polyester fiberfill
- Stitch markers: 1–2 removable markers
- Yarn needle: blunt tapestry needle
- Scissors
- Pins: for positioning parts (optional but very helpful)
- Accessories (Optional)
- Keychain ring: 25 mm split ring (only if turning the head into a charm)
- Ribbon/bow: 20–30 cm narrow satin ribbon
- Tiny heart applique (optional): small amount of red yarn, 5–10 g
Skill Level
Beginner / Easy.
First, basic stitches (single crochet, increases, decreases) do most of the work. Next, the shaping stays forgiving, especially with plush stuffing. Finally, assembly is simple and beginner-friendly, as long as parts are pinned before sewing.
Making Time (Overview)
Total time is approximately 3.5 to 6 hours, depending on experience, yarn type, and how detailed the face becomes.
- Body + head (joined or separate): 90–150 minutes
- Arms + ears + snout: 60–120 minutes
- Optional accessories: 15–40 minutes
- Face details + assembly: 45–90 minutes
Step-by-Step Instructions
Before starting, use these common amigurumi notes so the pattern stays smooth:
- Work in continuous rounds unless stated otherwise.
- Use a stitch marker to track the first stitch of each round.
- Stuff gradually; meanwhile, keep stitches tight and even.
Typical abbreviations:
- MR = magic ring
- sc = single crochet
- inc = increase (2 sc in one stitch)
- dec = invisible decrease
- sl st = slip stitch
- ch = chain
Body (3 Clear Steps | Making Time: 60–90 minutes)
1) Build the base and widen the shape (Rounds 1–6)
- Start with MR 6 sc (6)
- Next, inc around (12)
- Then, (sc, inc) around (18)
- After that, (2 sc, inc) around (24)
- Next, (3 sc, inc) around (30)
- Then, (4 sc, inc) around (36)
2) Add height and gentle belly shaping (Rounds 7–14)
7–10. sc around (36)
- Next, (4 sc, dec) around (30)
12–14. Then, sc around (30)
3) Narrow toward the neck and prep for the head (Rounds 15–20)
15. Next, (3 sc, dec) around (24)
16–17. Then, sc around (24)
- Next, (2 sc, dec) around (18)
- Then, sc around (18)
- Finally, (sc, dec) around (12)
Fasten off leaving a long tail if the head will be sewn on. Alternatively, continue directly into the head for a one-piece doll.
Beginner tip: If the body looks slightly lumpy at first, pause and redistribute stuffing later; meanwhile, keep crocheting because the shape often smooths out by the final rounds.
Additional Parts
Ears (Making Time: 15–25 minutes total for 2)
These ears are small and slightly pointed, so they read “pig” without looking like triangles.
- Round 1: MR 4 sc (4)
- Round 2: Next, inc around (8)
- Round 3: Then, (sc, inc) around (12)
- Round 4: Next, sc around (12)
- Round 5: Then, (2 sc, dec) around (9)
- Round 6: Next, sc around (9)
Flatten the ear and sc through both layers 4–5 stitches to close. Leave a tail for sewing.
Meanwhile, if the ear feels too stiff, switch to a slightly larger hook for this piece only; later, it will drape more softly.
Arms (Making Time: 20–30 minutes total for 2)
Small arms keep the doll balanced and extra cute.
- Round 1: MR 6 sc (6)
- Round 2: Next, (sc, inc) around (9)
- Rounds 3–6: Then, sc around (9)
- Round 7: Next, (sc, dec) around (6)
- Rounds 8–12: Then, sc around (6)
Lightly stuff the hand only; next, leave the tube mostly empty so the arm lays flat. Close with 3 sc through both layers. Leave a sewing tail.
Later, if the arms twist, roll them gently between fingers to relax the stitches.
Snout (Making Time: 15–20 minutes)
A plush snout is the “face anchor,” so take a moment to shape it neatly.
Using lighter pink (or the same pink for a minimal look):
- Round 1: MR 6 sc (6)
- Round 2: Next, inc around (12)
- Round 3: Then, (sc, inc) around (18)
- Round 4: Next, sc around (18)
- Round 5: Then, (sc, dec) around (12)
Add a small pinch of stuffing; meanwhile, keep it shallow rather than puffy. - Round 6: Finally, dec around (6) and close.
Optional nostrils: Embroider two small vertical stitches with dark pink or brown, spaced evenly.
Wings (Optional) (Making Time: 20–30 minutes total for 2)
If a classic pig is preferred, skip these. However, for a “flying pig” theme, these add charm without adding much difficulty.
- Chain 6, then sc in 2nd ch from hook and across (5)
- Next row: ch 1, turn, inc, sc 3, inc (7)
- Then: ch 1, turn, sc across (7)
- Next: ch 1, turn, dec, sc 3, dec (5)
- Finally: ch 1, turn, sc across (5), fasten off leaving tail
Sew with a slight curve so the wings sit naturally on the back.
Heart / Accessories / Details (if applicable) (Making Time: 15–25 minutes)
Mini heart applique (optional)
- In MR: ch 2, 3 dc, 3 dc, ch 2, sl st (classic tiny heart)
- Tighten ring and leave tails for sewing
This can be placed on the belly like a little patch, or attached near the ear like a playful accent.
Bow or ribbon collar (optional)
Cut 20–30 cm ribbon, tie neatly, and stitch in place. Next, trim ends at an angle for a clean finish.
Face & Assembly (Making Time: 45–90 minutes)
Assembly is where the plush becomes expressive. First, pin everything in place; next, step back and check symmetry; finally, sew slowly.
1) Eye placement
- Place safety eyes between the upper head area and snout line, roughly 6–8 stitches apart.
- Meanwhile, adjust spacing before locking the backs.
Beginner-friendly alternative: embroider closed “sleepy” eyes using black yarn; later, the face looks gentle and safe for toddlers.
2) Attach the snout
- Center the snout slightly below the eyes.
- Next, pin around the edges.
- Then sew with small, even whip stitches.
Tip: Add a tiny bit more stuffing right before closing to keep the snout rounded.
3) Add ears
- Place ears on the top sides of the head.
- Meanwhile, angle them slightly outward for a softer expression.
- Then stitch securely, catching multiple stitches on the head so they do not wobble.
4) Attach arms (and wings, if used)
- Arms look best attached slightly below the neck line.
- Next, sew them flat so the doll can sit comfortably.
- If adding wings, place them evenly on the back; then stitch around the edges.
5) Final shaping
- Finally, pinch and massage the stuffing gently so the body looks smooth.
- If the head tilts, add a few extra stitches at the back of the neck seam to straighten it.
Special Features
- Soft, rounded silhouette: The body shaping creates a steady “plush” look, so the doll sits nicely on a shelf or bed.
- Simple, expressive face: A slightly raised snout plus well-spaced eyes gives a calm, friendly expression.
- Beginner-safe structure: Minimal limbs and clear parts reduce tangles and confusing joins.
- Customizable details: Nostrils, blush, a heart patch, or even tiny wings can change the personality quickly.
Sizing Tips
Yarn and hook choices change the final size more than expected. First, pick a look (tight and firm vs. fluffy and soft); next, match hook size for neat stitches; then, adjust stuffing.
- DK yarn + 3.0 mm hook: about 15–18 cm (6–7 in) tall
- Worsted yarn + 3.5–4.0 mm hook: about 18–23 cm (7–9 in) tall
- Chenille/velvet yarn: can reach 23–28 cm (9–11 in), but stitches are harder to see
Meanwhile, if gaps appear between stitches, go down a hook size; later, the fabric becomes tighter and more “amigurumi solid.”
Finishing Tips
- Neat stitching
- First, keep tension consistent; next, tighten the magic ring firmly.
- Then, use invisible decreases instead of regular decreases for smoother shaping.
- Secure shaping
- Stuff in small pinches; meanwhile, push stuffing into edges with the back of a hook.
- Later, add a little more stuffing to the neck area to help the head stand upright.
- Clean final look
- Finally, weave ends inside the plush, then trim only after the yarn tail is pulled through several stitches.
- If embroidery ends poke out, re-thread and tuck them deeper before trimming.
Common Mistakes to Avoid for (Crochet Pig Doll Plush Amigurumi )
- Overstuffing the body
- The fabric can stretch, and holes can appear.
- Instead, add stuffing gradually; next, stop as soon as the shape feels firm but still squeezable.
- Placing eyes too low or too close
- The face can look surprised or crowded.
- So, pin first; then adjust; finally, lock in the safety eyes.
- Skipping stitch counts
- One missed increase can twist the shape.
- Therefore, count occasionally; meanwhile, move the stitch marker every round.
- Sewing parts without pinning
- Ears can end up uneven, and arms can sit too far forward.
- Instead, pin everything; next, check from the front and side; then sew.
- Leaving long gaps in sewing
- Parts can wobble with handling.
- Finally, use smaller stitches around the full edge for a secure finish.
Variations & Customization Ideas
- Color changes
- Classic pale pink with a lighter snout looks timeless.
- Alternatively, try dusty rose, peach, or cream for a modern, handmade decor palette.
- Meanwhile, a tiny stripe shirt (two rounds of contrasting color) adds instant “doll” styling.
- Size options
- For a mini version, use sport-weight yarn and a 2.5 mm hook.
- For a larger cuddle plush, use bulky yarn and a 5.0 mm hook; then enlarge safety eyes accordingly.
- Expression and theme
- Embroider curved eyebrows for a sweet, thoughtful face.
- Next, add blush circles using pink yarn or soft pastel felt.
- Later, turn it into a “sleepy pig” by stitching closed eyes and adding a tiny blanket accessory.
- Accessories
- Add a small scarf (ch 45–55, then sc back) for winter vibes.
- Alternatively, stitch a small pocket heart onto the belly for a keepsake-style custom gift.
Tutor Suggestions for (Crochet Pig Doll Plush Amigurumi )
- First, practice the magic ring and invisible decrease on a small swatch. Next, start the doll only when the stitches feel comfortable.
- Meanwhile, use a light-colored stitch marker so it never gets lost in pink yarn.
- Later, pause before assembly and lay out all pieces like a flat doll “map.” Then the parts feel less confusing.
- Finally, aim for neat, even rounds rather than speed. A steady pace makes amigurumi look polished, and the finished pig doll plush feels truly handmade in the best way.