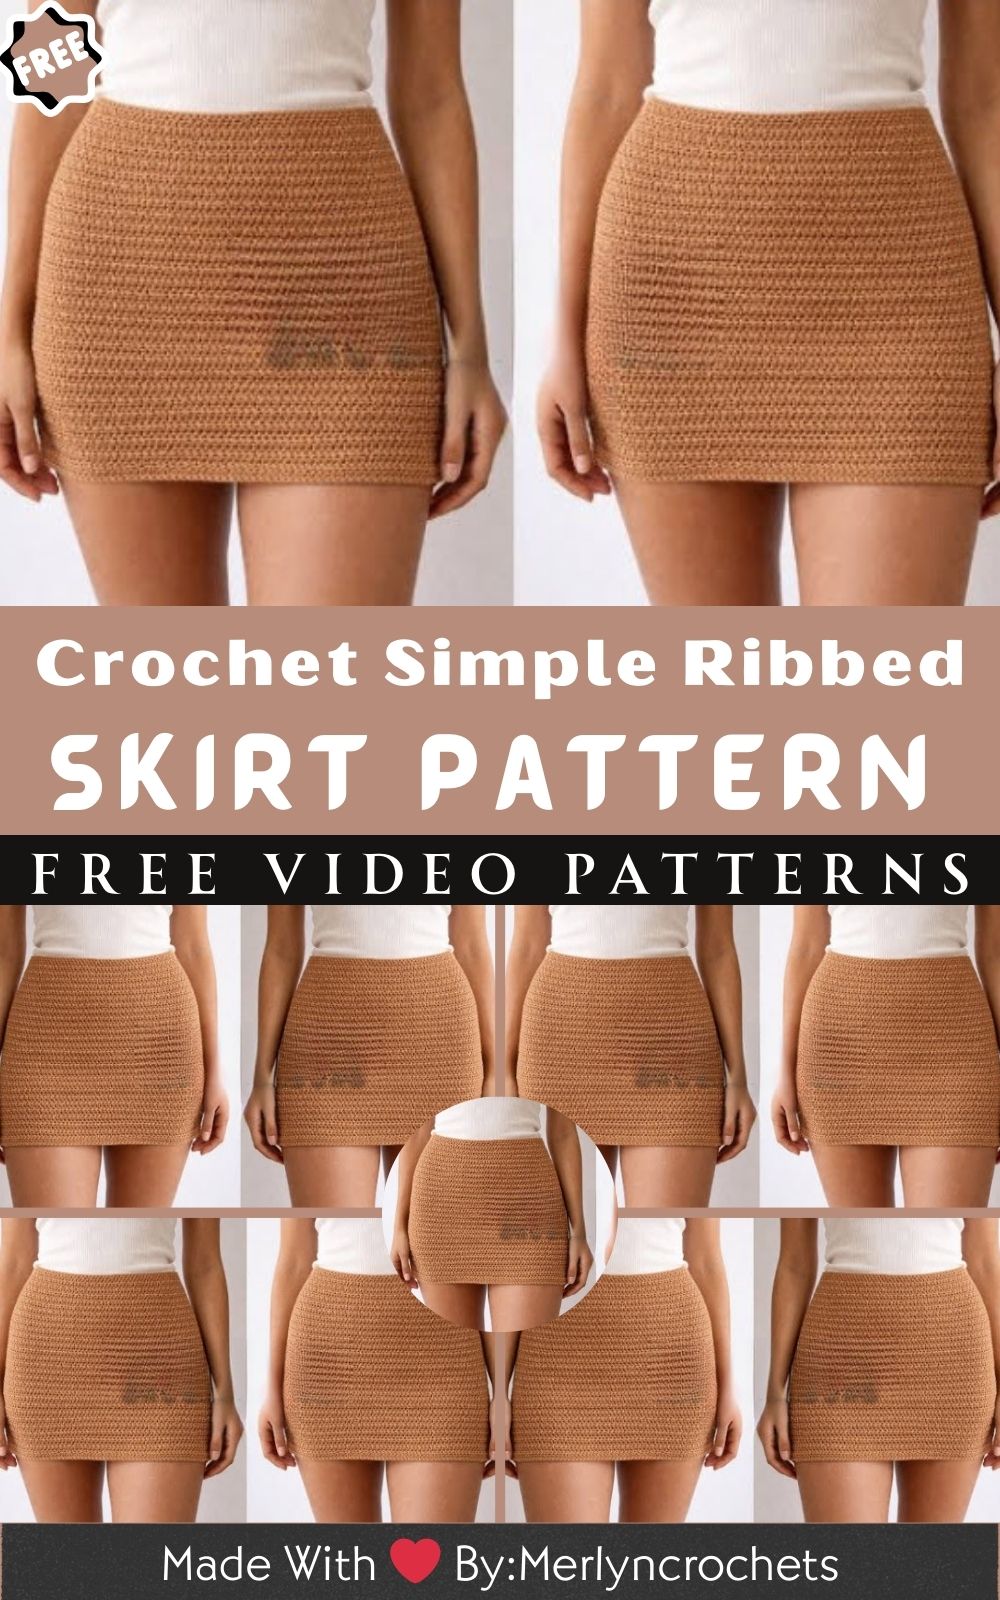
Breathtaking Crochet Simple Ribbed Skirt Pattern
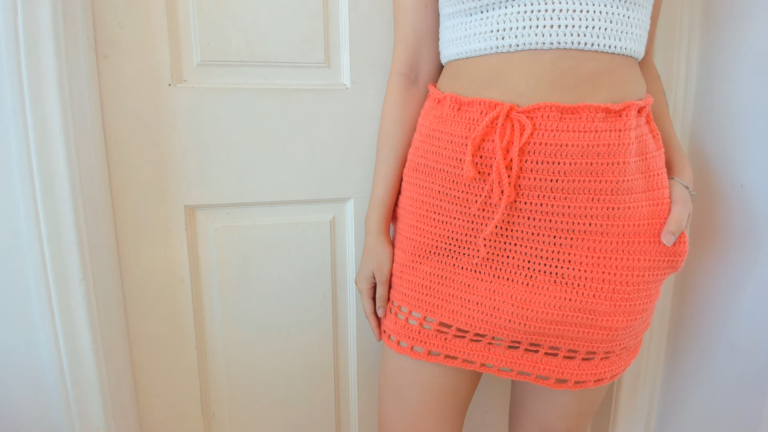
Crochet simple ribbed skirt pattern fans, meet the Breathtaking Crochet Simple Ribbed Skirt Pattern, elegant, beginner-friendly, and delightfully quick. Right away, gentle ribs and try-on-friendly increases create a custom fit; later, neat finishing touches turn the skirt into a thoughtful handmade present.
Breathtaking Crochet Simple Ribbed Skirt Pattern turns easy stitches into a flattering, handmade staple. Soft ribbing and a clean silhouette keep it cute yet timeless, while beginner-friendly repeats and minimal shaping make the process relaxing and quick.
Customize waist, length, and color for a perfect fit in any season. Practical uses: style it for everyday outfits, gift it to fashion-loving friends, or sell it at craft fairs and online. This simple crochet skirt pattern delivers comfort, versatility, and the satisfying joy of wearable crochet.
Breathtaking Crochet Simple Ribbed Skirt Pattern
To begin, meet the Breathtaking Crochet Simple Ribbed Skirt Pattern a cozy, beginner-friendly project that blends wearable style with the gentle rhythm amigurumi fans already love. Right away, the fabric hugs comfortably without clinging, while easy increases create a flattering A-line shape that suits many bodies. As a result, this skirt looks elegant dressed up and charmingly relaxed on casual days. From the first round to the final hem, the pattern builds in calm, repeatable rows, so it’s perfect for stress-free evenings or weekend crafting. In the end, expect a clean silhouette, soft ribbed texture, and a custom fit from waist to hem, all created with simple stitches and thoughtful, try-on-as-you-go shaping.
Materials Needed (Exact Measurements)
- Yarn: Worsted/medium-weight (category 4) cotton or cotton-blend for drape and breathability.
- Yardage guide (approximate; adjust for length and size):
- XS/S: 380–520 m (420–570 yd)
- M/L: 520–700 m (570–765 yd)
- XL/2XL: 700–900 m (765–985 yd)
- For the best texture, choose solid, heathered, or subtle variegated shades to highlight the ribbing.
- Yardage guide (approximate; adjust for length and size):
- Hook Size:
- 5.0 mm (H-8) for the main body (adjust to meet gauge)
- 4.5 mm (7) for a snug waist or a firmer hem, if desired
- Stitch Markers: 2–4 markers to mark side “seams,” the first stitch, and increase points
- Yarn Needle (tapestry needle): For weaving in ends and attaching optional drawstring tips
- Measuring Tape: Essential for accurate waist and hip fit
- Scissors: For neat snips and tidy finishing
- Optional Elastic: 1.5–2 cm (5/8–3/4 in) wide elastic for a cinched waistband
- Elastic length = waist measurement minus 2–5 cm (1–2 in) for negative ease
- Optional Drawstring: Crochet cord or i-cord: 110–160 cm (43–63 in), depending on waist size and preference
- Safety Eyes: Not needed for this wearable project (listed for amigurumi makers who keep a standard toolkit)
- Stuffing: Not needed for this skirt
- Keychain Ring or Accessories: Optional charm to decorate drawstring ends (a tiny amigurumi heart looks adorable)
Skill Level
Beginner/Easy. Specifically, only basic stitches are used (chains, slip stitch, and half double crochet). Moreover, the increases are simple and placed near the sides with the help of markers. Altogether, this makes it a perfect first garment after amigurumi practice.
Making Time (Overview)
On average, expect 6–12 hours depending on size, yarn weight, and desired length. In general, shorter, above-the-knee skirts in worsted cotton land near the lower end of the range; meanwhile, midi lengths or plus sizes take longer.
Step-by-Step Instructions
Note: For the signature rib, work half double crochet into the back loop only (HDC-BLO). Consequently, the BLO technique adds stretch and soft ridges that flatter the silhouette while feeling cozy to wear.
Body
- Foundation & Waistband (Making Time: 60–90 minutes)
- First, measure the natural waist where the skirt will sit. Then, subtract 2–5 cm (1–2 in) for gentle negative ease; this helps the skirt stay up without feeling tight.
- Next, chain to match the adjusted waist measurement. Carefully ensure the chain is not twisted. After that, join with a slip stitch to form a ring and place a marker in the first stitch of the round.
- Meanwhile, work Round 1 in HDC-BLO around. At the end, slip stitch to join and chain 1 to begin the next round.
- After the setup, work 2–3 more rounds straight (no increases), all in HDC-BLO, to establish the fabric. As you go, keep the chain-and-join consistent and even for a polished look.
- Simple Side Shaping for the Hips (Making Time: 2–3 hours)
- Before shaping, place two markers at opposite sides of the skirt to simulate side seams. To do this, count stitches to find the halfway point; markers should sit directly across from each other.
- Next, work in rounds with easy increases every other round near each side marker: One stitch before the side marker, place 2 HDC-BLO in the same stitch; then work 1 HDC-BLO into the stitch at the marker; immediately after, place 2 HDC-BLO in the next stitch after the marker. Then, continue the round as usual.
- After each increase round, work the next round as a “no-increase” round—simply HDC-BLO all the way around.
- Continue this two-round pattern (increase round, then plain round) until the hip area fits comfortably. During try-ons, pull the skirt over the hips and check for smooth, non-see-through coverage. Typically, 8–12 total increase rounds (with plain rounds in between) create a gentle A-line that skims the hips instead of clinging.
- Length & Hem (Making Time: 2–4 hours)
- Once the hips fit nicely, continue working straight rounds of HDC-BLO to the desired length: mini, above the knee, knee-length, or midi. Meanwhile, keep the tension steady to maintain an even rib.
- For a clean hem, switch to the smaller hook for the last 2–3 rounds. Alternatively, finish with one round of single crochet (SC) through both loops, followed by a slip-stitch edge to lock the shape.
- Finally, fasten off and leave a long tail for weaving in the end neatly.
Additional Parts
Although this wearable doesn’t have animal parts, similar “extras” easily translate into skirt enhancements. Consequently, think of these as decorative features that give personality to your ribbed skirt.
- Waistband Options (Making Time: 30–60 minutes)
- Drawstring Channel: First, work 2–3 rounds of SC through both loops to create a firm channel at the top; then, thread a crocheted cord, i-cord, or ribbon. Afterward, add a small knot at each end or slide on decorative beads.
- Elastic Casing: With a smaller hook, work 3–4 rounds of SC through both loops to form a neat facing. Next, fold to the inside and whipstitch the facing to the skirt’s wrong side, leaving a small opening to insert elastic. Then, overlap elastic ends by 2–3 cm (3/4–1 in) and sew securely; finally, close the opening.
- Side Slit (Making Time: 30–45 minutes)
- For added movement and style, stop joining at the last 5–10 cm (2–4 in) of the skirt and work back-and-forth rows instead of rounds at the marked side seam. After completing the length, finish both slit edges with 1–2 rounds of SC. As a result, the skirt gains a little swish while staying modest.
- Ruffle or Lettuce Hem (Making Time: 30–60 minutes)
- For a flirty finish, work one round of 2 HDC in each stitch; then, on the following round, place 2 HDC in every other stitch. If possible, use a slightly larger hook here to enhance drape.
- Tiny Pocket or Phone Slip (Making Time: 30–45 minutes)
- To add function, crochet a small rectangle in matching HDC-BLO rib. Then, sew it onto the front or back with neat whipstitches. As a cute touch, this pocket looks especially charming on mini or above-the-knee lengths.
- Charm Detail (Making Time: 10–20 minutes)
- For a playful accent, attach a keychain ring or a small amigurumi charm to the drawstring. Not only does this echo amigurumi style, but it also adds a lightweight, personal flourish.
Heart / Accessories / Details (if applicable)
- Mini Amigurumi Heart (Making Time: 15–25 minutes)
- First, make two identical heart shapes; then, lightly stuff if desired and whipstitch closed. For simplicity, work a small double-lobed shape in rounds, and afterward decrease to form the point. Finally, tie hearts onto the cord ends or attach them to a keychain ring.
- Beads & Tags (Making Time: 5–10 minutes)
- To finish the cord ends neatly, thread wooden beads, metal charms, or leather tags. Afterward, secure with a knot and a dab of clear-drying fabric glue for durability.
- Waist Tie Tips (Making Time: 5–10 minutes)
- To prevent fraying on cotton cords, end with a dab of fabric glue or a few whipstitches using sewing thread. Consequently, the ties remain tidy over time.
Face & Assembly
- Seamless Join & Round Tracking
- To keep rounds tidy, place a marker in the first stitch of each round, especially if working in a continuous spiral for a subtle, seam-like line. If visible joins are distracting, then use an invisible join on the final round of the hem.
- Weaving in Ends
- After fastening off, thread the yarn needle and weave ends along the wrong side in the direction of the ribbing; this hides them within the texture. For extra security, split the yarn plies and weave back in the opposite direction.
- Elastic or Drawstring
- If using elastic, measure carefully and sew the overlapped ends with firm back-and-forth stitches. Otherwise, if using a drawstring, feed it through the top channel using a safety pin or bodkin and then center the ends before knotting.
- Gentle Block
- To finish shaping, steam or wet-block lightly to relax the fibers and even the ribbing. With cotton, use steam carefully; however, avoid stretching the waist so the fit remains snug.
- Try-On Check
- Finally, try on the skirt post-blocking. If the waist feels loose, weave a thin elastic thread through the top round; alternatively, add one extra tightening round with a smaller hook.
Special Features
- Soothing Rib Texture
- Because HDC-BLO creates flexible ridges, the skirt moves comfortably with the body. Therefore, the look is classic while the feel remains soft and cozy.
- Side Shaping That Makes Sense
- Since it increases clusters around the side markers, the A-line forms naturally and flatters the hips without clinging. In effect, the method stays beginner-friendly yet effective.
- Amigurumi-Friendly Rhythm
- For those who love amigurumi, the repeatable rows, markers, and gentle shaping feel instantly familiar. Consequently, the project is relaxing, steady, and satisfying.
- Mix-and-Match Finish
- Whether adding a drawstring, elastic casing, slit, or ruffle, each option layers on personal style. As a result, the skirt adapts to any wardrobe or season.
Sizing Tips
- Chain Length vs. Waist
- First, aim for a foundation chain that’s 2–5 cm (1–2 in) smaller than the true waist. Because cotton relaxes with wear, this small negative ease helps the skirt stay comfortably secure.
- Gauge Matters
- Before starting, swatch. Suggested gauge: about 14 HDC-BLO stitches × 10 rows = 10 × 10 cm (4 × 4 in) with a 5.0 mm hook. If the fabric feels dense or stiff, go up a hook size; if it looks open or see-through, go down a size. Consequently, the final drape will match expectations.
- Hip Fit
- During shaping, increase every other round until the widest part of the hips slides through smoothly without pulling. For curvier hips, add a few extra increase rounds; for straighter figures, work fewer. In both cases, try on often to verify comfort.
- Length Options
- For guidance:
- Mini: 35–40 cm (14–16 in)
- Above the knee: 45–50 cm (18–20 in)
- Knee length: 55–60 cm (22–24 in)
- Midi: 70+ cm (28+ in)
- As you near the target, add or remove a round for exact preference, and then reevaluate after a light block.
- For guidance:
- Yarn & Hook Swaps
- If using DK (category 3), expect a lighter, flowier skirt—accordingly, plan for more rounds. Conversely, bulky (category 5) works up fast but can feel warmer and thicker. In any case, swatch to confirm drape and comfort.
Finishing Tips
- Neat Edges
- To lock the shape, finish the last round with an invisible join or a careful slip-stitch round through both loops. Immediately after, smooth the edge with gentle steam if needed.
- Secure Shaping
- To keep the garment balanced, mirror increases on both sides. Specifically, match each increase pair one stitch before and after the side markers.
- Clean Look Inside
- For invisible ends, weave along the direction of the stitches and split the yarn plies to anchor. Furthermore, avoid long floats; short backstitches secure ends without bulk.
- Last Touch
- Finally, give the hem a light steam to encourage it to lie flat. For cotton, use a pressing cloth and avoid pressing hard to prevent flattening the rib.
Common Mistakes to Avoid
- First: Twisting the Foundation Chain
- Before joining, lay the chain flat and check that it isn’t spiraled. Otherwise, a twisted join creates a permanent twist in the waistband.
- Second: Tight Foundation
- If the first round pulls, the chain may be too tight. Instead, use a larger hook for the foundation chain or try a chainless foundation HDC for extra stretch.
- Third: Forgetting Side Markers
- Without consistent markers, increases can drift and skew shaping. Therefore, keep a marker in the first stitch and at both side points.
- Fourth: Over- or Under-Increasing
- If the skirt starts to flare, reduce the number of increase rounds. Conversely, if it feels snug at the hips, add another cycle of increases.
- Fifth: See-Through Fabric
- Thin yarn and loose tension can create gaps. In that case, switch to a smaller hook or use a denser stitch for the first few rounds (for example, SC for the waistband channel, then HDC-BLO for the body).
- Sixth: Skipping Try-Ons
- Regular try-ons ensure a reliable fit. As a result, small adjustments happen early, and the final look remains smooth and flattering.
Variations & Customization Ideas for ( Crochet Ribbed Skirt Pattern)
- Color Play
- For stripes, alternate every 2–4 rounds for sporty vibes. Alternatively, for a bolder statement, color-block by adding a contrasting hem or a tonal fade from waist to hem. Additionally, hold two lighter yarns together for a marled, heathered effect.
- Textural Tweaks
- To add interest, switch to front loop only (FLO) for one or two accent rounds. Or, for a crisp corded border, finish with a round of crab stitch (reverse SC) at the top or bottom.
- Length & Style
- For a playful look, go mini with a gentle ruffle; for elegance, choose midi with a side slit. Meanwhile, high-waisted styling pairs beautifully with cropped tops, while a lower waist feels more relaxed.
- Lining & Warmth
- For extra modesty or winter wear, sew in a lightweight knit lining or wear a slip beneath. Likewise, acrylic/wool blends add warmth for cooler seasons while preserving structure.
- Theme Inspired by Amigurumi
- To echo the amigurumi charm, add tiny crocheted hearts, stars, or mini flowers to the drawstring ends. Not only does this personalize the skirt, but it also brings a cheerful, handmade touch.
Tutor Suggestions for ( Crochet Ribbed Skirt Pattern)
- To start, build a Soft Structure
- A few straight rounds at the waist create a stable base before shaping begins. Consequently, calm, even rounds at the start set the tone for the entire skirt.
- Let Markers Do the Work
- Place a marker in the first stitch of every round and at both sides. As a result, increases are easy to track and perfectly mirrored.
- Count on Repeat Rounds
- After every increase round, work one plain round. With this steady rhythm, the A-line stays smooth, and stitch counts remain simple to check.
- Try-On Intervals
- As you shape, slip the skirt on after every 2–3 rounds. If something feels off, then adjust early: add or skip increase cycles to match curves.
- Adjust for Comfort
- For a secure waist, either include elastic or finish with a snug drawstring. If the waist relaxes over time, discreetly sew a thin elastic thread through the topmost round.
- Be Kind to Hands
- Because ribbed fabric can be springy, pause to stretch hands and shoulders. Additionally, ergonomic hooks or a yarn bowl help maintain relaxed tension.
- Confidence Boost
- Small deviations won’t ruin the project. If an increase lands one stitch off, simply correct it on the next round. Thanks to the ribbing, tiny imperfections stay hidden while the finish remains polished.
- Finish with Pride
- Finally, block lightly, weave ends carefully, and add a charming detail—like a tiny amigurumi heart—to make the skirt uniquely yours. Altogether, simple stitches, mindful shaping, and a touch of personality create a handmade piece that feels as good as it looks.
In conclusion, this Breathtaking Crochet Simple Ribbed Skirt Pattern brings together beginner simplicity and wearable elegance. Because the HDC-BLO texture stretches smoothly and the side increases follow a clear rhythm, the music stays calm and enjoyable from start to finish. Furthermore, the customization options are endless, from drawstrings and elastic to slits and ruffles, so the skirt easily adapts to personal style. Ultimately, enjoy the process, try on often, and celebrate each soft ridge as the skirt grows from waist to hem, with amigurumi-friendly details adding playful charm along the way.