
Crochet Halloween Zombie Rose Floral Amigurumi for Spooky Season
There’s something truly magical about the simple act of turning a ball of yarn into a work of art. Whether it’s a tiny toy, a cozy scarf, or a whimsical decorative piece, crochet allows us to bring imagination to life one stitch at a time. The soothing motion of hooking loops together is more than just crafting it’s therapy, creativity, and joy bundled into a single string.
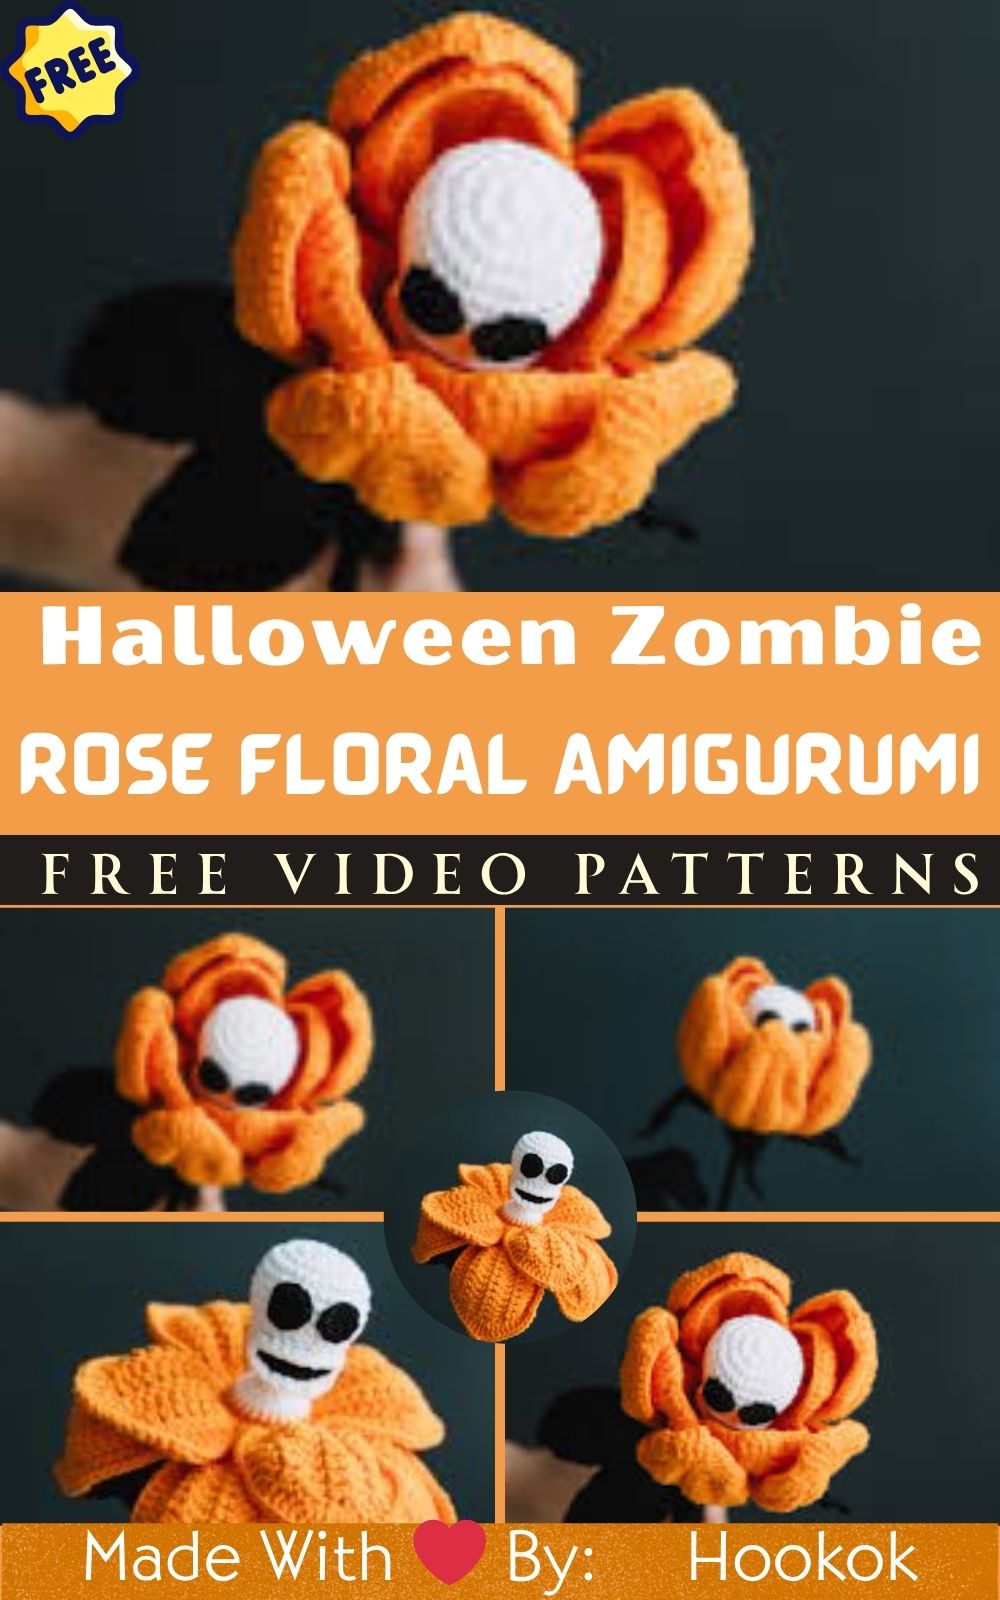
In this tutorial, we’re diving into one of the most eye-catching projects for the Halloween season: the Crochet Halloween Zombie Rose Floral Amigurumi. This isn’t your average flower plush. It’s a playful fusion of spooky charm and soft floral beauty perfect for those who love cute yet creepy décor. With a broken petal effect, stitched eyebrows, and eerie zombie facial expressions, this rose doll is packed with personality and Fall-season appeal.
What makes this crochet project even more exciting is how beginner-friendly it is. While advanced crocheters will appreciate the character-building details and shaping techniques, beginners can also enjoy experimenting with fun stitches and basic amigurumi structure. Whether you’re creating a full zombie bouquet or a single undead rose plush, this is a piece that’s bound to spark conversation.
And let’s not forget the calming joy of crochet the quiet satisfaction of seeing a handmade toy come to life. With its balance of creepy and cute, the Crochet Halloween Zombie Rose is not only ideal for Halloween lovers, but also for year-round gifting, display, or decorating your craft space with soft undead charm.
Materials & Tools You’ll Need
Before starting this spooky crochet adventure, make sure you’ve gathered the following supplies:
Yarn:
-
Weight: Worsted weight (Size 4)
-
Type: 100% acrylic or cotton-blend yarn
-
Colors Needed:
-
Deep red or burgundy (rose petals)
-
Green (stem and leaves)
-
Beige, grey, or pale green (zombie face)
-
Black (mouth/eyebrow embroidery)
-
Hook:
-
Size 2.5mm or 3.0mm crochet hook (smaller hook for tighter stitches)
Additional Supplies:
-
Polyester fiberfill stuffing
-
6mm–8mm safety eyes (or embroidered eyes)
-
Yarn needle for sewing and weaving ends
-
Scissors
-
Stitch markers
-
Optional: Red fabric paint or embroidery thread for “blood” drip effect
Yarn Tips:
-
Choose soft acrylic to keep the plush squishy.
-
Muted, eerie tones enhance the Halloween feel.
-
For a more realistic zombie tone, try marled yarn or mix greys and beiges.
Step-by-Step Crochet Instructions
Below is a general guide using typical amigurumi construction techniques. Follow along for a complete step-by-step approach to making your own Crochet Halloween Zombie Rose Floral Amigurumi.
1. Crocheting the Head (Zombie Face)
-
Begin with a magic ring, work single crochets in the round.
-
Increase each round until you reach the desired head width.
-
Insert safety eyes or leave space to embroider eyes later.
-
Add stuffing as you go but leave room for facial shaping later.
-
Expert Tip: Push the stuffing outward with the back of your hook for a smooth shape.
2. Creating the Neck and Upper Stem
-
Continue crocheting in green yarn from the base of the head.
-
Work a few rounds without increases to create the neck/stem.
-
Stuff lightly if needed for stability.
-
Optional: Add bendable wire inside the stem for poseable bending.
3. Building the Main Rose Base
-
After the stem, start crocheting wider rounds to form the bottom of the rosebud.
-
Work several rounds of red or burgundy to build the bulb shape.
-
Pinch and fold the edges slightly for a wilted, zombie-like petal effect.
-
Keep stuffing minimal to maintain the shape without bulging.
4. Shaping the Petals
-
Petals are made individually by crocheting flat or semi-circle pieces and attaching to the bud.
-
Make a mix of intact and jagged petals for an “undead” look.
-
Sew them around the base in layers.
-
Pro Tip: Use slip stitches for cleaner joins as you go.
5. Arms or Limbs (Optional)
-
For extra zombie character, crochet mini arms with hands shaped like vines or thorny tendrils.
-
Attach to the stem right below the head.
-
Embroider small scratches or stitches across the face and limbs.
6. Assembly
-
Make sure the head is securely attached to the stem before adding final touches.
-
Sew petals evenly around the rose base for a full look.
-
If creating a bouquet, repeat the pattern in different colors and attach stems.
7. Final Details
-
Embroider a crooked mouth, stitched X’s, or frown for a zombie expression.
-
Use red thread or fabric paint to simulate blood drips.
-
Add leaf accents along the stem or around the head.
Customization Ideas
Want to give your zombie rose even more personality? Here are some creative variants:
-
Black Petals + Neon Slime: Swap red for black petals and add bright green embroidery for a radioactive effect.
-
Multicolor Rainbow Zombie Rose: Each petal a different faded color—perfect for a pride-themed Halloween bouquet.
-
Pumpkin Rose: Use orange for petals and add a Jack O’Lantern face—a cute October mashup!
-
Add Props: Give your zombie rose a bow tie, a mini cape, a witch hat, or a gravestone base.
Advanced Tips & Troubleshooting
Here are some professional pointers to help you avoid common amigurumi challenges:
-
Invisible Decrease: Use front-loop-only decreases to avoid holes and keep the plush smooth.
-
Even Tension: Hold the yarn gently and check your work every few rounds.
-
Prevent Petal Twisting: Block gently with pins and a steam iron to keep shapes flat.
-
Fixing Gaps: If stuffing peeks through, work tighter stitches or switch to a smaller hook.
-
Joining Seams: Use the mattress stitch for clean and invisible part joining.
-
Safety Eye Positioning: Pin eyes in place, step back to view symmetry before securing.
-
Avoid Overstuffing: Too much stuffing creates bumps—add gradually and shape with fingers.
-
Reinforce Stems: If your rose leans over, add floral wire or pipe cleaners for support.
Care Instructions
Your Crochet Halloween Zombie Rose Floral Amigurumi is a handmade treasure—treat it with care!
-
Gently hand wash in cold water using mild soap.
-
Avoid harsh scrubbing—soaking works better.
-
Press water out (don’t twist), reshape and lay flat to dry.
-
Keep out of direct sunlight to prevent fading.
-
For display storage, keep in a clean, dry spot or within a dust cover.
Display & Gift Ideas
Here are some fun ways to showcase or gift your zombie rose creation!
-
Use as centerpiece Halloween décor in a jar labeled “Undead Florals.”
-
Display several in a spooky bouquet wrapped in black mesh.
-
Add a name tag and gift as a gothic Valentine or birthday present.
-
Use it as a desk plant alternative—no watering required.
-
Turn it into a spooky floral accessory by attaching a pin back.
Healing Through Handmade Art
Creating a Crochet Halloween Zombie Rose Floral Amigurumi isn’t just about making a seasonal craft—it’s an enriching experience that:
-
Encourages mindfulness and calm focus as you stitch.
-
Offers a release from stress, one rhythmic loop at a time.
-
Gives a sense of accomplishment and empowerment when finished.
-
Promotes eco-friendly, sustainable gifting through handmade art.
-
Connects you emotionally to your creation—and to whoever receives it.
Photography & Social Media Tips
Want your amigurumi zombie rose to shine online? Here’s how to capture it:
-
Shoot with soft, natural morning or afternoon light.
-
Use a vintage or woodland-themed background for eerie vibes.
-
Include fall props: pumpkins, bones, moss, or Halloween confetti.
-
Try top-down shots with the petals spread out.
-
Don’t forget hashtag fun: #HalloweenCrochet #AmigurumiGraveyard #CrochetRose
Conclusion
There’s an extra layer of delight in crafting something a little spooky, a little whimsical, and 100% handmade. The Crochet Halloween Zombie Rose Floral Amigurumi is a quirky, fun, and beginner-friendly project that brings out the magic of creativity—and makes a statement wherever it’s displayed. Grab your hook, turn up a spooky playlist, and let your imagination bloom into a stunning undead rose that’s guaranteed to bring smiles, spooks, and satisfying creative joy.


