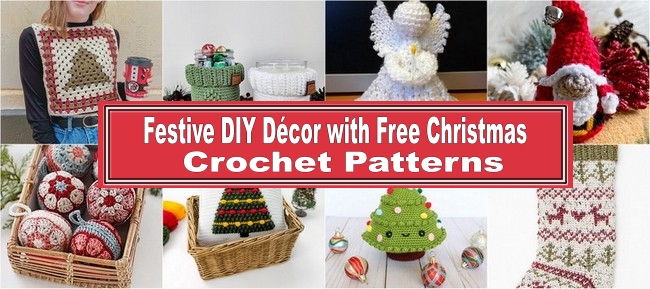
Crochet Baby Cardigan Pattern With Pockets and Buttons
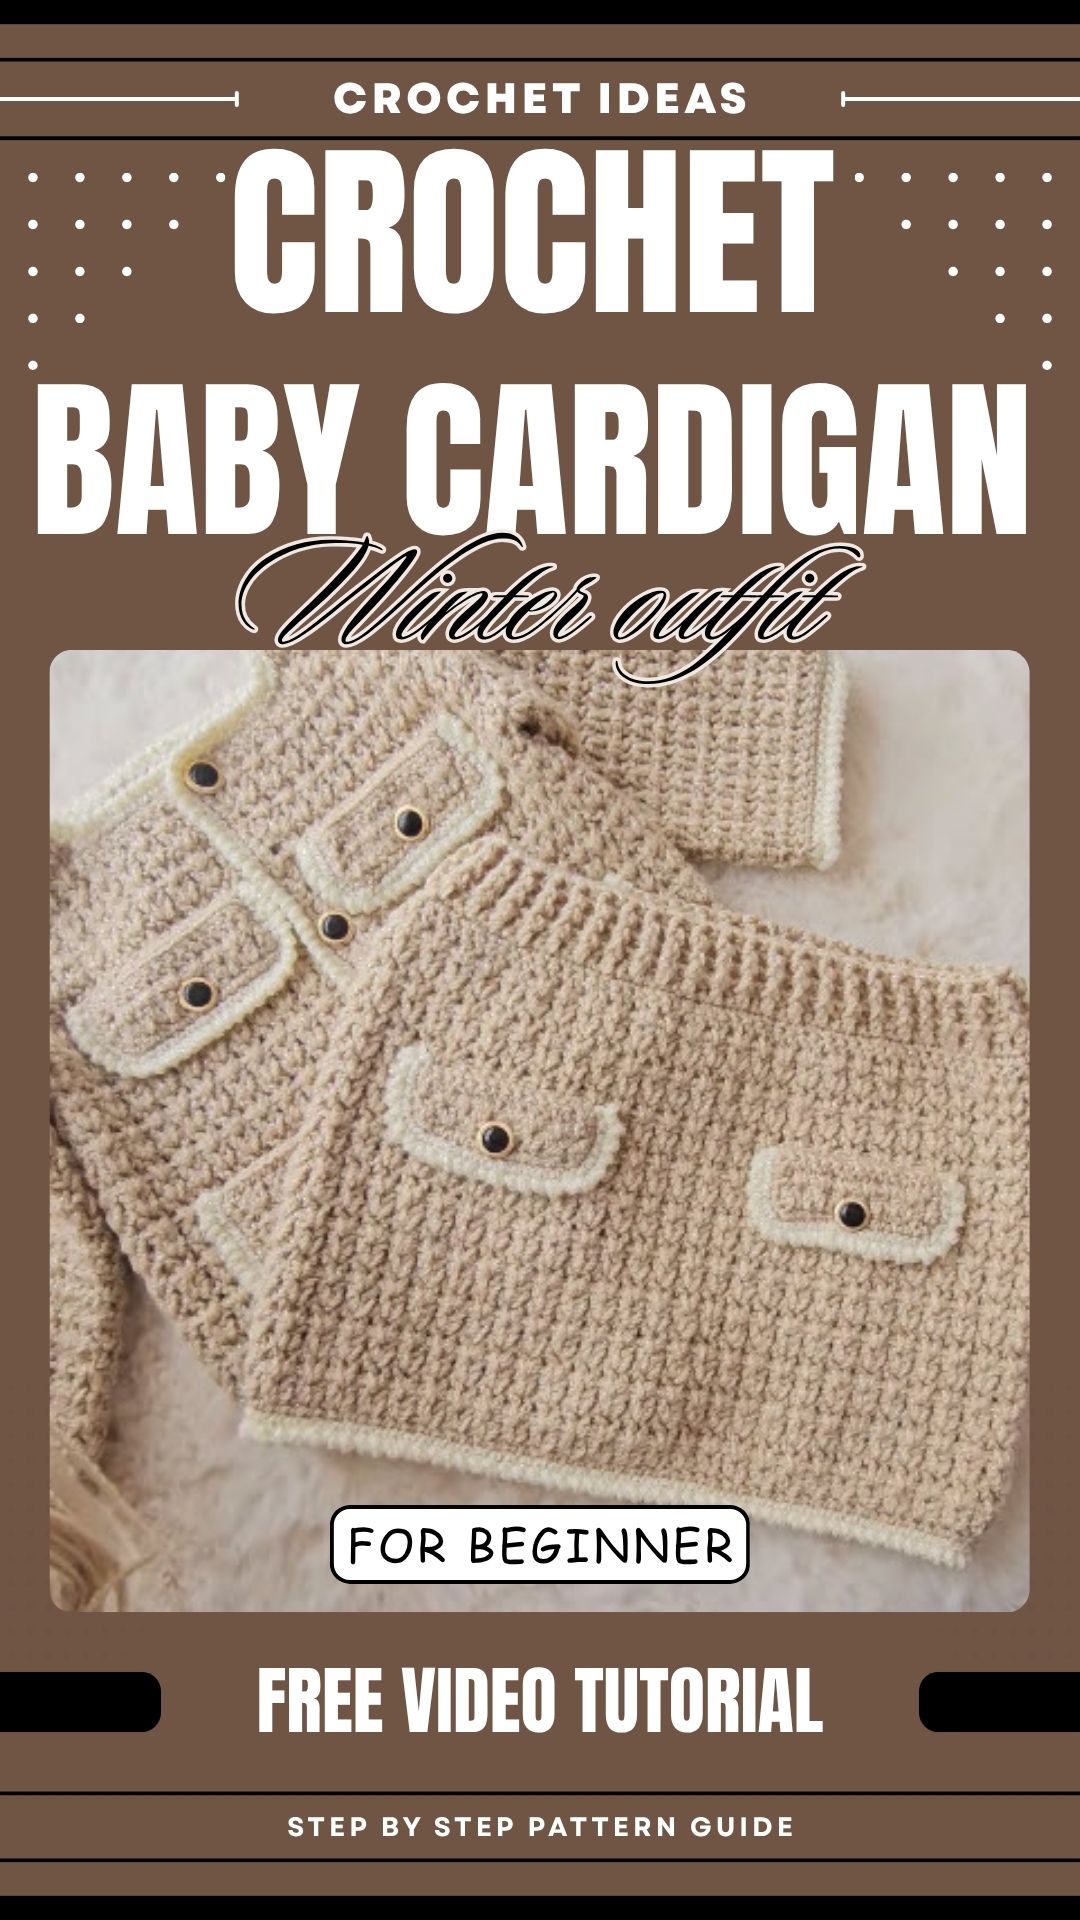
A handmade cardigan is one of the sweetest things to give a new baby, and this crochet baby cardigan pattern with pockets and buttons adds a little extra charm. Small pockets with shiny buttons make the front look polished, while a soft cream edging frames every piece. The textured beige fabric feels cozy without being heavy.
This guide covers yarn, hook size, stitches, edging, and pocket placement in plain language. Photos from the project also show how each stage should look in your hands.
Crochet Baby Cardigan Pattern Overview and Key Features
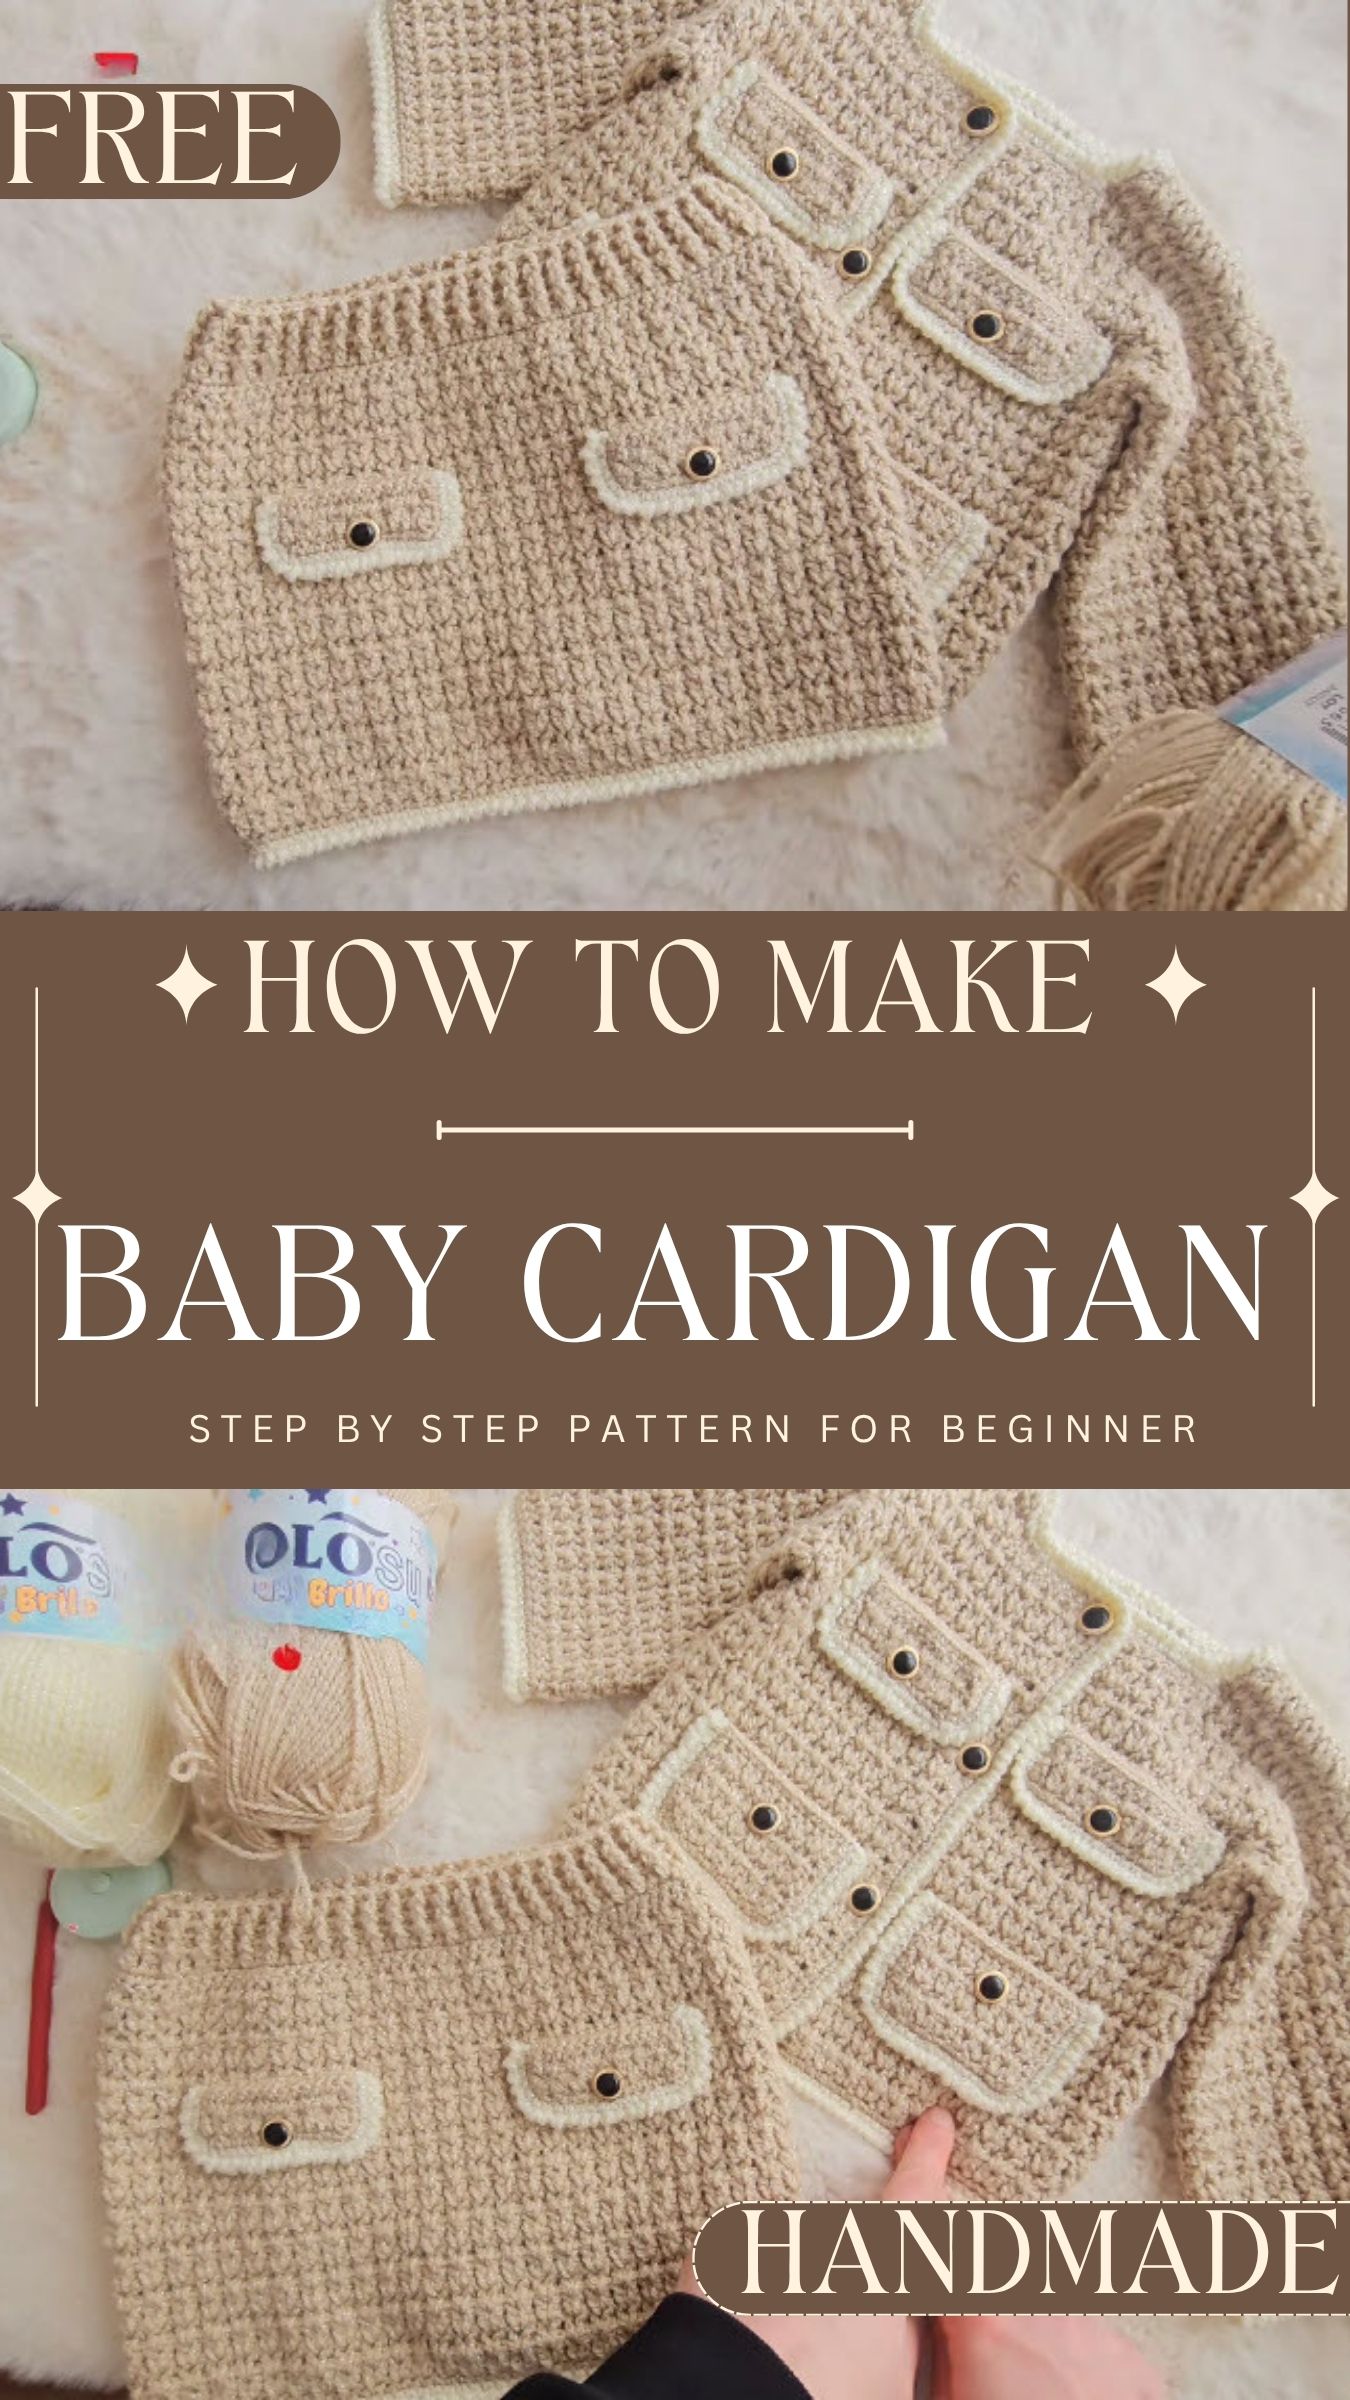
The cardigan has a textured body in warm beige with a subtle shimmer. Contrast comes from a cream border worked around the pieces, and two pockets sit on the front, each fastened with a dark button with a gold rim. This crochet baby cardigan pattern includes these key features:
- A textured stitch pattern built from double crochet pairs
- Ribbed sections made with front-post and back-post double crochet
- Single crochet edging in the main yarn, then an accent colour
- A reverse single crochet border for a neat, rope-like finish
- Matching pockets that you sew on after edging them
Skill Level for This Crochet Baby Cardigan Pattern
The pattern suits confident beginners and up. The stitches are basic, but edging curved pieces and sewing on pockets takes patience. Anyone comfortable with single crochet, double crochet, and slip stitch can follow along. Reverse single crochet may feel awkward at first, so a short practice swatch helps.
Materials and Yarn for the Crochet Baby Cardigan Pattern
- Yarn: Polosu Wavy Yarn, or any soft, non-scratchy yarn
- Accent yarn: a contrasting shade for the edging and pocket borders
- Hook: 2.5 mm, or 3 mm for a looser tension
- Buttons: one per pocket, plus any for the front closure
- Other tools: scissors, measuring tape, a yarn needle for sewing
Yarn Information
Baby skin is delicate, so softness matters more than anything. Choose a yarn that feels gentle against the inside of your wrist. Washable fibers also make life easier for parents.
Finished Size and Sizing Options for the Crochet Baby Cardigan Pattern
The pattern does not list finished measurements, so no fixed sizes appear here. Instead, measure the baby, or a cardigan that already fits well, across the chest and from shoulder to hem. Then add a little room for ease so the cardigan sits comfortably over clothes. You can adjust the size in two simple ways:
- Change the foundation chain length to match the width you need.
- Work more or fewer rows to reach the length you want.
A slightly roomy cardigan lasts longer than a snug one.
Stitches and Abbreviations for the Crochet Baby Cardigan Pattern
- ch: chain
- sl st: slip stitch
- sc: single crochet
- dc: double crochet
- FPdc: front-post double crochet
- BPdc: back-post double crochet
- Reverse sc: single crochet worked from left to right (crab stitch)
The Main Stitch Pattern
The body uses a repeating pair of double crochets. Chain 2, work two double crochets into the same stitch, skip a stitch, and repeat. Rows alternate between front and back, and you work each new row into the V-spaces between the double crochet pairs.
Gauge Information
The pattern lists no gauge, and guessing one could throw off the fit. Instead, make a swatch in the main stitch pattern with your chosen hook, then measure it. If the fabric feels stiff, go up to the 3 mm hook. If it looks gappy, stay with 2.5 mm. Gauge matters most when the pieces need to line up at the seams.
Tips Before You Start This Crochet Baby Cardigan Pattern
- Chain loosely, because a tight foundation chain pulls the edge inward.
- Mark the first stitch of every row so the count stays accurate.
- Keep the accent yarn within reach, since the edging comes up often.
- Test the buttons against the pocket fabric before sewing.
- Use a hook with a comfortable handle, because edging involves many small stitches.
Step-by-Step Crochet Baby Cardigan Pattern
Step 1: Work the Body in the Textured Stitch
First, chain a loose foundation to match your measurements. Then build the fabric upward in the double crochet pair pattern, alternating front and back rows until the piece reaches the length you want.

Step 2: Add Ribbing Where Needed
Next, work a row of plain double crochets, followed by several rows of alternating FPdc and BPdc. As a result, the ribbing gives the edges a stretchy, secure finish.
Step 3: Edge the Fabric With a Row of Single Crochet
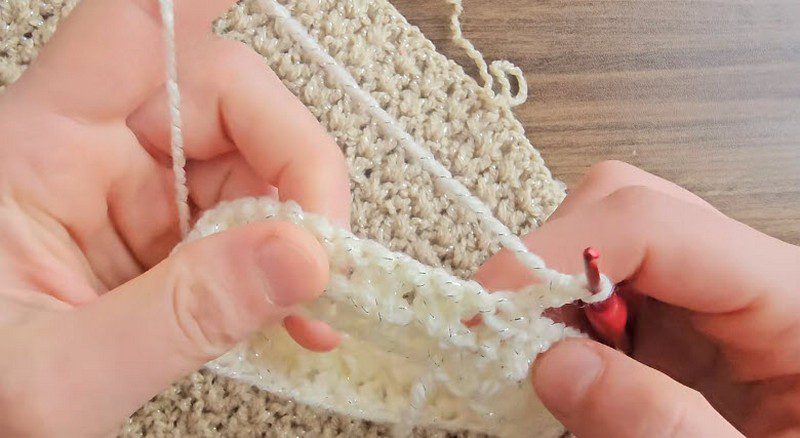
Hold the yarn over the fingers of your left hand and keep the fabric edge facing up. Insert the hook under both loops of each edge stitch and pull up a loop. Then work single crochet evenly along the whole edge in the main yarn.

Step 4: Add the Accent Color Row
Join the cream yarn and work another row of single crochet over the first. Keep the stitches even so the border lies flat and does not ruffle.
Step 5: Finish With Reverse Single Crochet
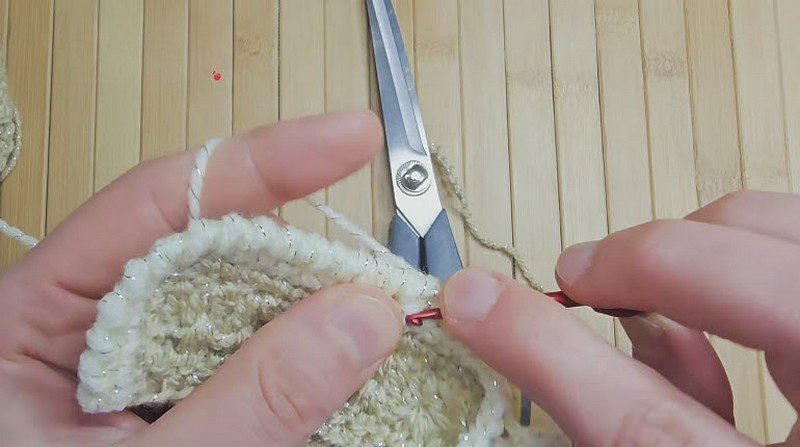
Turn the work so the stitches travel left to right. Insert the hook into the next stitch to the right, grab the yarn, and complete the stitch. The result is a twisted, rope-like edge.
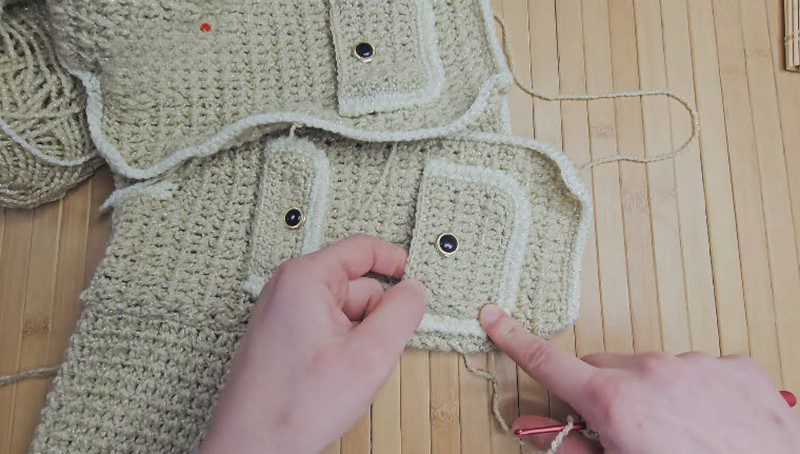
Step 6: Edge Curved Pieces Carefully
Curved areas such as cuffs need a little extra attention. Place stitches slightly closer together around the curve so the edge does not pull. Once you complete the round, cut the yarn and weave in the tail.
Step 7: Make and Attach the Pockets
Chain a short base and work a few rows in the same stitch pattern. Next, edge each pocket with single crochet, then reverse single crochet, in the contrasting color. After that, pin the pockets to the front and sew them on with the yarn needle. Finally, add a button to each pocket.
How the Crochet Baby Cardigan Pattern Comes Together
This crochet baby cardigan pattern uses separate pieces that you edge first and join afterwards. Before sewing, lay the front and back pieces flat with the right sides facing up. Then follow this order:
- Check that both fronts match in length.
- Mark the pocket positions with pins at the same height on each side.
- Sew the pockets down firmly along the three edges.
- Stitch on the buttons so they sit neatly in the pocket centre.
Customisation Options for the Crochet Baby Cardigan Pattern
- Colour: A soft pink, mint, or grey edge looks lovely against cream or beige.
- Buttons: Wooden, pearl, or animal-shaped buttons change the whole mood.
- Pocket shape: The photos show rectangles, but squares work well too.
- Edging: Skip the reverse single crochet for a plainer, quicker border.
- Yarn: A plain soft yarn works in place of the sparkly one.
Bonus: Gift Ideas and Button Choices
This cardigan makes a thoughtful baby shower gift. Pair it with a matching hat in the same yarn, or tuck a spare button into a small card in case one comes loose. Above all, sew buttons on very securely and check them often, since small buttons can be a hazard if they detach.
Bonus: Edging Order at a Glance
The edging follows a set order, so here it is in one place:
- Work one round of single crochet around the edge in the main yarn.
- Add a second round of single crochet in the cream accent colour.
- Finish with reverse single crochet for the rope-like border.
On the pockets, work single crochet and then reverse single crochet in the contrasting colour.
Common Mistakes and Troubleshooting for the Crochet Baby Cardigan Pattern
Edges wave or ruffle. You placed too many stitches along the edge. Remove the row and work fewer stitches.
Edges pull inward. The edging is too tight, so use a larger hook for that round.
Reverse single crochet looks messy. Keep the stitches the same size and avoid twisting the yarn.
Pockets look uneven. Pin them before sewing, then measure from the hem on both sides.
Rows get miscounted. Mark the starting stitch and count the V-spaces at the end of each row.
Finishing and Care for Your Crochet Baby Cardigan Pattern
Weave in all tails with the yarn needle, running them through several stitches so they stay hidden. Check every button for strength. Then block lightly by laying the cardigan flat and gently shaping it to the correct measurements.
For care, hand wash in cool water with mild soap and press out the water without wringing. Dry the cardigan flat on a towel. If the yarn label gives a different instruction, follow the label.
FAQs About This Crochet Baby Cardigan Pattern
What yarn works best for a baby cardigan?
Choose a soft, non-scratchy yarn that you can wash easily. The project here uses Polosu Wavy Yarn.
What hook size does the pattern use?
It uses a 2.5 mm hook, with 3 mm as an option for a looser fabric.
Is this pattern beginner friendly?
It suits confident beginners, since the stitches are basic but the edging takes practice.
Can I leave the pockets off?
Yes. The cardigan works well without them, though the pockets add much of its charm.
Are buttons safe on baby clothes?
Sew them on tightly and check them regularly. If you have any worry, skip the buttons for very young infants.
How can I make the cardigan bigger?
Measure the baby first. Then lengthen the foundation chain and add rows.
Wrap Up Your Little Gift
Gentle texture, a tidy cream border, and pockets with buttons give this crochet baby cardigan pattern its special feel. Take your time with the edging and the pocket placement, because those details create the finished look. Pick your favorite soft yarn, then share your color choices or button picks in the comments below.